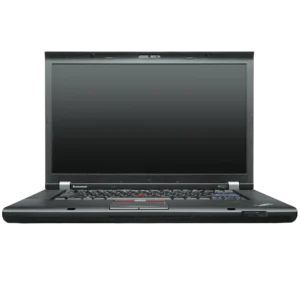
| Field | Details |
| Document Title | ThinkPad T520, T520i, and W520 User Guide |
| Document Type | User Guide |
| Brand Name | Lenovo |
| Product Name | ThinkPad W520 Laptop |
| Model Number(s) | W520, T520, T520i |
| PDF File Size | 6 MB |
| Number of Pages | 297 |
| Languages | English |
Lenovo ThinkPad W520
The Lenovo ThinkPad W520 is a 15.6-inch notebook computer with a TFT display, DDR3 memory, removable lithium-ion battery, and multiple storage and connectivity options. It includes an integrated keyboard, TrackPoint pointing stick, multi-touch touchpad, stereo speakers, microphones, and dedicated ThinkPad function keys.
The computer supports hard disk drives, solid-state drives, and an optional mSATA SSD. Additional hardware features include DisplayPort, an external monitor connector, USB and eSATA connections, Ethernet, an optical drive, an ExpressCard slot, and a docking connector.
Selected configurations also feature an integrated camera, fingerprint reader, display color sensor, multi-touch screen, wireless WAN, and NVIDIA Optimus graphics technology.
Product Overview
The ThinkPad W520 combines notebook computing with replaceable storage, expandable memory, and external device connectivity.
Its UltraNav system provides two pointing devices: the TrackPoint and the touchpad. The keyboard includes a blue ThinkVantage button, dedicated volume controls, function-key combinations, and ThinkLight illumination.
The Serial Ultrabay Enhanced bay supports compatible removable devices, including an optical drive and additional storage options. The docking connector supports compatible ThinkPad docking stations and port replicators.
Main Features
- 15.6-inch TFT display.
- Display resolution options up to 1920 × 1080 pixels.
- External display resolution up to 2560 × 1600 pixels.
- DDR3 SO-DIMM memory with four physical memory slots.
- 2.5-inch HDD or SSD storage.
- Optional mSATA solid-state drive.
- NVIDIA Optimus graphics support.
- Integrated UltraNav TrackPoint and multi-touch touchpad.
- ThinkLight keyboard illumination.
- Blue ThinkVantage button.
- Dedicated speaker volume and microphone mute buttons.
- Integrated stereo speakers.
- Dual-array microphones on supported configurations.
- Integrated camera on selected models.
- Fingerprint reader on selected models.
- Display color sensor on selected models.
- Multi-touch display on selected configurations.
- DisplayPort and external monitor connections.
- USB, USB/eSATA, and IEEE 1394 connectivity.
- Gigabit Ethernet.
- Optional wireless WAN and WiMAX.
- Bluetooth connectivity on supported configurations.
- Serial Ultrabay Enhanced device bay.
- ExpressCard and memory card support.
- Removable lithium-ion battery.
- Compatible ThinkPad docking accessories.
Technical Specifications
General Specifications
| Specification | Details |
| Brand | Lenovo |
| Product Name | ThinkPad W520 |
| Product Type | Notebook Computer |
| Display Size | 15.6 inches (396 mm) |
| Display Technology | TFT |
| Display Resolution Options | 1366 × 768, 1600 × 900, 1920 × 1080 |
| Maximum External Display Resolution | 2560 × 1600 |
| Memory Type | DDR3 SDRAM |
| Memory Slots | 4 Physical Slots |
| Supported Memory Module Standards | PC3-8500, PC3-10600 |
| Primary Storage | HDD or SSD |
| HDD Form Factor | 2.5 inches, 7 mm or 9.5 mm |
| SSD Form Factor | 2.5 inches, 7 mm |
| Additional Storage | mSATA SSD on Selected Models |
| Graphics Feature | NVIDIA Optimus on Supported Configurations |
| Keyboard | 89-Key Keyboard |
| Pointing Device | UltraNav TrackPoint and Multi-Touch Touchpad |
| Keyboard Illumination | ThinkLight |
| Integrated Camera | Selected Models |
| Microphones | Built-In |
| Speakers | Stereo |
| Fingerprint Reader | Selected Models |
| Color Sensor | Selected Models |
| Touchscreen | Selected Models |
| Optical Drive | Multi-Burner |
| Expansion Bay | Serial Ultrabay Enhanced |
| Battery Type | Lithium-Ion |
| Ethernet | Gigabit Ethernet |
| Wireless Networking | Wireless LAN |
| Bluetooth | Selected Models |
| Wireless WAN | Selected Models |
| WiMAX | Selected Models |
Dimensions
| Dimension | Measurement |
| Width | 372.8 mm (14.68 inches) |
| Depth | 245.1 mm (9.65 inches) |
| Height | 31.8–35.6 mm (1.25–1.40 inches) |
| Height of Multi-Touch Models | 34.1–39.6 mm (1.34–1.56 inches) |
Power Specifications
| Specification | Details |
| AC Adapter Input | 100–240 V AC |
| Input Frequency | 50–60 Hz |
| Documented Maximum Heat Output Options | 65 W, 90 W, 135 W, 170 W |
| Main Battery | Lithium-Ion Battery Pack |
| Typical Battery Charging Time | Approximately 3–6 Hours |
| Minimum Battery Charging Temperature | 10°C (50°F) |
Power adapter requirements vary with the installed hardware configuration. Use the adapter specified for the particular computer.
Memory Specifications
The ThinkPad W520 contains four physical memory slots, with two located beneath the keyboard and two accessible from the underside.
| Specification | Details |
| Memory Technology | DDR3 SDRAM |
| Module Type | Unbuffered SO-DIMM |
| Supported Standards | PC3-8500, PC3-10600 |
| Physical Slots | 4 |
| Slot Locations | 2 Under Keyboard, 2 Underneath Laptop |
Important: Dual-core W520 configurations contain two preinstalled Dummy DIMM cards. These must not be replaced with SO-DIMM memory modules.
Storage Specifications
| Storage Type | Details |
| Hard Disk Drive | 2.5-inch, 7 mm or 9.5 mm |
| Solid-State Drive | 2.5-inch, 7 mm |
| mSATA SSD | Available on Selected Models |
| Additional Drive Support | Serial Ultrabay Enhanced |
Operating Environment
| Condition | Specification |
| Maximum Altitude Without Pressurization | 3048 m (10,000 ft) |
| Operating Temperature Up to 2438 m | 5°C–35°C (41°F–95°F) |
| Storage Temperature | 5°C–43°C (41°F–109°F) |
| Maximum Operating Temperature Above 2438 m | 31.3°C (88°F) |
| Minimum Battery Charging Temperature | 10°C (50°F) |
| Operating Relative Humidity | 8%–80% |
| Storage Relative Humidity | 5%–95% |
Parts and Components
Front Components
The front assembly contains the display, keyboard, pointing devices, control buttons, microphones, speakers, and optional security and communication components.
| Component | Function |
| Computer Display | Displays text, images, and video |
| Built-In Microphones | Record voice and sound |
| Power Switch | Turns the computer on and controls power states |
| TrackPoint Pointing Stick | Controls the pointer |
| TrackPoint Buttons | Provide mouse-button and scrolling functions |
| Touchpad | Controls the pointer through finger movement |
| Touchpad Buttons | Provide left and right mouse-button functions |
| ThinkVantage Button | Opens Lenovo utilities or recovery functions |
| ThinkLight | Illuminates the keyboard |
| Integrated Camera | Captures images and video on supported models |
| Color Sensor | Measures and adjusts display color accuracy |
| Fingerprint Reader | Provides fingerprint authentication |
| Stereo Speakers | Produce audio output |
| Fn Key | Activates ThinkPad keyboard shortcuts |
| Volume Buttons | Adjust or mute audio |
| Caps Lock Indicator | Shows uppercase typing mode |
| Status Indicators | Display hardware and power states |
ThinkVantage Button
The blue ThinkVantage button opens Lenovo software when Windows is running.
| Operating System | Function |
| Windows 7 | Opens SimpleTap or the installed Lenovo utility |
| Windows XP | Opens ThinkVantage Productivity Center |
| Windows Vista | Opens ThinkVantage Productivity Center |
| During Startup | Opens Rescue and Recovery when prompted |
TrackPoint
The TrackPoint pointing stick sits between the keyboard keys and controls the on-screen pointer without requiring hand movement away from the typing position.
ThinkLight
ThinkLight provides illumination for the keyboard when working in reduced lighting.
Press Fn + PgUp to turn it on or off.
Fingerprint Reader
Selected W520 configurations include a fingerprint reader for supported Windows and ThinkPad authentication functions.
Color Sensor
Selected configurations include a display color sensor that works with the Color Sensor Utility to measure and adjust display color accuracy.
Right-Side Ports and Connectors
| Component | Function |
| Security Keyhole | Accepts a compatible security cable lock |
| Ethernet Connector | Connects a wired LAN |
| Serial Ultrabay Enhanced | Accepts compatible optical and other bay devices |
| Combo Audio Jack | Connects headphones or a compatible headset |
| ExpressCard Slot | Accepts 34 mm ExpressCard devices |
| Media Card Reader | Reads supported flash memory cards |
Ethernet Connector
The RJ-45 Ethernet port connects the computer to a wired local area network.
The connection supports Gigabit Ethernet.
Two indicators show connection activity.
| Indicator | Meaning |
| Solid Green | Network connection is available |
| Blinking Yellow | Network data is being transmitted |
Warning: Do not connect a telephone cable to the Ethernet connector.
Serial Ultrabay Enhanced
The Serial Ultrabay Enhanced bay contains the optical drive and supports compatible removable devices.
Supported device thicknesses include:
- 9.5 mm Serial Ultrabay Slim.
- 12.7 mm Serial Ultrabay Enhanced.
Combination Audio Jack
The 3.5 mm four-pole combination audio jack supports compatible headphones and headsets.
A conventional standalone microphone is not supported through this connector.
ExpressCard Slot
The ExpressCard slot accepts compatible 34 mm ExpressCard devices.
Memory Card Reader
Depending on the configuration, the media card reader supports:
| Memory Card | Support |
| SD | Yes |
| SDHC | Yes |
| SDXC | Yes |
| MultiMediaCard | Yes |
The reader does not support the CPRM function for SD cards.
Left-Side Ports and Connectors
| Component | Function |
| Fan Louvers | Allow internal cooling airflow |
| DisplayPort | Connects compatible digital displays |
| External Monitor Connector | Connects monitors or projectors |
| USB Connectors | Connect USB peripherals |
| USB/eSATA Combo Connector | Connects supported USB and external SATA devices |
| IEEE 1394 Connector | Connects compatible digital equipment |
| Wireless Radio Switch | Enables or disables wireless radios |
| Smart Card Slot | Accepts compatible smart cards |
DisplayPort
DisplayPort connects compatible external monitors, projectors, and HDTVs.
External Monitor Connector
The monitor connector supports compatible external displays and projectors.
USB Connectors
The computer supports USB 1.1 and USB 2.0 devices. Selected configurations also support USB 3.0.
On USB 3.0 models, USB 3.0-specific functions become available after Windows starts.
USB/eSATA Combo Connector
This connector supports compatible USB peripherals and, on supported models, external SATA devices.
Important: Connect cables in the correct orientation to avoid damaging the connector.
IEEE 1394 Connector
The IEEE 1394 connection supports compatible equipment such as digital video cameras and external storage devices.
Wireless Radio Switch
The wireless switch provides a way to turn supported wireless communication functions on or off.
Rear Components
| Component | Function |
| Always On USB | Supports compatible USB charging |
| Modem Connector | Connects an analog telephone line on supported models |
| Power Jack | Connects the AC adapter |
| Fan Louvers | Allow cooling airflow |
Always On USB
The Always On USB connection can charge certain external devices while the computer is in sleep mode.
Charging while the computer is shut down or hibernating may be enabled through Power Manager when the AC adapter is connected.
Modem Connector
The modem connector supports compatible analog telephone-line connections.
It must not be confused with the Ethernet connector.
Bottom Components
| Component | Function |
| SIM Card Slot | Holds a SIM card for supported wireless WAN configurations |
| Battery | Supplies portable power |
| Docking Connector | Connects compatible docking accessories |
| Memory-Upgrade Slot | Provides access to memory modules |
| HDD/SSD Compartment | Contains the main storage drive |
The underside also contains the product identification label.
Status Indicator Lights
System Status Indicators
| Indicator | Meaning |
| Device Access | Storage device is reading or writing data |
| Power On | Computer is operating |
| Caps Lock | Uppercase typing mode is enabled |
| Numeric Lock | Numeric keypad mode is enabled |
Important: Do not turn off the computer, enter sleep mode, or remove a bay device while the device-access indicator is blinking.
Sleep Indicator
| Indicator Status | Meaning |
| Solid Green | Computer is in sleep mode |
| Blinking Green | Computer is entering or leaving sleep or hibernation |
Battery Status Indicator
| Indicator Status | Meaning |
| Solid Green | Battery charge is above 20% |
| Solid Orange | Battery charge is between 5% and 20% |
| Fast Blinking Orange | Battery charge is below 5% |
| Slow Blinking Orange | Battery is charging below 20% |
| Slow Blinking Green | Battery is charging between 20% and 80% |
| Quick Blinking Orange Error Indication | Battery error |
| Off | Battery is detached |
The battery indicator may stop blinking at 80% while charging continues toward full capacity.
Color Sensor Indicator
| Indicator Status | Meaning |
| Green | Display calibration is complete |
| Blinking Green | Display calibration is running |
Wireless Indicator
A green wireless indicator shows that the relevant wireless function is enabled and ready or transferring data.
An unlit indicator shows that the wireless function is disabled.
Safety Instructions
Electrical Safety
- Use only the power cords and adapters supplied or approved by the manufacturer.
- Do not use damaged power cords, plugs, adapters, or electrical outlets.
- Keep the power adapter and cables away from liquids.
- Do not overload electrical outlets, extension cords, or power strips.
- Do not open power supplies or electrical components containing hazardous voltage.
- Disconnect power before opening the computer for an approved hardware replacement.
Battery Safety
Danger: Incorrect battery handling or replacement can cause fire, explosion, overheating, or leakage.
- Use only Lenovo-approved replacement batteries.
- Do not disassemble or modify battery packs.
- Do not puncture, crush, or short-circuit batteries.
- Keep batteries away from fire, excessive heat, and water.
- Do not use batteries showing signs of damage or leakage.
- Keep batteries away from children.
- Dispose of batteries according to applicable regulations.
Heat and Ventilation Safety
The base, palm rest, and AC adapter may become warm during operation.
Avoid prolonged contact with hot surfaces.
Keep ventilation openings unobstructed and do not operate the computer on soft materials that restrict airflow.
Display Safety
The LCD is made of glass.
Caution: If the display breaks and internal fluid contacts the skin or eyes, rinse the affected area with water for at least 15 minutes. Seek medical attention if symptoms remain.
External Device Safety
Do not connect or disconnect external device cables other than USB and IEEE 1394 while the computer is powered on.
After shutting down, wait at least five seconds before disconnecting other external devices.
Laser Safety
The optical drive contains laser components.
Do not remove optical drive covers or attempt internal laser-device repairs.
Audio Safety
Listening through headphones or earphones at excessive volume can damage hearing.
Use compatible audio equipment and avoid prolonged exposure to high sound levels.
Initial Setup Instructions
Connecting AC Power
The AC adapter converts electrical power for use by the computer and charges the installed battery.
- Connect the adapter plug to the computer’s power jack.
- Connect the power cord to the adapter.
- Connect the power cord to a suitable electrical outlet.
Follow this connection order when supplying AC power.
Turning On the Computer
Press the Power switch to start the notebook.
Allow the installed operating system to load.
Registering the Computer
Lenovo provides product registration for service and support communication.
Registration website:
https://www.lenovo.com/register
Keyboard Shortcuts and Function Keys
The W520 keyboard includes Fn combinations for power management, wireless communication, display settings, keyboard lighting, and multimedia functions.
Function Key Shortcuts
| Shortcut | Function |
| Fn + F2 | Locks the computer |
| Fn + F3 | Opens power-plan controls |
| Fn + F4 | Enters sleep mode |
| Fn + F5 | Opens wireless radio controls |
| Fn + F6 | Opens camera and audio settings |
| Fn + F7 | Changes display output or presentation configuration |
| Fn + F8 | Opens UltraNav settings |
| Fn + F12 | Enters hibernation |
| Fn + PgUp | Turns ThinkLight on or off |
| Fn + Home | Increases screen brightness |
| Fn + End | Decreases screen brightness |
| Fn + Spacebar | Opens FullScreen Magnifier |
| Fn + PrtSc | Performs SysRq function |
| Fn + ScrLk | Enables or disables numeric keypad |
| Fn + Pause | Performs Break function |
Power management shortcuts require the appropriate ThinkPad power-management driver.
Multimedia Shortcuts
| Shortcut | Function |
| Fn + Down Arrow | Play or Pause |
| Fn + Up Arrow | Stop |
| Fn + Right Arrow | Next Track |
| Fn + Left Arrow | Previous Track |
Numeric Keypad
The keyboard contains an embedded numeric keypad.
Press Shift + NmLk or Fn + NmLk to enable or disable it.
Using the UltraNav Pointing Devices
UltraNav combines the TrackPoint pointing stick and touchpad.
Both devices can operate together or be configured independently.
Using the TrackPoint
- Place the hands in the normal typing position.
- Apply gentle pressure to the TrackPoint pointing stick.
- Move the pointer by pressing in the desired direction.
- Use the left or right TrackPoint button to select items.
- Use the center button for scrolling.
The pointer may occasionally drift after extended TrackPoint movement. This can be normal, and the pointer should stop after a short pause.
Using the Touchpad
- Slide a fingertip across the touchpad to move the pointer.
- Use the touchpad buttons for mouse actions.
- Use supported multi-touch gestures for scrolling, zooming, and rotating.
Changing UltraNav Settings
- Press Fn + F8.
- Select Manage Settings.
- Open the UltraNav tab.
- Select the required pointing-device configuration.
Available settings allow either the TrackPoint or touchpad to be disabled while the other remains active.
Using the Camera and Microphone
Selected ThinkPad W520 configurations include an integrated camera.
Opening Camera Settings
- Press Fn + F6.
- Open the Communications settings window.
- View the camera preview.
- Select Manage Settings to change supported options.
Camera Image Settings
| Mode | Function |
| Speed Priority | Prioritizes frame rate |
| Balance | Balances video quality and frame rate |
| Image Quality Priority | Prioritizes image quality over frame rate |
Built-In Microphones
The built-in microphone system supports audio recording and communication.
The dual-array microphone is designed to capture speech from in front of the computer while reducing unwanted surrounding sounds.
Display and External Monitor Instructions
Adjusting Screen Brightness
- Press Fn + Home to increase brightness.
- Press Fn + End to decrease brightness.
Connecting an External Display
The W520 supports compatible displays through DisplayPort and the external monitor connector.
- Connect the monitor to the appropriate video connector.
- Turn on the external monitor.
- Turn on the computer.
- Configure the display output.
Switching Display Modes
Press Fn + F7.
On Windows 7, the available output modes include:
| Display Mode | Function |
| Computer Display Only | Uses the notebook screen |
| Duplicate Displays | Displays the same image on both screens |
| Extended Desktop | Extends the desktop across both displays |
| External Monitor Only | Uses the external display |
Windows 7 also supports Windows + P for display selection.
NVIDIA Optimus Graphics
Supported W520 configurations use NVIDIA Optimus to switch graphics processing according to the active power settings.
On supported configurations, switching to High Performance Graphics may be required for certain DisplayPort or docking-station DVI functions.
Display Color Calibration
Selected W520 models include a built-in color sensor.
Calibrating the Display
- Open Start > All Programs > X-Rite > Color Calibrator > PANTONE Color Calibrator.
- Click Next.
- Close the notebook display as instructed.
- Allow the calibration process to run.
- Monitor the indicator and audible signals for completion.
The calibration function measures and adjusts display color accuracy.
Connecting to Networks
Wired Ethernet
The computer includes an Ethernet connector supporting Gigabit network communication.
Connect a compatible Ethernet cable to the RJ-45 port.
Wireless LAN
The computer supports wireless LAN through its installed wireless adapter.
To configure a connection:
- Turn on the wireless radio switch.
- Press Fn + F5 if required.
- Open Access Connections.
- Choose or configure a wireless network.
- Enter the network name and security information when requested.
Wireless WAN
Selected configurations include wireless WAN hardware for supported cellular data networks.
A SIM card and an appropriate wireless service may be required.
Bluetooth
Supported configurations include Bluetooth for connecting compatible wireless accessories.
Press Fn + F5 to enable or disable the Bluetooth radio.
Wireless Radio Switch
The physical wireless switch provides a direct way to enable or disable supported wireless functions.
Power Management
Checking Battery Status
The Power Manager Battery Gauge displays the estimated remaining battery charge.
Battery operating time depends on usage, display brightness, storage activity, and the installed hardware.
Charging the Battery
- Install the battery correctly.
- Connect the AC power adapter.
- Allow the battery to charge.
- Check the battery status indicator.
Charging generally takes approximately three to six hours.
Charging Requirements
The battery temperature must be at least 10°C before charging.
The computer normally does not begin recharging when the remaining battery level is above 95%.
Power-Saving Modes
| Mode | Description |
| Screen Blank | Turns off display power |
| Sleep | Keeps the session in memory while reducing power use |
| Hibernation | Saves the session to storage and powers down the computer |
Entering Sleep Mode
Press Fn + F4.
To resume, press Fn.
Entering Hibernation
Press Fn + F12.
To resume, press the Power button for less than four seconds.
Important: Do not move the computer while it is entering hibernation. Wait until the sleep indicator stops blinking.
Battery Alarm
Power Manager can display a warning and perform a selected action when the battery reaches a configured low-charge threshold.
Replacing the Main Battery
The ThinkPad W520 uses a removable battery pack.
Warning: Use only the battery type approved by Lenovo. An unauthorized battery may not charge and can present safety risks.
Removing and Replacing the Battery
- Turn off the computer or enter hibernation.
- Disconnect the AC adapter and other cables.
- Close the display.
- Turn the computer over.
- Slide the battery latch into the unlocked position.
- Hold the latch open and remove the battery.
- Insert the compatible replacement battery.
- Slide the battery latch into the locked position.
- Turn the computer upright.
- Reconnect the power adapter and cables.
Extended Life Battery
An optional Extended Life Battery can be connected through the docking connector.
The computer must be turned off or placed into hibernation before the extended battery is attached or removed.
Upgrading or Replacing Memory
The W520 includes four physical memory slots.
Two are located under the keyboard and two beneath the computer.
Supported Memory
Use supported PC3-8500 or PC3-10600 DDR3 unbuffered SO-DIMM modules.
Important: On dual-core processor configurations, two slots contain Dummy DIMM cards. Do not replace these dummy cards with SO-DIMM modules.
Installing Memory Beneath the Computer
- Shut down the notebook.
- Disconnect the AC adapter and external cables.
- Close the display and turn the computer over.
- Remove the battery.
- Remove the memory compartment cover.
- Locate an available SO-DIMM socket.
- Align the notch on the module with the socket.
- Insert the module at approximately a 20-degree angle.
- Press the module down until it locks.
- Reinstall the compartment cover.
- Reinstall the battery and reconnect cables.
If both underside memory slots are empty, the first module should be installed in the socket labeled SLOT-0.
Installing Memory Beneath the Keyboard
Additional memory sockets are located under the keyboard.
These sockets require keyboard removal for access.
Follow the W520-specific memory installation sequence and retain any existing modules that must be temporarily removed to reach a lower socket.
Checking Installed Memory
- Start the computer.
- Press F1 during startup.
- Open ThinkPad Setup.
- Check the installed memory information.
Replacing the HDD or SSD
The W520 supports replacement of its primary storage drive.
Storage Replacement Precautions
- Back up important files before removing a drive.
- Turn off the computer completely.
- Disconnect external power.
- Remove the battery.
- Avoid touching storage connectors.
- Protect the drive from shocks and drops.
- Never remove the primary drive while Windows is running, sleeping, or hibernating.
HDD Replacement Procedure
- Shut down the notebook.
- Disconnect the AC adapter and cables.
- Remove the battery.
- Remove the storage compartment cover.
- Pull the drive tab to remove the installed drive.
- Remove the rubber side rails.
- Attach the rails to the replacement drive.
- Insert the replacement into the drive compartment.
- Slide the drive firmly into position.
- Reinstall the compartment cover.
- Reinstall the battery.
- Reconnect the external power and cables.
mSATA Storage
Selected configurations support an mSATA SSD through a compatible PCI Express Mini Card slot.
Use the appropriate Lenovo installation procedure when replacing an mSATA device.
Serial Ultrabay Enhanced
The Serial Ultrabay Enhanced bay supports compatible removable devices.
Optical Drive
The installed Multi-Burner supports compatible CD and DVD media.
Supported formats include:
- CD-ROM.
- CD-R.
- CD-RW.
- DVD-ROM.
- DVD-R.
- DVD-RW.
- DVD-RAM.
Additional Storage
A compatible hard disk drive adapter can be installed in the Ultrabay to provide additional storage.
Replacing Ultrabay Devices
The guide provides procedures for hot swapping and warm swapping supported devices.
Follow the appropriate procedure for the installed operating system and device. Do not remove a device while it is actively reading or writing data.
ThinkPad Docking Stations
The W520 supports selected ThinkPad Series 3 docking accessories.
Compatible Docking Accessories
- ThinkPad Port Replicator Series 3.
- ThinkPad Mini Dock Series 3.
- ThinkPad Mini Dock Plus Series 3.
- ThinkPad Mini Dock Plus Series 3 (170 W).
Using a Docking Station
- Position the computer above the docking connector.
- Align the computer with the docking station.
- Press the computer into position as instructed for the dock.
- Connect supported external devices.
Before detaching the computer, complete active operations involving connected devices and follow the docking station’s release procedure.
ThinkPad Setup and BIOS
ThinkPad Setup allows changes to firmware and hardware configuration settings.
Opening ThinkPad Setup
- Restart or turn on the computer.
- Press F1 during startup.
- Open ThinkPad Setup.
BIOS Menus
| Menu | Purpose |
| Config | Hardware configuration |
| Date/Time | System date and time |
| Security | Password and security settings |
| Startup | Boot sequence |
| Restart | Save, exit, and restart options |
Changing the Boot Order
- Open ThinkPad Setup.
- Select the Startup menu.
- Open the boot configuration.
- Change the device startup order.
- Save the changes and restart.
Temporary Startup Device Selection
Press F12 during startup to open the Startup Device Menu.
This allows a compatible boot device to be selected without permanently changing the boot order.
Password and Security Features
Supported Password Types
| Password | Function |
| Power-On Password | Prevents unauthorized startup |
| Hard Disk Password | Protects access to stored data |
| Supervisor Password | Restricts access to firmware settings |
Power-On Password
A Power-On Password must be entered before the computer can complete startup.
Hard Disk Password
The hard disk password restricts access to the protected storage device.
Important: Forgotten hard disk passwords may make stored information permanently inaccessible.
Supervisor Password
The Supervisor Password restricts changes to system configuration.
Lenovo may not be able to reset a forgotten supervisor password.
Fingerprint Authentication
Selected W520 configurations allow fingerprint registration through Lenovo Fingerprint Software.
The fingerprint can be associated with Windows authentication and supported ThinkPad security functions.
Rescue and Recovery
The W520 includes Lenovo Rescue and Recovery functions for supported operating system configurations.
Creating Recovery Media
For Windows 7:
- Open Start > All Programs > Lenovo ThinkVantage Tools.
- Select Factory Recovery Disks.
- Follow the instructions to create the recovery media.
Windows 7 supports compatible disc and USB recovery media.
Windows Vista and Windows XP recovery media creation uses optical discs.
Backing Up the Computer
For Windows 7:
- Open Lenovo ThinkVantage Tools.
- Select Enhanced Backup and Restore.
- Open the advanced Rescue and Recovery options.
- Select Back up your hard drive.
- Choose the backup destination.
- Follow the instructions.
Backups may be stored in a protected storage area, a secondary drive, an external USB drive, a network location, or recordable media.
Opening Rescue and Recovery During Startup
- Turn on the computer.
- Wait for the ThinkVantage startup prompt.
- Press the blue ThinkVantage button.
- Open the Rescue and Recovery workspace.
Recovery Functions
| Function | Purpose |
| Rescue Files | Copies accessible files to another location |
| Restore from Backup | Restores previously backed-up information |
| Factory Recovery | Returns the supported system partition or drive to factory settings |
| Recovery Workspace | Provides recovery functions without starting Windows |
Warning: Factory recovery can delete stored information. Back up important files before proceeding.
Restoring Through Recovery Media
- Connect or insert the recovery media.
- Restart the computer.
- Press F12 to open the startup device menu.
- Select the recovery device.
- Follow the restoration instructions.
Lenovo Software and Utilities
ThinkVantage Applications
| Application | Function |
| Access Connections | Manages network profiles |
| Active Protection System | Protects supported HDD storage from movement |
| Client Security Solution | Manages security functions |
| Color Sensor Utility | Calibrates supported displays |
| Fingerprint Software | Manages fingerprint authentication |
| Lenovo Solution Center | Runs system diagnostics |
| ThinkVantage Toolbox | Provides diagnostics and problem information |
| Password Manager | Stores supported login information |
| Power Manager | Manages power settings |
| Rescue and Recovery | Provides backup and recovery functions |
| System Update | Installs supported software and driver updates |
| SimpleTap | Provides quick access to common functions |
Application availability depends on the installed operating system and original software configuration.
Cleaning Instructions
Cleaning the Laptop Cover
- Mix five parts water with one part gentle kitchen detergent.
- Apply the mixture to a sponge.
- Squeeze out excess liquid.
- Gently wipe the cover.
- Remove detergent residue.
- Wipe with a clean, damp sponge.
- Dry with a soft, lint-free cloth.
- Allow the surface to dry completely.
Avoid abrasive cleaners and strong chemicals.
Cleaning the Keyboard
- Apply a small amount of isopropyl rubbing alcohol to a soft, dust-free cloth.
- Wipe the keytops individually.
- Keep liquid from dripping between the keys.
- Allow the keyboard to dry.
A camera blower with a brush or cool air from a hair dryer can be used to remove loose particles beneath the keys.
Important: Do not spray cleaning products directly onto the keyboard.
Cleaning the Display
- Wipe the display using a dry, soft, lint-free cloth.
- Remove loose dust carefully.
- If marks remain, dampen the cloth with water or a 50:50 mixture of isopropyl alcohol and clean water.
- Remove excess liquid.
- Gently wipe the surface.
- Dry the display before closing the lid.
Cleaning the Fingerprint Reader
Use a dry, soft, lint-free cloth to clean the fingerprint reader if it becomes dirty or fails to recognize fingerprints consistently.
Maintenance and Storage Instructions
Ventilation Maintenance
Keep the cooling vents free from dust and obstructions.
Do not operate the laptop on beds, sofas, carpets, or similar soft materials that can block airflow.
Storage Drive Care
Avoid moving the computer while an HDD is actively reading or writing data.
For transport, shut down, enter sleep mode, or hibernate the computer before moving it.
Battery Storage
For extended storage, keep the removable battery at room temperature with approximately 30%–50% charge.
Lenovo recommends charging the stored battery approximately once per year to prevent overdischarge.
Travel Precautions
- Use a protective carrying case.
- Disconnect external cables before transporting the laptop.
- Remove optical discs and other removable media when appropriate.
- Do not place heavy objects on the display.
- Do not pack the computer tightly.
- Do not place the computer in a carrying case while it is operating.
Troubleshooting Guide
Common Problems and Solutions
| Problem | Recommended Action |
| Computer does not turn on | Check the battery, AC adapter, and power outlet |
| Computer stops responding | Hold the Power button for at least four seconds |
| Blank display during startup | Check power connections and screen brightness |
| White cursor on a blank screen | Use recovery tools or restore the affected partition |
| Computer does not wake from sleep | Connect AC power and use the appropriate wake control |
| Battery does not charge | Check battery temperature, connection, and condition |
| Battery operating time is short | Follow the documented recharge procedure; replace if necessary |
| Hard disk not detected | Check the reported storage error and seek service |
| No sound | Check audio mute and playback configuration |
| External monitor does not work | Check the display connection and selected graphics settings |
| Wireless network is unavailable | Check the wireless switch and Fn + F5 settings |
| USB accessory does not work | Check driver installation and Device Manager |
| Optical disc cannot be read | Check disc condition and correct insertion |
| Docking station does not respond | Check docking attachment and power |
Computer Does Not Turn On
- Verify that the battery is installed correctly.
- Connect the AC adapter to a working outlet.
- Press the Power switch.
- Disconnect unnecessary external devices if the problem continues.
If the computer remains unresponsive, Lenovo provides additional diagnostic procedures in the troubleshooting chapter.
Computer Freezes
- Hold the Power switch for at least four seconds.
- Restart the computer.
If the system remains unresponsive, remove power sources while the computer is off and follow the reset and diagnostic procedure.
Unsaved work may be lost during a forced shutdown.
Blank Screen During Startup
- Confirm that the AC adapter is connected.
- Check the battery installation.
- Press Fn + Home to increase brightness.
- Enter the required startup password if prompted.
If the display stays blank after these checks, contact a service technician.
White Cursor on a Blank Screen
A damaged partition or master boot record may prevent Windows from starting.
The guide directs users to use partition recovery tools or Lenovo Rescue and Recovery to restore the system.
If recovery does not resolve the issue, seek service.
Battery Does Not Charge
- Confirm that the battery is installed.
- Check the AC adapter and outlet.
- Allow an overheated battery to cool.
- Reinstall the battery and reconnect the adapter.
- Attempt charging again.
If the battery still does not charge, obtain service.
Computer Will Not Wake from Sleep
- Connect the AC adapter.
- Press Fn to resume from sleep.
- If the computer is hibernating, press the Power button.
If the system remains unresponsive, perform the documented forced shutdown procedure.
Optical Drive Does Not Work
- Confirm that the computer is on.
- Check that the disc is correctly seated in the drive.
- Close the drive tray completely.
- Check that the required driver is installed.
If the tray does not open, the guide permits use of a straightened paper clip in the optical drive’s emergency eject hole while the computer is running.
USB Device Does Not Work
Open Device Manager and check whether the device and its driver are configured correctly.
Run the supported diagnostic test for the USB connection if the problem continues.
BIOS Error Codes
The W520 may display an error message during startup when it detects a hardware, configuration, or security problem.
Startup Error Codes and Solutions
| Error Code | Meaning | Recommended Action |
| 0176 | Security system tamper detected | Enter ThinkPad Setup; seek service if unresolved |
| 0177 | Invalid Supervisor Password data | Contact Lenovo service |
| 0182 | Security settings EEPROM checksum error | Check settings in ThinkPad Setup and save |
| 0183 | Security settings EFI variable checksum error | Check settings in ThinkPad Setup and save |
| 0187 | EEPROM data access error | Have the computer serviced |
| 0188 | Invalid RFID serialization information | Have the computer serviced |
| 0189 | Invalid RFID configuration information | Have the computer serviced |
| 0190 | Critical low battery | Connect AC power or install a charged battery |
| 0191 | Invalid remote security configuration change | Confirm the change and enter ThinkPad Setup |
| 0192 | Security hardware tamper detected | Have the computer serviced |
| 0199 | Supervisor password retry limit exceeded | Confirm the password and enter ThinkPad Setup |
| 0251 | CMOS checksum error | Reconfigure settings in ThinkPad Setup |
| 0253 | EFI variable block data error | Restore BIOS defaults and restart |
| 0271 | Incorrect date and time | Set the date and time in ThinkPad Setup |
| 1802 | Unsupported network card | Remove the unsupported network card |
| 1820 | Multiple external fingerprint readers detected | Disconnect extra readers |
| 2000 | Active Protection sensor diagnostic failure | Have the computer serviced |
| 2100 | Main HDD detection error | Have the main drive serviced |
| 2101 | Ultrabay HDD detection error | Have the Ultrabay drive serviced |
| 2102 | Mini SATA detection error | Have the Mini SATA device serviced |
| 2110 | Main HDD read error | Have the main drive serviced |
| 2111 | Ultrabay HDD read error | Have the Ultrabay drive serviced |
| 2112 | Mini SATA read error | Have the Mini SATA device serviced |
| 2200 | Invalid machine type and serial number | Have the computer serviced |
| 2201 | Invalid machine UUID | Have the computer serviced |
Restoring BIOS Defaults for Error 0253
- Press F1 to enter ThinkPad Setup.
- Press F9.
- Press Enter to load default settings.
- Press F10.
- Press Enter to restart.
Seek service if the error continues.
Fan Error
A Fan Error message indicates a cooling fan failure.
Have the computer serviced.
Beep Error Codes
The computer may produce beep sequences during startup when a hardware problem is detected.
| Beep Pattern | Meaning or Recommended Action |
| One short, pause, three short, pause, three short, one short | Check memory installation; seek service if unresolved |
| One long and two short | Video subsystem problem; seek service |
| Four cycles of four short | Security chip problem; seek service |
| Five beeps | System board problem; seek service |
Replacement Parts and Accessories
The user guide covers replacement or installation of several hardware components.
Documented Service Components
| Component | Service Information |
| Main Battery | Removable and replaceable |
| Backup Battery | Located beneath the keyboard |
| HDD | Replaceable |
| SSD | Replaceable |
| mSATA SSD | Supported on selected configurations |
| Memory Modules | Replaceable within supported configuration limits |
| Keyboard | Replacement procedure provided |
| Wireless LAN Card | PCI Express Mini Card replacement procedure |
| Wireless WAN Card | PCI Express Mini Card replacement procedure |
| SIM Card | Replaceable on supported configurations |
| Ultrabay Device | Removable and replaceable |
| Docking Accessories | Compatible Series 3 devices |
Important: Before replacing internal components, disconnect the AC adapter, remove the main battery, observe static-electricity precautions, and follow the applicable Lenovo service procedure.
Do not open sealed battery packs or other hazardous electrical components.
Warranty Information
Lenovo provides warranty terms through the Safety and Warranty Guide supplied with the computer.
Warranty service may include covered hardware diagnosis, repair, or replacement according to the applicable warranty conditions.
The computer’s machine type and serial number are used to identify the product during support requests.
Warranty and Service Limitations
The manual distinguishes covered hardware service from certain other services, including:
- Replacement of nonwarranted parts.
- Identification of software problem sources.
- BIOS configuration during installation or upgrades.
- Driver changes and upgrades.
- Network operating system installation.
- Application installation and maintenance.
Applicable warranty terms depend on the product and its coverage.
Lenovo Customer Support
Lenovo provides technical assistance, drivers, software, documentation, and hardware service resources.
Support Resources
| Resource | Website |
| Lenovo Support | https://support.lenovo.com |
| Lenovo Product Registration | https://www.lenovo.com/register |
| Lenovo Support Telephone Directory | https://www.lenovo.com/support/phone |
| Microsoft Support | https://support.microsoft.com |
Before Contacting Lenovo
Prepare the following information:
- Product name: ThinkPad W520.
- Machine type and model.
- Serial number.
- Operating system version.
- Exact error messages or codes.
- Description of the problem.
- Installed hardware and software configuration.
- Steps that reproduce the issue.
The machine type, model, and serial number label is located on the underside of the computer.
Frequently Asked Questions
1. What are the specifications of the Lenovo ThinkPad W520?
The ThinkPad W520 has a 15.6-inch TFT display with resolution options up to 1920 × 1080, DDR3 memory, four physical memory slots, HDD or SSD storage, and optional mSATA storage. It includes UltraNav, ThinkLight, DisplayPort, Ethernet, USB connections, and an optical drive. Some hardware functions depend on the configuration.
2. How do I enter BIOS on the ThinkPad W520?
Restart the computer and press F1 during startup to enter ThinkPad Setup. BIOS settings include hardware configuration, startup order, date and time, and security settings.
3. How do I turn on the ThinkPad W520 keyboard light?
Press Fn + PgUp to turn on ThinkLight. Press the same combination again to switch it off.
4. How do I upgrade the RAM on the ThinkPad W520?
The W520 includes four physical DDR3 SO-DIMM slots, with two underneath the computer and two beneath the keyboard. Use compatible PC3-8500 or PC3-10600 DDR3 modules. On dual-core models, do not replace the two preinstalled Dummy DIMM cards.
5. How do I reset the ThinkPad W520 when it freezes?
Press and hold the Power switch for at least four seconds to shut down the computer. Restart it afterward. If the computer remains unresponsive, use the power-reset and diagnostic procedure provided in the troubleshooting instructions.
6. How long does the ThinkPad W520 battery take to charge?
The battery usually takes approximately three to six hours to charge. Charging time depends on the battery size, operating environment, and computer usage.
7. How do I restore the ThinkPad W520 to factory settings?
Use Lenovo Rescue and Recovery or the factory recovery media created for the installed operating system. Press the blue ThinkVantage button during startup when prompted to open the recovery workspace. Back up important files before performing factory recovery.