| Field | Details |
| Document Title | ThinkPad X220, X220i, X220 Tablet, and X220i Tablet User Guide |
| Document Type | User Guide |
| Brand Name | Lenovo |
| Product Name | ThinkPad X220 Tablet Laptop |
| Model Number(s) | X220, X220i, X220 Tablet, X220i Tablet |
| PDF File Size | 6 MB |
| Number of Pages | 270 |
| Languages | English |
Lenovo ThinkPad X220 Tablet
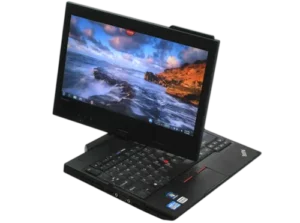
The Lenovo ThinkPad X220 Tablet is a convertible notebook computer designed for traditional laptop operation and pen-based tablet use. It combines a 12.5-inch display, rotating screen mechanism, full keyboard, UltraNav pointing device, and Tablet Digitizer Pen in a portable computer.
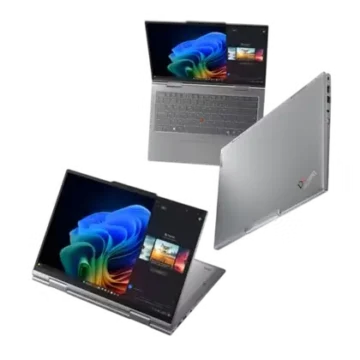
The ThinkPad X220 Tablet and X220i Tablet can switch between notebook, picture frame, and tablet modes. The rotating display allows handwritten notes, drawings, document annotation, and touchscreen interaction on supported configurations.
The computer includes a removable lithium-ion battery, DDR3 memory, a hard disk drive or solid-state drive, Ethernet connectivity, external display support, and several expansion options. Depending on the configuration, it can also include wireless LAN, Bluetooth, wireless WAN, WiMAX, an integrated camera, a fingerprint reader, and a multitouch display.
Product Features and Specifications
Technical Specifications
| Specification | Details |
| Brand | Lenovo |
| Product Series | ThinkPad X220 |
| Models | X220, X220i, X220 Tablet, X220i Tablet |
| Product Type | Convertible Notebook Computer |
| Display Size | 12.5 inches (317.5 mm) |
| Display Technology | TFT LCD |
| Display Resolution | 1366 × 768 pixels |
| Display Backlight | LED |
| External Display Resolution | Up to 2560 × 1600 pixels |
| Memory Type | DDR3 SDRAM |
| Memory Expansion | SO-DIMM Memory Slots |
| Primary Storage | 2.5-inch HDD or SSD |
| Additional Storage Option | mSATA SSD on Selected Models |
| Keyboard | 89, 90, or 94 Keys |
| Pointing Device | UltraNav with TrackPoint and Touchpad |
| Tablet Input | Tablet Digitizer Pen |
| Finger Touch | Selected Tablet Models |
| Audio | Integrated Stereo Speakers and Microphones |
| Integrated Camera | Selected Models |
| Wired Networking | RJ45 Ethernet |
| Wireless Networking | WLAN, Bluetooth, WWAN, WiMAX on Supported Models |
| USB Ports | 3 |
| Display Connections | DisplayPort, External Monitor Connector |
| Expansion Slot | 54 mm ExpressCard |
| Media Reader | 4-in-1 Card Reader |
| Battery Type | Lithium-Ion |
| AC Input | 100–240 V, 50–60 Hz |
| Docking Support | ThinkPad X220 UltraBase |
| Extended Battery Support | ThinkPad Battery 19+ |
Dimensions
The tablet and standard notebook versions have different dimensions.
| Dimension | X220 Tablet / X220i Tablet | X220 / X220i |
| Width | 305.0 mm | 305.0 mm |
| Depth | 228.7 mm | 206.5 mm |
| Height | 27–31.3 mm | 19–26.6 mm |
Display Features
The 12.5-inch TFT LCD offers a native resolution of 1366 × 768 pixels and LED backlighting.
The X220 Tablet supports screen rotation for tablet operation. Selected models include a finger-sensitive touch panel, while the Tablet Digitizer Pen provides pen input.
The standard X220 and X220i notebook models use a conventional laptop display configuration.
Storage and Memory
The computer supports DDR3 SDRAM installed in replaceable SO-DIMM memory slots.
Storage configurations include a 2.5-inch hard disk drive or solid-state drive. Selected models also support an mSATA SSD installed in the compatible internal expansion slot.
The memory and storage components can be serviced or replaced by following the appropriate hardware replacement instructions.
Package Contents
The ThinkPad X220 Tablet system is supplied with the computer and its applicable power accessories.
| Item | Description |
| ThinkPad Computer | X220 Tablet or X220i Tablet |
| Battery Pack | Rechargeable Lithium-Ion Battery |
| AC Power Adapter | Provides external power and battery charging |
| Power Cord | Connects the adapter to an electrical outlet |
| Tablet Digitizer Pen | Pen for screen input and handwritten notes |
| Pen Accessories | Packaged with the digitizer pen |
| Setup Documentation | Product setup and safety information |
The Tablet Digitizer Pen and its accessories are packaged in a separate box inside the ThinkPad shipping box.
Parts and Components
Front View
The ThinkPad X220 Tablet has the following components.
| Component | Function |
| Computer Display | Displays text, images, and applications |
| Integrated Camera | Supports photographs and video communication |
| Built-In Microphones | Capture sound and speech |
| Built-In Stereo Speakers | Provide audio output |
| Power Switch | Turns the computer on or off |
| ThinkVantage Button | Opens Lenovo utilities and recovery functions |
| TrackPoint Pointing Stick | Moves the on-screen pointer |
| TrackPoint Buttons | Provide mouse button and scrolling functions |
| Touchpad | Controls the pointer through finger movement |
| Fn Key | Activates special keyboard functions |
| Volume Buttons | Adjust speaker volume |
| Fingerprint Reader | Provides biometric authentication on supported models |
| Tablet Buttons | Control selected functions in tablet mode |
| Status Indicators | Display power, battery, and device activity |
Right-Side Components
| Component | Function |
| Security Keyhole | Accepts a compatible mechanical cable lock |
| Tablet Digitizer Pen | Stored in the pen holder |
| HDD or SSD | Primary data storage |
| Combo Audio Jack | Connects compatible headphones or headsets |
| Ethernet Port | Connects to a wired network |
| Always On USB | Connects and charges supported USB devices |
| Media Card Reader | Reads compatible flash memory cards |
Left-Side Components
| Component | Function |
| ExpressCard Slot | Accepts 54 mm ExpressCards |
| Wireless Radio Switch | Controls wireless features |
| USB Connectors | Connect USB peripherals |
| DisplayPort | Connects compatible digital displays |
| External Monitor Connector | Connects a compatible monitor or projector |
| Cooling Vents | Allow airflow through the computer |
Bottom Components
The underside of the X220 Tablet contains the following:
- Removable battery pack.
- SIM card slot.
- Docking connector.
- Memory-upgrade compartment.
Rear Components
The rear of the computer includes the AC power jack and cooling vents.
The AC adapter connects to the power jack to operate the computer and charge the battery.
Safety Instructions
General Safety
- The computer must be protected from moisture, excessive heat, and physical damage.
- Power cords and adapters must be kept away from liquids.
- Ventilation openings must remain unobstructed.
- The computer should not be operated on soft surfaces that restrict cooling airflow.
- The display should not be twisted or forced beyond its intended movement.
- The computer should be turned off and disconnected from power before approved internal servicing.
- Damaged power adapters, cables, and batteries must not be used.
Heat Safety
The underside of the computer, palm rest, and AC adapter can become warm during operation and charging.
Extended direct contact may cause discomfort or burns. The computer should be placed on a stable surface with adequate airflow.
Battery Safety
The lithium-ion battery must not be disassembled, punctured, crushed, short-circuited, or exposed to fire.
Only a Lenovo-approved compatible replacement battery should be used.
If the battery is damaged, leaking, or unusually hot, operation must stop until the problem has been assessed.
Electrical Safety
The power adapter must be connected to a suitable electrical outlet.
Damaged outlets, plugs, extension cords, or power cables must not be used.
During electrical storms, cables should not be connected or disconnected, and the computer should not be serviced.
Display Safety
The LCD contains glass and must be handled carefully.
If a damaged display releases liquid crystal material onto the skin or into the eyes, the affected area must be rinsed with water for at least 15 minutes. Medical attention is required if symptoms remain.
Hearing Protection
Headphones and earphones should be used at moderate listening levels.
Extended exposure to excessive volume can damage hearing.
Operating Environment
| Condition | Specification |
| Operating Temperature | 5°C–35°C (41°F–95°F) |
| Non-Operating Temperature | 5°C–43°C (41°F–109°F) |
| Operating Humidity | 8%–80% |
| Non-Operating Humidity | 5%–95% |
| Maximum Altitude Without Pressurization | 3,048 m (10,000 ft) |
| Maximum Operating Temperature Above 2,438 m | 31.3°C (88°F) |
| Minimum Battery Charging Temperature | 10°C (50°F) |
The computer should be operated in a dry, ventilated area away from direct sunlight and strong magnetic fields.
Initial Setup Instructions
Connecting the AC Power Adapter
- Connect the AC adapter cable to the power jack on the computer.
- Connect the power cord to the AC adapter.
- Plug the power cord into a suitable electrical outlet.
- Press the power switch to start the computer.
The battery charges automatically while the compatible AC adapter is connected.
Turning On the Computer
Press the power switch.
The power indicator illuminates when the computer is running.
Shutting Down the Computer
Use the operating system’s Start menu and select the shutdown option.
If the computer stops responding, press and hold the power switch for at least four seconds to force it off. Unsaved work may be lost.
Registering the Computer
Product registration can be completed through Lenovo at:
https://www.lenovo.com/register
Registration can help with product identification, support, and technical notifications.
Using Notebook and Tablet Modes
The ThinkPad X220 Tablet uses a rotating display that allows the computer to switch between conventional notebook operation and tablet use.
Notebook Mode
Notebook mode provides the traditional laptop arrangement.
The keyboard, TrackPoint, and touchpad can be used for typing, pointer control, and application interaction.
Converting to Tablet Mode
- Open the display slowly while holding its upper-left and upper-right sides.
- Open the screen to at least 45 degrees, preferably 90 degrees.
- Hold the keyboard base with one hand.
- With the other hand, carefully rotate the display clockwise around the swivel hinge.
- Continue rotating until the back of the display faces the keyboard.
- Make sure the display has rotated through 180 degrees.
- Lower the display carefully onto the keyboard area.
The computer is now in tablet mode.
Picture Frame Mode
The picture frame position is reached when the display is rotated and remains upright.
This arrangement supports screen viewing and digitizer pen interaction.
Returning to Notebook Mode
- Open the display to at least 45 degrees, preferably 90 degrees.
- Follow the display swivel direction indicator.
- Rotate the screen slowly until the display faces the keyboard.
- Return the display to its conventional notebook position.
Tablet Handling Precautions
- Do not force the rotating hinge.
- Do not lift the computer by holding only the display.
- Avoid excessive vibration and shock.
- Keep the cooling vents unobstructed.
- Protect the computer from rain and moisture.
- Return the display to notebook mode before placing the computer in a carrying case.
Using the Tablet Digitizer Pen
The Tablet Digitizer Pen provides mouse-like control and handwriting input through the display.
Pen Components
| Component | Function |
| Pen Tip | Selects and writes on the screen |
| Click Button | Performs a right-click |
| Eraser Tip | Erases content in supported applications |
| Pen Holder | Stores the pen inside the computer |
Removing the Pen
- Locate the digitizer pen holder on the right side of the computer.
- Press the pen gently into its holder.
- Release it to disengage the retaining mechanism.
- Pull the pen out.
Storing the Pen
Insert the pen into the holder and press gently until it clicks into place.
Using the Pen
| Action | Operation |
| Move Pointer | Point the pen toward the display |
| Single Click | Tap the display once |
| Double Click | Tap twice without pausing |
| Right Click | Use the pen click button or tap and hold |
| Erase | Use the eraser tip in a supported application |
Pen Safety and Care
The Tablet Digitizer Pen contains pressure-sensitive components.
- Do not press the pen tip continuously for long periods.
- Do not drop or strike the pen.
- Avoid exposing the pen to vibration.
- Keep it away from water.
- Store it in its designated holder when not in use.
Using the Touchscreen
Selected X220 Tablet and X220i Tablet models include a touch-sensitive display.
Basic Touch Operations
| Action | Touch Gesture |
| Select Item | Tap once |
| Open Item | Tap twice |
| Open Shortcut Menu | Touch and hold |
Multitouch Gestures
Supported multitouch configurations allow the following:
| Gesture | Function |
| Two-Finger Pinch | Zoom out |
| Two-Finger Spread | Zoom in |
| Two-Finger Swipe | Scroll |
| Two-Finger Rotation | Rotate a compatible image |
Touchscreen Precautions
Only fingers or the specified Tablet Digitizer Pen should be used for screen input.
Hard objects, metallic pens, and incompatible styluses may damage the touch panel.
When both a finger and the digitizer pen are used simultaneously, the pen input takes priority.
Touchscreen Calibration
If the position of a finger touch does not match the on-screen pointer, the touch panel accuracy can be adjusted through the touch panel Settings Utility.
Tablet Buttons
The X220 Tablet includes dedicated buttons along the display bezel.
| Button | Function |
| Screen Rotation | Rotates the display orientation clockwise |
| Secure Attention Sequence | Performs the Ctrl + Alt + Delete function |
| Power Button | Controls computer power |
Tablet Shortcut Menu
The Tablet Shortcut Menu provides access to system functions while using tablet mode.
It supports access to Lenovo utilities, display orientation settings, and selected tablet functions.
On Windows 7, it can be opened through:
Start > All Programs > Lenovo ThinkVantage Tools > Tablet Utility
For Windows Vista and Windows XP, the corresponding utility is available through the ThinkVantage program group.
Keyboard Shortcuts and Function Keys
The ThinkPad keyboard provides special functions through the Fn key.
Function Key Guide
| Shortcut | Function |
| Fn + F2 | Lock the computer |
| Fn + F3 | Open power management controls |
| Fn + F4 | Enter sleep or standby mode |
| Fn + F5 | Manage wireless devices |
| Fn + F6 | Open camera and audio settings |
| Fn + F7 | Switch display output |
| Fn + F8 | Open UltraNav settings |
| Fn + F12 | Enter hibernation |
| Fn + Home | Increase screen brightness |
| Fn + End | Decrease screen brightness |
| Fn + Spacebar | Open FullScreen Magnifier |
| Fn + ScrLk | Toggle numeric keypad |
| Fn + Pause | Perform Break |
| Fn + PrtSc | Perform System Request |
The Fn + F4 and Fn + F12 power functions require the appropriate ThinkPad Power Management driver.
Media Controls
| Shortcut | Function |
| Fn + Down Arrow | Play or Pause |
| Fn + Up Arrow | Stop |
| Fn + Right Arrow | Next Track |
| Fn + Left Arrow | Previous Track |
These media shortcuts are intended for Windows Media Player.
ThinkVantage Button
The blue ThinkVantage button opens Lenovo utilities.
During startup, pressing the ThinkVantage button when prompted can open the Rescue and Recovery workspace.
This provides access to recovery functions when Windows cannot start normally.
Numeric Keypad
The keyboard includes embedded numeric keypad functionality.
Press Fn + NmLk or Shift + NmLk to enable or disable it.
Using the UltraNav Pointing Device
UltraNav combines the TrackPoint pointing stick and touchpad.
TrackPoint Operation
The TrackPoint is the red pointing stick located within the keyboard.
Apply gentle pressure in the required direction to move the pointer.
The left and right TrackPoint buttons provide conventional mouse clicking.
The center button supports scrolling through documents and webpages.
Using the Touchpad
Move a fingertip across the touchpad to move the pointer.
The lower-left and lower-right areas perform mouse button functions.
The multitouch touchpad also supports compatible zooming, scrolling, and rotation gestures.
Changing UltraNav Settings
- Press Fn + F8.
- Select Manage Settings.
- Open the UltraNav tab.
- Change the required settings.
- Apply the changes.
The user can configure the TrackPoint and touchpad independently or disable either device.
Power Management and Battery Charging
Checking Battery Status
The Power Manager Battery Gauge displays the remaining battery percentage on the Windows taskbar.
Battery operating time depends on display brightness, storage activity, system workload, and installed components.
Charging the Battery
- Install the battery correctly.
- Connect the AC adapter to the computer.
- Plug the power cord into an electrical outlet.
- Allow charging to continue until the battery reaches the required level.
Under the conditions described in the user guide, charging takes approximately three to six hours.
The computer normally does not begin recharging when the remaining battery charge is greater than 95%.
Battery Charging Precautions
The battery temperature must be at least 10°C (50°F) before charging.
A hot battery should be allowed to cool before charging again.
Power-Saving Modes
| Mode | Function |
| Screen Blank | Turns off the display while retaining the current session |
| Sleep / Standby | Saves the current session in memory and reduces power use |
| Hibernation | Saves the current session to storage and turns off the computer |
Entering Sleep Mode
Press Fn + F4.
To resume operation, press Fn.
Entering Hibernation
Press Fn + F12.
To resume, press the power button briefly.
Maximizing Battery Life
- Use Power Manager to select an appropriate power plan.
- Reduce display brightness when possible.
- Turn off unused wireless connections.
- Use sleep or hibernation when the computer is not needed.
- Follow the battery charge and discharge recommendations.
- Replace a battery that no longer provides acceptable operating time.
Battery and System Indicator Lights
Battery Status Indicator
| Indicator | Meaning |
| Solid Green | Battery charge is at least 20% |
| Solid Orange | Battery charge is between 5% and 20% |
| Fast Blinking Orange | Battery charge is below 5% |
| Slow Blinking Orange | Battery is charging below 20% |
| Slow Blinking Green | Battery is charging between 20% and 80% |
| Quick Blinking Orange | Battery error |
| Three Blinks | AC adapter connected |
| Indicator Off | Battery fully charged or removed |
Power Indicator
| Indicator | Meaning |
| Power Light On | Computer is operating |
| Power Light Blinking | Computer is in sleep or standby |
| Power Light Off | Computer is turned off |
Wireless Indicators
A green wireless indicator shows that the associated wireless feature is enabled and ready or transmitting data.
An unlit indicator shows that the wireless function is disabled.
Device Access Indicator
The device access light indicates storage activity.
The computer should not be turned off or have an active storage device removed while the indicator shows ongoing data access.
Connecting to Networks
Wired Ethernet Connection
The computer includes an RJ45 Ethernet port.
- Connect an Ethernet cable to the computer.
- Connect the opposite end to a compatible network device.
- Configure the network connection through Windows or Access Connections.
The Ethernet connector indicators display connection and activity status.
| Indicator | Meaning |
| Solid Green | Network link available |
| Blinking Yellow | Network data transfer |
Only an Ethernet cable should be connected to the Ethernet port. Telephone cables must not be inserted.
Wireless LAN Connection
Supported configurations include an internal wireless LAN adapter.
- Turn on the physical wireless radio switch.
- Press Fn + F5 to access wireless functions.
- Enable wireless LAN.
- Open Access Connections or the operating system’s network settings.
- Select the available wireless network.
- Complete the required authentication.
Bluetooth Connection
Bluetooth is available on selected configurations.
- Enable the wireless radio switch.
- Press Fn + F5.
- Enable Bluetooth.
- Open the Bluetooth configuration program.
- Select the compatible device.
- Follow the pairing instructions.
Wireless WAN
Selected models support mobile broadband through an internal wireless WAN adapter.
The service requires a compatible cellular connection and an authorized service provider.
The connection can be managed through Lenovo Access Connections.
Installing a SIM Card
The SIM card slot is located within the battery compartment.
- Shut down the computer.
- Disconnect the AC adapter and cables.
- Close the display and turn the computer over.
- Remove the battery.
- Locate the SIM card slot.
- Remove the existing card or dummy card if applicable.
- Insert the SIM card fully into the slot.
- Reinstall the battery.
- Reconnect power and start the computer.
External Displays and Projectors
Connecting a Monitor
The computer provides an external monitor connector and DisplayPort connection.
- Turn off the computer and external display when required for connection.
- Connect the compatible display cable.
- Turn on the display.
- Start the computer.
- Configure the display output.
Selecting Display Mode
Press Fn + F7 to change the display arrangement.
On Windows 7, the following display arrangements are available:
- Computer display only.
- Computer and external display showing the same image.
- Extended desktop.
- External display only.
The Windows + P shortcut can also be used in Windows 7.
Audio, Camera, and Media Features
Audio System
The ThinkPad provides built-in stereo speakers, integrated microphones, and a 3.5 mm combo audio jack.
Connecting Headphones
Connect a compatible headset or headphones to the combo audio jack.
A four-pole headset can support headphone and microphone functions.
A conventional standalone microphone is not supported through the combo audio jack.
Volume Control
The dedicated volume buttons can increase, decrease, or mute the sound.
Integrated Camera
Selected models include an integrated camera for photographs and video calls.
Press Fn + F6 to open the Communications settings window.
The camera settings can be adjusted through the Communications Utility.
Media Card Reader
The 4-in-1 media card reader supports:
- SD.
- SDHC.
- SDXC.
- MultiMediaCard (MMC).
Before removing a memory card, use the operating system’s Safely Remove Hardware function where applicable.
Lenovo ThinkVantage Software
The ThinkPad X220 family includes Lenovo utilities for device management, productivity, backup, and security.
| Software | Function |
| Access Connections | Network connection management |
| Active Protection System | Protects compatible HDDs from shocks |
| Power Manager | Battery and power settings |
| Rescue and Recovery | Backup and system restoration |
| System Update | Driver, firmware, and software updates |
| Lenovo Solution Center | System diagnostics |
| ThinkVantage Toolbox | Hardware diagnostics |
| Fingerprint Software | Fingerprint registration and authentication |
| Password Manager | Password management |
| SimpleTap | Access to selected system functions |
| Tablet Shortcut Menu | Tablet-specific controls |
| ThinkVantage GPS | Location functions on supported configurations |
Active Protection System
Active Protection System helps protect a mechanical hard disk drive from damage caused by sudden movement or vibration.
When an unsafe movement is detected, the system temporarily stops disk operation until conditions stabilize.
Power Manager
Power Manager controls battery use, power plans, and sleep or hibernation settings.
System Update
System Update downloads and installs supported Lenovo software, device drivers, and firmware updates.
Security and Password Settings
Mechanical Security Lock
The security keyhole allows a compatible cable lock to secure the computer to a suitable object.
Power-On Password
A power-on password prevents unauthorized startup.
Hard Disk Password
A hard disk password protects access to data stored on the internal storage device.
A forgotten hard disk password may prevent Lenovo from recovering the stored information.
Supervisor Password
The Supervisor Password protects ThinkPad Setup configuration settings.
If the password is forgotten, Lenovo may require replacement of the system board.
Configuring BIOS Passwords
- Restart the computer.
- Press F1 when the ThinkPad logo appears.
- Open Security > Password.
- Select the required password type.
- Configure the password.
- Save the changes.
Fingerprint Authentication
Selected X220 Tablet configurations include a fingerprint reader.
Fingerprints can be enrolled through Lenovo Fingerprint Software and associated with supported system passwords.
Fingerprint Reader Indicator
| Indicator | Meaning |
| Solid Green | Ready for fingerprint input |
| Blinking Green | Authentication in progress or successful |
| Blinking Amber | Fingerprint authentication failed |
Fingerprint Reader Care
The fingerprint reader should be kept clean and free from scratches.
A dry, soft, lint-free cloth can be used for cleaning.
Wet, dirty, injured, or excessively dry fingers may affect recognition.
ThinkPad Setup and BIOS Configuration
Entering ThinkPad Setup
- Shut down the computer.
- Turn it on.
- Press F1 when the Lenovo logo appears.
- Use the arrow keys to select the required menu.
BIOS Menu Functions
| Menu | Purpose |
| Config | Hardware and device configuration |
| Date/Time | System date and clock |
| Security | Password and security configuration |
| Startup | Boot sequence |
| Restart | Save changes, discard changes, or restore defaults |
Changing Boot Order
- Open ThinkPad Setup.
- Select Startup > Boot.
- Select the preferred startup device.
- Use the indicated keys to change its priority.
- Press F10 to save the changes.
Selecting a Temporary Boot Device
Press F12 during startup.
Select the preferred boot device from the Startup Device Menu and press Enter.
Restoring BIOS Defaults
Press F9 within ThinkPad Setup to load the default settings.
Confirm the selection and save the changes.
BIOS settings should be changed carefully because incorrect configuration may affect startup or device operation.
Backup and Recovery Instructions
Creating Recovery Media
Lenovo recovery media can restore the computer to its original factory software configuration.
For Windows 7:
- Open the Start menu.
- Select All Programs > Lenovo ThinkVantage Tools.
- Open Factory Recovery Disks.
- Follow the instructions.
Windows 7 supports recovery creation using discs or suitable external USB storage devices.
Windows Vista and Windows XP use disc-based Product Recovery procedures.
Using Recovery Media
- Connect the recovery USB device or insert the recovery disc.
- Start the computer.
- Press F12 repeatedly.
- Select the recovery device.
- Press Enter.
- Follow the recovery instructions.
Warning: Factory recovery can delete files currently stored on the computer. Important data should be backed up first.
Rescue and Recovery Workspace
The Rescue and Recovery workspace operates independently of Windows.
It can be used to:
- Recover selected files.
- Restore backed-up data.
- Restore the operating system.
- Restore the factory software configuration.
Opening Rescue and Recovery
- Turn on the computer.
- Press the blue ThinkVantage button when the startup interruption message appears.
- Open the Rescue and Recovery workspace.
- Select the required recovery function.
Backing Up the Computer
On Windows 7:
- Open Start > All Programs > Lenovo ThinkVantage Tools.
- Select Enhanced Backup and Restore.
- Open advanced Rescue and Recovery options.
- Select the hard drive backup operation.
- Follow the instructions.
Reinstalling Drivers
Drivers and applications originally supplied with the system may be stored in:
- C:\SWTOOLS\DRIVERS
- C:\SWTOOLS\APPS
The required installation files can be selected from the relevant folders.
Replacing and Upgrading Components
General Replacement Precautions
Before replacing a supported internal component:
- Turn off the computer.
- Disconnect the AC adapter and external cables.
- Wait three to five minutes for cooling.
- Remove the battery.
- Protect components from electrostatic discharge.
- Use the specified replacement procedure.
Replacing the Battery
- Shut down the computer or place it in hibernation.
- Disconnect the AC adapter and cables.
- Close the display.
- Turn the computer over.
- Move the battery latch to the unlocked position.
- Remove the battery.
- Install the compatible replacement.
- Slide the latch to the locked position.
- Reconnect the AC adapter.
Replacing DDR3 Memory
The computer supports replaceable SO-DIMM memory modules.
- Turn off the computer and disconnect power.
- Remove the battery.
- Open the memory compartment.
- Release the retaining clips of the installed memory module if replacement is required.
- Remove the module carefully.
- Align the notch of the new SO-DIMM with the socket.
- Insert the module at approximately a 20-degree angle.
- Press it into the socket.
- Pivot it downward until it locks.
- Reinstall the memory cover and battery.
If only one memory module is installed, Lenovo specifies the lower memory slot.
Verifying Installed Memory
Turn on the computer and press F1 during startup.
The Installed Memory field in ThinkPad Setup displays the detected memory capacity.
Replacing a Hard Disk Drive or SSD
- Back up important data.
- Turn off the computer.
- Disconnect the AC adapter.
- Remove the battery.
- Access the storage drive compartment.
- Remove the existing drive according to the replacement procedure.
- Install the compatible replacement.
- Secure the drive and compartment cover.
- Reinstall the battery.
- Restore the required software or data.
Replacing the mSATA SSD
Selected models contain an mSATA SSD installed in a compatible internal slot.
Replacement requires access through the appropriate internal components, including the keyboard and palm rest.
The replacement card must be inserted into the connector and secured correctly before reassembly.
Replacing the Keyboard
The keyboard can be replaced using Lenovo’s documented disassembly and installation procedure.
All power sources must be disconnected before accessing the keyboard.
Replacing Wireless Modules
The manual includes replacement procedures for compatible wireless LAN, WiMAX, and wireless WAN PCI Express Mini Cards.
Only supported replacement modules should be installed.
Docking Stations and Accessories
ThinkPad X220 UltraBase
The ThinkPad X220 UltraBase expands the computer’s connection options.
It supports compatible docking connections and optional optical drives, including DVD and DVD Multi-Burner devices.
Attaching the UltraBase
- Position the computer correctly over the docking connection.
- Align the docking guides.
- Lower the computer into the docking connector.
- Confirm that it is securely attached.
Detaching the UltraBase
- Unlock the docking mechanism.
- Confirm the computer is ready for removal.
- Operate the eject mechanism.
- Lift the computer away carefully.
ThinkPad Battery 19+
The ThinkPad Battery 19+ is an optional external battery accessory supported by the X220, X220i, X220 Tablet, and X220i Tablet.
It attaches through the computer’s docking connection and extends battery-powered operating time.
Disconnect AC power before attaching the accessory.
Cleaning and Maintenance
Cleaning the Computer Cover
- Prepare a diluted solution using five parts water and one part mild kitchen detergent.
- Dampen a sponge with the solution.
- Squeeze out excess liquid.
- Gently clean the cover.
- Remove detergent residue with a clean damp sponge.
- Wipe dry with a soft, lint-free cloth.
- Allow the surface to dry completely.
Cleaning the Keyboard
- Apply a small amount of isopropyl alcohol to a soft, dust-free cloth.
- Clean each key individually.
- Prevent liquid from entering beneath the keys.
- Allow the keyboard to dry.
A suitable camera blower or cool airflow may be used to remove dust from beneath the keys.
Cleaning the Display
- Wipe the display gently with a dry, lint-free cloth.
- If marks remain, slightly moisten the cloth with water or a 50:50 mixture of water and isopropyl alcohol.
- Remove as much liquid as possible from the cloth.
- Wipe the display carefully.
- Dry the display before closing it.
Cleaning the Touch Panel
Use a dry, soft, lint-free cloth or absorbent cotton to remove fingerprints and dirt.
Do not apply solvents to the cloth.
Preventive Maintenance
- Keep air vents clear.
- Remove dust regularly.
- Protect the display and hinges from excessive force.
- Avoid exposure to liquids.
- Maintain suitable operating temperatures.
- Keep drivers and software updated.
- Back up important data regularly.
Storage and Transportation
Storing the Computer
The computer should be stored in a dry environment away from direct sunlight and strong magnetic fields.
For extended battery storage, Lenovo recommends approximately 30%–50% battery charge at room temperature.
The battery should be recharged approximately once per year to prevent overdischarge.
Transporting the Computer
Before carrying the computer:
- Save open files.
- Shut down, enter sleep mode, or enter hibernation.
- Return a tablet model to notebook mode.
- Close the display.
- Place the computer in a protective carrying case.
The computer should not be carried while operating in an enclosed bag.
Troubleshooting Guide
Computer Does Not Start
- Check the AC adapter connection.
- Confirm that the electrical outlet works.
- Check the battery installation.
- Remove unnecessary external devices.
- Attempt to start the computer again.
If the problem remains, Lenovo diagnostic or repair assistance may be required.
Computer Stops Responding
- Press and hold the power switch until the computer turns off.
- Restart the computer.
- If startup fails, disconnect the AC adapter and remove the battery.
- Hold the power button for approximately 10 seconds.
- Connect AC power while leaving the battery removed.
- Try restarting.
If the problem persists, contact Lenovo Support.
Battery Does Not Charge
Check the power adapter, battery installation, and battery temperature.
If the battery is hot, remove it and allow it to cool to room temperature before charging again.
A battery that cannot charge normally may require replacement or service.
Battery Drains Quickly
Use Power Manager to reduce energy consumption.
Reduce screen brightness, disable unused wireless functions, and limit unnecessary background activity.
If battery life remains unusually short after a full charge cycle, the battery may need replacement.
Screen Remains Blank
- Confirm that the computer is powered on.
- Increase brightness using Fn + Home.
- Check whether the computer is in sleep or hibernation.
- If an external monitor was used, press Fn + F7 to restore the computer display.
- Restart the computer if necessary.
Fingerprint Reader Does Not Recognize a Finger
- Clean the fingerprint reader.
- Dry the finger.
- Use an enrolled fingerprint.
- Try another registered finger.
- Check the fingerprint software configuration.
Wireless Connection Does Not Work
- Check the physical wireless radio switch.
- Press Fn + F5.
- Confirm that the appropriate wireless function is enabled.
- Verify network settings.
- Check the wireless adapter and driver.
USB Device Does Not Work
Check the connection and device driver.
Use Device Manager to confirm that the USB controller and connected device are recognized correctly.
Run the available diagnostic utility if the problem continues.
Computer Does Not Resume from Sleep
Connect AC power and press Fn.
If the computer has entered hibernation, use the power button to resume.
If it remains unresponsive, follow the power reset procedure.
Liquid Spilled on the Keyboard
- Disconnect the AC adapter immediately.
- Turn off the computer.
- Remove the battery if required to interrupt power.
- Do not restart until the computer is fully dry.
Professional inspection may be required if liquid entered the computer.
System Error Codes
The ThinkPad X220 family can display POST error messages when hardware or configuration problems occur.
| Error Code | Meaning | Recommended Action |
| 0176 | Security Chip Tamper Detected | Check ThinkPad Setup; service if unresolved |
| 0177 | Supervisor Password Data Error | Authorized service required |
| 0182 | Security Settings Checksum Error | Check BIOS security settings and save |
| 0183 | EFI Security Settings Checksum Error | Check BIOS security settings and save |
| 0187 | EEPROM Access Error | Authorized service required |
| 0188 | Invalid RFID Serialization Information | Authorized service required |
| 0189 | Invalid RFID Configuration Information | Authorized service required |
| 0190 | Critical Low Battery | Recharge or replace the battery |
| 0191 | Invalid Remote Security Change | Confirm configuration and enter ThinkPad Setup |
| 0192 | Security Hardware Tamper Detected | Authorized service required |
| 0199 | Security Password Retry Count Exceeded | Verify password and enter ThinkPad Setup |
| 0251 | CMOS Checksum Error | Reconfigure BIOS settings |
| 0253 | EFI Variable Block Data Error | Load BIOS defaults and restart |
| 0271 | Incorrect Date or Time | Configure date and time in BIOS |
| 1802 | Unauthorized Network Card | Remove the unsupported network card |
| 1820 | Multiple External Fingerprint Readers | Remove unnecessary readers |
| 2000 | Active Protection Sensor Diagnostics Failure | Authorized service required |
| 2100 | Main HDD Detection Error | Storage service required |
| 2101 | Ultrabay HDD Detection Error | Storage service required |
| 2102 | Mini SATA Detection Error | Mini SATA device service required |
| 2110 | Main HDD Read Error | Storage service required |
| 2111 | Ultrabay HDD Read Error | Storage service required |
| 2112 | Mini SATA Read Error | Mini SATA device service required |
| 2200 | Invalid Machine Type or Serial Number | Authorized service required |
| 2201 | Invalid Machine UUID | Authorized service required |
Fan Error
A Fan Error indicates a cooling fan failure.
The computer requires professional service.
Hibernation Error
A hibernation error may occur when the computer’s hardware or system configuration changes while it is in hibernation.
Restoring the previous configuration or recreating the hibernation file may resolve the issue.
Beep Error Codes
The computer can also indicate hardware problems using audible beep patterns.
| Beep Pattern | Meaning |
| 1 short, pause, 3 short, pause, 3 short, pause, 1 short | Memory problem |
| 1 long, 2 short | Video function problem |
| 4 cycles of 4 short beeps | Security Chip problem |
| 5 beeps | System board problem |
Memory Beep Error
Check that the memory modules are correctly installed.
If the same beep pattern continues, the computer requires service.
Video or System Board Beep Error
A video or system board beep error requires professional diagnosis.
Warranty Information
The ThinkPad X220 family is subject to the applicable Lenovo Limited Warranty.
Warranty terms, coverage, and service eligibility depend on the product’s purchase and warranty documentation.
Covered Lenovo hardware problems may be serviced by authorized personnel.
Warranty Service
Warranty support may include:
- Hardware problem determination.
- Repair of covered Lenovo components.
- Applicable engineering changes.
Software installation, unsupported components, modifications, and certain nonwarranty services may incur additional charges.
Warranty information can be checked through Lenovo Support.
Customer Support Information
Lenovo provides product assistance through its support resources.
| Support Resource | Website |
| Lenovo Support | https://www.lenovo.com/support |
| Lenovo Product Registration | https://www.lenovo.com/register |
| Lenovo Telephone Support | https://www.lenovo.com/support/phone |
Preparing for Technical Support
Before contacting Lenovo, record:
- Product name.
- Machine type and model number.
- Serial number.
- Operating system and version.
- Error messages.
- Description of the problem.
- Steps taken to troubleshoot the problem.
The machine type and serial number can be found on the identification label on the underside of the computer.
Frequently Asked Questions
1. How does the Lenovo ThinkPad X220 Tablet switch to tablet mode?
The display must be opened, rotated clockwise through 180 degrees, and lowered onto the keyboard area. The computer can then be operated using the Tablet Digitizer Pen or touchscreen on supported configurations.
2. How is the ThinkPad X220 Tablet Digitizer Pen used?
The digitizer pen controls the pointer and supports clicking, writing, drawing, and erasing in compatible applications. A single tap selects an item, while the click button performs a right-click.
3. How long does the ThinkPad X220 Tablet battery take to charge?
The user guide states that charging takes approximately three to six hours, depending on the battery size and operating conditions.
4. How can the ThinkPad X220 Tablet enter BIOS?
Turn on the computer and press F1 when the ThinkPad logo appears. This opens ThinkPad Setup, where hardware, startup, password, and other system settings can be configured.
5. How is the ThinkPad X220 Tablet battery replaced?
Turn off the computer, disconnect power, close the display, and turn the computer over. Unlock the battery latch, remove the existing battery, insert the compatible replacement, and lock the latch again.
6. What type of RAM does the ThinkPad X220 Tablet use?
The ThinkPad X220 Tablet uses DDR3 SDRAM installed in SO-DIMM memory slots. The memory modules can be replaced or upgraded using the documented installation procedure.
7. What should be done if the ThinkPad X220 Tablet does not turn on?
Check the AC adapter, battery, and power outlet. If the computer remains unresponsive, the power reset procedure involves disconnecting the AC adapter, removing the battery, holding the power button for approximately 10 seconds, and restarting with AC power connected.