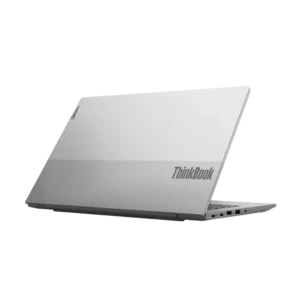
| Field | Details |
| Document Title | Lenovo S14 Gen 2 and Lenovo S15 Gen 2 User Guide |
| Document Type | User Guide |
| Brand Name | Lenovo |
| Product Name | S14 Gen 2, S15 Gen 2 |
| Model Number(s) | S14 G2 ITL, S14 G2 ITL Ua, S14 G2 ITL Ub, S14 G2 ALC, S15 G2 ITL, S15 G2 ALC |
| Machine Type | 82MU (S14 G2 ITL) |
| PDF File Size | 2 MB |
| Number of Pages | 36 |
| Languages | English |
Lenovo S14 G2 ITL
The Lenovo S14 G2 ITL is a 14-inch notebook computer equipped with a Full HD display, DDR4 memory, PCI Express solid-state storage, and a built-in 45 Wh rechargeable battery. It supports Wi-Fi, Bluetooth, external displays, USB accessories, and Windows operating system functions.
The laptop includes an integrated camera with a privacy cover, built-in microphones, speakers, a keyboard, and a multi-touch touchpad. Additional functions include keyboard hotkeys, configurable performance modes, fingerprint authentication on supported configurations, and UEFI/BIOS security settings.
This Lenovo S14 G2 ITL user manual covers machine type 82MU, including product specifications, hardware components, setup instructions, operating controls, battery charging, BIOS configuration, Windows recovery, maintenance, troubleshooting, and customer support.
The same user guide also covers the Lenovo S14 G2 ALC, S15 G2 ITL, and S15 G2 ALC. Hardware layouts and certain operating settings differ between these models.
Product Overview
The Lenovo S14 G2 ITL is part of the Lenovo S14 Gen 2 notebook series. It provides essential computing functions for document work, Internet access, video communication, and multimedia applications.
Its 14-inch display supports a Full HD resolution of 1920 × 1080 pixels. The computer uses DDR4 memory and includes one physical SO-DIMM memory slot alongside onboard memory. Storage is provided through a PCI Express M.2 solid-state drive.
The computer supports external monitors through HDMI and USB-C, while its USB Type-A ports allow compatible storage devices, keyboards, mice, printers, and other peripherals to be connected.
Main Features
- 14-inch Full HD display.
- 1920 × 1080 screen resolution.
- Onboard DDR4 memory.
- One DDR4 SO-DIMM memory slot.
- M.2 PCI Express SSD storage.
- 45 Wh three-cell rechargeable battery.
- 65 W AC power adapter.
- USB 3.0 connector.
- USB 2.0 connector.
- USB-C connector for data and compatible external devices.
- HDMI external display output.
- SD and MMC memory card reader.
- Integrated camera with privacy slider.
- Built-in microphones and speakers.
- Wi-Fi and Bluetooth connectivity.
- Multi-touch touchpad.
- Keyboard hotkeys and FnLock.
- Keyboard backlighting.
- Fingerprint reader on supported configurations.
- Novo button for BIOS and startup options.
- Configurable performance modes.
- Lenovo Vantage and Lenovo PC Manager support.
Technical Specifications
The following specifications apply to the Lenovo S14 G2 ITL and the hardware configuration described in the user guide.
General Specifications
| Specification | Details |
| Brand | Lenovo |
| Product Name | S14 G2 ITL |
| Product Series | S14 Gen 2 |
| Machine Type | 82MU |
| Product Type | Notebook Computer |
| Display Size | 14 inches (355.6 mm) |
| Display Resolution | 1920 × 1080 pixels (FHD) |
| Memory Type | DDR4 |
| Memory Configuration | Onboard DDR4 and DDR4 SO-DIMM |
| Physical Memory Slots | 1 |
| Storage Type | Solid-State Drive |
| SSD Form Factor | M.2 2242 or 2280 |
| Storage Interface | PCI Express |
| Battery Capacity | 45 Wh |
| Battery Cells | 3 |
| AC Power Adapter | 65 W |
| USB Ports | USB 3.0, USB 2.0, USB-C |
| External Display | HDMI |
| Audio Connection | 3.5 mm Combo Audio Jack |
| Memory Card Reader | SD, MMC |
| Wireless Connectivity | Wi-Fi, Bluetooth |
| Fingerprint Reader | Supported Configurations |
| Security | UEFI/BIOS Passwords |
| Operating System Instructions | Windows |
Physical Dimensions
| Dimension | Measurement |
| Width | 324.2 mm (12.76 inches) |
| Depth | 215.2 mm (8.47 inches) |
| Thickness | 17.9 mm (0.70 inches) |
Memory and Storage
| Component | Specification |
| Memory Technology | DDR4 |
| Onboard Memory | DDR4 |
| Additional Memory Type | DDR4 SO-DIMM |
| Physical Memory Slots | 1 |
| Storage Device | SSD |
| Supported SSD Form Factors | M.2 2242, M.2 2280 |
| Storage Bus | PCI Express |
Power Specifications
| Specification | Details |
| Adapter Input | 100–240 V AC |
| Input Frequency | 50–60 Hz |
| Adapter Output | 20 V DC, 3.25 A |
| Adapter Power | 65 W |
| Battery Capacity | 45 Wh |
| Battery Cells | 3 |
| Typical Full Charging Time | 2–4 hours |
| Recommended Battery Charging Temperature | 10°C–35°C (50°F–95°F) |
The listed battery capacity is a typical value measured under defined test conditions. Actual measured capacity may vary according to the operating environment.
USB Specifications
| Connector | Details |
| USB 3.0 | Connects compatible USB peripherals |
| USB 2.0 | Connects compatible USB peripherals |
| USB-C | Connects compatible external displays, storage, and data devices |
| USB-C Data Rate | Up to 5 Gbps (USB 3.2 Gen 1) |
| USB-C Maximum Power Output | 5 V, 3 A |
Actual transfer speeds depend on the connected devices, cables, files, and system conditions.
Parts and Components
The Lenovo S14 G2 ITL includes hardware components on the display assembly, keyboard base, left side, right side, and bottom cover.
Front Components
| Component | Function |
| Microphones | Capture voice and sound |
| Integrated Camera | Takes photographs and records video |
| Camera Cover Slider | Covers or uncovers the camera lens |
| Camera Light | Indicates camera activity |
| Screen | Displays text, images, and videos |
Integrated Camera
The built-in camera supports:
- Taking photographs.
- Recording videos.
- Video communication.
When the camera is operating, the camera light turns on.
Camera Privacy Cover
The camera includes a sliding privacy cover.
Move the slider to uncover the camera before using an application that requires video.
Slide the cover back over the lens when the camera is not in use.
Built-In Microphones
The integrated microphones capture sound for recording and communication applications.
Display
The S14 G2 ITL features a 14-inch Full HD screen.
The display provides visual output for Windows, applications, documents, and multimedia content.
Keyboard Base Components
The keyboard base includes the Power button, keyboard, touchpad, speakers, and integrated wireless antennas.
| Component | Function |
| Wireless Antennas | Transmit and receive Wi-Fi and Bluetooth signals |
| Power Light | Indicates the computer’s operating state |
| Power Button | Turns on the computer or puts it into sleep mode |
| Fingerprint Reader | Provides fingerprint authentication on supported models |
| Touchpad | Controls pointer movement and supports multi-touch input |
| Keyboard | Enters text and activates supported functions |
Power Button
Press the Power button to turn on the computer.
By default, pressing it while Windows is running places the laptop into sleep mode.
The Power button behavior can be changed through Windows Power Options.
Fingerprint Reader
On supported configurations, the fingerprint reader is integrated into the Power button.
It can be used for Windows user authentication after fingerprint enrollment.
Touchpad
The touchpad supports standard mouse-style functions.
Move a finger across the touchpad to control the pointer.
The touchpad also supports multi-touch gestures.
Keyboard
The keyboard includes standard character keys, hotkeys, and function keys.
The FnLock setting changes how shared hotkey and function-key controls operate.
Left-Side Ports
The left side of the Lenovo S14 G2 ITL contains the power connection and primary external-device connectors.
| Component | Function |
| Power Connector | Connects the AC power adapter |
| Charging Light | Displays charging and AC power status |
| USB 3.0 Connector | Connects compatible USB devices |
| HDMI Connector | Connects an external digital display |
| USB-C Connector | Connects compatible displays, storage, and data devices |
| Combo Audio Jack | Connects compatible headphones and headsets |
Power Connector
Connect the included AC power adapter to the dedicated power connector.
USB 3.0 Connector
The USB 3.0 connector supports compatible peripherals, including:
- USB keyboards.
- USB mice.
- USB storage devices.
- USB printers.
HDMI Connector
The HDMI port can connect compatible digital audio and video equipment, including external monitors and televisions.
USB-C Connector
The USB-C connector supports compatible external displays, storage devices, and data peripherals.
An appropriate cable or adapter may be required depending on the connected device.
Combo Audio Jack
The 3.5 mm four-pole audio jack supports compatible headphones and headsets.
Important: The connector does not support conventional standalone external microphones. For headset microphone input, use a compatible headset with a single combined plug.
Right-Side Ports
| Component | Function |
| Power Light | Displays power and sleep status |
| Novo Button Hole | Opens BIOS, boot, and Windows startup options |
| SD Card Slot | Accepts SD and MMC memory cards |
| USB 2.0 Connector | Connects compatible USB peripherals |
Novo Button Hole
The Novo button provides access to startup options before Windows loads.
It can be used to open:
- UEFI/BIOS Setup Utility.
- Boot Device Selection Menu.
- Windows Startup Options.
SD Card Slot
The memory card reader supports Secure Digital (SD) cards and MultiMediaCard (MMC).
It provides removable storage and data transfer functions.
USB 2.0 Connector
The USB 2.0 port supports compatible USB devices such as keyboards, mice, storage devices, and printers.
Bottom Components
Ventilation Slots
The ventilation openings on the underside allow air to enter the computer and help remove internal heat.
Important: Do not obstruct these openings. Blocked airflow may cause the computer to overheat.
Speakers
The built-in speakers produce audio for the operating system, applications, video, and multimedia playback.
Power and Charging Indicator Guide
The Lenovo S14 G2 ITL has status lights for power, battery charging, and fingerprint authentication on supported configurations.
Power Status Indicator
| Indicator | Meaning |
| Solid White | Computer is turned on |
| Blinking White | Computer is in sleep mode |
| Off | Computer is turned off or hibernating |
Charging Indicator
| Indicator | Meaning |
| Solid White | AC power connected; battery charge is 91%–100% |
| Solid Amber | AC power connected; battery charge is 1%–90% |
| Off | Computer is not connected to AC power |
Fingerprint Reader Indicator
| Indicator | Meaning |
| Blinking Amber | Fingerprint reader is starting |
| Solid Amber | Fingerprint reader is waiting for a fingerprint |
Understanding the Charging Light
A solid amber charging light indicates that the computer is connected to an electrical outlet and the battery charge is between 1% and 90%.
The charging light changes to solid white when the battery reaches 91% or higher.
Safety Instructions
Read the supplied Safety and Warranty Guide, Generic Safety and Compliance Notices, and Setup Guide before using the computer.
Power Safety
Use the included power adapter and a suitable electrical outlet.
The supplied adapter has an input range of 100–240 V AC at 50–60 Hz.
Heat and Ventilation Safety
Operate the notebook on a hard, flat surface.
- Keep ventilation openings unobstructed.
- Avoid surfaces that restrict airflow.
- Prevent prolonged direct contact between the underside and bare skin.
Caution: The bottom surface can become warm during normal operation. Prolonged skin contact for more than one minute may cause discomfort or harm.
Battery Charging Temperature
The recommended charging temperature is between:
10°C and 35°C (50°F and 95°F)
Liquid Spill Safety
If liquid is spilled on the laptop:
- Carefully unplug the AC power adapter.
- Turn off the computer immediately.
- Wait until all liquid has completely dried before turning the computer on again.
Caution: Do not turn the laptop upside down to drain liquid. If the model has keyboard drainage holes, liquid will drain through those openings.
Turning off the laptop immediately may cause unsaved work to be lost, but continuing to use it after a spill can cause serious electrical damage.
Operating and Storage Conditions
The Lenovo S14 G2 ITL should be operated and stored within the following environmental limits.
| Condition | Supported Range |
| Maximum Altitude Without Pressurization | 3048 m (10,000 ft) |
| Operating Temperature Up to 2438 m | 5°C–35°C (41°F–95°F) |
| Storage Temperature | 5°C–43°C (41°F–109°F) |
| Maximum Operating Temperature Above 2438 m | 31.3°C (88°F) |
| Minimum Battery Charging Temperature | 10°C (50°F) |
| Operating Relative Humidity | 8%–95% at 23°C wet-bulb temperature |
| Storage Relative Humidity | 5%–95% at 27°C wet-bulb temperature |
Before First Use
Connecting Power
- Connect the power cord to the AC adapter.
- Connect the adapter to the notebook’s power connector.
- Plug the power cord into a suitable electrical outlet.
- Open the display.
- Press the Power button.
Starting Windows
Follow the instructions displayed by Windows to complete the initial configuration.
Windows Operating Instructions
Windows provides built-in tools for managing network connections, display settings, updates, and hardware configuration.
Opening Control Panel
- Type Control Panel in Windows Search.
- Select the matching application.
- Open the required settings.
Connecting to Wi-Fi
- Select the network icon in the Windows notification area.
- Review the available wireless networks.
- Select the required network.
- Click Connect.
- Enter the network security key if requested.
Using Airplane Mode
Airplane Mode turns wireless communication functions on or off.
To access it:
- Open Windows Search.
- Type Airplane mode.
- Open the setting.
- Select the required state.
Using Night Light
Night Light changes the display to warmer colors and reduces blue-light output.
To enable it:
- Open Windows Search.
- Type Night light.
- Open the matching setting.
- Turn Night Light on.
Adjusting Night Light Color Temperature
Open the Night Light settings and adjust the color temperature to the preferred value.
Installing Windows Updates
- Search for Windows Update.
- Open the Windows Update settings.
- Check for available updates.
- Install applicable updates.
- Restart the computer when prompted.
Attention: Use Windows Update for operating system updates. Software updates downloaded from unrelated sources may present security risks.
Lenovo Vantage and Lenovo PC Manager
Lenovo Vantage and Lenovo PC Manager are applications used to manage supported computer functions.
Available Functions
| Function | Description |
| Product Information | Displays model and system details |
| System Status | Shows information about computer operation |
| Device Settings | Provides access to supported hardware settings |
| System Updates | Checks for applicable updates |
| Driver Updates | Helps obtain updated device drivers |
Opening Lenovo Software
- Open Windows Search.
- Type Lenovo Vantage or Lenovo PC Manager.
- Open the matching application.
Depending on the region, one of these applications may be preinstalled.
Lenovo Vantage can also be downloaded from the Microsoft Store.
Keyboard Hotkeys
The keyboard includes hotkeys for common operating system and hardware functions.
The icons printed on the keys identify their actions.
Hotkey Function Guide
| Hotkey Function | Description |
| Speaker Mute | Mutes or unmutes audio |
| Volume Down | Decreases sound volume |
| Volume Up | Increases sound volume |
| Microphone Mute | Mutes or unmutes the microphone |
| Brightness Down | Decreases display brightness |
| Brightness Up | Increases display brightness |
| Display Selection | Changes the active display device |
| Airplane Mode | Turns Airplane Mode on or off |
| Service Key | Opens the associated service function |
| Answer Call | Answers supported Skype for Business or Microsoft Teams calls |
| Reject Call | Rejects supported Skype for Business or Microsoft Teams calls |
| Calculator | Opens Windows Calculator |
| Lenovo Application | Opens Lenovo Vantage, Lenovo PC Manager, or an application launch bar |
| Snipping Tool | Opens the Windows screen capture tool |
| Play/Pause | Starts or pauses media playback |
| Stop | Stops media playback |
| Next Track | Moves to the next media file |
| Previous Track | Moves to the previous media file |
| Keyboard Backlight | Turns on, turns off, or changes backlight brightness |
Call-related hotkeys work with supported versions of Skype for Business and Microsoft Teams.
Adjusting Audio Volume
Use the volume hotkeys to:
- Increase volume.
- Decrease volume.
- Mute or unmute sound.
Changing Screen Brightness
Use the brightness hotkeys to adjust the display.
Switching Display Devices
Press the display selection hotkey to change the active display configuration.
Keyboard Backlight
Use the keyboard backlight hotkey together with Fn to turn the backlight on or off or change its brightness.
FnLock and Hotkey Mode
Some hotkeys share keys with standard F1–F12 function keys.
Using FnLock
Press:
Fn + Esc
This turns FnLock on or off.
The FnLock light indicates the current setting.
FnLock Behavior
| FnLock | Light | F1 Key Function |
| Off | Off | Speaker Mute/Unmute |
| On | On | Standard F1 function |
Hotkey Mode
Hotkey Mode can also be configured in BIOS.
| Setting | Hotkey Operation | Standard Function Key Operation |
| Disabled | Hold Fn and press the hotkey | Press F1–F12 directly |
| Enabled | Press the hotkey directly | Hold Fn and press F1–F12 |
Changing Hotkey Mode in BIOS
- Open the UEFI/BIOS Setup Utility.
- Select Configuration > Hotkey Mode.
- Press Enter.
- Select Enabled or Disabled.
- Select Exit > Exit Saving Changes.
Using the Touchpad
The touchpad provides standard mouse functions and supports multi-touch gestures.
Basic Touchpad Operation
- Slide a finger across the touchpad to move the pointer.
- Tap or click to select an item.
- Use supported multi-touch gestures to interact with Windows.
Numeric Keypad
The Lenovo S15 G2 models include a numeric keypad for entering numbers and operators.
Press NumLock to enable or disable the keypad.
This feature applies to the larger keyboard layout.
Battery Charging and Power Management
The Lenovo S14 G2 ITL includes a built-in rechargeable battery with a capacity of 45 Wh.
The computer can operate using battery power or the AC power adapter.
Checking Battery Status
- Locate the battery status icon in the Windows notification area.
- Click the icon.
- Review the remaining battery percentage and power settings.
Windows displays a warning when battery charge becomes low.
Charging the Battery
- Connect the AC power adapter.
- Plug the adapter into an electrical outlet.
- Allow the battery to charge.
The battery typically reaches full charge in 2–4 hours.
Actual charging time depends on battery condition, temperature, and computer usage.
Battery Charging Temperature
Charge the battery within the recommended temperature range of 10°C–35°C.
Battery Recharge Threshold
After the battery becomes fully charged, charging does not restart until the charge level drops to 94% or lower.
Recovering Full Charging Capacity
When the battery has been used under limited charging and discharging conditions for an extended period, its full capacity may not become available immediately.
The battery can be discharged to approximately 20% and recharged completely to help restore its charging capacity.
Sleep Mode and Power Plans
Default Power Button Behavior
Pressing the Power button while Windows is running puts the computer into sleep mode.
Changing Power Button Behavior
- Open Windows Search.
- Type Control Panel.
- Open Control Panel.
- Select Power Options.
- Click Choose what the power button does.
- Configure the preferred behavior.
Default Power Plan
The Lenovo S14 G2 ITL uses the Balanced power plan by default.
When connected to AC power, the documented settings are:
| Setting | Default |
| Power Plan | Balanced |
| Turn Off Display | After 10 minutes |
| Enter Sleep Mode | After 10 minutes |
Waking the Computer
Press the Power button or any keyboard key.
Customizing a Power Plan
- Type power plan in Windows Search.
- Open the matching setting.
- Adjust the available power-saving options.
Performance Modes
The computer supports different performance modes with varying power consumption and performance characteristics.
Press Fn + Q to cycle through the available performance modes.
Connecting External Displays
The Lenovo S14 G2 ITL includes HDMI and USB-C connectors for compatible external displays.
Using HDMI
- Connect a compatible HDMI cable.
- Connect the other end to the external display.
- Turn on the display.
- Select the appropriate input.
- Configure the display through Windows.
Using USB-C
The USB-C port can connect compatible display devices.
Use an appropriate cable or adapter according to the display’s supported connections.
Using the Novo Button
The Novo button provides access to startup configuration options before Windows loads.
Opening the Novo Button Menu
- Turn off the computer.
- Open the LCD.
- Press the Novo button.
Alternatively:
- Turn off the computer.
- Press Fn + Power.
Novo Button Options
| Option | Function |
| BIOS/UEFI Setup | Opens the firmware configuration utility |
| Boot Menu | Selects a startup device |
| Windows Startup Options | Opens recovery and advanced startup functions |
BIOS Setup Instructions
The UEFI/BIOS Setup Utility initializes hardware and provides firmware configuration settings.
How to Enter BIOS on Lenovo S14 G2 ITL
- Turn on or restart the computer.
- Press F2 repeatedly.
Changing Boot Priority
- Open BIOS Setup.
- Select the Boot menu.
- Follow the instructions to change the device order under Boot Priority Order.
- Save the changes.
Temporary Boot Device Selection
- Start the computer.
- Press F12 repeatedly when the Lenovo logo appears.
- Select the required startup device.
Enabling or Disabling Always On USB
On configurations supporting Always On USB:
- Open BIOS Setup.
- Select Configuration > Always On USB.
- Press Enter.
- Change the setting to Enabled or Disabled.
- Save the changes.
BIOS Passwords and Security
The Lenovo S14 G2 ITL supports several UEFI/BIOS password types.
Password Types
| Password | Purpose |
| Administrator Password | Restricts access to BIOS configuration |
| User Password | Allows limited BIOS access |
| Master Hard Disk Password | Protects storage access |
| User Hard Disk Password | Provides access to protected storage |
Setting an Administrator Password
- Open BIOS Setup.
- Select Security > Set Administrator Password.
- Press Enter.
- Enter a password containing letters and numbers.
- Confirm the password.
- Select Exit > Exit Saving Changes.
Warning: Lenovo-authorized service personnel cannot reset a forgotten administrator password. System board replacement is required, with proof of purchase and applicable charges.
Changing or Removing an Administrator Password
- Open BIOS using the administrator password.
- Select Security > Set Administrator Password.
- Enter the current password.
- Enter and confirm the replacement password.
To remove the password, leave the new password fields blank and press Enter.
- Save the changes.
Removing the administrator password also removes the user password.
Setting a User Password
An administrator password must be configured first.
- Open BIOS using the administrator password.
- Select Security > Set User Password.
- Enter a password different from the administrator password.
- Confirm it.
- Save the changes.
Enabling a Power-On Password
- Open BIOS.
- Select Security > Power on Password.
- Set the option to Enabled.
- Save the changes.
The administrator or user password must then be entered when the computer starts.
Setting a Hard Disk Password
- Open BIOS Setup.
- Select Security > Set Hard Disk Passwords.
- Follow the instructions to create the master and user hard disk passwords.
- Save the settings.
Important: The master and user hard disk passwords must be configured together.
If the hard disk password is forgotten, Lenovo cannot reset it or recover the protected data. Storage replacement may be required, with proof of purchase and applicable charges.
Changing or Removing Hard Disk Passwords
- Open BIOS.
- Select Security.
- Choose the relevant password setting.
- Follow the instructions.
- Save the changes.
Removing the master hard disk password also removes the user hard disk password.
The user hard disk password cannot be removed separately.
Troubleshooting Guide
The following table covers common problems and support procedures described in the Lenovo S14 Gen 2 user guide.
| Problem | Recommended Action |
| Computer stops responding | Hold the Power button until it turns off, then restart |
| Liquid is spilled on the laptop | Disconnect AC power immediately, shut down, and allow complete drying |
| Computer needs Windows recovery | Use Novo Button Menu and Windows Startup Options |
| Battery charging stops near full capacity | Charging normally resumes after the battery falls to 94% or lower |
| Computer enters sleep after inactivity | Check the power plan and timeout settings |
| Required driver is unavailable or outdated | Check Lenovo Vantage, Lenovo PC Manager, or Lenovo Support |
| Firmware settings need to be changed | Open BIOS using F2 or Novo Button Menu |
Computer Stops Responding
- Press and hold the Power button until the computer turns off.
- Press the Power button again to restart.
Liquid Spilled on the Computer
- Disconnect the AC power adapter immediately.
- Turn off the computer.
- Wait until all liquid is dry before restarting.
Do not turn the computer upside down to drain liquid.
Battery Does Not Immediately Resume Charging
The battery charging system prevents charging from restarting immediately after a full charge.
Charging normally resumes when the battery level falls to 94% or lower.
Computer Enters Sleep Automatically
The default power plan places the Lenovo S14 G2 ITL into sleep mode after ten minutes of inactivity while connected to AC power.
To change the setting:
- Open Windows Power Options.
- Select the active power plan.
- Adjust the sleep timeout.
Windows Startup Problems
The Novo Button Menu provides access to Windows Startup Options.
Available functions include:
- Starting from a recovery drive.
- Resetting Windows.
- Opening advanced startup options.
Driver or BIOS Update Problems
Lenovo provides current drivers, firmware updates, diagnostics, and support information through its support resources.
Use Lenovo Vantage, Lenovo PC Manager, or the official Lenovo Support website.
Windows Recovery Instructions
Opening Windows Startup Options
- Turn off the computer.
- Open the Novo Button Menu.
- Select Windows Startup Options.
The startup options screen provides access to recovery and advanced tools.
Using Windows Recovery
The available recovery functions include:
- Starting from a recovery drive.
- Resetting the computer.
- Opening advanced startup options.
For additional recovery instructions, use Lenovo’s official recovery resources.
https://support.lenovo.com/HowToCreateLenovoRecovery
Maintenance Instructions
Routine maintenance includes keeping Windows and device drivers updated, managing battery power, and maintaining unobstructed airflow.
Recommended Maintenance Tasks
| Task | Method |
| Windows Updates | Use Windows Update |
| Driver Updates | Use Lenovo Vantage or Lenovo PC Manager |
| BIOS Updates | Obtain updates through Lenovo Support |
| Battery Management | Check battery condition and charging status |
| Power Management | Adjust the power plan |
| Ventilation | Keep air openings unobstructed |
| System Recovery | Use Novo Button Menu or Windows recovery options |
Maintaining Battery Performance
Use the laptop within the recommended operating and charging temperature ranges.
The battery normally charges to full capacity in approximately 2–4 hours.
Maintaining Ventilation
Keep the bottom ventilation openings clear during operation.
Blocked vents can cause overheating.
Storage Instructions
Store the computer within the specified environmental conditions.
| Condition | Requirement |
| Storage Temperature | 5°C–43°C (41°F–109°F) |
| Storage Relative Humidity | 5%–95% at 27°C wet-bulb temperature |
Replacement Parts and Accessories
Lenovo identifies certain components as Customer Replaceable Units (CRUs).
Customer Replaceable Units
| Part | CRU Type |
| Power Cord | Self-Service CRU on Selected Models |
| AC Power Adapter | Self-Service CRU |
Internal Component Replacement
Components not listed as CRUs, including the built-in rechargeable battery, must be replaced by a Lenovo-authorized repair facility or technician.
Returning Defective Components
When Lenovo provides a replacement CRU and requires return of the defective component:
- Return instructions are included.
- A prepaid shipping label is provided.
- A suitable shipping container is supplied.
Charges may apply if Lenovo does not receive the defective component within 30 days after delivery of the replacement.
Authorized Repair Locations
https://support.lenovo.com/partnerlocation
Warranty Information
The Lenovo S14 G2 ITL is covered under the applicable Lenovo Limited Warranty.
The warranty period and service entitlement depend on the product and purchase region.
Services Available During Warranty
Eligible warranty services may include:
- Hardware problem identification.
- Repair of covered Lenovo hardware.
- Applicable engineering changes.
Services Not Covered
Examples of services outside standard warranty coverage include:
- Replacement of nonwarranted parts.
- Identification of software problem sources.
- BIOS configuration during installation or upgrades.
- Changes or upgrades to device drivers.
- Installation and maintenance of network operating systems.
- Software installation and maintenance.
The applicable warranty conditions are provided in the Safety and Warranty Guide.
Lenovo Limited Warranty: https://www.lenovo.com/warranty/llw_02
Additional Services
Additional support services may be available during or after the warranty period.
https://pcsupport.lenovo.com/warrantyupgrade
Customer Support Information
Lenovo provides technical support, driver downloads, firmware updates, product documentation, diagnostics, and warranty services.
Lenovo Support Resources
| Resource | Website |
| Lenovo Support | https://support.lenovo.com |
| Lenovo Support Phone Directory | https://pcsupport.lenovo.com/supportphonelist |
| Lenovo Authorized Repair Locations | https://support.lenovo.com/partnerlocation |
| Lenovo Warranty Services | https://pcsupport.lenovo.com/warrantyupgrade |
| Lenovo Troubleshooting Resources | https://www.lenovo.com/tips |
| Lenovo Community | https://forums.lenovo.com |
| Microsoft Support | https://support.microsoft.com |
Before Contacting Lenovo
Prepare the following product information:
- Product name.
- Machine type.
- Serial number.
- Description of the problem.
- Error messages or codes.
- Operating system version.
- Applications running when the problem occurred.
- Steps required to reproduce the issue.
The product name and serial number are normally printed on a label or marked on the underside of the notebook.
Frequently Asked Questions
1. What are the specifications of the Lenovo S14 G2 ITL?
The Lenovo S14 G2 ITL, machine type 82MU, features a 14-inch Full HD 1920 × 1080 display, onboard DDR4 memory, one DDR4 SO-DIMM slot, M.2 PCI Express SSD storage, a 45 Wh three-cell battery, HDMI, USB 3.0, USB 2.0, USB-C, Wi-Fi, and Bluetooth.
2. How do I enter BIOS on the Lenovo S14 G2 ITL?
Turn on or restart the laptop and press F2 repeatedly. The BIOS Setup Utility can also be accessed through the Novo Button Menu.
3. What charger does the Lenovo S14 G2 ITL use?
The laptop uses a 65 W AC power adapter rated at 20 V DC and 3.25 A, with an input range of 100–240 V AC at 50–60 Hz.
4. How long does the Lenovo S14 G2 ITL battery take to charge?
The 45 Wh battery normally reaches a full charge in approximately 2–4 hours. Actual charging time depends on battery condition, temperature, and computer usage.
5. How do I open the Novo Button Menu on the Lenovo S14 G2 ITL?
Turn off the computer, open the display, and press the Novo button. The menu provides access to BIOS Setup, boot device selection, and Windows Startup Options.
6. How do I boot the Lenovo S14 G2 ITL from a USB drive?
Connect a compatible bootable USB device, start the computer, and press F12 repeatedly when the Lenovo logo appears. Select the USB device from the boot selection menu.
7. How do I reset a frozen Lenovo S14 G2 ITL?
Press and hold the Power button until the computer turns off. Then press the Power button again to restart it.
8. Where can I download Lenovo S14 G2 ITL drivers and BIOS updates?
Drivers and firmware updates are available through Lenovo Vantage, Lenovo PC Manager, or Lenovo Support. Select the S14 G2 ITL or machine type 82MU to locate the appropriate downloads.