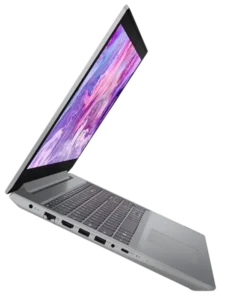
| Field | Details |
| Document Title | IdeaPad L3 (15″, 05) User Guide |
| Document Type | User Guide |
| Brand Name | Lenovo |
| Product Name | IdeaPad L3 (15″, 05) |
| Model Number(s) | IdeaPad L3 15IML05, IdeaPad L3 15IML05 U, IdeaPad L3 15IML05 D |
| Machine Type | 81Y3 |
| PDF File Size | 3 MB |
| Number of Pages | 64 |
| Languages | English |
Lenovo IdeaPad L3 15IML05
The Lenovo IdeaPad L3 15IML05 is a 15.6-inch notebook computer designed for everyday computing, productivity, communication, and multimedia tasks. It supports Windows 10, wired and wireless networking, Bluetooth connectivity, external devices, and several built-in security and system management features.
The notebook is available with HD or Full HD display options, DDR4 memory, HDD or SSD storage configurations, a built-in camera, microphones, speakers, and a keyboard with a dedicated numeric keypad. Selected models also include an optical drive.
This user guide covers the IdeaPad L3 15IML05, 15IML05 U, and 15IML05 D variants under machine type 81Y3. It provides instructions for identifying the laptop’s components, configuring Windows, connecting to networks, using keyboard shortcuts, charging the battery, changing BIOS settings, recovering Windows, maintaining the computer, and resolving common problems.
Features and software options may vary by configuration. Windows procedures in this guide refer to the Windows 10 interface.
Technical Specifications
The Lenovo IdeaPad L3 15IML05 is available in different hardware configurations. The following specifications cover the options identified for this model family.
| Specification | Details |
| Brand | Lenovo |
| Product | IdeaPad L3 (15″, 05) |
| Models | 15IML05, 15IML05 U, 15IML05 D |
| Machine Type | 81Y3 |
| Product Type | Notebook Computer |
| Display Size | 15.6 inches (396.24 mm) |
| HD Display Resolution | 1366 × 768 pixels |
| Full HD Display Resolution | 1920 × 1080 pixels |
| Memory | Onboard memory and DDR4 SODIMM |
| Memory Slots | 1 SODIMM slot |
| HDD Storage | 2.5-inch SATA hard disk drive |
| SSD Storage | M.2 2242/2280 PCIe solid-state drive |
| Battery Capacity | 36 Wh |
| Battery Cells | 3 |
| AC Adapter Power | 45 W / 65 W |
| AC Adapter Input | 100–240 V AC, 50–60 Hz |
| AC Adapter Output | 20 V DC, 2.25 A / 3.25 A |
| USB-A Ports | 2 × USB 3.2 Gen 1 |
| USB-C Port | USB 3.2 Gen 1 |
| USB-C Data Rate | Up to 5 Gbit/s |
| USB-C Power Output | Up to 5 V, 1.5 A |
| Video Connector | HDMI |
| Audio Connector | 3.5 mm combo audio jack |
| Wired Networking | Ethernet |
| Wireless Networking | Wireless LAN |
| Bluetooth | Supported |
| Security | Mini security-lock slot, UEFI/BIOS passwords, TPM |
| Keyboard | Function keys, hotkeys, numeric keypad |
| Optical Drive | Available on selected models |
| Width | 363 mm (14.29 inches) |
| Depth | 254.6 mm (10.02 inches) |
| Thickness | 22.9 mm (0.90 inches) |
Battery capacity is a typical value measured under specified test conditions. Actual measured capacity can vary with the environment.
Checking the Processor Information
To identify the processor installed in the notebook:
- Right-click the Windows Start button.
- Select System.
- Review the processor and system information displayed by Windows.
Parts and Components
The IdeaPad L3 includes several built-in components and external connectors for power, networking, audio, storage accessories, and everyday operation.
Front Components
| Component | Function |
| Camera | Captures photographs and video for supported applications. |
| Camera Cover Slider | Covers or uncovers the camera lens. |
| Camera Light | Indicates when the camera is in use. |
| Wireless Antennas | Send and receive wireless LAN and Bluetooth signals. |
| Microphones | Capture voice and other audio. |
| Screen | Displays text, graphics, applications, and video. |
The wireless antennas are integrated into the notebook and are not visible from the outside.
Using the Camera Cover
The camera includes a sliding cover that provides physical privacy protection.
- Locate the camera cover slider near the webcam.
- Move the slider to uncover the camera lens when camera access is needed.
- Move it back to cover the lens when the camera is not in use.
The camera indicator illuminates when the webcam is active.
Base Components
| Component | Function |
| Ventilation Slots | Allow heat to escape from the notebook. |
| Keyboard | Provides text input and access to function keys and shortcuts. |
| Numeric Keypad | Provides dedicated number and operator keys. |
| Touch Pad | Controls the pointer and supports multi-touch operations. |
The ventilation openings must remain unobstructed during operation.
Left-Side Ports and Connectors
| Port or Component | Function |
| Power Connector | Connects the AC power adapter and power cord. |
| Charging Light | Displays AC connection and battery charging status. |
| Ethernet Connector | Connects the notebook to a wired LAN. |
| HDMI Connector | Connects compatible digital video or audio equipment. |
| USB 3.2 Gen 1 Type-A Ports | Two connectors for compatible USB devices. |
| Combo Audio Jack | Connects a compatible headset or headphones. |
| USB-C Connector | Supports USB data transfer and power output to connected devices. |
| Novo Button Hole | Opens the Novo Button menu for startup and recovery options. |
| Power Light | Indicates whether the computer is on, asleep, or turned off. |
USB-C Connector
The USB-C connector supports USB 3.2 Gen 1 data transfer at reference speeds up to 5 Gbit/s and power output up to 5 V, 1.5 A.
It can connect compatible USB storage devices and other USB peripherals. An adapter may be necessary for some accessories.
Important: The USB-C connector cannot be used to connect an external display. External monitors should be connected through the HDMI connector.
Actual USB transfer speeds depend on connected devices, file characteristics, computer performance, and operating conditions. They are lower than the theoretical interface speed.
Combo Audio Jack
The 3.5 mm combo audio jack supports compatible headphones and headsets using a four-pole plug.
A headset with a single combined connector should be used when both headphone and microphone functions are required.
Note: The combo audio jack does not support standalone external microphones.
Right-Side Components
| Component | Function |
| Optical Drive | Reads and writes compatible CD/DVD discs on selected models. |
| Mini Security-Lock Slot | Accepts a compatible cable lock to secure the notebook. |
The mini security-lock slot supports compatible Kensington MicroSaver locks using T-bar locking technology and MiniSaver locks using Cleat locking technology.
Compatible security accessories are available through Lenovo SmartFind.
Bottom Components
The speakers are located on the underside of the notebook and provide sound output for applications, video, and other supported audio functions.
Indicator Lights and Their Meanings
The IdeaPad L3 includes charging, power, camera, Ethernet, and keyboard indicators.
Battery Charging Light
| Indicator | Meaning |
| Solid White | Connected to AC power; battery capacity is 91%–100%. |
| Solid Amber | Connected to AC power; battery capacity is 1%–90%. |
| Off | Computer is not connected to AC power. |
Power Indicator
| Indicator | Meaning |
| On | The computer is turned on. |
| Off | The computer is turned off or in hibernation mode. |
| Blinking | The computer is in sleep mode. |
Ethernet Indicators
| Indicator | Meaning |
| Green Light On | The computer is connected to a local area network. |
| Yellow Light Blinking | Data is being transmitted over the network. |
Other Indicators
- Camera light: Illuminates when the camera is in use.
- Num Lock light: Indicates that the numeric keypad is enabled.
Safety Instructions
The IdeaPad L3 is an electrical device containing a rechargeable battery and components that generate heat during operation.
Read the supplied Safety and Warranty Guide and Setup Guide before using the notebook.
Electrical Safety
Danger: Electrical current from power and communication cables can cause serious injury.
- Use only power cords and adapters supplied by the product manufacturer.
- Do not use damaged, cracked, or overheated power cords or adapters.
- Keep electrical connections away from water and other liquids.
- Connect power cords to correctly wired electrical outlets.
- Do not overload electrical outlets, extension cords, or power strips.
- Never modify a power plug or defeat the grounding feature of a grounded plug.
- Do not open electrical power supplies or other components marked with hazardous-voltage warnings.
- Do not connect or disconnect cables or perform installation or maintenance during an electrical storm.
A damaged or corroded electrical outlet must be replaced by a qualified electrician before use.
Power Adapter Safety
The AC power adapter generates heat when connected to the computer and an electrical outlet.
- Do not place the adapter against the body while it is operating.
- Never use the adapter to warm the body.
- Do not wrap the power cord around the adapter.
- Do not cover an operating adapter with clothing or other objects.
- Stop using the adapter if it shows overheating, corrosion, or physical damage.
Battery Safety
Danger: Incorrect handling of rechargeable batteries may cause overheating, leakage, fire, or explosion.
- Do not open, disassemble, modify, or repair a battery.
- Do not crush, puncture, or short-circuit a battery.
- Keep batteries away from water, fire, and children.
- Stop using a battery if it is damaged or leaking.
- Use only replacement batteries approved by Lenovo.
- Recharge batteries only according to the product instructions.
Important: The built-in rechargeable battery must not be removed or replaced by the user. Replacement must be carried out by a Lenovo-authorized repair facility or technician.
Lithium Coin-Cell Battery Safety
The notebook also contains an internal battery used for system clock functions.
An incorrectly replaced lithium coin-cell battery may explode.
- Do not attempt to replace a coin-cell battery unless it is specifically designated as a customer-replaceable part.
- Keep coin-cell batteries away from children.
- Do not heat, crush, puncture, cut, disassemble, or burn them.
- Do not expose them to water, extreme temperatures, or extremely low air pressure.
- Dispose of used batteries according to applicable local regulations.
Danger: Swallowing a lithium coin-cell battery can cause serious internal burns and may be fatal. If a battery is swallowed or placed inside any part of the body, seek medical care immediately.
Heat and Ventilation Safety
The notebook, palm rest, and power adapter may become warm during operation.
- Avoid extended body contact with hot notebook surfaces.
- Do not keep any part of the body against a hot section of the computer for more than one minute.
- Take occasional breaks from resting the hands on the palm rest.
- Do not block ventilation openings.
- Do not operate the notebook on a bed, sofa, carpet, or other surface that may obstruct airflow.
- Do not operate or charge the computer near flammable materials or in explosive environments.
- Do not operate the computer inside furniture that restricts ventilation.
- Keep incoming airflow temperatures at or below 35°C (95°F).
External Device Safety
To avoid potential equipment damage, do not connect or disconnect external device cables other than USB and IEEE 1394 cables while the computer is powered on.
After shutting down the computer, wait at least five seconds before disconnecting other external devices.
Optical Drive Safety
Selected models include an optical drive.
Caution: Optical drives may contain laser components. Do not remove the drive covers or attempt procedures that expose internal laser components.
Laser radiation can cause injury if a laser device is opened or operated incorrectly.
Screen and Audio Safety
The LCD contains glass that can break if the notebook is dropped or handled roughly.
If the LCD breaks and internal liquid reaches the eyes or skin, wash the affected areas with water for at least 15 minutes. Seek medical care if symptoms remain.
For headphone use, excessive listening volume can damage hearing. Use an appropriate volume level and compatible headphones.
Conditions That Require Immediate Attention
Stop using the computer, disconnect it from power and communication connections, and contact Lenovo Support if any of the following occurs:
- Smoke, sparks, fire, or signs of overheating.
- A strong or unusual odor.
- Cracking, popping, or hissing sounds.
- Damaged electrical cords, plugs, or adapters.
- Battery leakage or physical battery damage.
- Liquid exposure.
- Severe physical damage to the computer.
- Abnormal operation despite following the instructions.
Do not attempt to diagnose dangerous electrical or hardware conditions by opening the notebook.
Getting Started with Windows 10
The Lenovo IdeaPad L3 15IML05 user manual provides instructions for using Windows 10, including account setup, the desktop interface, application access, and network connections.
Creating a Windows Account
At least one Windows account is required to use the operating system.
Two account types are supported:
| Account Type | Description |
| Local Account | Created and used on one Windows device. |
| Microsoft Account | Used to sign in to Windows and supported Microsoft services. |
A password is recommended for local accounts to help prevent unauthorized access.
A Microsoft account can be used with services such as OneDrive, Outlook.com, and other supported Microsoft applications.
It also allows certain settings to be synchronized between Windows devices.
Switching to a Microsoft Account
To switch from a local Windows account:
- Open the Start menu.
- Select Settings > Accounts.
- Click Sign in with a Microsoft account instead.
- Enter the Microsoft account credentials.
- If necessary, select Create one to register a new account.
- Follow the on-screen instructions.
An Internet connection is required the first time a Microsoft account is used on the device.
Switching Back to a Local Account
- Open Start > Settings > Accounts.
- Select Sign in with a local account instead.
- Follow the instructions to complete the change.
Adding Additional Windows Users
An administrator account is required to create additional user accounts.
- Open the Start menu.
- Select Settings > Accounts > Family & other users.
- Choose Add someone else to this PC.
- Enter the information for the new account.
- Set the username and password.
A Microsoft account is required when adding family members through the family account option described in Windows 10.
Windows Desktop Controls
| Windows Feature | Function |
| Start Button | Opens the Start menu. |
| Account | Provides account settings, lock, and sign-out options. |
| Documents | Opens the Documents folder. |
| Pictures | Opens the Pictures folder. |
| Settings | Opens Windows Settings. |
| Power | Provides shutdown, restart, and sleep options. |
| Windows Search | Searches applications, files, and available web results. |
| Task View | Displays open applications and allows switching between them. |
| Notification Area | Displays system notifications and status indicators. |
| Battery Icon | Shows battery status and power settings. |
| Network Icon | Displays network connections and status. |
| Action Center | Provides notifications and quick settings. |
Opening the Start Menu
The Start menu can be opened by clicking the Start button or pressing the Windows logo key.
Opening Control Panel
Control Panel can be opened through Start > Windows System > Control Panel or by searching for Control Panel in Windows Search.
Network Setup and Connections
The IdeaPad L3 supports both wired Ethernet and wireless LAN connections.
Connecting to a Wi-Fi Network
- Click the network icon in the Windows notification area.
- Review the available wireless networks.
- Select the network to connect to.
- Click Connect.
- Enter the network security key if prompted.
If no networks appear, check whether airplane mode is enabled.
Forgetting a Saved Wi-Fi Network
Windows remembers previously used networks and their connection settings.
If a saved wireless network password has changed, the network can be removed and connected again.
- Open Start > Settings > Network & Internet > Wi-Fi.
- Select Manage known networks.
- Choose the saved network.
- Click Forget.
The network can then be selected again and connected using its current security key.
Connecting to a Wired Network
- Locate the Ethernet connector on the notebook’s left side.
- Connect an Ethernet cable to the notebook.
- Connect the other end to the local network.
When the green Ethernet indicator is illuminated, the computer is connected to the LAN. A blinking yellow indicator shows network data transmission.
Turning Airplane Mode On or Off
Airplane mode controls wireless communication functions.
- Click the Action Center icon in the Windows notification area.
- Select Airplane mode to switch it on or off.
If the airplane mode control is hidden, select Expand to display additional quick settings.
Using the Novo Button Menu
The Novo button provides access to startup and recovery-related options before Windows starts.
The menu can be used to open:
- UEFI/BIOS setup utility.
- Boot device selection menu.
- Windows startup options.
Windows startup options provide access to recovery drives, computer reset features, and advanced startup settings.
How to Open the Novo Button Menu
- Turn off the computer.
- Open the LCD screen.
- Press the Novo button through the designated button hole.
- Select the required option from the displayed menu.
The guide also provides an alternative keyboard method.
With the computer turned off, press Fn + Power to open the Novo Button menu.
Keyboard Hotkeys and Function Keys
The IdeaPad L3 keyboard includes keys with printed icons for commonly used system functions.
Depending on the hotkey mode, these functions can be accessed directly or by holding the Fn key.
Keyboard Hotkey Functions
| Hotkey Function | Description |
| Sound Mute | Mutes or unmutes system audio. |
| Volume Down | Decreases system volume. |
| Volume Up | Increases system volume. |
| Microphone Mute | Mutes or unmutes the built-in microphone. |
| Refresh | Reloads a web page or refreshes the screen. |
| Touch Pad | Enables or disables the touch pad. |
| Airplane Mode | Turns airplane mode on or off. |
| Camera | Enables or disables the integrated camera. |
| Screen Lock | Locks the computer screen. |
| Display Switching | Switches between supported display devices. |
| Brightness Down | Reduces display brightness. |
| Brightness Up | Increases display brightness. |
The symbols printed on the keyboard identify the corresponding shortcut keys.
Understanding Hotkey Mode
Hotkey mode determines whether the special functions or standard F1–F12 functions are accessed directly.
| Hotkey Mode | Using Hotkeys | Using F1–F12 |
| Enabled | Press the hotkey directly. | Hold Fn and press the function key. |
| Disabled | Hold Fn and press the hotkey. | Press the function key directly. |
Hotkeys that do not share keys with F1–F12 are not affected by this setting and must be used with Fn.
Using the Numeric Keypad
The notebook includes a dedicated numeric keypad on the right side of the keyboard.
To activate or deactivate the numeric keypad, press Num Lock.
When the Num Lock indicator is illuminated, the numeric keypad is active.
Battery Charging and Power Management
The IdeaPad L3 includes a 36 Wh, three-cell rechargeable battery and supports charging through a compatible AC power adapter.
Checking Battery Status
The Windows notification area displays the battery status icon.
To view battery information:
- Click the battery icon.
- Review the remaining battery percentage.
- Check the current power mode.
- Open the available battery or power settings when required.
Windows displays a warning when the battery level becomes low.
Charging the Battery
When battery power is low:
- Connect the AC adapter to the notebook’s power connector.
- Connect the power adapter to an electrical outlet.
- Allow the battery to charge.
A full charge normally takes approximately 2–4 hours.
Charging time depends on battery capacity, environmental conditions, and whether the notebook is being used.
Battery Charging Temperature
The recommended battery charging temperature is:
10°C to 35°C (50°F to 95°F)
The battery temperature must not be lower than 10°C (50°F) during charging.
Battery Recharge Behavior
To help manage battery lifespan, the computer does not begin recharging when the remaining battery capacity is greater than 95%.
This means the notebook may remain connected to AC power without immediately restarting the battery charging process when its charge is already high.
Checking Battery Temperature
Battery temperature information is available through Lenovo Vantage or Lenovo PC Manager.
Using Lenovo Vantage:
- Open Lenovo Vantage.
- Select Hardware Settings > Power.
- Locate Power Status.
- Click Show Details to view the battery temperature.
Using Lenovo PC Manager:
- Open Lenovo PC Manager.
- Select System hardware > Battery.
Changing Power Button Behavior
By default, pressing the power button puts the computer into sleep mode.
To change this behavior:
- Right-click the battery status icon in the Windows notification area.
- Select Power Options.
- Click Choose what the power button does.
- Change the available settings.
Changing or Creating a Power Plan
A Windows power plan controls power-related settings.
- Right-click the battery status icon.
- Select Power Options > Change plan settings.
- Choose or modify the preferred power plan settings.
ENERGY STAR Power Settings
For ENERGY STAR-certified configurations, Lenovo identifies the following preset behavior under the Balanced power plan when connected to AC power.
| Setting | Idle Time |
| Turn Off Display | After 10 minutes |
| Put Computer to Sleep | After 30 minutes |
UEFI/BIOS Setup Instructions
The UEFI/BIOS firmware initializes the computer’s hardware and starts the operating system.
The setup utility provides access to startup configuration, keyboard behavior, security passwords, and other firmware settings.
How to Enter BIOS on the IdeaPad L3 15IML05
- Turn on or restart the computer.
- When the Lenovo logo appears, repeatedly press F2.
- The UEFI/BIOS setup utility opens.
For computers with hotkey mode enabled, press Fn + F2 instead.
Changing the Startup Sequence
The startup sequence controls the order in which the computer checks devices for bootable software.
- Enter UEFI/BIOS setup.
- Open the Boot menu.
- Locate Boot Priority Order.
- Follow the on-screen instructions to change the device order.
Selecting a Temporary Boot Device
A temporary startup device can be selected without changing the saved BIOS configuration.
- Turn on or restart the computer.
- When the Lenovo logo appears, repeatedly press F12.
- If required by hotkey mode, use Fn + F12.
- Select the required startup device.
Changing Hotkey Mode in BIOS
- Open the UEFI/BIOS setup utility.
- Select Configuration > Hotkey Mode.
- Press Enter.
- Choose Enabled or Disabled.
- Select Exit > Exit Saving Changes.
Enabling or Disabling Always On USB
Some Lenovo configurations support an Always On USB feature.
Where this option is available:
- Open UEFI/BIOS setup.
- Select Configuration > Always On USB.
- Press Enter.
- Change the setting to Enabled or Disabled.
- Select Exit > Exit Saving Changes.
UEFI/BIOS Security Passwords
The IdeaPad L3 supports several password types for protecting firmware settings and storage access.
BIOS Password Types
| Password | Requirement | Purpose |
| Administrator Password | No prerequisite | Restricts access to UEFI/BIOS setup. |
| User Password | Administrator password must already be set | Provides limited access to UEFI/BIOS setup. |
| Master Hard Disk Password | No prerequisite | Protects access to the storage device. |
| User Hard Disk Password | Master hard disk password must already be set | Allows authorized access to the protected storage device. |
Passwords configured through UEFI/BIOS setup use letters and numbers only.
Setting an Administrator Password
- Enter UEFI/BIOS setup.
- Select Security > Set Administrator Password.
- Press Enter.
- Enter the required password using letters and numbers.
- Press Enter.
- Enter the password again for confirmation.
- Select Exit > Exit Saving Changes.
Warning: If the administrator password is forgotten, Lenovo-authorized service personnel cannot reset it. The system board must be replaced by authorized service personnel. Proof of purchase is required, and service charges apply.
Changing or Removing the Administrator Password
Only the administrator can change or remove the administrator password.
- Enter BIOS using the administrator password.
- Select Security > Set Administrator Password.
- Enter the current password.
- Enter the new password in Enter New Password.
- Confirm the new password.
- Select Exit > Exit Saving Changes.
To remove the administrator password, leave both new password fields empty and press Enter.
Removing the administrator password also removes the user password.
Setting a User Password
An administrator password must be configured first.
- Enter BIOS using the administrator password.
- Select Security > Set User Password.
- Enter a password containing letters and numbers.
- Confirm the password.
- Save the changes.
The user password must differ from the administrator password.
A user who enters BIOS with the user password can change only a limited number of settings.
Enabling a Power-On Password
When the power-on password option is enabled, a password prompt appears whenever the computer starts.
- Open BIOS setup.
- Select Security > Power on Password.
- Set the option to Enabled.
- Select Exit > Exit Saving Changes.
The administrator password must be configured before enabling this feature.
After activation, the administrator or user password is required to start the computer.
Setting a Hard Disk Password
A hard disk password can restrict unauthorized access to stored information.
- Enter BIOS setup.
- Select Security > Set Hard Disk Password.
- Press Enter.
- Follow the prompts to configure the master and user hard disk passwords.
- Select Exit > Exit Saving Changes.
The master and user hard disk passwords must be configured together.
The hard disk password cannot be configured when BIOS has been opened using only the user password.
Important: If the hard disk password is forgotten, Lenovo cannot reset it or recover the protected data. Authorized service personnel must replace the drive. Proof of purchase and applicable service charges are required.
Changing or Removing Hard Disk Passwords
- Open UEFI/BIOS setup.
- Select Security.
- Choose the appropriate password option.
Available options include:
- Change Master Password: Changes or removes the master hard disk password.
- Change User Password: Changes the user hard disk password.
Removing the master hard disk password also removes the user hard disk password.
The user hard disk password cannot be removed independently.
Save the configuration using Exit > Exit Saving Changes.
Windows Recovery and Reset Instructions
Windows 10 includes recovery tools for restoring system settings or resetting the operating system.
Attention: Some recovery procedures delete personal files and installed software. Back up important information before beginning.
Choosing a Recovery Method
| Problem or Situation | Recovery Option |
| Computer performs poorly after installing applications, drivers, or updates | System Restore |
| Computer does not operate correctly and the cause is unknown | Reset Windows |
| Computer is being prepared for recycling or donation | Reset Windows |
| Windows cannot start properly | Use a recovery drive |
Creating a System Restore Point
System Restore records system information that can be used to return Windows to an earlier state.
To create a restore point:
- Enter Create a restore point in Windows Search.
- Open the matching result.
- Select the System Protection tab.
- Click Create.
System protection must be enabled for the system drive before restore points can be created.
Restoring Windows to an Earlier State
- Enter Recovery in Windows Search.
- Open the matching result.
- Select Open System Restore.
- Click Next.
- Choose an available restore point.
- Select Next > Finish.
The Scan for affected programs option can be used to inspect which applications or drivers are associated with a restore point.
System Restore does not affect personal data, although it can reverse system changes associated with installed applications, drivers, or updates.
Resetting Windows 10
To reset Windows:
- Open the Start menu.
- Select Settings > Update & Security > Recovery.
- Find Reset this PC.
- Click Get started.
- Choose Keep my files or Remove everything.
- Follow the on-screen instructions.
Attention: Back up important personal data before choosing Remove everything.
Creating a Windows Recovery Drive
A USB recovery drive can be used when Windows cannot start.
A USB drive is required for this procedure.
- Enter Create a recovery drive in Windows Search.
- Open the matching result.
- Select Back up system files to the recovery drive.
- Click Next.
- Connect the USB drive.
- Select the USB drive.
- Click Next > Create.
Warning: Creating the recovery drive erases existing files on the selected USB drive.
After creation, Windows may offer an option to delete the recovery partition from the computer. Select Finish to leave the partition in place.
Restoring Windows from a Recovery Drive
If Windows cannot start:
- Connect the previously created recovery drive.
- Restart the notebook.
- Configure the computer to boot from the recovery drive.
- On the Choose an option screen, select Troubleshoot.
- Select the preferred recovery method.
Available choices include:
- Advanced Options > System Restore: Returns the system to an available restore point.
- Recover from a drive: Resets the computer using the recovery drive.
The Recover from a drive option requires system files to have been included when the recovery drive was created.
Warning: Recovering Windows from the recovery drive deletes personal files stored on the computer.
Lenovo Vantage and Lenovo PC Manager
Lenovo Vantage and Lenovo PC Manager provide tools for reviewing and maintaining the notebook.
Depending on the installed application and configuration, these tools can:
- Display product information.
- Show warranty and support details.
- Run hardware diagnostic scans.
- Change supported hardware settings.
- Check for driver and firmware updates.
- Update Windows and UEFI/BIOS.
- Display battery information.
Opening Lenovo Vantage or PC Manager
- Open Windows Search.
- Enter Lenovo Vantage or Lenovo PC Manager.
- Select the matching application.
If Lenovo Vantage is not installed, it can be downloaded through the Microsoft Store.
Cleaning, Care, and Maintenance
The IdeaPad L3 requires proper handling, adequate ventilation, and periodic inspection to help prevent damage.
Ventilation Maintenance
Dust accumulation can restrict airflow.
- Inspect the exterior of the notebook regularly.
- Remove dust from ventilation openings and perforations.
- Keep airflow paths unobstructed.
- Inspect ventilation areas more frequently in dusty environments.
Screen and Keyboard Care
- Keep the display clean for comfortable viewing.
- Do not scratch, strike, twist, or press heavily on the screen.
- Avoid placing heavy objects on the notebook.
- Keep food, drinks, and other liquids away from the keyboard and computer.
- Protect cables from pinching, stretching, or excessive force.
Moving and Carrying the Notebook
Before moving a computer equipped with a hard disk drive, turn it off or place it in sleep or hibernation mode.
For transportation:
- Shut down the computer or place it into sleep or hibernation.
- Use a carrying case with sufficient cushioning.
- Avoid tightly packing the notebook in a bag or suitcase.
- Protect the computer from strong impacts, pressure, and vibration.
Do not place the computer in a carrying case while it remains powered on.
Handling Replaceable Components
Some computer parts may be classified as Customer Replaceable Units (CRUs).
Only perform replacements that are explicitly supported by Lenovo instructions.
Before permitted internal component service:
- Turn off the computer.
- Disconnect it from power.
- Follow the relevant replacement instructions.
- Allow hot components to cool.
- Protect static-sensitive parts from electrostatic discharge.
- Reinstall protective covers before reconnecting power.
Do not attempt unauthorized internal repairs.
Storage and Operating Conditions
The notebook must be operated and stored within the environmental limits listed by Lenovo.
| Environmental Specification | Limit |
| Maximum Altitude Without Pressurization | 3048 m (10,000 ft) |
| Operating Temperature at Altitudes Up to 2438 m | 5°C to 35°C (41°F to 95°F) |
| Storage Temperature | 5°C to 43°C (41°F to 109°F) |
| Maximum Operating Temperature Above 2438 m | 31.3°C (88°F) |
| Recommended Charging Temperature | 10°C to 35°C (50°F to 95°F) |
| Operating Relative Humidity | 8%–95% at 23°C (73°F) wet-bulb temperature |
| Storage Relative Humidity | 5%–95% at 27°C (81°F) wet-bulb temperature |
Long-Term Battery Storage
For extended storage, Lenovo’s battery safety guidance recommends:
- Storing rechargeable batteries or products containing them at room temperature.
- Maintaining approximately 30%–50% battery charge.
- Charging the battery at least once per year to prevent excessive discharge.
Used batteries must be disposed of according to applicable local regulations.
Accessibility and Ergonomic Settings
Windows 10 provides accessibility tools for users with visual, hearing, mobility, or other accessibility needs.
Accessibility Keyboard Shortcuts
| Shortcut | Function |
| Windows + U | Opens Ease of Access Center. |
| Right Shift for 8 seconds | Turns Filter Keys on or off. |
| Shift five times | Turns Sticky Keys on or off. |
| Num Lock for 5 seconds | Turns Toggle Keys on or off. |
| Left Alt + Left Shift + Num Lock | Turns Mouse Keys on or off. |
| Left Alt + Left Shift + PrtSc | Turns High Contrast on or off. |
Some shortcuts may vary depending on the keyboard configuration.
Opening Ease of Access Center
- Open Control Panel.
- View Control Panel by Category.
- Select Ease of Access > Ease of Access Center.
- Choose the required accessibility tool.
Available tools include Magnifier, Narrator, On-Screen Keyboard, High Contrast, and personalized keyboard and mouse settings.
Using Speech Recognition
Windows Speech Recognition supports voice commands for applications and certain system functions.
- Open Control Panel.
- Select Ease of Access > Speech Recognition.
- Follow the on-screen instructions.
Changing Display Resolution
- Right-click an empty area of the desktop.
- Select Display settings > Display.
- Change the available display settings.
Using an excessively low resolution may prevent some interface elements from fitting on the screen.
Changing Text and Item Sizes
Windows display settings can change the size of text and other interface elements.
For web pages, hold Ctrl and press + to increase the displayed size or – to reduce it.
Ergonomic Guidance
Proper positioning can help reduce discomfort during extended computer use.
- Maintain a comfortable viewing distance of approximately 510–760 mm (20–30 inches).
- Position the display to reduce glare and reflections.
- Keep the head and neck in a neutral position.
- Use a chair with suitable back support.
- Keep forearms, wrists, and hands relaxed.
- Keep feet flat on the floor or on a footrest.
- Take short breaks and change posture periodically.
Additional accessibility information is available at https://www.lenovo.com/accessibility.
Troubleshooting Guide
The following table covers common problems and recovery actions described for the Lenovo IdeaPad L3 15IML05.
| Problem | Possible Cause or Condition | Recommended Action |
| Computer stops responding | System is unresponsive. | Hold the power button until the computer turns off, then restart it. |
| Wi-Fi networks are not displayed | Airplane mode may be enabled. | Check airplane mode and turn it off if necessary. |
| Saved Wi-Fi connection needs a new password | The stored network credentials are outdated. | Forget the network in Windows Wi-Fi settings and reconnect. |
| Computer is not working well after installing applications or updates | Recent system changes may be involved. | Restore Windows to an available system restore point. |
| Windows is not working correctly and the cause is unknown | Windows requires recovery. | Use the Windows reset options described in the guide. |
| Windows cannot start properly | A Windows startup problem is present. | Start the computer from a previously created recovery drive and select an available recovery option. |
| Battery does not start recharging while above 95% | Normal battery charging control. | The notebook does not begin recharging while remaining capacity is greater than 95%. |
| Battery charging is affected by temperature | Battery temperature is outside the recommended charging range. | Follow the specified battery charging temperature limits. |
| User needs battery temperature information | Battery information is accessed through Lenovo software. | Check Lenovo Vantage or Lenovo PC Manager. |
| An administrator password is forgotten | BIOS access is protected. | Contact Lenovo-authorized service for system board replacement. |
| A hard disk password is forgotten | Access to storage is password-protected. | Contact Lenovo-authorized service regarding storage drive replacement. |
| Computer is exposed to liquid | Liquid may cause electrical short circuits. | Disconnect AC power, turn off the computer, and follow the liquid-exposure safety instructions. |
Computer Freezes or Stops Responding
If the notebook becomes unresponsive:
- Press and hold the power button until the computer turns off.
- Restart the computer.
If the problem continues, Lenovo Vantage or Lenovo PC Manager may be used to run available hardware diagnostics.
Windows Does Not Start Correctly
A recovery drive can be used to access Windows recovery tools.
- Connect the recovery drive.
- Start the computer from the recovery device.
- Select Troubleshoot.
- Choose System Restore or another available recovery method.
Review all warnings before resetting or recovering Windows because some operations erase personal data.
Liquid Is Spilled on the Notebook
- Carefully disconnect the AC power adapter.
- Turn off the notebook immediately.
- Do not turn the notebook upside down to drain the liquid.
- Wait until all liquid is dry before turning the notebook on.
Caution: Continuing operation after a liquid spill can increase damage from short circuits. If there is any safety concern, keep the computer disconnected and contact Lenovo Support.
Forgotten BIOS or Hard Disk Password
A forgotten administrator password requires authorized system board replacement.
A forgotten hard disk password cannot be reset by Lenovo service personnel, and Lenovo cannot recover the protected drive data through a password-removal procedure.
Authorized replacement service requires proof of purchase and may involve charges.
Warranty Information
The Lenovo IdeaPad L3 is subject to the applicable Lenovo Limited Warranty terms.
Warranty conditions and service eligibility are described in the Safety and Warranty Guide supplied with the computer.
Services Available During the Warranty Period
Depending on the product’s warranty coverage, Lenovo Customer Support can provide:
- Problem determination: Assistance identifying a possible hardware problem and determining the appropriate action.
- Hardware repair: Applicable repair services for Lenovo hardware covered under warranty.
- Engineering changes: Selected hardware changes made available by Lenovo or an authorized reseller.
Services Not Covered
The guide identifies the following examples of services excluded from the listed warranty support:
- Replacement or use of non-Lenovo or nonwarranted components.
- Identification of software problem sources.
- UEFI/BIOS configuration as part of installation or upgrading.
- Device driver changes, modifications, or upgrades.
- Installation and maintenance of network operating systems.
- Installation and maintenance of software applications.
Additional Lenovo Services
Additional services may be purchased during or after the warranty period.
Service names and availability vary by country or region.
Visit https://www.lenovo.com/services for service information.
Customer Support Information
Lenovo provides assistance through its support website, diagnostic software, documentation, and Customer Support Center.
Before Contacting Lenovo Support
Prepare the following information.
Product details:
- Product name.
- Machine type.
- Serial number.
Problem details:
- Description of the issue.
- Whether the issue is constant or intermittent.
- Displayed error messages or codes.
- Operating system and version.
- Applications running when the problem occurred.
- Steps that reproduce the problem, when applicable.
The product identification and serial number are generally printed on a label or etched on the underside of the notebook.
Lenovo Support Resources
| Resource | Link |
| Lenovo Product Support | https://support.lenovo.com |
| Lenovo Support Telephone Numbers | https://pcsupport.lenovo.com/supportphonelist |
| Lenovo Additional Services | https://www.lenovo.com/services |
| Lenovo Accessories | https://www.lenovo.com/accessories |
| Lenovo Security Accessories | https://smartfind.lenovo.com |
| Lenovo Accessibility Support | https://www.lenovo.com/accessibility |
| Microsoft Support | https://support.microsoft.com |
To find a local Lenovo Customer Support telephone number, use the support phone directory.
If a number is unavailable for the applicable country or region, contact a Lenovo reseller or representative.
Recycling and Environmental Information
Lenovo provides information about responsible disposal and recycling of computers, batteries, and other electronic equipment.
Electronic products marked for waste electrical and electronic equipment collection should be delivered through the appropriate collection or recycling system rather than discarded with ordinary municipal waste.
Used rechargeable and coin-cell batteries must be handled and disposed of according to applicable local regulations.
Regional recycling programs and environmental information are available through:
The notebook also carries region-dependent radio, electromagnetic compatibility, and environmental compliance information. ENERGY STAR requirements apply to configurations carrying the corresponding certification mark.
Frequently Asked Questions
1. How do I enter BIOS on the Lenovo IdeaPad L3 15IML05?
Turn on or restart the notebook and repeatedly press F2 when the Lenovo logo appears. If hotkey mode is enabled, press Fn + F2 instead. BIOS can also be accessed through the Novo Button menu.
2. How do I open the Novo Button menu on the IdeaPad L3?
Turn off the notebook, open the display, and press the Novo button through its designated hole on the left side. Alternatively, with the computer turned off, press Fn + Power. The menu provides access to BIOS setup, boot device selection, and Windows startup options.
3. How long does the Lenovo IdeaPad L3 battery take to charge?
The 36 Wh battery normally takes approximately 2–4 hours to charge fully. Charging time depends on environmental conditions and computer activity. Lenovo recommends charging at temperatures between 10°C and 35°C (50°F and 95°F).
4. Does the Lenovo IdeaPad L3 15IML05 support USB-C display output?
No. The USB-C connector supports USB data transfer and power output to compatible connected devices, but it cannot connect external displays. The notebook has an HDMI connector for compatible external monitors and other digital display equipment.
5. What should I do if my IdeaPad L3 is not responding?
Press and hold the power button until the computer turns off, then restart it. If the system continues to experience problems, Lenovo Vantage or Lenovo PC Manager can be used for supported hardware diagnostics.
6. How do I reset Windows on the Lenovo IdeaPad L3?
In Windows 10, open Start > Settings > Update & Security > Recovery. Under Reset this PC, select Get started, then choose Keep my files or Remove everything and follow the on-screen instructions. Important data should be backed up before performing recovery operations.
7. How do I turn the IdeaPad L3 touch pad on or off?
Use the keyboard hotkey marked with the touch pad icon. Depending on the current hotkey mode, the shortcut can be activated directly or by holding Fn while pressing the corresponding key.