| Field | Details |
| Document Title | ThinkPad 25 User Guide |
| Document Type | User Guide |
| Brand Name | Lenovo |
| Product Name | ThinkPad 25 |
| Model Number(s) | 20K7 |
| PDF File Size | 9 MB |
| Number of Pages | 156 |
| Languages | English |
Lenovo ThinkPad 25 20K7
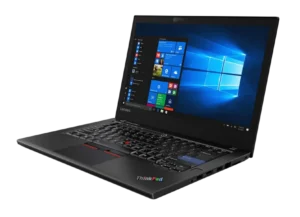
The Lenovo ThinkPad 25 is a notebook computer featuring a traditional seven-row backlit keyboard, a 14-inch Full HD multi-touch display, TrackPoint pointing device, fingerprint reader, and several wired and wireless connectivity options.
The computer supports DDR4 memory, M.2 solid-state storage, Thunderbolt 3 connectivity, HDMI output, Ethernet networking, and compatible ThinkPad docking stations. It also provides hardware security functions, battery power management, and system recovery features.
The ThinkPad 25 uses a combination of a removable battery and an internal rechargeable battery. It includes an emergency-reset hole for recovering from certain system failures and keyboard drainage holes that help remove accidentally spilled liquids.
Product Overview
Main Features
- 14-inch IPS multi-touch display with Full HD resolution.
- Traditional seven-row keyboard with backlighting.
- TrackPoint pointing stick and dedicated buttons.
- Multi-touch trackpad.
- DDR4 SODIMM memory supporting up to 16 GB.
- M.2 2280 solid-state drive.
- Thunderbolt 3-compatible USB-C connector.
- USB 3.0 ports, including an Always On USB connector.
- HDMI video output.
- Built-in Ethernet connector.
- Conventional and infrared cameras.
- Fingerprint authentication.
- Near Field Communication (NFC).
- Bluetooth and wireless LAN.
- Optional wireless WAN and GPS.
- Removable and built-in rechargeable batteries.
- Compatible ThinkPad docking-station support.
- Lenovo Vantage system management.
- UEFI BIOS configuration and security controls.
- Windows recovery and hardware diagnostic functions.
Technical Specifications
Hardware Specifications
| Specification | Details |
| Brand | Lenovo |
| Product | ThinkPad 25 |
| Machine Type | 20K7 |
| Compliance ID | TP00088A |
| Product Type | Notebook Computer |
| Memory Type | DDR4 SODIMM |
| Maximum Supported Memory | 16 GB |
| Storage Device | M.2 2280 Solid-State Drive |
| Display Technology | IPS |
| Display Size | 14 inches (355.6 mm) |
| Display Resolution | 1920 × 1080 |
| Touch Input | Multi-Touch |
| Keyboard | Seven-Row Backlit Keyboard |
| Pointing Devices | TrackPoint and Trackpad |
| Cameras | Conventional Camera, Infrared Camera |
| Security | Fingerprint Reader, Security Chip, Security-Lock Slot |
| Wired Networking | Ethernet |
| Wireless Networking | Wireless LAN, Bluetooth, NFC |
| Cellular Networking | Wireless WAN on Selected Configurations |
| GPS | Selected Configurations |
| Video Output | HDMI, USB-C |
| USB-C Technology | Thunderbolt 3 Compatible |
| Storage Card Reader | Media-Card Slot |
Physical Dimensions
| Dimension | Measurement |
| Width | 336.6 mm (13.25 inches) |
| Depth | 232.5 mm (9.15 inches) |
| Thickness | 19.95 mm (0.79 inches) |
Power Specifications
| Specification | Details |
| AC Input Voltage | 100–240 V AC |
| Input Frequency | 50–60 Hz |
| Maximum Heat Output | 65 W (222 BTU/hour), depending on configuration |
| Battery Charging Time | Approximately 4–8 hours |
| Recommended Charging Temperature | 10°C–35°C (50°F–95°F) |
External Display Support
| Connection | Maximum Supported Resolution |
| USB-C | 4096 × 2304 at 60 Hz |
| HDMI | 4096 × 2160 at 24 Hz |
| HDMI | 3840 × 2160 at 30 Hz |
The connected display must support the selected resolution.
Parts and Components
Front Components
| Component | Description |
| Conventional Camera | Captures photographs and video |
| Microphones | Record voice and sound |
| Infrared Camera | Supports facial recognition |
| TrackPoint Pointing Stick | Controls the on-screen pointer |
| Power Button | Turns the computer on and manages power functions |
| Fingerprint Reader | Supports fingerprint-based authentication |
| TrackPoint Buttons | Provide clicking and scrolling controls |
| Trackpad | Supports pointer movement and gestures |
| NFC Label | Identifies the NFC communication area |
| Multi-Touch Screen | Accepts direct touch input |
Power Button
The Power button turns on the computer or activates the configured power function.
To shut down through Windows:
- Open the Start menu.
- Select Power.
- Click Shut down.
If the computer does not respond, the Power button can be held for four seconds or longer to force it off.
The button’s behavior can be changed through Control Panel > Power Options > Choose what the power buttons do.
Infrared Camera
The infrared camera supports facial authentication and can be configured through Windows Hello.
Fingerprint Reader
The fingerprint reader allows compatible passwords to be associated with registered fingerprints for computer access.
TrackPoint and Trackpad
Both pointing devices allow mouse-style movement, clicking, and scrolling.
They are enabled by default and can be configured through Windows mouse settings.
Ports and Connectors
Left-Side Connectors
| Component | Function |
| Power Connector | Connects the AC adapter |
| USB 3.0 Connector | Connects USB-compatible devices |
| Thunderbolt 3-Compatible USB-C Connector | Supports data, charging, and display connections |
| Fan Louvers | Allow cooling airflow |
Thunderbolt 3 USB-C Connector
The USB-C connector supports USB Type-C and Thunderbolt 3 technology.
With a compatible cable or accessory, the connection can be used for:
- Data transfer.
- Compatible device charging.
- External monitors.
- USB-C accessories.
- Supported expansion devices.
When the computer battery is below 10%, connected USB-C accessories might not operate correctly.
Right-Side Connectors
| Component | Function |
| Audio Connector | Connects compatible headphones and headsets |
| USB 3.0 Connector | Connects USB peripherals |
| HDMI Connector | Connects external digital displays |
| Always On USB 3.0 Connector | Supports compatible device charging |
| Ethernet Connector | Connects a wired LAN |
| Media-Card Slot | Reads supported memory cards |
| Security-Lock Slot | Accepts a compatible security cable |
Audio Connector
The 3.5 mm audio connector supports compatible headsets with four-pole plugs and conventional headphones.
A conventional standalone microphone is not supported through this connector.
Always On USB 3.0
The Always On USB connector can charge compatible devices while the notebook is:
- Turned on.
- In sleep mode.
- Turned off or hibernating while connected to AC power.
Additional battery-powered charging behavior can be configured through Lenovo Vantage.
Ethernet Connector
The Ethernet port provides a wired network connection.
Warning: Only an Ethernet cable should be connected to this port. A telephone cable must not be inserted.
Bottom Components
| Component | Function |
| Removable Battery | Supplies portable power |
| Docking-Station Connector | Connects compatible docks |
| Stereo Speakers | Provide audio playback |
| Keyboard Drainage Holes | Help remove accidentally spilled liquid |
| Emergency-Reset Hole | Resets an unresponsive computer |
| Micro-SIM-Card Slot | Supports cellular connectivity on selected configurations |
The micro-SIM slot is located inside the removable battery compartment.
A nano-SIM card with a nano-to-micro-SIM adapter must not be inserted because it can damage the slot.
Status Indicator Guide
System Status Indicators
The ThinkPad logo indicator and Power button indicator show computer operating status.
| Indicator Behavior | Meaning |
| Blinks Three Times | Computer has just connected to power |
| Solid On | Computer is operating |
| Off | Computer is off or hibernating |
| Fast Blinking | Entering sleep or hibernation |
| Slow Blinking | Computer is sleeping |
Other Indicators
| Indicator | Meaning |
| Camera Indicator On | Camera is active |
| Microphone-Mute Indicator On | Microphones are muted |
| Speaker-Mute Indicator On | Speakers are muted |
| Caps Lock Indicator On | Caps Lock is active |
AC Power Indicator
| Indicator Color | Meaning |
| Green | Connected to AC power; battery at 80%–100% |
| Yellow | Connected to AC power; battery at 1%–80% |
| Off | Not connected to AC power |
Safety Instructions
Electrical Safety
- Use the manufacturer’s approved power cord and adapter.
- Do not use damaged plugs, electrical cords, or adapters.
- Keep liquids away from electrical connections.
- Avoid overloading electrical outlets.
- Do not use the computer during an electrical storm.
- Disconnect power before servicing approved replaceable components.
- Never open or repair the power supply.
Battery Safety
The computer contains rechargeable batteries that require careful handling.
- Use Lenovo-approved replacement batteries.
- Do not disassemble, crush, puncture, or short-circuit a battery.
- Keep batteries away from fire, excessive heat, and water.
- Stop using a damaged battery.
- Do not dispose of batteries in ordinary landfill waste.
The built-in rechargeable battery must be replaced by a Lenovo-authorized repair facility or technician.
Heat and Ventilation
The computer and AC adapter can become hot during normal operation.
- Keep ventilation openings clear.
- Avoid placing the computer on beds, carpets, or other soft surfaces that block airflow.
- Do not maintain prolonged skin contact with hot computer surfaces.
- Keep the AC adapter uncovered while operating.
- Do not operate or charge the computer near flammable materials.
Screen Safety
The LCD contains glass and must be handled carefully.
Do not apply excessive force to the display.
If the screen breaks and LCD fluid contacts skin or eyes, wash the affected area with water for at least 15 minutes and obtain medical care if symptoms remain.
Handling and Transportation
- Carry the notebook in a protective case.
- Do not lift it by the display.
- Avoid dropping or twisting the computer.
- Remove external devices and disconnect cables before transportation.
- Shut down, sleep, or hibernate the computer before placing it inside a carrying case.
Operating Environment
| Condition | Requirement |
| Maximum Altitude Without Pressurization | 3048 m (10,000 ft) |
| Operating Temperature Up to 2438 m Altitude | 5°C–35°C (41°F–95°F) |
| Storage Temperature | 5°C–43°C (41°F–109°F) |
| Maximum Operating Temperature Above 2438 m | 31.3°C (88°F) |
| Operating Humidity | 8%–95% at 23°C wet-bulb temperature |
| Storage Humidity | 5%–95% at 27°C wet-bulb temperature |
| Minimum Battery Charging Temperature | 10°C (50°F) |
Use the notebook in a dry, ventilated location away from direct sunlight and strong magnetic fields.
Initial Setup Instructions
Connecting the AC Adapter
- Connect the power cord to the AC adapter.
- Connect the adapter to the notebook’s power connector.
- Connect the power cord to a suitable electrical outlet.
- Press the Power button.
If the supplied adapter uses USB-C, connect it to the compatible USB-C power connection.
Registering the Computer
Registering the notebook can help Lenovo identify the product during support requests and provide applicable service notifications.
Registration website:
https://support.lenovo.com/productregistration
Using the Keyboard
The ThinkPad 25 includes a traditional seven-row backlit keyboard with special key combinations.
Function Key Shortcuts
| Shortcut | Function |
| Fn + F2 | Locks the computer screen |
| Fn + F3 | Changes power settings |
| Fn + F4 | Enters sleep mode |
| Fn + F5 | Opens ThinkPad pointing-device settings |
| Fn + F6 | Opens audio settings |
| Fn + F7 | Manages external displays |
| Fn + F8 | Enables or disables Airplane Mode |
| Fn + F9 | Opens Settings |
| Fn + F10 | Enables or disables Bluetooth |
| Fn + F11 | Opens keyboard settings |
| Fn + F12 | Runs a user-defined function |
The keyboard also provides function combinations for screen brightness, keyboard backlighting, and Magnifier.
Changing Keyboard Backlighting
The backlit keyboard supports three states:
| Mode | Function |
| Off | Keyboard light disabled |
| Low | Reduced illumination |
| High | Increased illumination |
Use the keyboard backlight function combination to cycle through these settings.
Customizing the User-Defined Key
- Open Control Panel.
- Change the display to Large icons or Small icons.
- Open Keyboard Manager.
- Select the User-defined key tab.
- Configure the function.
Using the TrackPoint
The TrackPoint device provides pointer control while the hands remain close to the keyboard.
TrackPoint Controls
| Control | Function |
| Pointing Stick | Moves the pointer |
| Left Button | Selects or opens items |
| Right Button | Opens shortcut menus |
| Center Scroll Control | Scrolls through content |
Moving the Pointer
Apply pressure to the red pointing stick in the desired direction.
Greater pressure increases pointer speed.
Scrolling
- Press and hold the center scrolling control.
- Move the pointing stick vertically or horizontally.
- Release the control to stop scrolling.
Replacing the TrackPoint Cap
The pointing-stick cap is removable.
Use a compatible replacement cap with the required grooves.
Using the Trackpad
The trackpad supports clicking, scrolling, and touch gestures.
Trackpad Controls
| Action | Function |
| Slide One Finger | Moves pointer |
| One-Finger Tap | Left-click |
| Two-Finger Tap | Right-click |
| Two-Finger Slide | Scroll |
| Two-Finger Pinch | Zoom out |
| Two-Finger Spread | Zoom in |
| Three-Finger Swipe Up | Opens Task View |
| Three-Finger Swipe Down | Shows desktop |
Customizing the Pointing Device
- Open Control Panel.
- Select Mouse.
- Open the Mouse Properties window.
- Configure TrackPoint, trackpad, or gesture settings.
Multi-Touch Screen Instructions
The multi-touch display supports direct interaction using fingers.
Touchscreen Gestures
| Gesture | Function |
| Tap | Opens or selects an item |
| Tap and Hold | Opens a shortcut menu |
| Slide | Scrolls through content |
| Drag | Moves an object |
| Pinch Fingers Together | Zooms out |
| Spread Fingers Apart | Zooms in |
| Swipe from Right Edge | Opens Action Center |
| Swipe from Left Edge | Opens Task View |
| Short Swipe from Top | Reveals hidden title bar |
| Long Swipe from Top to Bottom in Tablet Mode | Closes the current application |
Touchscreen Precautions
- Avoid touching the screen with fingernails or hard objects.
- Do not apply excessive pressure.
- Avoid unsuitable gloves or objects.
- Clean the display regularly.
- Calibrate touch input when necessary.
Battery and Power Management
The ThinkPad 25 operates using AC power or rechargeable battery power.
Checking Battery Status
Move the pointer over the battery icon in the Windows notification area.
The icon displays battery percentage and estimated remaining operating time.
Battery runtime depends on screen brightness, wireless activity, storage usage, and other workloads.
Charging the Battery
- Connect the computer to AC power.
- Allow the battery to charge.
- Monitor charging status through the Windows battery icon.
A complete charge takes approximately four to eight hours.
Actual charging time varies according to environmental conditions and computer activity.
The notebook does not begin recharging if the remaining battery charge is greater than 95%.
When to Charge
Charging is recommended when:
- A new battery is installed.
- The battery level is low.
- The battery has not been used for an extended period.
Power-Saving Modes
| Mode | Description |
| Sleep | Keeps the work session in memory while reducing power consumption |
| Hibernation | Saves the current session to storage and turns off the computer |
| Wireless Off | Reduces power consumption by disabling unused wireless connections |
Enabling Sleep Mode
- Open the Start menu.
- Select Power.
- Click Sleep.
Changing Power Settings
- Open Control Panel.
- Select Power Options.
- Change the preferred power plan.
ENERGY STAR Default Power Settings
For qualifying configurations while connected to AC power:
| Setting | Default |
| Turn Off Display | 10 minutes |
| Enter Sleep Mode | 30 minutes |
Connecting to Networks
Wired Ethernet Connection
- Connect an Ethernet cable to the notebook.
- Connect the other end to a compatible network device.
- Check the connection status.
The Ethernet port provides status lights:
| Indicator | Meaning |
| Green | Connected to the network |
| Yellow Blinking | Network data transfer |
Connecting to Wi-Fi
- Enable wireless networking.
- Click the wireless network icon in Windows.
- Select an available network.
- Enter the required password.
- Complete the connection.
For improved signal reception, minimize obstacles between the notebook and wireless access point.
Wireless WAN Connection
Supported configurations can connect to cellular networks using a wireless-WAN card and micro-SIM card.
Available network technologies can include HSPA, 3G, 4G, GPRS, and LTE.
A suitable service plan may be required.
Bluetooth Connection
- Enable Bluetooth using Fn + F10.
- Open the relevant Bluetooth controls.
- Select the compatible device.
- Complete the connection instructions.
Bluetooth can be used for compatible peripherals and data transfer.
Airplane Mode
- Open Settings > Network & Internet > Airplane mode.
- Turn Airplane Mode on or off.
When enabled, wireless functions are disabled.
Using NFC
Near Field Communication allows short-range communication with compatible cards and devices.
Enabling NFC
- Open Windows Settings.
- Select Network & Internet > Airplane mode.
- Turn off Airplane Mode.
- Enable NFC.
Pairing an NFC Card
The card must support NFC Data Exchange Format (NDEF).
- Place the card approximately 40 mm from the palm-rest edge near the NFC label.
- Move it slowly toward the display by up to 30 mm.
- Hold the card in position until detection is confirmed.
Pairing an NFC Smartphone
- Place the smartphone screen upward.
- Position it near the NFC label.
- Move it slowly toward the display.
- Hold it until the connection is detected.
Camera and Audio Instructions
Conventional Camera
To use the camera:
- Open the Start menu.
- Select Camera.
- Use the available picture or video functions.
Camera settings can be adjusted through Lenovo Vantage under Hardware Settings > Audio/Visual.
Infrared Camera and Windows Hello
The infrared camera can authenticate a registered face.
Setting Up Facial Recognition
- Open Settings > Accounts > Sign-in options.
- Configure the required password and PIN.
- Select Windows Hello Face Recognition.
- Click Set up and follow the prompts.
- Complete the face registration.
The Improve Recognition option can help recognition under different lighting conditions.
Audio Features
The computer supports:
- Stereo speakers.
- Built-in microphones.
- Compatible headphones and headsets.
- High Definition Audio.
- Playback of MIDI and MP3.
- Recording and playback of PCM and WAV formats.
Using Memory Cards
The media-card slot supports:
| Card Type | Supported |
| MultiMediaCard (MMC) | Yes |
| Secure Digital (SD) | Yes |
| Secure Digital High-Capacity (SDHC) | Yes |
| Secure Digital eXtended-Capacity (SDXC) | Yes |
Installing a Memory Card
- Locate the media-card slot.
- Position the card with metal contacts facing downward toward the slot.
- Push the card firmly into the slot.
Removing a Memory Card
- Stop any operations involving the card.
- Select Safely Remove Hardware and Eject Media in Windows.
- Eject the card through Windows.
- Press the card to release it.
- Remove it carefully.
Do not remove the card during an active data transfer or while the computer is sleeping or hibernating.
Connecting External Displays
The computer supports compatible HDMI, USB-C, and Miracast displays.
Connecting a Wired Display
- Connect the display cable to the HDMI or USB-C connector.
- Connect the display to power.
- Turn on the display.
- Configure the connection through Windows Display Settings.
Wireless Display Connection
Both devices must support Miracast.
- Open the Windows Action Center.
- Select Connect.
- Choose the wireless display.
- Follow the connection instructions.
Display Modes
Press Fn + F7 to select the preferred display mode.
| Mode | Function |
| PC Screen Only | Displays content on the notebook |
| Duplicate | Shows the same content on both displays |
| Extend | Creates an extended desktop |
| Second Screen Only | Displays content only on the external monitor |
Using ThinkPad Docking Stations
The ThinkPad 25 supports compatible docking accessories, including:
- ThinkPad Basic Dock.
- ThinkPad Pro Dock.
- ThinkPad Ultra Dock.
These docking stations provide additional connectivity options.
Docking Station Features
Depending on the dock, connections include:
- USB 2.0 and USB 3.0.
- Ethernet.
- VGA.
- DisplayPort.
- DVI.
- HDMI.
- Audio connections.
- External power connection.
Attaching a Docking Station
- Disconnect attached cables and devices from the notebook.
- Unlock the docking mechanism if applicable.
- Align the computer with the docking-station connector.
- Lower the computer into position until it clicks.
- Lock the docking station if a system lock is provided.
- Check the docking status indicator.
Removing the Notebook from a Dock
- Disconnect applicable cables.
- Unlock the docking station.
- Press the eject button.
- Lift the computer carefully using both sides.
Attention: Never lift the computer and docking station assembly by holding only the notebook.
Multiple Monitor Support
The ThinkPad Ultra Dock supports a maximum of three active displays, including the notebook screen.
Some docking-station video connectors share display resources and cannot all be used simultaneously.
Lenovo Vantage
Lenovo Vantage provides access to system information and maintenance tools.
Main Functions
| Feature | Description |
| System Updates | Downloads available drivers and firmware |
| Hardware Settings | Configures supported components |
| System Health | Displays device status |
| Warranty Information | Shows applicable warranty details |
| Security | Provides supported protection functions |
| Documentation | Opens manuals and help resources |
| Accessories | Displays compatible accessory information |
Updating Drivers
- Open Lenovo Vantage.
- Use the update function.
- Review available critical, recommended, or optional packages.
- Select the required updates.
- Follow the installation instructions.
Security Settings
BIOS Password Types
| Password | Function |
| Power-On Password | Restricts startup access |
| Supervisor Password | Protects system configuration |
| User Hard Disk Password | Protects storage access |
| Master Hard Disk Password | Provides administrator-level storage access |
Setting a BIOS Password
- Restart the computer.
- Press F1 when the Lenovo logo appears.
- Select Security > Password.
- Choose the required password type.
- Follow the instructions.
Important: Forgotten hard disk passwords can prevent access to data. Lenovo cannot reset a forgotten user hard disk password when the required master password is unavailable.
Fingerprint Authentication
- Open Settings > Accounts > Sign-in options.
- Enroll one or more fingerprints.
- Follow the prompts to complete registration.
For authentication, place the registered finger on the reader for approximately one or two seconds.
Fingerprint Indicator Lights
| Indicator | Meaning |
| Off | Reader is not ready |
| Solid Green | Ready to scan |
| Blinking Amber | Authentication failed |
Security Chip
The security chip provides hardware-supported security functions.
To configure it:
- Restart the notebook.
- Press F1.
- Open Security > Security Chip.
- Configure the required settings.
- Press F10 to save and exit.
BitLocker Drive Encryption
Supported Windows editions provide BitLocker encryption.
The encryption status can be checked in Control Panel > System and Security > BitLocker Drive Encryption.
UEFI BIOS Setup
Entering ThinkPad Setup
- Restart the computer.
- Press F1 when the Lenovo logo appears.
- Use the arrow keys to select menu options.
- Press Enter to open a setting.
BIOS Menu Guide
| Menu | Function |
| Main | Displays hardware and firmware information |
| Config | Configures network, USB, keyboard, display, and power settings |
| Date/Time | Changes system date and time |
| Security | Manages passwords and security options |
| Startup | Configures startup devices and boot behavior |
| Restart | Saves, discards, or resets settings |
BIOS Navigation Shortcuts
| Key | Function |
| F1 | Opens BIOS during startup |
| F5 | Decreases applicable setting value |
| F6 | Increases applicable setting value |
| F9 | Restores default settings |
| F10 | Saves changes and exits |
| F12 | Opens temporary startup device menu |
| Esc | Returns to the previous menu |
Changing Boot Order
- Enter ThinkPad Setup.
- Open Startup > Boot.
- Select the preferred startup sequence.
- Press F10 to save changes.
Temporary Boot Selection
- Turn on the computer.
- Press F12 when the Lenovo logo appears.
- Select the required boot device.
- Press Enter.
Updating UEFI BIOS
BIOS updates are available through Lenovo Support and Lenovo Vantage.
Use the update package intended for the computer’s machine type and follow the installation instructions.
Troubleshooting Guide
Common Problems and Solutions
| Problem | Recommended Solution |
| Computer does not respond | Hold the Power button or use the emergency-reset hole |
| Computer does not start | Check power sources and battery connections |
| Battery does not charge | Check AC adapter and charging conditions |
| Keyboard stops working | Check keyboard and system settings |
| TrackPoint does not work | Check pointing-device settings |
| Trackpad does not respond | Review Mouse Properties |
| Wi-Fi does not connect | Check wireless settings, range, and driver |
| Bluetooth audio is unavailable | Review connected audio output settings |
| Ethernet does not connect | Check cable, adapter settings, and driver |
| Screen is blank | Check power, brightness, and display output |
| External monitor does not work | Check cables and display settings |
| No audio | Check volume and audio device configuration |
| Fingerprint authentication fails | Clean reader and use an enrolled finger |
| SSD is not detected | Review startup error messages and request service |
| USB device is not detected | Check connection and USB settings |
| Docking station does not connect | Reattach the notebook and check docking indicator |
Computer Stops Responding
- Hold the Power button until the computer turns off.
- If necessary, disconnect the AC adapter.
- Insert a straightened paper clip into the emergency-reset hole.
- Restart the computer.
If the computer cannot start, disconnect external devices and follow the power troubleshooting procedure.
Liquid Spilled on the Keyboard
- Prevent contact with electrical power.
- Disconnect the AC adapter immediately.
- Turn off the computer.
- Remove the removable battery.
- Allow liquid to drain through the keyboard drainage holes before attempting operation.
Wireless LAN Problems
Confirm that:
- Airplane Mode is disabled.
- Wireless LAN is enabled.
- The notebook is within access-point range.
- The wireless driver is installed correctly.
Ethernet Problems
- Confirm that the Ethernet cable is firmly connected.
- Check the network adapter driver.
- Verify network equipment settings.
- Confirm that network speed and duplex settings are compatible.
Fingerprint Reader Problems
- Clean the reader with a dry, lint-free cloth.
- Make sure the finger is dry and clean.
- Use a registered finger.
- Register another finger if necessary.
Display Problems
If the internal screen remains blank:
- Check whether the notebook is powered on.
- Adjust screen brightness.
- Disconnect external displays.
- Restart the computer.
- Run available diagnostics when needed.
Power Problems
- Check the electrical outlet.
- Verify that the power adapter is connected properly.
- Check the battery installation.
- Restart or reset the notebook if necessary.
Error Messages and Codes
The ThinkPad 25 displays startup error messages when hardware, firmware, or configuration problems are detected.
| Error Code | Description | Recommended Action |
| 0177 | Bad supervisor password data | Obtain authorized service |
| 0183 | Invalid security settings checksum | Review security settings in BIOS |
| 0187 | EEPROM data access error | Obtain authorized service |
| 0188 | Invalid RFID serialization information | Obtain authorized service |
| 0189 | Invalid RFID configuration information | Obtain authorized service |
| 0190 | Critical low-battery condition | Connect AC power and charge |
| 0191 | Invalid remote configuration change | Confirm configuration and retry |
| 0199 | Supervisor password retry limit exceeded | Confirm password and enter BIOS |
| 0270 | Real-time clock error | Obtain authorized service |
| 0271 | Date and time settings error | Correct date and time in BIOS |
| 1802 | Unauthorized network card | Remove unsupported card |
| 1820 | Multiple external fingerprint readers | Disconnect extra readers |
| 2100 | Main storage detection error | Service storage device |
| 2101 | M.2 SSD detection error | Service M.2 SSD |
| 2102 | Main storage detection error | Service storage device |
| 2110 | Main storage read error | Service storage device |
| 2111 | M.2 SSD read error | Service M.2 SSD |
| 2112 | Main storage read error | Service storage device |
| 2200 | Invalid machine type or serial number | Obtain authorized service |
| 2201 | Invalid machine UUID | Obtain authorized service |
| Fan Error | Cooling fan failure | Shut down immediately and obtain service |
| Thermal Sensing Error | Thermal sensor failure | Shut down immediately and obtain service |
UEFI Variable Storage Nearly Full
This message indicates that the system’s nonvolatile UEFI variable storage is almost full.
Press F1 to enter ThinkPad Setup and review the cleanup confirmation.
Selecting the cleanup option deletes applicable variables created by the operating system or applications while retaining UEFI-defined global variables.
SmartBeep Diagnostic Codes
Lenovo SmartBeep can identify startup beep errors using a compatible smartphone application.
Using SmartBeep
- Visit https://support.lenovo.com/smartbeep.
- Install the diagnostic application.
- Open the application.
- Place the phone near the notebook.
- Press Fn to repeat the diagnostic beep.
- Review the decoded error.
Diagnostic Error Codes
| Code | Meaning | Recommended Action |
| 0001 | Reset error | Check power/reset condition; service if unresolved |
| 0002 | Internal bus error | System board service |
| 0281 | Embedded controller error | System board service |
| 0282 | Memory module error | Check memory installation or replacement |
| 0283 | PCI resource error | Professional hardware inspection |
| 0284 | TCG-related validation error | System board service |
| 0285 | TPM initialization error | System board service |
| 0286 | Integrated graphics error | System board service |
| 0287 | Discrete graphics error | Professional hardware service |
| 0288 | Computer display error | Professional display or system board service |
Service-only procedures should be performed by an authorized technician.
Windows Recovery
Resetting Windows 10
- Open the Start menu.
- Select Settings > Update & Security > Recovery.
- Under Reset this PC, click Get started.
- Choose the required recovery option.
- Follow the instructions.
Windows recovery can reinstall the operating system while offering options to retain or remove personal files.
Advanced Startup
- Open Settings > Update & Security > Recovery.
- Under Advanced startup, click Restart now.
- Select Troubleshoot > Advanced options.
- Choose the required repair or startup function.
Recovery After Failed Startup
If Windows fails to start twice consecutively, the Windows Recovery Environment can start automatically.
Use the available troubleshooting or recovery options.
Keep the notebook connected to AC power during recovery.
Creating a Recovery USB Drive
A USB recovery drive can be used to troubleshoot or recover Windows when normal recovery programs are unavailable.
USB Requirements
| Item | Requirement |
| USB Capacity | At least 16 GB |
| AC Power | Connected |
| Existing USB Data | Deleted During Creation |
Creating the Recovery Drive
- Connect a USB drive with at least 16 GB capacity.
- Search Windows for Recovery.
- Select Create a recovery drive.
- Approve the User Account Control prompt.
- Follow the Recovery Drive instructions.
The required capacity may vary with the recovery image.
Recovering from USB
- Connect the recovery USB drive.
- Restart the computer.
- Press F12 repeatedly before Windows starts.
- Select the USB recovery device.
- Select the keyboard layout.
- Open Troubleshoot.
- Choose the required recovery option.
Cleaning and Maintenance
Cleaning the Exterior
Use a lint-free cloth lightly dampened with mild soap and water.
Do not apply liquid directly to the computer.
Cleaning the Keyboard
- Use a lint-free cloth dampened with mild soap and water.
- Wipe keys individually.
- Remove dust using a camera blower or cool air from a hair dryer.
- Avoid spraying cleaner directly onto the keyboard.
Cleaning the Display
- Turn off the computer.
- Gently wipe the screen with a dry, soft, lint-free cloth.
- For persistent marks, lightly moisten the cloth with water or eyeglass cleaner.
- Allow the display to dry before closing it.
Cleaning the Fingerprint Reader
Use a dry, soft, lint-free cloth to clean the reader when dirty or wet.
General Maintenance
- Back up important data regularly.
- Install relevant device drivers and firmware updates.
- Keep cooling vents clear.
- Remove unnecessary files and applications.
- Monitor battery condition.
- Avoid extreme temperatures and physical shocks.
Storage and Travel Instructions
Long-Term Battery Storage
For extended storage, rechargeable batteries should be maintained at approximately 30%–50% charge.
Lenovo recommends charging stored batteries about once each year to prevent overdischarge.
Traveling with the Computer
- Use a protective carrying case.
- Disconnect power cords and accessories before packing.
- Follow airline requirements for electronic devices.
- Use Airplane Mode when required.
- Protect the display from pressure during transportation.
Replacement Parts and Accessories
The ThinkPad 25 includes customer-replaceable components.
Self-Service CRUs
| Component | Classification |
| AC Adapter and Power Cord | Self-Service |
| Removable Battery | Self-Service |
| Base Cover Assembly | Self-Service |
| Coin-Cell Battery | Self-Service |
| Memory Module | Self-Service |
Optional-Service CRUs
| Component | Classification |
| M.2 2280 SSD, Cable, and Adapter | Optional-Service |
| Wireless LAN Card | Optional-Service |
| Wireless WAN Card | Optional-Service |
Before Replacing a Component
- Back up important files when appropriate.
- Turn off the notebook.
- Disconnect AC power.
- Disconnect connected devices.
- Disable Fast Startup.
- Disable the built-in battery through BIOS.
- Follow the appropriate component replacement instructions.
Disabling the Built-In Battery
- Restart the computer.
- Press F1 when the Lenovo logo appears.
- Select Config > Power.
- Choose Disable Built-in Battery.
- Confirm the action.
- Allow the computer to shut down.
- Wait three to five minutes before servicing.
Replacing the Removable Battery
- Disable the built-in battery.
- Turn off and disconnect the notebook.
- Close the display and turn the computer over.
- Move the battery latches to the unlocked position.
- Remove the existing battery.
- Insert a Lenovo-approved replacement battery until it clicks.
- Confirm that the battery is securely locked.
Replacing a Memory Module
The computer supports DDR4 SODIMM memory up to 16 GB.
The replacement procedure involves:
- Disabling the built-in battery.
- Removing the removable battery.
- Removing the base cover.
- Releasing the memory-module retaining clips.
- Removing the module.
- Inserting the compatible replacement at an angle of approximately 20 degrees.
- Pressing the module downward until secured.
- Reinstalling the cover and battery.
Avoid touching the memory module’s electrical contacts.
Replacing the M.2 2280 SSD
The notebook uses an M.2 2280 solid-state drive.
Before replacement:
- Back up important data.
- Disable the built-in battery.
- Disconnect power.
- Remove the removable battery and base cover.
- Handle the SSD carefully.
- Follow the specified cable, converter, and mounting procedure.
The SSD is an optional-service CRU.
Accessories
Compatible accessories can include docking stations, storage devices, memory modules, power adapters, replacement batteries, and input devices.
Accessory information:
https://www.lenovo.com/accessories
Warranty Information
The ThinkPad 25 is covered by the applicable Lenovo Limited Warranty.
Warranty service depends on the product, location, and purchased coverage.
Applicable Warranty Services
During the warranty period, eligible services may include:
- Hardware problem identification.
- Repair of covered Lenovo hardware.
- Applicable engineering changes.
Warranty Exclusions
Examples of services outside standard warranty coverage include:
- Nonwarranted components.
- Software problem identification.
- BIOS configuration during an upgrade.
- Driver modifications.
- Network operating system maintenance.
- Application installation and maintenance.
Lenovo Limited Warranty
https://www.lenovo.com/warranty/llw_02
Customer Support Information
Lenovo provides drivers, documentation, product information, troubleshooting resources, and authorized repair assistance.
Support Resources
| Resource | Website |
| Lenovo Support | https://support.lenovo.com |
| Lenovo PC Support | https://pcsupport.lenovo.com |
| Support Phone Numbers | https://pcsupport.lenovo.com/supportphonelist |
| Product Registration | https://support.lenovo.com/productregistration |
| SmartBeep Diagnostics | https://support.lenovo.com/smartbeep |
| Lenovo Accessories | https://www.lenovo.com/accessories |
| Lenovo Limited Warranty | https://www.lenovo.com/warranty/llw_02 |
Before Contacting Support
Prepare:
- Computer model and machine type.
- Serial number.
- Operating system version.
- Description of the problem.
- Exact error message or code.
- Relevant software and hardware configuration.
- Results of diagnostic testing.
The machine type and serial number are identified on the computer’s bottom label.
Frequently Asked Questions
1. What are the specifications of the Lenovo ThinkPad 25?
The Lenovo ThinkPad 25, machine type 20K7, features a 14-inch 1920 × 1080 IPS multi-touch display, traditional seven-row backlit keyboard, DDR4 SODIMM memory up to 16 GB, M.2 2280 SSD, Thunderbolt 3-compatible USB-C, HDMI, Ethernet, Bluetooth, Wi-Fi, and fingerprint authentication.
2. How do I enter BIOS on the ThinkPad 25?
Restart the notebook and press F1 when the Lenovo logo appears. ThinkPad Setup provides access to startup, power, security, network, and hardware configuration settings.
3. How do I reset a frozen ThinkPad 25?
Hold the Power button until the notebook turns off. If it does not respond, disconnect the AC adapter and insert a straightened paper clip into the emergency-reset hole on the underside.
4. How do I replace the ThinkPad 25 battery?
Disable the built-in battery through BIOS, turn off and disconnect the notebook, release the removable battery latches, remove the battery, and insert a compatible Lenovo replacement until it locks securely.
5. How much RAM does the ThinkPad 25 support?
The ThinkPad 25 supports DDR4 SODIMM memory with a maximum listed capacity of 16 GB.
6. How do I change the ThinkPad 25 boot order?
Press F1 during startup, open Startup > Boot, and change the preferred boot order. Press F10 to save. For a temporary startup-device selection, press F12 during startup.
7. How do I create a ThinkPad 25 recovery USB?
Connect a USB drive with at least 16 GB capacity, search Windows for Create a recovery drive, and follow the instructions. The process deletes existing data from the USB drive.
8. Where can I download Lenovo ThinkPad 25 drivers and BIOS updates?
Drivers, firmware, BIOS updates, and support resources are available at https://support.lenovo.com. Select the ThinkPad 25 or machine type 20K7 to find the appropriate software.