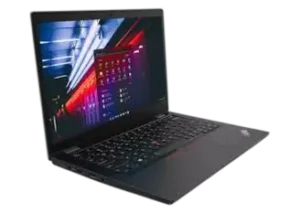
| Field | Details |
| Document Title | L13, L13 Yoga, S2 5th Gen and S2 Yoga 5th Gen User Guide |
| Document Type | User Guide |
| Brand Name | Lenovo |
| Product Name | ThinkPad L13, ThinkPad L13 Yoga, ThinkPad S2 5th Gen, ThinkPad S2 Yoga 5th Gen |
| Model Number(s) | L13, L13 Yoga, S2 5th Gen, S2 Yoga 5th Gen |
| Machine Types | 20R3, 20R4, 20R5, 20R6, 20R7, 20R8 |
| PDF File Size | 7 MB |
| Number of Pages | 110 |
| Languages | English |
Lenovo ThinkPad L13
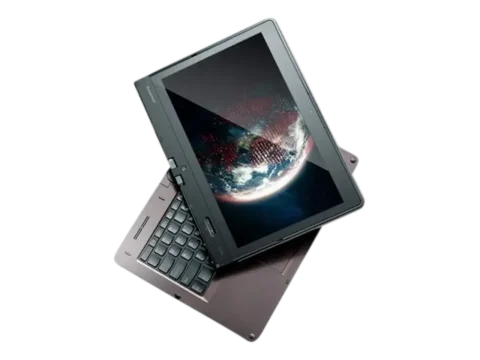
The Lenovo ThinkPad L13 is a 13.3-inch notebook computer with a six-row keyboard, TrackPoint pointing device, trackpad, USB-C connectivity, wireless networking, and built-in security features. The ThinkPad L13 Yoga adds a convertible display that supports notebook, stand, tent, and tablet modes.
This user guide covers four related models: ThinkPad L13, ThinkPad L13 Yoga, ThinkPad S2 5th Gen, and ThinkPad S2 Yoga 5th Gen. The Yoga versions also support the ThinkPad Pen Pro, which can be stored and charged inside the computer.
The Lenovo ThinkPad L13 user manual provides instructions for identifying hardware components, setting up Windows 10, using keyboard shortcuts and touch controls, connecting external displays, configuring power settings, operating docking stations, managing BIOS security, replacing supported components, and resolving system errors.
The guide also includes battery charging information, maintenance procedures, Windows recovery instructions, and Lenovo customer support resources. Some features are available only on selected configurations.
Supported Models and Machine Types
| Product Model | Machine Type | Compliance ID |
| ThinkPad L13 | 20R3, 20R4 | TP00114A |
| ThinkPad L13 Yoga | 20R5, 20R6 | TP00114A |
| ThinkPad S2 5th Gen | 20R7 | TP00114A |
| ThinkPad S2 Yoga 5th Gen | 20R8 | TP00114A |
Technical Specifications
The ThinkPad L13 series is available in different hardware configurations, including conventional notebook and convertible Yoga models.
| Specification | Details |
| Brand | Lenovo |
| Product Series | ThinkPad L13 / S2 5th Gen |
| Product Type | Notebook Computer |
| Display Size | 13.3 inches (337.82 mm) |
| Display Technology | IPS or TN |
| Display Resolution | 1366 × 768 or 1920 × 1080 pixels |
| Touchscreen | Available on selected models |
| Graphics | Integrated Graphics |
| Memory | DDR4 SDRAM |
| Memory Installation | Soldered on the system board |
| Storage | M.2 solid-state drive |
| Additional Storage Option | Hybrid SSD with Intel Optane memory, selected models |
| Keyboard | Six-row keyboard |
| Keyboard Backlight | Available on selected models |
| Pointing Devices | TrackPoint and trackpad |
| Wireless Networking | Wireless LAN |
| Bluetooth | Supported |
| Wired Networking | Through supported Ethernet adapters |
| USB-C | 2 × USB 3.1 Gen 1 |
| USB-A | 2 × USB 3.1 Gen 1, including one Always On USB connector |
| Video Output | HDMI, USB-C display output |
| Audio | 3.5 mm combination audio connector |
| Card Reader | microSD card slot |
| Smart-Card Reader | Selected models |
| Security | UEFI BIOS passwords, security-lock slot, ThinkShutter |
| Fingerprint Reader | Selected models |
| Infrared Camera | Selected models |
| Trusted Platform Module | Selected models |
| Pen Support | ThinkPad Pen Pro on Yoga models |
| Width | 311.5 mm (12.26 inches) |
| Depth | 219 mm (8.62 inches) |
| Thickness | 17.6–17.85 mm (0.69–0.70 inches) |
| AC Adapter Input | 100–240 V AC, 50–60 Hz |
| Maximum Heat Output | 45 W or 65 W, depending on model |
Checking Processor Information
The installed processor information can be viewed through Windows:
- Right-click the Start button.
- Select System.
- Review the processor and system information.
USB Data Transfer Rates
The USB specification information identifies the following reference transfer rates.
| USB Standard | Reference Data Rate |
| USB 3.1 Gen 1 / USB 3.2 Gen 1 | 5 Gbit/s |
| USB 3.1 Gen 2 / USB 3.2 Gen 2 | 10 Gbit/s |
| USB 3.2 Gen 2 × 2 | 20 Gbit/s |
These are interface reference rates, not confirmation that every listed USB standard is installed on the computer. Actual transfer speeds depend on the computer configuration, connected devices, file characteristics, and operating conditions.
Parts and Components
The ThinkPad L13 and Yoga models include integrated cameras, microphones, pointing devices, connection ports, and security-related components.
Front Components
| Component | Function |
| Microphones | Capture and record audio. |
| Infrared LED | Provides infrared illumination for face authentication on selected models. |
| ThinkShutter | Slides over the camera lens for privacy. |
| Infrared Camera | Supports compatible facial authentication and camera functions. |
| Camera | Captures photographs and records videos. |
| Multi-Touch Screen | Supports touch-based interaction on selected models. |
| Smart-Card Slot | Supports compatible smart cards on selected models. |
Note: The infrared LED must not be blocked during face authentication, or the infrared function may not operate correctly.
Base Components
| Component | Function |
| Fingerprint Reader | Allows fingerprint sign-in on selected models. |
| Trackpad | Controls the pointer using finger movements and gestures. |
| TrackPoint Pointing Device | Provides pointer control through the keyboard-mounted pointing stick. |
| Rear Camera | Available on selected Yoga configurations for photos and videos. |
The TrackPoint and trackpad provide mouse functions without requiring an external pointing device.
Left-Side Ports
| Component | Function |
| Pen Tether Hole | Secures the ThinkPad Pen Pro on Yoga models. |
| USB-C Connectors | Support charging, data transfer, and compatible external displays. |
| Ethernet Extension Connector Gen 2 | Connects a compatible Lenovo Ethernet extension adapter. |
| Docking-Station Connector | Connects supported ThinkPad docking stations. |
| Always On USB 3.1 Gen 1 | Supports USB accessories and charging functions. |
| Audio Connector | Connects compatible headphones or headsets. |
USB-C Connector Functions
The USB-C connectors support several functions:
- Charging the computer.
- Charging compatible USB-C devices at 5 V and 3 A.
- USB 3.1 Gen 1 data transfer up to 5 Gbit/s.
- Connecting compatible external displays.
- Connecting USB-C accessories.
- Peer-to-peer charging between compatible computers.
The guide identifies the following display output capabilities through supported USB-C adapters.
| Connection | Supported Resolution |
| USB-C to VGA | 1920 × 1200 at 60 Hz |
| USB-C to DisplayPort | 3840 × 2160 at 60 Hz |
The external-display specifications also list a maximum USB-C output of 4096 × 2304 at 60 Hz.
Important: When the computer battery is below 10%, connected USB-C accessories may not operate correctly.
Ethernet Extension Connector Gen 2
The Ethernet extension connector can be used with the ThinkPad Ethernet Extension Adapter Gen 2.
When attaching the adapter, the USB mark must face upward. Incorrect insertion can damage the connector.
Always On USB Connector
The Always On USB connector can charge compatible USB devices when the computer is:
- Turned on.
- Turned off.
- In sleep mode.
- In hibernation mode.
By default, Always On USB is enabled, while Charge in Battery Mode is disabled in UEFI BIOS.
When the computer is turned off or hibernating and battery-mode charging is disabled, the computer must be connected to AC power to charge devices through this connector.
Audio Connector
The 3.5 mm audio connector supports compatible headphones and headsets using a four-pole plug.
It can be used for listening to audio or communicating through a connected headset.
The connector does not support standalone external microphones.
Right-Side Components
| Component | Function |
| Pen Slot | Stores the ThinkPad Pen Pro on Yoga models. |
| Power Button | Turns on the computer or places it into sleep mode. |
| microSD Card Slot | Provides access to compatible microSD storage cards. |
| USB 3.1 Gen 1 Connector | Connects compatible USB accessories. |
| HDMI Connector | Connects a compatible monitor, projector, or HDTV. |
| Security-Lock Slot | Accepts a compatible security cable lock. |
| Pen Tether Hole | Provides an additional pen tether attachment point on Yoga models. |
Bottom Components
| Component | Function |
| Docking-Station Hook Holes | Secure the computer to a supported docking station. |
| Emergency-Reset Hole | Temporarily disconnects internal power when the computer becomes unresponsive. |
| Speakers | Provide audio output. |
Power Button and Indicator Lights
The power button contains an indicator showing the computer’s operating state.
| Indicator State | Meaning |
| Blinks Three Times | Computer is initially connected to power. |
| Solid On | Computer is turned on. |
| Off | Computer is turned off or hibernating. |
| Rapid Blinking | Computer is entering sleep or hibernation. |
| Slow Blinking | Computer is in sleep mode. |
Turning the Computer On or Off
Press the power button to turn on the computer.
To shut down Windows:
- Open the Start menu.
- Select Power.
- Click Shut down.
Pressing the power button during normal operation can place the computer into sleep mode, depending on its configured power settings.
Safety Instructions
The ThinkPad L13 contains electrical components, rechargeable batteries, and parts that may become hot during operation.
The Safety and Warranty Guide and Setup Guide should be read before using the computer.
Electrical and Power Adapter Safety
- Use only power cords and adapters supplied by the product manufacturer.
- Connect power cords to correctly wired and grounded electrical outlets.
- Do not use cracked, damaged, or corroded power cords or adapters.
- Keep electrical connections away from water and other liquids.
- Do not wrap power cords around the AC adapter.
- Do not cover the adapter with clothing or other objects while operating.
- Avoid overloading extension cords, outlets, and power strips.
- Never open a power supply or component carrying hazardous-voltage markings.
- Do not connect or disconnect cables or perform maintenance during an electrical storm.
Danger: Electrical current from power and communication cables can cause serious injury.
Battery Safety
Incorrect battery handling can cause overheating, leakage, fire, or explosion.
- Do not disassemble, crush, puncture, or modify the battery.
- Do not short-circuit the battery.
- Keep batteries away from fire, water, and children.
- Stop using a damaged or leaking battery.
- Use only Lenovo-approved replacement batteries.
- Follow the specified charging instructions.
Important: The built-in rechargeable battery must not be removed or replaced by the user. Battery replacement must be carried out by a Lenovo-authorized repair facility or technician.
Heat and Ventilation Safety
The notebook and power adapter may become warm during operation.
- Avoid prolonged contact between the body and hot computer surfaces.
- Do not use the computer on soft surfaces that block ventilation.
- Keep ventilation openings clear.
- Do not operate or charge the computer near flammable materials.
- Do not use the computer inside furniture that restricts airflow.
- Keep incoming airflow temperatures at or below 35°C (95°F).
Liquid Exposure
If liquid is spilled on the computer:
- Carefully disconnect the AC power adapter.
- Turn off the computer immediately.
- Do not turn the computer upside down to drain the liquid.
- Wait until all liquid is dry before attempting to turn it on.
Caution: Continuing to operate a computer after liquid exposure can cause damage from electrical short circuits. If there is any indication of damage or a safety concern, keep the computer disconnected and contact Lenovo Support.
LCD and Glass Safety
The display contains glass and can break if the computer is dropped or handled roughly.
If LCD fluid reaches the skin or eyes, wash the affected areas with water for at least 15 minutes. Seek medical care if symptoms remain.
If glass breaks, stop using the computer and do not attempt to remove broken components. Replacement must be performed by trained service personnel.
Conditions Requiring Immediate Service
Stop using the computer and disconnect it from power if any of the following occurs:
- Smoke, sparks, or signs of fire.
- Unusual odors or cracking sounds.
- Damaged power cords or adapters.
- Battery leakage or physical damage.
- Liquid exposure.
- Severe impact damage.
- Abnormal operation despite following the instructions.
Do not attempt unauthorized repairs. Contact Lenovo Customer Support for assistance.
Getting Started with Windows 10
The ThinkPad L13 supports Windows 10 account management, system settings, application access, and network connections.
Creating a Windows Account
A Windows account is required to use the operating system.
During initial Windows setup, the first account created is an administrator account.
The administrator can create additional accounts or change account types.
To add another account:
- Open the Start menu.
- Select Settings > Accounts > Family & other users.
- Follow the on-screen instructions.
Using a Microsoft Account
A Microsoft account can be used to sign in to Windows and compatible Microsoft services.
It supports:
- Signing in to supported Microsoft applications.
- Synchronizing certain personalized settings between Windows devices.
To create a Microsoft account, visit https://signup.live.com.
Windows Desktop Controls
| Windows Feature | Function |
| Start Button | Opens the Start menu. |
| Account | Provides account settings, lock, and sign-out options. |
| Documents | Opens the Documents folder. |
| Pictures | Opens the Pictures folder. |
| Settings | Opens Windows Settings. |
| Power | Provides shutdown, restart, and sleep options. |
| Windows Search | Searches applications, files, and supported online results. |
| Task View | Displays open applications and windows. |
| Notification Area | Displays system notifications and status information. |
| Battery Status Icon | Displays battery and power information. |
| Network Icon | Shows network status and available connections. |
| Action Center | Provides notifications and quick actions. |
Network Setup Instructions
Connecting to Wi-Fi
- Click the network icon in the Windows notification area.
- Select an available Wi-Fi network.
- Enter the required network information if prompted.
- Complete the connection.
Connecting to Wired Ethernet
The computer supports wired networking through compatible adapters.
Supported accessories include:
- Lenovo USB-C to Ethernet Adapter.
- ThinkPad Ethernet Extension Adapter Gen 2.
Connect the adapter to the appropriate connector and use an Ethernet cable to connect to the local network.
Connecting Bluetooth Devices
Bluetooth can be used with compatible keyboards, mice, smartphones, speakers, and other devices.
Keep the Bluetooth device within approximately 10 meters (33 feet) of the computer during connection.
- Enable Bluetooth through Action Center or Windows Settings.
- Open Settings > Devices > Bluetooth & other devices.
- Select Add Bluetooth or other device > Bluetooth.
- Choose the required device.
- Follow the on-screen instructions.
Previously paired devices can reconnect automatically when Bluetooth is enabled and both devices are within range.
Turning Airplane Mode On or Off
Airplane mode disables wireless communication features.
- Open the Start menu.
- Select Settings > Network & Internet > Airplane mode.
- Turn the Airplane mode switch on or off.
Lenovo Vantage
Lenovo Vantage provides system information, hardware controls, diagnostic tools, updates, and support resources.
Opening Lenovo Vantage
- Open the Start menu.
- Select Lenovo Vantage.
The application can also be opened by searching for Lenovo Vantage in Windows Search.
Lenovo Vantage Functions
Depending on the configuration, Lenovo Vantage can:
- Display computer status and hardware information.
- Change supported hardware settings.
- Download device drivers and firmware updates.
- Install UEFI BIOS updates.
- Run hardware diagnostics.
- Monitor system health.
- Display warranty information.
- Provide access to the user guide and support articles.
The latest version can be obtained through the Microsoft Store.
Keyboard Controls and Shortcuts
The ThinkPad L13 includes function keys and keyboard shortcuts for quick access to frequently used features.
FnLock Settings
FnLock changes how the F1–F12 keys operate.
Press Fn + Esc to switch between standard function keys and their special functions.
| FnLock Indicator | Key Behavior |
| On | F1–F12 perform standard function-key operations. |
| Off | F1–F12 perform the special functions printed on the keys. |
When FnLock is enabled, hold Fn to use the printed special functions. When FnLock is disabled, hold Fn to use standard F1–F12 functions.
Special Keyboard Functions
| Function | Description |
| Speaker Mute | Mutes or unmutes speaker audio. |
| Volume Down | Reduces system volume. |
| Volume Up | Increases system volume. |
| Microphone Mute | Mutes or unmutes the microphones. |
| Brightness Down | Darkens the display. |
| Brightness Up | Brightens the display. |
| External Display | Opens display management options. |
| Wireless Controls | Enables or disables built-in wireless features. |
| Settings | Opens Windows Settings. |
| Bluetooth | Enables or disables Bluetooth. |
| Keyboard Settings | Opens keyboard configuration options. |
| User-Defined Function | Performs the function assigned by the user. |
| Lenovo Vantage | Opens Lenovo Vantage. |
| Snipping Tool | Opens the Windows screen capture utility. |
Additional Fn Shortcuts
| Shortcut | Function |
| Fn + Spacebar | Changes keyboard backlight status on supported models. |
| Fn + B | Break |
| Fn + K | Scroll Lock |
| Fn + P | Pause |
| Fn + S | SysRq |
| Fn + 4 | Puts the computer into sleep mode. |
| Fn + Left Arrow | Home |
| Fn + Right Arrow | End |
To wake the computer after using Fn + 4, press Fn or the power button.
Using the TrackPoint Pointing Device
The TrackPoint pointing device provides pointer movement, clicking, and scrolling.
TrackPoint Controls
| Component | Function |
| Pointing Stick | Moves the pointer using finger pressure. |
| Left-Click Button | Selects or opens items. |
| Right-Click Button | Opens shortcut menus. |
| Middle Button | Supports scrolling when used with the pointing stick. |
Moving the Pointer
Place a finger on the TrackPoint pointing stick and apply pressure in the desired direction.
The on-screen pointer moves according to the direction and pressure applied.
Greater pressure produces faster pointer movement.
Scrolling with TrackPoint
- Press and hold the middle TrackPoint button.
- Apply pressure to the pointing stick vertically or horizontally.
- Move through the document, webpage, or application.
Disabling TrackPoint
- Open Start > Settings > Devices > Mouse.
- Follow the available settings to disable the TrackPoint device.
Replacing the TrackPoint Cap
The TrackPoint pointing-stick cap can be replaced when necessary.
The replacement cap must have the grooves shown in Lenovo’s replacement illustration.
Using the Trackpad
The trackpad supports pointer movement, clicking, scrolling, and multi-finger gestures.
Trackpad Controls
| Gesture | Function |
| One-Finger Tap | Selects or opens an item. |
| Two-Finger Tap | Opens a shortcut menu. |
| Two-Finger Scroll | Scrolls vertically or horizontally. |
| Two Fingers Moving Together | Zooms out. |
| Two Fingers Moving Apart | Zooms in. |
| Three-Finger Swipe Up | Opens Task View. |
| Three-Finger Swipe Down | Shows the desktop. |
Some gestures depend on the active application and pointing device settings.
Disabling the Trackpad
- Open Start > Settings > Devices > Touchpad.
- Turn off the Touchpad control.
Cleaning the Trackpad
If the trackpad becomes oily or stained:
- Turn off the computer.
- Use a soft, lint-free cloth lightly moistened with lukewarm water or computer cleaner.
- Gently wipe the trackpad surface.
Using the Multi-Touch Screen
Selected models support multi-touch interaction.
Touchscreen Gestures
| Gesture | Function |
| Single Tap | Selects an item or performs an application action. |
| Double Tap | Opens an item from the desktop. |
| Tap and Hold | Opens a shortcut menu. |
| Slide | Scrolls through content. |
| Drag | Moves an item. |
| Pinch In | Zooms out. |
| Spread Fingers | Zooms in. |
| Swipe from Right Edge | Opens Action Center. |
| Swipe from Left Edge | Opens Task View. |
| Swipe Down from Top | Displays a hidden title bar or closes an app, depending on mode. |
Touchscreen Care
- Turn off the computer before cleaning the display.
- Use a dry, soft, lint-free cloth or absorbent cotton.
- Do not apply solvents.
- Do not apply excessive pressure.
- Do not place metallic objects against the touchscreen.
- Do not use fingernails or gloved fingers for touch input.
Intelligent Cooling Modes
The ThinkPad L13 includes Intelligent Cooling settings that adjust the balance between performance and fan noise.
| Mode | Description |
| Quiet Mode | Prioritizes the lowest fan noise. |
| Balanced Mode | Balances performance and fan noise. |
| Performance Mode | Provides the highest performance with normal fan operation. |
Changing Intelligent Cooling in Windows
- Click the battery status icon in the Windows notification area.
- Move the available power-mode slider to the preferred setting.
Changing Intelligent Cooling in Linux
On supported Linux configurations, the computer starts in Balanced mode by default.
| Shortcut | Mode |
| Fn + L | Quiet |
| Fn + M | Balanced |
| Fn + H | Performance |
Camera and Audio Instructions
Using the Camera
- Slide ThinkShutter to uncover the camera lens.
- Open the Start menu.
- Select Camera.
- Choose the camera icon to capture a photograph.
- Select the video control to switch to video recording.
The camera indicator illuminates while the camera is being used.
Compatible video calling and conferencing applications can also activate the camera when their camera functions are enabled.
Changing Audio Settings
- Open Control Panel.
- View Control Panel by category.
- Select Hardware and Sound > Sound.
- Change the available sound settings.
Connecting External Displays
The ThinkPad L13 supports external monitors, projectors, and compatible televisions.
Connecting a Wired Display
- Connect the external display to a supported USB-C video connection or HDMI connector.
- Connect the external display to power.
- Turn on the external display.
If Windows does not identify the monitor:
- Right-click an empty area on the desktop.
- Select Display settings.
- Click Detect.
Supported External Display Resolutions
| Connection | Maximum Resolution |
| USB-C | 4096 × 2304 at 60 Hz |
| HDMI | 3840 × 2160 at 30 Hz |
Connecting a Wireless Display
Wireless display connections require Miracast support on both devices.
To connect through Windows Settings:
- Open Start > Settings > Devices > Bluetooth & other devices.
- Select Add Bluetooth or other device.
- Choose Wireless display or dock.
- Follow the on-screen instructions.
Alternatively, open Action Center, select Connect, and choose the wireless display.
Display Modes
| Display Mode | Description |
| Duplicate | Shows the same image on both displays. |
| Extend | Extends the Windows desktop across connected displays. |
| Show Only on 1 | Uses the computer’s display only. |
| Show Only on 2 | Uses the external display only. |
To change display resolution or orientation, right-click the desktop and open Display settings.
Yoga Convertible Modes
The ThinkPad L13 Yoga and ThinkPad S2 Yoga 5th Gen have displays that can rotate up to 360 degrees.
These computers support four usage positions.
| Yoga Mode | Description |
| Notebook Mode | Standard laptop position with keyboard access. |
| Stand Mode | Display faces outward while the keyboard faces downward. |
| Tent Mode | Computer forms an inverted V-shaped position. |
| Tablet Mode | Display folds back for tablet-style use. |
The keyboard and pointing devices are automatically disabled in Stand, Tent, and Tablet modes.
The touchscreen is used for interaction in those positions.
Attention: Do not force the display beyond its intended movement or apply excessive pressure to the display corners. Doing so can damage the hinges or screen.
ThinkPad Pen Pro Instructions
The ThinkPad Pen Pro is provided with the L13 Yoga and S2 Yoga 5th Gen models described in this guide.
The pen is stored in the computer’s pen slot and can be charged while inserted.
ThinkPad Pen Pro Components
| Component | Function |
| Pen Tip | Provides touchscreen input. |
| Eraser Button | Erases compatible digital ink. |
| Right-Click Button | Performs the right-click function. |
| Pen Tether Hole | Allows the pen to be attached with a tether. |
Using the Pen
Selecting an Item
Tap the display once with the pen tip.
Double-Clicking
Tap the same location twice without pausing.
Right-Clicking
Press and hold the pen tip against the display for one second, or hold the right-click button while tapping the screen.
Erasing Digital Ink
- Press and hold the eraser button.
- Touch the display with the pen tip.
- Move the pen across the ink to erase.
Checking Pen Battery Status
- Tap the pen tip against the computer screen before checking battery information.
- Open Lenovo Pen Settings using Windows Search.
- Locate the battery icon in the upper-right corner.
- Move the pointer over the icon to view the battery status.
Charging the ThinkPad Pen Pro
- Confirm that the computer is turned on or in sleep mode.
- Insert the pen into its storage slot.
- Allow the pen to charge.
| Charging Time | Approximate Charge |
| 15 seconds | 80% |
| 5 minutes | 100% |
Important: The ThinkPad Pen Pro is not waterproof. Keep it away from water and excessive moisture.
Battery Charging and Power Management
Checking Battery Status
Click the battery icon in the Windows notification area to view remaining battery power and access power settings.
Battery temperature information is available through Lenovo Vantage.
Charging the Computer
When battery power is low, connect the computer to AC power through the supported USB-C charging connection.
The battery normally takes approximately 4–8 hours to charge fully.
If the supplied adapter supports Rapid Charge, the battery can reach approximately 80% charge in about one hour while the computer is turned off.
Charging speed depends on battery capacity, environmental conditions, and computer activity.
Battery Charging Temperature
The recommended battery charging range is:
10°C to 35°C (50°F to 95°F)
To help maintain battery life, the computer does not restart charging after reaching full capacity until the battery level falls to 94% or lower.
Peer-to-Peer 2.0 Charging
The ThinkPad L13 supports Lenovo’s P-to-P 2.0 charging function through compatible USB-C connections.
This function allows one computer to provide power to another.
Before using it, confirm that both computers support the required USB-C power delivery and P-to-P charging functions.
Always On USB and Charge in Battery Mode must be enabled in BIOS when the function is needed while a computer is off or hibernating.
Charging Another Computer Without AC Power
- Confirm that the supplying computer has at least 30% battery charge.
- Its battery level must also be at least three percentage points higher than the receiving computer.
- Connect the two computers using a USB-C to USB-C cable.
The supplying computer stops providing power when its battery charge falls below 30%.
Charging Two Computers with One AC Adapter
- Connect the computers using a compatible USB-C to USB-C cable.
- Connect one computer to AC power.
- Both computers can receive charging power through the supported P-to-P connection.
Actual charging speed varies with adapter wattage, battery levels, and computer activity.
Power Management Settings
To change the power button behavior:
- Right-click the Windows battery icon.
- Select Power Options > Choose what the power buttons do.
- Change the available settings.
For ENERGY STAR-compliant models, Lenovo lists these default idle settings when connected to AC power:
| Setting | Default Time |
| Turn Off Display | After 10 minutes |
| Sleep Mode | After 30 minutes |
Using microSD and Smart Cards
Supported microSD Cards
The computer supports compatible microSD storage formats, including SD, SDHC, and SDXC cards.
The microSD reader does not support the CPRM content-protection feature.
Inserting a microSD Card
- Locate the microSD card slot.
- Position the card with its metal contacts facing downward toward the slot.
- Insert it until securely positioned.
Using a Smart Card
Selected models include a smart-card reader.
The supported smart-card dimensions are 85.60 × 53.98 mm (3.37 × 2.13 inches).
Smart cards with slits must not be inserted because they can damage the reader.
Insert a compatible smart card with its metal contacts facing upward toward the slot.
Removing a Card
- Open the hidden icons area in the Windows notification area.
- Right-click Safely Remove Hardware and Eject Media.
- Select the card to eject.
- Press the card and remove it.
Eject cards through Windows before removing them to reduce the risk of data loss or corruption.
Docking Station Instructions
The ThinkPad L13 supports three mechanical docking stations:
- ThinkPad Basic Docking Station.
- ThinkPad Pro Docking Station.
- ThinkPad Ultra Docking Station.
Docking Station Components
| Component | Function |
| System Lock | Locks or releases the docking mechanism. |
| Key Lock Indicator | Shows when the system lock is locked. |
| Docking Status Indicator | Confirms successful docking. |
| Power Button | Controls the attached computer. |
| Guide Post | Helps align the computer. |
| Docking Connector | Connects the computer to the station. |
| Hooks | Hold the computer securely. |
| Latch | Attaches or releases the computer. |
The ThinkPad Basic Docking Station does not include a preinstalled system lock. Lenovo identifies system-lock option part number 4XE0Q56388.
Connecting the Computer to a Docking Station
- Connect the docking station to AC power.
- Disconnect cables and devices from the computer’s left side.
- Turn the system-lock key to the unlocked position, if installed.
- Align the computer’s upper-left corner with the docking station guide post.
- Lower the computer into the docking connection until it clicks.
- Slide the latch to secure the computer.
- Confirm that the docking status indicator illuminates.
- Turn the system lock to the locked position, if installed.
If the docking status indicator remains off, detach and reconnect the computer.
Removing the Computer from the Dock
- Unlock the system lock, if installed.
- Slide the release latch.
- Hold both sides of the computer.
- Lift the computer away from the docking station.
Attention: When moving a computer with its docking station attached, support the entire assembly to prevent the dock from falling.
Connecting Multiple External Displays
| Docking Station | Maximum External Displays | Display Connections |
| ThinkPad Basic Docking Station | 2 | DisplayPort, VGA |
| ThinkPad Pro Docking Station | 2 | 2 × DisplayPort |
| ThinkPad Ultra Docking Station | 3 | 2 × DisplayPort, HDMI, VGA |
The number of external displays depends on the docking station and supported display connections.
Computer Security Features
The ThinkPad L13 includes physical, firmware, and biometric security options.
Security Cable Lock
A compatible security cable can be attached to the computer’s security-lock slot.
The slot supports compatible Kensington MicroSaver and MiniSaver locking standards.
Fingerprint Reader
Selected models include a fingerprint reader for Windows sign-in.
Registering Fingerprints
- Open Start > Settings > Accounts > Sign-in options.
- Select the fingerprint registration option.
- Follow the on-screen instructions.
During registration, place the finger near the center of the reader.
Registering more than one fingerprint provides another sign-in option if a finger is injured.
Fingerprint Reader Care
- Do not scratch the sensor surface.
- Do not use wet or dirty fingers.
- Avoid attempting fingerprint authentication with an injured or wrinkled finger.
Face Authentication
Selected models include a Windows Hello-compatible infrared camera.
Setting Up Face Recognition
- Open Start > Settings > Accounts > Sign-in options.
- Create a Windows password if required.
- Locate Windows Hello Face.
- Select Set up.
- Click Get Started.
- Complete PIN creation and facial registration.
The Improve Recognition option can help Windows Hello recognize the user under different lighting conditions or after changes in appearance.
Signing In with Face Recognition
- At the Windows lock screen, select the face recognition sign-in option.
- Face the infrared camera directly.
- Allow Windows Hello to recognize the registered face.
Power Loss Protection
Selected models equipped with an NVMe M.2 SSD support Lenovo Power Loss Protection.
This feature helps preserve important data when the computer experiences an unexpected power interruption.
It does not guarantee recovery of all data in every situation.
UEFI BIOS Setup Instructions
UEFI BIOS initializes the computer hardware and loads the operating system.
Entering BIOS
- Restart the computer.
- When the Lenovo logo appears, press F1.
- The UEFI BIOS menu opens.
If a supervisor password has been configured, enter it when prompted to access protected settings.
BIOS Keyboard Controls
| Key | Function |
| F1 | General Help |
| F9 | Restore Default Settings |
| F10 | Save and Exit |
| F5 / Minus | Decrease a value |
| F6 / Plus | Increase a value |
| Arrow Keys | Move through settings and menus |
| Enter | Select an item or open a submenu |
| Esc | Return to the previous menu |
Changing Boot Order
- Restart the computer.
- Press F1 at the Lenovo logo.
- Select Startup > Boot.
- Change the boot device order.
- Press F10 to save and exit.
Selecting a Temporary Boot Device
- Restart the computer.
- Press F12 at the Lenovo logo.
- Choose the desired startup device.
- Press Enter.
Changing Date and Time
- Enter BIOS using F1.
- Select Date/Time.
- Adjust the system date and time.
- Press F10 to save changes.
Updating UEFI BIOS
BIOS updates can be obtained through Lenovo Vantage or the Lenovo Support website.
- Open Lenovo Vantage or Lenovo Support.
- Select the appropriate computer model.
- Locate an available BIOS update.
- Follow Lenovo’s installation instructions.
Attention: Incorrect BIOS settings can cause unexpected system behavior. Change only the settings required for the intended operation.
BIOS Password Management
The ThinkPad L13 supports multiple BIOS password types.
| Password Type | Function |
| Power-On Password | Restricts computer startup. |
| Supervisor Password | Protects BIOS settings. |
| System Management Password | Provides system management access with configurable authority. |
| Hard Disk Password | Restricts access to stored data. |
Setting or Changing a BIOS Password
- Restart the computer.
- Press F1 at the Lenovo logo.
- Open Security > Password.
- Select the password type.
- Follow the instructions to set, change, or remove the password.
Passwords should be recorded and stored securely.
Forgotten Power-On Password
If the supervisor password is known:
- Enter BIOS using the supervisor password.
- Select Security > Password > Power-On Password.
- Enter the current supervisor password.
- Leave the new password field empty.
- Confirm the change.
- Press F10 to save and exit.
If the supervisor password is unavailable, contact Lenovo-authorized service.
Forgotten Supervisor Password
A forgotten supervisor password cannot be removed through a Lenovo service procedure.
The system board must be replaced by a Lenovo-authorized service provider. Charges apply.
Forgotten Hard Disk Password
If the required hard disk password is forgotten, Lenovo cannot reset the password or recover the protected data.
A replacement storage drive may be required. Applicable parts and service charges apply.
Windows Recovery Instructions
Windows 10 includes recovery options for system repair, restoration, and reset.
Attention: Recovery operations may delete data. Important files should be backed up before proceeding.
Restoring System Files and Settings
- Open Control Panel.
- Select Recovery > Open System Restore.
- Follow the on-screen instructions.
Restoring Files from File History
If File History backups were previously created:
- Open Control Panel.
- Select File History > Restore personal files.
- Follow the restoration instructions.
Resetting Windows
- Open Start > Settings > Update & Security > Recovery.
- Under Reset this PC, select Get started.
- Choose the appropriate reset option.
- Follow the on-screen instructions.
Windows Automatic Recovery
After two consecutive failed startup attempts, the Windows recovery environment may open automatically.
The recovery environment provides system repair and recovery options even when Windows cannot start normally.
Creating a Recovery USB Drive
A recovery USB drive can be created for system troubleshooting.
Requirements: A USB drive with at least 16 GB capacity and an AC power connection. The actual storage capacity required depends on the recovery image.
- Connect the computer to AC power.
- Insert the USB drive.
- Search Windows for Create a recovery drive.
- Open the matching result.
- Approve the User Account Control prompt.
- Follow the Recovery Drive instructions.
Warning: Creating the recovery drive deletes existing data on the USB drive.
Recovering Windows from USB
- Connect the computer to AC power.
- Insert the recovery USB drive.
- Restart the computer.
- Press F12 at the Lenovo logo.
- Select the USB recovery drive.
- Choose Troubleshoot.
- Select the required recovery option.
Installing Windows 10 and Device Drivers
Before installing Windows, review Lenovo’s operating system compatibility information.
Installing a new operating system can erase all data on the internal drive, including hidden folders.
Windows Installation
- Back up important files.
- Disable BitLocker when applicable before beginning the documented installation procedure.
- Enter BIOS using F1.
- Open Security > Security Chip.
- Confirm that TPM 2.0 is set to Active.
- For applicable hybrid SSD configurations with Intel Optane memory, confirm the required RST mode under Config > Storage > Controller mode.
- Connect the Windows installation drive.
- Open BIOS and select Startup > Boot.
- Select the installation drive.
- Confirm the required operating system configuration settings.
- Save the BIOS changes.
- Follow the installation instructions.
- Install the necessary device drivers.
- Run Windows Update.
- Install Lenovo Vantage.
Important: On hybrid SSD configurations using Intel Optane memory, Windows must not be installed into the Optane memory.
Installing Device Drivers
Drivers can be updated through:
- Lenovo Vantage.
- Lenovo Support.
Driver updates are useful when supported components perform poorly or after hardware changes.
Customer Replaceable Units
Customer Replaceable Units are components that can be replaced by the customer according to Lenovo’s documented service procedures.
Self-Service CRUs
| Component | Classification |
| AC Power Adapter | Self-Service |
| Power Cord | Self-Service |
| ThinkPad Pen Pro | Self-Service, Yoga models only |
Optional-Service CRUs
| Component | Classification |
| Base Cover Assembly | Optional-Service |
| Keyboard | Optional-Service |
| M.2 SSD Bracket | Optional-Service, selected models |
| M.2 Solid-State Drive | Optional-Service |
Optional-service CRU replacement requires following Lenovo’s detailed procedures and safety requirements. A qualified service technician can also perform these replacements.
Preparing for CRU Replacement
Before replacing a supported internal CRU, Fast Startup and the built-in battery must be disabled.
Disabling Fast Startup
- Open Control Panel.
- Select Power Options.
- Click Choose what the power buttons do.
- Select Change settings that are currently unavailable.
- Clear Turn on fast startup.
- Save the changes.
Disabling the Built-In Battery
- Restart the computer and press F1.
- Select Config > Power.
- Choose Disable Built-in Battery.
- Press Enter.
- Confirm the operation.
The computer turns off automatically.
Wait three to five minutes for cooling before beginning the applicable replacement procedure. Follow the additional component cooling and safety precautions before opening the computer.
Replacing the Base Cover Assembly
For the documented optional-service replacement:
- Complete the required CRU preparation.
- Disconnect AC power and connected cables.
- Close the display and turn the computer over.
- Loosen the base cover screws.
- Release the retaining latches and remove the base cover.
- Position the replacement cover.
- Secure the retaining latches.
- Tighten the screws.
- Reconnect the AC adapter and cables.
Caution: Never remove the base cover while the computer is connected to AC power.
Replacing the M.2 Solid-State Drive
The M.2 SSD may be replaced for a supported upgrade or repair.
Before replacement:
- Back up important data.
- Disable the built-in battery.
- Disconnect power and external cables.
- Avoid touching circuit contacts.
- Protect the drive from impact and static electricity.
- Follow the appropriate short-drive or long-drive replacement procedure.
Short M.2 drives use the documented bracket arrangement, while long M.2 drives are secured directly in the drive position.
Depending on the replacement, Windows may need to be installed again.
For hybrid SSD configurations with Intel Optane memory, use Lenovo’s specific replacement guidance at https://support.lenovo.com/docs/tg_ssd.
Replacing the Keyboard
The keyboard is classified as an optional-service CRU.
The replacement procedure includes:
- Disabling the built-in battery and disconnecting power.
- Removing the TrackPoint buttons using the supplied keyboard replacement tool.
- Loosening the keyboard retaining screws.
- Releasing the keyboard frame and retaining latches.
- Lifting the keyboard carefully.
- Disconnecting the keyboard cables.
- Connecting the replacement keyboard.
- Positioning and securing the new keyboard.
- Tightening the retaining screws.
- Reinstalling the TrackPoint buttons.
- Reconnecting power and external cables.
The replacement requires careful handling of the keyboard retaining mechanism and internal connectors. Use Lenovo’s illustrated replacement instructions for component positioning.
Cleaning and Maintenance
Regular cleaning helps keep the ThinkPad L13 in suitable operating condition.
Cleaning the Computer Cover
- Prepare a lint-free cloth dampened with mild soap and water.
- Gently wipe the computer cover.
- Avoid applying liquid directly to the computer.
Cleaning the Keyboard
- Use a lint-free cloth dampened with mild soap and water.
- Clean the keys individually.
- Avoid dragging the cloth across several keys at once.
- Do not spray cleaning liquid directly onto the keyboard.
Dust or crumbs beneath the keys can be removed using a camera blower with a brush or cool air from a hair dryer.
Cleaning the Screen
- Use a dry, soft, lint-free cloth.
- Wipe the screen gently.
- If a stain remains, lightly moisten the cloth with water or eyeglass cleaner.
- Do not apply liquid directly to the screen.
- Allow the screen to dry before closing the notebook.
Maintenance Guidelines
- Keep ventilation openings free from dust.
- Avoid leaving the computer in direct sunlight.
- Do not place objects between the keyboard and display.
- Avoid forcing the hinges.
- Keep cables away from areas where they may be pinched or pulled.
- Protect the computer from impacts and excessive vibration.
- Use a padded carrying case during transportation.
- Allow only authorized personnel to perform repairs outside the documented CRU procedures.
Storage and Operating Environment
| Condition | Supported Range |
| Maximum Altitude Without Pressurization | 3048 m (10,000 ft) |
| Operating Temperature | 5°C to 35°C (41°F to 95°F) |
| Storage Temperature Without Packaging | 5°C to 43°C (41°F to 109°F) |
| Storage and Transport in Original Packaging | -20°C to 60°C (-4°F to 140°F) |
| Minimum Battery Charging Temperature | 10°C (50°F) |
| Operating Relative Humidity | 8%–95% |
| Storage Relative Humidity | 5%–95% |
Long-Term Battery Storage
For extended storage, Lenovo recommends keeping rechargeable batteries or products containing them at room temperature with approximately 30%–50% battery charge.
Charging the battery about once per year helps prevent excessive discharge.
Troubleshooting Guide
The following table lists problems and actions addressed in the ThinkPad L13 documentation.
| Problem | Possible Cause or Condition | Recommended Action |
| Computer stops responding | System is unresponsive. | Hold the power button to turn it off, then restart. |
| Computer remains unresponsive | Normal shutdown does not work. | Use the documented emergency-reset procedure. |
| Windows fails to start | Startup or operating system problem. | Use Windows recovery options or a recovery USB drive. |
| External monitor is not detected | Display connection is not recognized. | Open Display settings and select Detect. |
| Docking station indicator remains off | Computer may not be securely docked. | Detach and reconnect the computer. |
| Battery does not resume charging above 94% | Normal battery charging control. | Charging resumes when the battery level falls to 94% or lower. |
| Fingerprint reader does not recognize a finger | Finger or reader condition may interfere with recognition. | Avoid wet, dirty, or injured fingers and protect the reader surface. |
| System performs poorly after driver changes | Driver or system changes may be involved. | Check driver updates or use an available Windows restore point. |
| Storage drive reports a detection or read error | Storage drive is not operating correctly. | Follow the documented drive reseating or replacement procedure, or use authorized service. |
| Computer displays a fan error | Cooling fan may not be operating correctly. | Follow the error instructions and arrange service if the condition remains. |
Resetting an Unresponsive Computer
- Press and hold the power button until the computer turns off.
- Restart the computer.
If the computer cannot be turned off normally:
- Disconnect AC power.
- Locate the emergency-reset hole on the underside of the computer.
- Insert a straightened paper clip into the emergency-reset hole to temporarily disconnect power.
- Reconnect AC power.
- Turn on the computer.
Error Codes and Messages
The ThinkPad L13 displays specific error messages for power, security, storage, firmware, and cooling problems.
| Error Code / Message | Meaning | Recommended Action |
| 0190: Critical low-battery error | Computer turned off because battery charge was too low. | Connect AC power and charge the battery. |
| 0191: System Security – Invalid remote change requested | A requested system configuration change failed. | Confirm the operation and try again. |
| 0199: System Security – Security password retry count exceeded | Incorrect supervisor password entered more than three times. | Confirm the correct supervisor password and try again. |
| 0271: Check Date and Time settings | System date or time is not configured. | Enter BIOS and set the date and time. |
| 210x/211x: Detection/Read error on HDDx/SSDx | Storage drive is not working correctly. | Reinstall the drive using the approved procedure; replace it if the issue remains. |
| Non-volatile system UEFI variable storage is nearly full | Firmware variable storage has insufficient available space. | Follow the BIOS cleanup confirmation procedure. |
| Fan error | Thermal fan may not be operating correctly. | Follow the startup warning and contact service if the error continues. |
UEFI Variable Storage Nearly Full
When the firmware variable storage is nearly full, the computer may display a cleanup confirmation.
Press F1 to enter BIOS after the error.
Selecting Yes deletes operating system and application-created variable data, except the global variables protected by the UEFI specification.
Selecting No preserves the data, but applications or the operating system may be unable to create, modify, or delete additional variables.
Fan Error
If the computer reports a fan error, pressing Esc within five seconds allows startup with limited performance.
Otherwise, the computer shuts down.
If the error appears again, the computer must be serviced.
Lenovo SmartBeep Diagnostics
Lenovo SmartBeep can help identify certain errors when a computer produces beep sounds and displays a black screen.
Using SmartBeep
- Visit https://support.lenovo.com/smartbeep.
- Download the appropriate diagnostic application to a smartphone.
- Open the application.
- Place the smartphone near the computer.
- Press Fn on the computer to repeat the beep.
- Review the decoded error information and possible actions in the application.
Do not perform unauthorized repairs. Use Lenovo-authorized service when required.
Warranty Information
The ThinkPad L13 is covered by the applicable Lenovo Limited Warranty terms.
Warranty coverage depends on the computer’s configuration, location, and applicable service agreement.
Warranty Services
Depending on eligibility, Lenovo may provide:
- Hardware problem determination.
- Hardware repair for covered failures.
- Applicable engineering changes.
Services Not Covered
The guide identifies examples of excluded services, including:
- Nonwarranted or non-Lenovo parts.
- Software problem identification.
- BIOS configuration during installation or upgrades.
- Driver modifications and upgrades.
- Network operating system installation or maintenance.
- Application installation and maintenance.
For applicable warranty terms, see the Safety and Warranty Guide or Lenovo Limited Warranty.
Additional Services
Additional Lenovo service options may be purchased during or after warranty coverage.
Visit https://www.lenovo.com/services.
Customer Support Information
Lenovo provides technical assistance, warranty information, product documentation, and diagnostic resources.
Before Contacting Support
Prepare the following information:
- Product name.
- Machine type.
- Serial number.
- Description of the problem.
- Displayed error code or message.
- Operating system and version.
- Programs running when the problem occurred.
- Steps that reproduce the issue, if available.
The machine type and serial number can be found on the identification label on the underside of the computer.
Lenovo Support Resources
| Resource | Link |
| Lenovo Product Support | https://pcsupport.lenovo.com |
| Lenovo Support Phone Directory | https://pcsupport.lenovo.com/supportphonelist |
| Lenovo Accessories | https://www.lenovo.com/accessories |
| Lenovo Additional Services | https://www.lenovo.com/services |
| Lenovo Limited Warranty | https://www.lenovo.com/warranty/llw_02 |
| Lenovo Accessibility | https://www.lenovo.com/accessibility |
| Lenovo Recycling | https://www.lenovo.com/recycling |
| Microsoft Support | https://support.microsoft.com |
Support telephone numbers vary by country and region and may change without notice.
Frequently Asked Questions
1. How do I enter BIOS on the Lenovo ThinkPad L13?
Restart the computer and press F1 when the Lenovo logo appears. The UEFI BIOS menu provides access to startup settings, security options, system configuration, and firmware information.
2. How do I reset a Lenovo ThinkPad L13 that is not responding?
Hold the power button until the computer turns off, then restart it. If normal shutdown does not work, disconnect AC power and use the emergency-reset hole with a straightened paper clip. Reconnect AC power before restarting.
3. Does the ThinkPad L13 support USB-C charging?
Yes. The supported USB-C connectors provide computer charging, USB data transfer, and compatible device charging. The computer also supports Lenovo’s P-to-P 2.0 charging function between compatible computers.
4. How long does the ThinkPad L13 battery take to charge?
A full battery charge normally takes approximately 4–8 hours. When the supplied power adapter supports Rapid Charge, the battery can reach approximately 80% charge in about one hour with the computer turned off.
5. How do I use the ThinkPad Pen Pro on the L13 Yoga?
Remove the pen from its storage slot and use the tip to select items or write on the touchscreen. The right-click button provides right-click functionality, and the eraser button removes compatible digital ink. The pen charges when inserted into its slot while the computer is on or asleep.
6. How do I connect an external monitor to the ThinkPad L13?
Connect a compatible display through HDMI or a supported USB-C display connection. The USB-C output supports resolutions up to 4096 × 2304 at 60 Hz, while HDMI supports up to 3840 × 2160 at 30 Hz.
7. What should I do if my ThinkPad L13 displays an error code?
Identify the displayed code in the Error Codes and Messages section. For example, error 0190 indicates critically low battery charge, while 0271 indicates incorrect date or time settings. Storage, fan, or repeated firmware errors may require additional service.