| Field | Details |
| Document Title | Lenovo V14 Gen 2 and Lenovo V15 Gen 2 User Guide |
| Document Type | User Guide |
| Brand Name | Lenovo |
| Product Name | V14 Gen 2 Laptop |
| Model Number(s) | V14 G2 ITL, V14 G2 ALC, V14 G2 IJL, V14 G2 IJL U1, V14 G2 IJL U2, V14 G2 IJL U3, V15 G2 ITL, V15 G2 ALC, V15 G2 IJL, V15 G2 IJL U1, V15 G2 IJL U2, V15 G2 IJL U3 |
| Machine Type(s) | 82KA, 82NM, 82KC, 82QX, 82KB, 82ME, 82KD, 82QY |
| PDF File Size | 2 MB |
| Number of Pages | 36 |
| Languages | English, French |
Lenovo V14 Gen 2
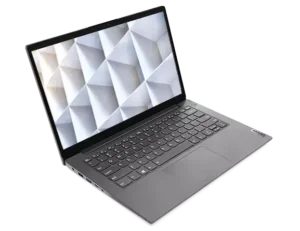
The Lenovo V14 Gen 2 is a 14-inch notebook computer with an integrated display, keyboard, multi-touch touchpad, camera, microphones, and speakers. Depending on the configuration, the computer includes an Intel or AMD platform, DDR4 memory, and a solid-state drive or hard disk drive.
The laptop supports USB 3.0, USB 2.0, HDMI, USB-C data connectivity, and wireless networking. Selected configurations also include an Ethernet port for wired network access. A dedicated power connector supplies electricity through the AC power adapter.
Product Overview
The V14 Gen 2 is designed for everyday computing tasks, including document editing, Internet access, video communication, running applications, and working with external devices.
Its keyboard provides conventional typing controls and function-key shortcuts. The touchpad supports standard mouse operations and multi-touch gestures.
The computer includes a rechargeable battery for portable operation and an AC power adapter for external power and battery charging.
Main Features
- 14-inch integrated display.
- Full HD resolution of 1920 × 1080 pixels on FHD configurations.
- Built-in camera with a camera on/off switch.
- Integrated microphones.
- Built-in speakers.
- Keyboard with function keys and hotkeys.
- Multi-touch touchpad.
- DDR4 onboard and SO-DIMM memory support.
- M.2 PCIe SSD or 2.5-inch SATA HDD storage configurations.
- USB 3.0 connector.
- USB 2.0 connector.
- USB-C connector for data devices.
- HDMI output for external displays.
- 3.5 mm combination audio jack.
- Optional Ethernet connectivity.
- Wi-Fi and Bluetooth.
- Rechargeable battery with 38 Wh or 45 Wh capacity.
- Novo button for firmware and recovery options.
- Lenovo Vantage or Lenovo PC Manager support.
- UEFI/BIOS password protection.
- Windows power management functions.
- Nano security-lock slot.
Supported Models and Machine Types
The V14 Gen 2 family includes different hardware platforms.
| Model | Machine Type |
| Lenovo V14 G2 ITL | 82KA, 82NM |
| Lenovo V14 G2 ALC | 82KC |
| Lenovo V14 G2 IJL | 82QX |
| Lenovo V14 G2 IJL U1 | 82QX |
| Lenovo V14 G2 IJL U2 | 82QX |
| Lenovo V14 G2 IJL U3 | 82QX |
The same user guide also covers the Lenovo V15 Gen 2 family, including ITL, ALC, and IJL configurations.
Technical Specifications
General Specifications
| Specification | Details |
| Brand | Lenovo |
| Product | V14 Gen 2 |
| Product Category | Laptop Computer |
| Display Size | 14 inches (355.60 mm) |
| Full HD Display Resolution | 1920 × 1080 pixels |
| Memory Type | DDR4 |
| Onboard Memory | DDR4 |
| Memory Module | DDR4 SO-DIMM |
| Physical Memory Slots | 1 |
| Storage Options | SSD, HDD |
| SSD Form Factor | M.2 2242 or 2280 |
| SSD Interface | PCI Express |
| HDD Form Factor | 2.5 inches, 7 mm |
| HDD Interface | SATA |
| Keyboard | Integrated with Function Keys and Hotkeys |
| Pointing Device | Multi-Touch Touchpad |
| Camera | Integrated |
| Microphones | Built-In |
| Speakers | Built-In |
| Wireless Networking | Wi-Fi |
| Bluetooth | Supported |
| Ethernet | 10/100/1000 Mbps on Selected Models |
| Audio Connector | Combination Audio Jack |
| Video Output | HDMI |
| USB Connections | USB 3.0, USB 2.0, USB-C |
| Security Slot | Nano Security-Lock Slot |
Dimensions
| Dimension | Measurement |
| Width | 324.2 mm (12.76 inches) |
| Depth | 215.2 mm (8.47 inches) |
| Thickness | 19.9 mm (0.78 inches) |
AC Power Adapter Specifications
The power adapter requirements differ between the ITL, ALC, and IJL configurations.
| Model | AC Input | DC Output | Power |
| V14 G2 ITL | 100–240 V AC, 50–60 Hz | 20 V, 3.25 A | 65 W |
| V14 G2 ALC | 100–240 V AC, 50–60 Hz | 20 V, 3.25 A | 65 W |
| V14 G2 IJL | 100–240 V AC, 50–60 Hz | 20 V, 3.25 A or 20 V, 2.25 A | 65 W or 45 W |
Use the power adapter appropriate for the computer’s hardware configuration.
Battery Specifications
| Specification | Details |
| Battery Type | Built-In Rechargeable Battery |
| Available Capacities | 38 Wh, 45 Wh |
| Battery Cells | 2 or 3 |
| Typical Full Charging Time | 2–4 Hours |
| Recommended Charging Temperature | 10°C–35°C (50°F–95°F) |
| Charging Restart Threshold | 94% or Lower |
The installed battery capacity depends on the computer configuration.
Memory Specifications
The V14 Gen 2 supports DDR4 memory installed on the system board and DDR4 SO-DIMM memory modules.
| Specification | Details |
| Memory Technology | DDR4 |
| Onboard Memory | Supported |
| Memory Module Type | SO-DIMM |
| Physical Memory Slots | 1 |
Storage Specifications
| Storage Type | Form Factor | Interface |
| Solid-State Drive | M.2 2242 or M.2 2280 | PCI Express |
| Hard Disk Drive | 2.5-inch, 7 mm | SATA |
USB-C Specifications
The USB-C connector supports data transfer and compatible external storage devices.
| Specification | Details |
| Connector Type | USB-C |
| USB 3.2 Gen 1 Data Rate | Up to 5 Gbps |
| AC Mode Power Output | Up to 5 V, 3 A |
| Battery Mode Output with 38 Wh Battery | Up to 5 V, 1.5 A |
| Battery Mode Output with 45 Wh Battery | Up to 5 V, 3 A |
| External Display Connection | Not Supported |
Important: The USB-C connector cannot be used to connect external display devices. Use the HDMI connector for external video output.
Networking Specifications
| Connection | Details |
| Wireless LAN | Wi-Fi |
| Bluetooth | Integrated Wi-Fi and Bluetooth Combo Adapter |
| Wired Ethernet | 10/100/1000 Mbps on Selected Configurations |
| Ethernet Connector | RJ-45 on Selected Models |
Parts and Components
Front Components
The front section includes the microphones, camera, camera switch, camera status light, and display.
| Component | Function |
| Microphones | Capture voice and other sounds |
| Camera | Captures photographs and videos |
| Camera Switch | Turns the camera on or off |
| Camera Light | Indicates camera activity |
| Screen | Displays text, graphics, and video |
Integrated Camera
The camera is used for taking photographs, recording video, and video communication.
Camera Switch
The computer includes a camera switch that allows the camera to be turned on or off.
Camera Indicator
When the camera status light is illuminated, the camera is being used.
Microphones
The built-in microphones capture audio for recording and communication applications.
Display
The integrated screen provides the main visual output for the operating system and applications.
Keyboard and Touchpad Components
The keyboard base contains the Power button, keyboard, touchpad, and internal wireless antennas.
| Component | Function |
| Wireless Antennas | Send and receive Wi-Fi and Bluetooth signals |
| Power Button | Turns on the laptop or puts it into sleep mode |
| Keyboard | Provides typing and shortcut controls |
| Touchpad | Controls the pointer and supports multi-touch |
Wireless Antennas
The wireless antennas support communication with Wi-Fi networks and Bluetooth devices.
The antennas are installed inside the computer and are not visible externally.
Power Button
Press the Power button to turn on the laptop.
When the computer is operating, the button can place it into sleep mode.
Touchpad
The touchpad provides functions similar to a conventional mouse.
To control the pointer:
- Place a fingertip on the touchpad.
- Slide the finger to move the pointer.
- Use the supported touch gestures to interact with applications.
Left-Side Ports and Connectors
The left side includes the power connector, charging indicator, USB 3.0 connector, HDMI connector, USB-C connector, and audio jack.
Left-Side Component Guide
| Component | Function |
| Power Connector | Connects the AC power adapter |
| Charging Light | Shows external power and battery charging status |
| USB 3.0 Connector | Connects compatible USB devices |
| HDMI Connector | Connects compatible digital audio or video equipment |
| USB-C Connector | Connects compatible external storage and data devices |
| Combo Audio Jack | Connects compatible headphones or headsets |
Power Connector
Use the AC power adapter and power cord to connect the computer to an electrical outlet.
USB 3.0 Connector
The USB 3.0 connection supports compatible peripherals, including:
- USB keyboards.
- USB mice.
- USB storage devices.
- USB printers.
HDMI Connector
The HDMI port supports compatible digital audio and video equipment, including external monitors and HDTVs.
USB-C Connector
The USB-C connector supports compatible storage and data devices.
An adapter may be required when connecting accessories with different connector types.
This port does not support external display output.
Combination Audio Jack
The 3.5 mm audio jack supports compatible headphones and headsets using a four-pole connector.
Standalone external microphones are not supported through this jack.
Use a compatible single-plug headset when microphone and headphone functionality are required together.
Right-Side Ports and Connectors
| Component | Function |
| Power Light | Displays the computer’s power state |
| Novo Button Hole | Opens the Novo Button Menu |
| Ethernet Connector | Connects to a wired network on selected models |
| USB 2.0 Connector | Connects USB-compatible peripherals |
| Nano Security-Lock Slot | Accepts a compatible security cable |
Ethernet Connector
On supported configurations, the Ethernet port connects the computer to a local area network.
The supported Ethernet connection speed is 10/100/1000 Mbps.
USB 2.0 Connector
The USB 2.0 port supports compatible devices such as keyboards, mice, printers, and USB storage.
Nano Security-Lock Slot
The security slot allows the laptop to be attached to a desk, table, or another suitable fixture using a compatible cable lock.
Bottom Components
Ventilation Slots
The underside contains ventilation openings that allow cooling air to enter the computer.
Important: Do not block the ventilation slots. Restricted airflow may cause overheating.
Speakers
The speakers are located on the underside of the laptop and provide audio output.
Power and Battery Indicator Lights
Charging Indicator
| Indicator Status | Meaning |
| Solid White | AC power connected; battery charge 91%–100% |
| Solid Amber | AC power connected; battery charge 1%–90% |
| Off | AC power disconnected |
Power Indicator
| Indicator Status | Meaning |
| On | Computer is powered on |
| Blinking | Computer is in sleep mode |
| Off | Computer is powered off or hibernating |
Safety Instructions
Electrical Safety
Read the supplied Safety and Warranty Guide and Generic Safety and Compliance Notices before using the computer.
Use the AC power adapter appropriate for the computer model.
Heat and Ventilation Safety
The laptop should operate on a hard, flat surface that allows adequate airflow.
Do not obstruct the ventilation openings.
The underside can become warm during normal operation.
Caution: Avoid prolonged direct contact between the bottom of the computer and bare skin. Contact lasting longer than one minute may cause discomfort or harm.
Liquid Spill Safety
If liquid is spilled on the computer:
- Carefully disconnect the AC power adapter.
- Turn off the computer immediately.
- Allow all liquid to dry before restarting.
Warning: Do not attempt to drain liquid by turning the computer upside down.
Turning off the laptop immediately helps reduce the possibility of electrical short circuits.
Battery Safety
Keep the battery within the recommended temperature range during charging.
The battery temperature must be at least 10°C (50°F) before charging.
Operating Environment
| Condition | Requirement |
| Maximum Altitude Without Pressurization | 3048 m (10,000 ft) |
| Operating Temperature Up to 2438 m | 5°C–35°C (41°F–95°F) |
| Storage Temperature | 5°C–43°C (41°F–109°F) |
| Maximum Operating Temperature Above 2438 m | 31.3°C (88°F) |
| Operating Humidity | 8%–95% |
| Storage Humidity | 5%–95% |
Before First Use
Connecting the Power Adapter
- Place the laptop on a stable, flat surface.
- Locate the dedicated power connector.
- Connect the AC adapter to the computer.
- Connect the power cord to an electrical outlet.
- Check the charging indicator.
- Press the Power button to turn on the laptop.
Checking the Battery
The charging indicator shows whether the computer is connected to external power.
A solid amber light indicates the battery is between 1% and 90% while connected to AC power.
A solid white light indicates a charge of 91%–100%.
Getting Started with Windows
The user guide covers Windows settings for operating and configuring the laptop.
Windows Search provides access to system settings and applications.
Opening Windows Settings
Type the required setting or application name into the Windows search box and select the matching result.
Common Windows Settings
| Function | Search Keyword |
| Control Panel | Control Panel |
| Wireless Network Settings | Wi-Fi |
| Airplane Mode | Airplane mode |
| Night Light | Night light |
| Windows Updates | Windows Updates |
Control Panel
Control Panel provides settings for hardware, software, and system configuration.
Airplane Mode
Airplane Mode can disable wireless communication functions when required.
Search Windows for Airplane mode to access the setting.
Night Light
Night Light changes the screen to warmer colors and reduces blue-light emission.
To enable it:
- Search for Night light in Windows.
- Open the setting.
- Turn Night Light on.
- Adjust the color temperature if required.
Windows Updates
Windows Update provides operating system updates, security updates, and other improvements.
To check for updates:
- Search Windows for Windows Updates.
- Open the matching setting.
- Check for available updates.
- Follow the installation instructions.
Attention: Use Windows Update for Windows operating system updates. Updates obtained from unapproved sources may create security risks.
Connecting to Wi-Fi
The V14 Gen 2 supports wireless networking through its integrated Wi-Fi adapter.
Wi-Fi Connection Instructions
- Open the Windows notification area.
- Select the network icon.
- View the available wireless networks.
- Select the preferred network.
- Connect using the required network credentials.
The available wireless functions depend on the installed network adapter and regional regulations.
Connecting to a Wired Network
Selected V14 Gen 2 configurations include an RJ-45 Ethernet connector.
Ethernet Connection Instructions
- Locate the Ethernet connector on the right side of the computer.
- Connect a compatible Ethernet cable.
- Connect the other end to the appropriate network equipment.
- Configure the connection through Windows.
Connecting External Devices
USB Devices
The laptop includes USB Type-A and USB-C connections for compatible peripherals.
USB devices may include:
- External keyboards.
- Mice.
- Storage drives.
- Printers.
- Other compatible accessories.
USB Data Transfer
The USB-C connector supports USB 3.2 Gen 1 data transfer at up to 5 Gbps.
Actual transfer speeds vary with the connected device, files, and operating conditions.
External Monitors
Use the HDMI connector to connect compatible external video devices.
The USB-C port is intended for compatible data devices and does not support external monitor output.
Keyboard Hotkeys
The V14 Gen 2 includes keyboard shortcuts for common system functions.
Hotkey Functions
| Hotkey | Function |
| Speaker Mute | Mutes or unmutes audio |
| Volume Controls | Increases or decreases system volume |
| Microphone Mute | Mutes or unmutes the microphone |
| Brightness Controls | Adjusts screen brightness |
| Display Selection | Changes the display device |
| Airplane Mode | Enables or disables Airplane Mode |
| Service Key | Opens the assigned service function |
| Microsoft Teams Answer | Answers supported Teams calls |
| Microsoft Teams Reject | Rejects supported Teams calls |
| Calculator | Opens Windows Calculator |
| Lenovo Application Key | Opens Lenovo Vantage, Lenovo PC Manager, or an application launch bar |
| Snipping Tool | Opens the Windows Snipping Tool |
| Media Play/Pause | Plays or pauses media |
| Media Stop | Stops media playback |
| Next Media | Opens the next media item |
| Previous Media | Opens the previous media item |
The Teams call-control hotkeys require a supported version of Microsoft Teams, which must be installed separately.
Hotkey Mode
Hotkey Mode controls how function keys and their special functions operate.
| Hotkey Mode | Hotkey Function | Standard Function Key |
| Enabled | Press the hotkey directly | Hold Fn and press the key |
| Disabled | Hold Fn and press the hotkey | Press the function key directly |
FnLock
FnLock changes the functions of dual-purpose keys.
Press Fn + Esc to turn FnLock on or off.
The FnLock indicator on the Esc key shows the selected state.
Numeric Keypad
The 15-inch V15 Gen 2 models covered by the shared guide include a dedicated numeric keypad.
Press Num Lock to enable or disable it.
Battery Charging and Power Management
The laptop includes a built-in rechargeable battery.
Checking Battery Status
The Windows notification area displays the battery status icon.
Selecting the icon allows users to:
- Check remaining battery percentage.
- View the active power plan.
- Open battery settings.
Windows displays a warning when the battery level becomes low.
Charging the Battery
- Connect the AC power adapter.
- Connect it to an electrical outlet.
- Allow the battery to charge.
- Check the charging indicator or Windows battery status.
A full charge generally takes two to four hours.
Charging time varies depending on:
- Battery capacity.
- Operating environment.
- Whether the computer is being used during charging.
Charging Temperature
The recommended battery charging temperature is 10°C–35°C (50°F–95°F).
Battery Recharge Threshold
After reaching full charge, the battery must discharge to 94% or lower before charging begins again.
This behavior is intended to support battery life.
Recovering Available Battery Capacity
After prolonged periods of limited battery use, the battery may not immediately reach its full available charging capacity.
The guide describes discharging the battery to approximately 20% and then recharging completely to restore its available charging potential.
Changing Power Button Behavior
The Power button normally puts the computer into sleep mode when Windows is running.
Its behavior can be changed through Windows Control Panel.
Configuration Steps
- Search Windows for Control Panel.
- Open Control Panel.
- Change the view to large or small icons.
- Select Power Options.
- Click Choose what the power button does.
- Configure the preferred behavior.
Power Plans
A power plan controls how the computer manages energy consumption.
The default plan described in the guide is Balanced.
Default Power Settings
| Setting | Default Value |
| Power Plan | Balanced |
| Turn Off Display | After 10 Minutes |
| Enter Sleep Mode on Battery | After 15 Minutes |
| Enter Sleep Mode on AC Power | After 30 Minutes |
Changing the Power Plan
- Type power plan into Windows Search.
- Open the matching result.
- Choose the required power plan.
- Adjust the settings.
Waking the Computer
Press the Power button or any key on the keyboard to resume from sleep mode.
Performance Modes
The Lenovo V14 Gen 2 supports different performance modes.
These modes affect the balance between system performance and power consumption.
Switching Performance Modes
Press Fn + Q to cycle through the available performance modes.
Lenovo Vantage and Lenovo PC Manager
Lenovo provides software for managing hardware settings and system maintenance.
Depending on the region and computer configuration, Lenovo Vantage or Lenovo PC Manager may be installed.
Main Functions
| Function | Description |
| Product Information | Displays computer information |
| System Status | Shows available system status information |
| Device Settings | Allows supported hardware settings to be changed |
| System Updates | Checks for applicable updates |
| Driver Updates | Provides driver update functions |
System update functions are available through Lenovo Vantage, while Lenovo PC Manager provides driver update capabilities.
Opening the Application
- Open Windows Search.
- Type Lenovo Vantage or Lenovo PC Manager.
- Select the matching application.
Lenovo Vantage can be obtained from the Microsoft Store.
Novo Button Menu
The Novo Button Menu provides startup, firmware, and recovery options.
Opening the Novo Button Menu
- Shut down the computer.
- Open the LCD screen.
- Locate the recessed Novo button.
- Press the Novo button.
Alternatively, shut down the laptop and press Fn + Power to open the Novo Button Menu.
Novo Button Options
| Option | Function |
| Normal Startup | Starts Windows normally |
| BIOS Setup | Opens UEFI/BIOS settings |
| Boot Menu | Opens startup device selection |
| System Recovery | Opens Windows recovery options |
System Recovery Options
| Option | Function |
| Continue | Exits recovery and continues to Windows |
| Use a Device | Boots from supported USB, network, or recovery media |
| Troubleshoot | Opens reset and advanced recovery tools |
| Turn Off Your PC | Shuts down the computer |
UEFI/BIOS Setup Instructions
UEFI/BIOS initializes the computer hardware and starts the operating system.
The setup utility provides controls for supported firmware and startup settings.
Entering BIOS
- Turn on or restart the computer.
- When the Lenovo logo appears, press F2 repeatedly.
If Hotkey Mode is enabled, press Fn + F2.
Changing the Boot Order
- Open UEFI/BIOS Setup.
- Select the Boot menu.
- Locate Boot Priority Order.
- Follow the instructions to change the startup device order.
Temporary Boot Device Selection
To select a startup device without permanently changing the boot order:
- Turn on the computer.
- When the Lenovo logo appears, repeatedly press F12.
- If required, use Fn + F12.
- Choose the desired boot device.
Changing Hotkey Mode in BIOS
- Enter UEFI/BIOS Setup.
- Select Configuration > Hotkey Mode.
- Press Enter.
- Select Enabled or Disabled.
- Choose Exit > Exit Saving Changes.
Enabling or Disabling Always On USB
On configurations with an Always On USB function:
- Open UEFI/BIOS Setup.
- Select Configuration > Always On USB.
- Press Enter.
- Select Enabled or Disabled.
- Save the changes.
BIOS Password Security
The V14 Gen 2 provides multiple password options through UEFI/BIOS Setup.
Password Types
| Password | Function |
| Administrator Password | Restricts access to BIOS Setup |
| User Password | Provides limited BIOS access |
| Master Hard Disk Password | Protects storage access |
| User Hard Disk Password | Allows storage access using the assigned password |
Setting an Administrator Password
- Enter UEFI/BIOS Setup.
- Select Security > Set Administrator Password.
- Press Enter.
- Enter a password containing letters and numbers.
- Confirm the password.
- Select Exit > Exit Saving Changes.
Important: A forgotten administrator password cannot be reset by Lenovo service personnel. System board replacement may be required, and parts and service charges apply.
Changing an Administrator Password
- Open BIOS Setup using the administrator password.
- Select Security > Set Administrator Password.
- Enter the current password.
- Enter the replacement password.
- Confirm it.
- Save the changes.
Removing an Administrator Password
Follow the administrator password change procedure, but leave the new password fields empty.
Removing the administrator password also removes the user password.
Setting a User Password
The administrator password must be configured first.
- Enter BIOS Setup using the administrator password.
- Select Security > Set User Password.
- Enter a password different from the administrator password.
- Confirm the password.
- Save the changes.
Enabling Power-On Password
- Open BIOS Setup.
- Select Security > Power on Password.
- Press Enter.
- Change the setting to Enabled.
- Save the changes.
When enabled, the computer requires the administrator or user password during startup.
Setting a Hard Disk Password
- Open UEFI/BIOS Setup.
- Select Security > Set Hard Disk Password.
- Press Enter.
- Follow the instructions to configure both master and user passwords.
- Save the changes.
Warning: If a hard disk password is forgotten, Lenovo cannot reset it or recover the protected data. Storage replacement may be required.
Changing or Removing Hard Disk Passwords
- Open BIOS Setup.
- Select Security.
- Choose the applicable password option.
- Change or remove the password.
- Save the changes.
Removing the master hard disk password also removes the user hard disk password.
The user hard disk password cannot be removed separately.
Windows Recovery and System Reset
The Lenovo V14 Gen 2 provides access to Windows recovery functions through the Novo Button Menu and Windows recovery resources.
Opening System Recovery
- Shut down the computer.
- Press the Novo button.
- Select System Recovery.
- Choose the required recovery option.
Recovery Options
- Continue to Windows.
- Boot from a USB drive or supported recovery device.
- Open troubleshooting and reset functions.
- Turn off the computer.
Lenovo Recovery Resources
Lenovo provides recovery instructions through:
https://support.lenovo.com/HowToCreateLenovoRecovery
Windows Recovery Resources
For operating system recovery and diagnostics:
- Open https://pcsupport.lenovo.com.
- Select or detect the computer model.
- Choose Diagnostics > Operating System Diagnostics.
- Follow the instructions.
Troubleshooting Guide
Common Problems and Recommended Solutions
| Problem | Recommended Action |
| Computer stops responding | Hold the Power button until shutdown, then restart |
| Liquid spilled on laptop | Disconnect power and turn off immediately |
| Windows requires recovery | Use the Novo Button Menu and recovery options |
| BIOS setup cannot be opened with F2 | Use Fn + F2 when Hotkey Mode is enabled |
| Startup device needs changing | Use F12 or Fn + F12 during startup |
| Battery does not immediately recharge after full charge | Charging resumes when the level reaches 94% or below |
| Device drivers need updating | Use Lenovo Vantage, Lenovo PC Manager, or Lenovo Support |
| Hardware problems require diagnosis | Use Lenovo’s diagnostics and support resources |
Computer Stops Responding
If the laptop freezes or becomes unresponsive:
- Press and hold the Power button until the computer turns off.
- Press the Power button again to restart.
Liquid Spilled on the Laptop
- Carefully disconnect the power adapter.
- Turn off the computer immediately.
- Allow the liquid to dry completely before attempting to restart.
Warning: Do not turn the computer over to drain liquid.
BIOS Does Not Open with F2
If Hotkey Mode is enabled, use Fn + F2 when the Lenovo logo appears.
The Novo Button Menu also provides an option to open BIOS Setup.
Changing the Startup Device
Press F12 or Fn + F12 repeatedly when the Lenovo logo appears.
Select the required startup device from the displayed menu.
Battery Charging Behavior
After a full charge, the battery may not begin charging again until its capacity falls to 94% or lower.
Check the battery status through Windows or Lenovo Vantage.
Finding Updated Drivers
Driver updates and firmware information are available through:
- Lenovo Vantage.
- Lenovo PC Manager.
- Lenovo Support.
Official support website: https://support.lenovo.com
Maintenance Instructions
Ventilation Maintenance
Keep the bottom ventilation openings clear during operation.
Do not place the operating laptop on surfaces that restrict airflow.
Battery Care
- Charge the battery within the recommended temperature range.
- Use the appropriate AC power adapter.
- Allow the battery level to reach 94% or below before expecting charging to restart after a full charge.
- Review battery settings through Lenovo Vantage or Lenovo PC Manager.
System Software Maintenance
Use Lenovo Vantage or Lenovo PC Manager to review system status and available updates.
Windows Update can provide applicable operating system updates.
Device Driver Maintenance
Drivers and firmware updates are available through Lenovo’s support tools and website.
Use the product model or machine type when locating suitable files.
Accessibility Features
The V14 Gen 2 supports Windows accessibility functions and compatible assistive technology devices.
USB Assistive Devices
Compatible USB accessories can be connected to the computer.
Assistive devices may include refreshable Braille displays used with compatible screen-reading software.
Keyboard Accessibility
The keyboard includes tactile markings on the F and J keys to help users identify finger positions.
Windows Accessibility Settings
Open Start > Settings > Accessibility.
Alternatively, press Windows + U.
Narrator
Narrator reads screen content aloud.
Press Windows + Ctrl + Enter to turn Narrator on or off.
Changing Text Size
- Open Settings > Accessibility > Text size.
- Move the slider to select the preferred size.
- Click Apply.
High-Contrast Themes
- Open Settings > Accessibility > Contrast themes.
- Select a theme.
- Click Apply.
To disable the selected theme, choose None.
Magnifier
| Shortcut | Function |
| Windows + Plus | Enables Magnifier or increases zoom |
| Windows + Minus | Decreases zoom |
| Windows + Esc | Exits Magnifier |
Sticky Keys
Press Shift five times to open the Sticky Keys confirmation.
Sticky Keys allows modifier keys to be pressed separately rather than simultaneously.
Replacement Parts
Lenovo identifies certain accessories as Customer Replaceable Units.
Customer Replaceable Units
| Component | CRU Type |
| Power Cord | Self-Service CRU on Selected Models |
| AC Power Adapter | Self-Service CRU |
Other Components
Replacement of other components, including the built-in rechargeable battery, should be performed by a qualified technician or by carefully following Lenovo’s applicable service instructions.
Authorized Repair Locations
https://support.lenovo.com/partnerlocator
Warranty Information
The Lenovo V14 Gen 2 is subject to the applicable Lenovo Limited Warranty.
Warranty terms and conditions are provided in the Safety and Warranty Guide supplied with the computer.
Warranty Services
Available services may include:
- Hardware problem determination.
- Repair of covered Lenovo hardware.
- Applicable engineering changes.
Services Not Covered
Examples include:
- Replacement or use of nonwarranted parts.
- Identifying software problem sources.
- BIOS configuration during installation or upgrades.
- Driver changes or upgrades.
- Network operating system installation and maintenance.
- Application installation and maintenance.
Customer Replaceable Unit Service
If a covered CRU needs replacement, Lenovo may ship the replacement part to the customer.
If the defective part must be returned, Lenovo may require its return within 30 days of receiving the replacement.
Lenovo Customer Support
Lenovo provides technical support, drivers, product documentation, warranty assistance, and repair services.
Official Support Resources
| Resource | Website |
| Lenovo Support | https://support.lenovo.com |
| Lenovo PC Support | https://pcsupport.lenovo.com |
| Support Telephone Numbers | https://pcsupport.lenovo.com/supportphonelist |
| Repair Locations | https://support.lenovo.com/partnerlocator |
| Warranty Upgrades | https://pcsupport.lenovo.com/warrantyupgrade |
| Lenovo Troubleshooting | https://www.lenovo.com/tips |
| Lenovo Support Community | https://forums.lenovo.com |
| Microsoft Support | https://support.microsoft.com |
Before Contacting Support
Prepare:
- Product name.
- Machine type.
- Serial number.
- Operating system version.
- Exact error messages.
- Description of the problem.
- Applications running when the issue occurred.
- Steps to reproduce the problem.
The product name and serial number can usually be found on a label or marking on the underside of the laptop.
Frequently Asked Questions
1. What are the specifications of the Lenovo V14 Gen 2?
The Lenovo V14 Gen 2 features a 14-inch display, DDR4 memory, SSD or HDD storage options, USB 3.0, USB 2.0, USB-C data connectivity, HDMI, Wi-Fi, Bluetooth, and a 38 Wh or 45 Wh rechargeable battery. FHD configurations have a resolution of 1920 × 1080.
2. How do I enter BIOS on the Lenovo V14 Gen 2?
Restart the laptop and press F2 repeatedly when the Lenovo logo appears. If Hotkey Mode is enabled, use Fn + F2.
3. How do I open the Novo Button Menu?
Turn off the laptop and press the Novo button. Alternatively, press Fn + Power while the computer is turned off. The menu provides Normal Startup, BIOS Setup, Boot Menu, and System Recovery options.
4. How long does the Lenovo V14 Gen 2 take to charge?
A full battery charge typically takes two to four hours. Charging time depends on the installed battery, operating environment, and whether the laptop is being used.
5. How do I change performance modes?
Press Fn + Q to cycle through the available performance modes.
6. Can the Lenovo V14 Gen 2 USB-C port connect to an external monitor?
No. The USB-C connector described in the guide supports data devices but does not support external display output. Use the HDMI port for connecting a compatible external monitor.
7. What should I do if the Lenovo V14 Gen 2 stops responding?
Press and hold the Power button until the computer turns off, then restart it.