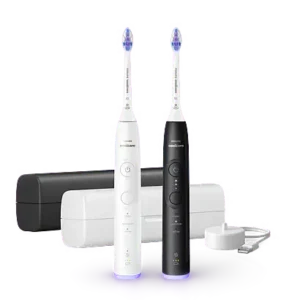
| Field | Details |
| Document Title | Philips Sonicare 6400–7400 User Manual |
| Document Type | User Manual |
| Brand Name | Philips |
| Product Name | Sonicare 6500 Series Power Toothbrush |
| Model Number(s) | 6400–7400 Series |
| PDF File Size | 3 MB |
| Number of Pages | 74 |
| Languages | English, Spanish, French |
Philips Sonicare 6500 Series
The Philips Sonicare 6500 Series is a rechargeable electric toothbrush designed to remove plaque and food debris from teeth while supporting daily gum care and oral hygiene. It uses Sonicare brushing technology, adjustable brushing intensity, smart pressure feedback, and timed brushing programs to guide regular cleaning.
The toothbrush features BrushSync technology, which allows compatible smart brush heads to communicate with the handle. It can select a recommended brushing mode and intensity, track brush head wear, and indicate when a replacement is needed.
The Philips Sonicare 6500 also supports Bluetooth connectivity with the Sonicare app, which records brushing sessions, monitors brushing pressure, and provides personalized brushing recommendations.
The Sonicare 6400–7400 Series user manual covers the product family that includes the 6500 Series. Available brushing modes and supplied accessories may vary by configuration.
These instructions cover initial setup, brushing techniques, mode and intensity settings, pressure sensor feedback, BrushSync functions, app pairing, charging, battery indicators, cleaning, maintenance, storage, and warranty information.
Product Overview and Features
The Philips Sonicare power toothbrush uses sonic brushing movement to remove plaque and clean along the gumline. Sonicare fluid action helps move fluid between teeth and around the gums during brushing.
The toothbrush also includes smart sensors that provide feedback on brushing behavior.
Main Features
| Feature | Description |
| Sonicare brushing technology | Uses powered sonic movement to clean teeth and gums. |
| Multiple brushing modes | Supports up to four modes: Clean, Sensitive, White, and Gum Health. |
| Adjustable brushing intensity | Three settings: Low, Medium, and High. |
| Pressure Sensor Feedback | Alerts users when excessive brushing pressure is applied. |
| BrushPacer | Divides the brushing cycle into six timed sections. |
| SmarTimer | Automatically stops the toothbrush at the end of a brushing program. |
| EasyStart | Gradually increases brushing power during the first 14 sessions when activated. |
| BrushSync technology | Allows compatible smart brush heads to communicate with the handle. |
| Automatic mode pairing | Selects a recommended brushing mode and intensity for compatible smart brush heads. |
| Brush head replacement reminder | Monitors brush head wear and indicates when replacement is needed. |
| Bluetooth connectivity | Connects the toothbrush to the Sonicare mobile app. |
| Sonicare app | Tracks brushing sessions, duration, pressure, and brush head wear. |
| Rechargeable lithium-ion battery | Supports approximately 42 two-minute brushing sessions per full charge. |
| USB charging | Charges the handle using compatible Philips charging equipment. |
| Charging travel case | Provides another charging option on configurations that include it. |
Parts and Components
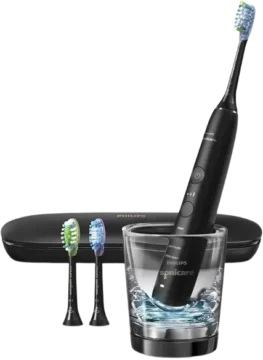
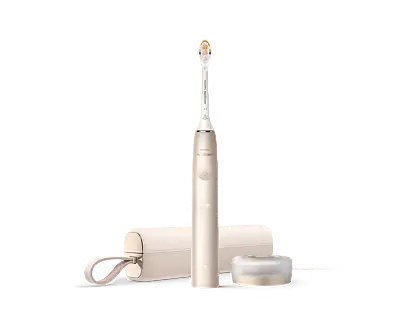
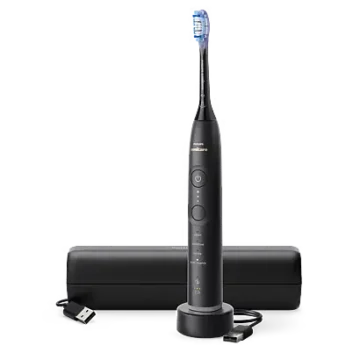
The Philips Sonicare toothbrush includes a rechargeable handle, control buttons, indicator lights, and removable brush head and charging accessories.
Toothbrush Components
| Part No. | Component | Function |
| 1 | Handle | Contains the motor, rechargeable battery, sensors, and electronic controls. |
| 2 | Power On/Off button | Starts, pauses, or switches off the toothbrush. |
| 3 | Intensity indicator | Displays the selected brushing intensity. |
| 4 | Mode/Intensity button | Changes the brushing mode or intensity setting. |
| 5 | Mode indicator | Shows the selected brushing mode. |
| 6 | Brush head replacement reminder | Indicates when a compatible smart brush head needs replacement. |
| 7 | Battery indicator | Displays battery level and charging status. |
| 8 | Light ring | Provides visual feedback, including excessive brushing pressure alerts. |
Brush Head and Charging Accessories
| Part No. | Accessory | Description |
| 9 | Brush head cap | Protective cap provided for the brush head during shipping. |
| 10 | Smart brush head | Removable brush head used for cleaning teeth and gums. |
| 11 | BrushSync symbol | Identifies a smart brush head that supports BrushSync technology. |
| 12 | USB charger | Charges the rechargeable toothbrush handle. |
| 13 | Travel case | Stores the toothbrush during travel. |
| 14 | Charging travel case | Stores and charges the toothbrush during travel. |
| 15 | USB cable | Connects compatible charging equipment to a power source. |
The accessories supplied with the toothbrush depend on the model configuration.
Important: A USB wall adapter is not included. A compatible IPX4 splash-proof adapter may be used according to the specified charging requirements.
Control Buttons and Indicator Lights
The Sonicare 6500 Series uses a Power On/Off button, a Mode/Intensity button, and several indicator lights.
Button Functions
| Button or Indicator | Function |
| Power On/Off | Starts, pauses, or stops the brushing cycle. |
| Mode/Intensity | Selects a brushing mode when the toothbrush is off and changes intensity when it is operating. |
| Mode indicator | Shows the current brushing program. |
| Intensity indicator | Displays Low, Medium, or High intensity. |
| Battery indicator | Shows charging progress and remaining battery level. |
| Brush head replacement reminder | Indicates brush head wear when a compatible smart brush head is attached. |
| Light ring | Flashes purple when excessive pressure is detected. |
How the Mode/Intensity Button Works
The Mode/Intensity button performs two different functions.
When the toothbrush is switched off: Press the button to move between available brushing modes.
When the toothbrush is switched on: Press the button to adjust the brushing intensity.
The intensity can only be changed while the toothbrush is operating.
Technical Specifications
| Specification | Details |
| Brand | Philips |
| Product | Sonicare 6500 Series |
| Manual coverage | Sonicare 6400–7400 Series |
| Product type | Rechargeable electric toothbrush |
| Intended use | Cleaning teeth, gums, and tongue |
| Brushing technology | Sonicare |
| Available brushing modes across product family | Up to 4 |
| Brushing modes described | Clean, Sensitive, White, Gum Health |
| Intensity settings | 3 |
| Pressure Sensor Feedback | Enabled by default |
| BrushPacer | 6 timed sections |
| SmarTimer | Automatic end-of-cycle shutoff |
| EasyStart | Disabled by default |
| EasyStart duration | First 14 brushing sessions |
| BrushSync | Supported |
| Brush head replacement reminder | Supported with compatible smart brush heads |
| Wireless connectivity | Bluetooth |
| Battery type | Built-in rechargeable lithium-ion |
| Battery life | Approximately 42 two-minute brushing sessions |
| Estimated use per charge | 21 days when brushing twice daily |
| Initial charging time | Up to 24 hours |
| Charging travel case charging time | Up to 48 hours |
| Charging and operating temperature | 0°C–40°C / 32°F–104°F |
| Storage and transportation temperature | −10°C–60°C / 14°F–140°F |
| Maximum operating altitude | 4500 meters |
| Recommended brush head replacement | Every 3 months or sooner if worn |
| Warranty | 2 years |
Charging Power Specifications
| Charging Requirement | Specification |
| Philips charging equipment identified | HX6110, HYTCxx |
| Approved adapter rating in battery safety instructions | 4.75–5.25 V DC, 1.5 W |
| USB charging supply output | 5 V DC, 2.5 W |
| USB adapter input specification | 100–240 V AC, 50/60 Hz, 3.5 W |
| North American supply classification | UL-listed or certified 1310 Class 2 |
| Wall adapter | Not included |
Use only charging equipment that meets the applicable Philips specifications and the ratings marked on the appliance.
Important Safety Instructions
The Philips Sonicare 6500 Series contains electrical components and a rechargeable lithium-ion battery. Proper handling is required to reduce the risk of electrical hazards, battery damage, and personal injury.
Electrical Safety
- Read all operating instructions before using the toothbrush.
- Use the toothbrush only for cleaning teeth, gums, and tongue.
- Use only original Philips accessories and consumables.
- Use the original USB cable and power supply unit when supplied.
- Keep the charger and charging travel case away from water.
- Make sure charging accessories are completely dry before connecting them to power.
- Do not use adapters or chargers outdoors or near heated surfaces.
- Do not use the toothbrush if the handle or charging equipment is damaged.
- Stop using a damaged USB cable or power supply unit.
- Do not place any toothbrush component in a dishwasher.
- Do not attempt to open or repair the toothbrush.
Warning: The appliance contains no user-serviceable parts. If the toothbrush is damaged, stop using it and contact Philips Consumer Care.
Battery Safety
- Keep the toothbrush and battery away from fire.
- Do not expose the product to direct sunlight or excessive heat.
- Do not place the toothbrush in a microwave oven or on an induction cooker.
- Do not open, puncture, modify, damage, or disassemble the battery.
- Do not short-circuit the battery.
- Do not overcharge or reverse-charge the battery.
- Stop using and charging the toothbrush if it becomes unusually hot, produces an unusual smell, changes color, or takes longer than normal to charge.
- Contact Philips if an abnormal battery condition occurs.
- Charge and operate the toothbrush only between 0°C and 40°C (32°F and 104°F).
The rechargeable lithium-ion battery is not user-replaceable.
It must be properly recycled or disposed of at the end of the product’s service life.
Oral Health and Medical Precautions
The toothbrush is intended for individual use and should not be shared among multiple users.
Stop using it and consult a dentist or doctor if:
- Excessive bleeding occurs after brushing.
- Bleeding continues after one week of use.
- Brushing causes discomfort or pain.
Users with pacemakers or other implanted medical devices should consult their doctor or the device manufacturer before using the toothbrush.
Brush Head Safety
- Replace the brush head every three months or sooner if signs of wear appear.
- Stop using a brush head with bent or crushed bristles.
- Avoid direct contact between the brush head and products containing essential oils or coconut oil.
- Use genuine Philips Sonicare replacement brush heads.
Essential oils and coconut oil can cause brush head bristles to become dislodged.
Safety for Children
Children and people with reduced physical, sensory, or mental capabilities may use the toothbrush when they have received appropriate supervision or instructions and understand the risks.
Children must not clean or maintain the product without supervision.
Children should also be supervised to prevent them from playing with the toothbrush.
Before First Use
Before using the Sonicare toothbrush for the first time, attach the brush head and charge the handle.
A full initial charge may take up to 24 hours.
The toothbrush can be used before the battery is completely charged.
How to Attach the Brush Head
- Remove the toothbrush handle and brush head from the packaging.
- Align the brush head so its bristles point in the same direction as the front of the handle.
- Position the brush head above the metal shaft.
- Push the brush head firmly downward until it will not move farther.
A small visible gap between the brush head and handle is normal.
Charging Before First Use
- Connect the USB charging cable to a compatible power adapter.
- Plug the adapter into a wall outlet.
- Place the toothbrush handle on the charger.
- Check that the battery indicator and light ring illuminate.
- Listen for two beeps confirming the charging connection.
- Allow the battery to charge.
The battery indicator flashes while charging.
When charging finishes, the indicator turns solid green for approximately 30 seconds before switching off.
Getting Used to Sonicare Brushing
First-time electric toothbrush users may notice stronger vibration than when using a manual toothbrush.
Philips recommends using a lower intensity setting during the first one to two weeks.
The intensity can then be increased after becoming familiar with the brushing sensation.
How to Use the Philips Sonicare 6500 Series
The toothbrush uses powered sonic movements and timed brushing programs to clean the teeth and gumline.
During use, gentle pressure should be applied while moving the brush head slowly across the teeth.
Step-by-Step Brushing Instructions
- Wet the brush head bristles.
- Apply a small amount of toothpaste.
- Position the bristles against the teeth at approximately a 45-degree angle.
- Apply gentle pressure so the bristles reach the gumline or slightly beneath it.
- Keep the center of the brush head in contact with the teeth.
- Press Power On/Off to start brushing.
- Move the brush head slowly using small back-and-forth movements.
- Allow the bristles to reach between the teeth.
- Continue brushing until the BrushPacer signals the next section.
- Move the brush head to the next area of the mouth.
- For the inside surfaces of the front teeth, tilt the handle into a semi-upright position.
- Make several overlapping vertical strokes on each front tooth.
- Continue until the selected brushing cycle finishes.
- Allow the toothbrush to switch off automatically.
The bristles should spread slightly during brushing.
Important: Do not scrub the teeth as forcefully as with a manual toothbrush. The powered brush head performs the cleaning action.
Brushing Additional Areas
After completing the regular brushing program, additional time may be spent cleaning:
- Chewing surfaces.
- Areas where staining occurs.
- The tongue.
The tongue can be brushed with the toothbrush switched on or off.
Using the Toothbrush with Braces
The Philips Sonicare toothbrush can be used with orthodontic braces.
Brush heads may wear out sooner when used on braces.
Using the Toothbrush with Dental Restorations
The toothbrush can also be used with:
- Fillings.
- Crowns.
- Veneers.
Dental restorations must be properly attached and in good condition.
Brushing Modes and Settings
The Sonicare 6400–7400 product family supports up to four brushing modes.
The available modes depend on the specific toothbrush configuration.
Brushing Mode Comparison
| Mode | Main Purpose | Recommended Intensity | Duration |
| Clean | Plaque removal | High | 2 minutes |
| Sensitive | Gentle cleaning for sensitive teeth and gums | Low | 2 minutes |
| White | Plaque removal and surface stain cleaning | High | 2 minutes 40 seconds |
| Gum Health | Plaque removal and gum massage | High | 3 minutes 20 seconds |
Clean Mode
Clean mode is intended for regular plaque removal.
The brushing cycle lasts two minutes.
The BrushPacer divides the cycle into six sections.
Each section receives 20 seconds of brushing time.
Sensitive Mode
Sensitive mode provides a gentler brushing experience for people with sensitive teeth and gums.
It uses a two-minute brushing cycle with Low as the recommended intensity.
Each of the six sections receives 20 seconds.
White Mode
White mode combines plaque removal with additional time for cleaning surface stains.
The complete program lasts two minutes and 40 seconds.
- Brush the first six sections for 20 seconds each.
- Continue with the two additional sections.
- Brush sections seven and eight for 20 seconds each.
Gum Health Mode
Gum Health combines plaque removal with additional gum massage.
The complete program lasts three minutes and 20 seconds.
- Brush the first six sections for 20 seconds each.
- Continue with four additional sections.
- Brush sections seven, eight, nine, and ten for 20 seconds each.
How to Change the Brushing Mode
- Make sure the toothbrush is switched off.
- Press the Mode/Intensity button.
- Continue pressing to move through the available modes.
- Stop when the preferred brushing mode is selected.
- Press Power On/Off to begin brushing.
All brush heads can be used with the available brushing modes.
Compatible BrushSync smart brush heads may automatically select a recommended mode and intensity.
Adjusting Brushing Intensity
The Philips Sonicare toothbrush includes three intensity settings.
| Intensity | Indicator |
| Low | 1 illuminated light |
| Medium | 2 illuminated lights |
| High | 3 illuminated lights |
Philips recommends High intensity for the best cleaning results.
How to Change the Intensity
- Switch on the toothbrush.
- Press the Mode/Intensity button.
- Continue pressing to cycle through Low, Medium, and High.
- Stop when the required intensity is selected.
Important: The intensity can only be adjusted while the toothbrush is switched on.
Choosing an Intensity
The recommended intensity depends on the brushing mode.
Clean, White, and Gum Health use High as the recommended setting.
Sensitive uses Low as the recommended setting.
Users who are new to Sonicare brushing can begin with a lower intensity for the first one to two weeks.
BrushPacer Brushing Timer
BrushPacer is a built-in interval timer designed to divide brushing time evenly across the mouth.
It separates the standard brushing cycle into six sections.
How BrushPacer Works
- Begin brushing the first section of the mouth.
- Continue until the toothbrush briefly pauses its vibration.
- Move the brush head to the next section.
- Continue brushing until the next signal.
- Repeat until all six sections have been cleaned.
During a two-minute brushing program, each section receives approximately 20 seconds.
White and Gum Health modes add additional brushing sections when available.
SmarTimer Function
SmarTimer automatically switches off the toothbrush when the selected brushing cycle is complete.
Dental professionals recommend brushing for at least two minutes twice daily.
How to Pause and Resume Brushing
- Press Power On/Off while brushing.
- The toothbrush pauses.
- Press Power On/Off again within 30 seconds to resume the same cycle.
If the toothbrush remains paused for 30 seconds, SmarTimer resets.
The next brushing session begins with a new timer cycle.
Pressure Sensor Feedback
The Sonicare pressure sensor monitors how much force is applied while brushing.
It provides feedback when excessive pressure is detected.
Pressure Sensor Feedback is enabled by default.
What Happens When Too Much Pressure Is Applied?
If excessive brushing pressure is detected:
- The handle changes its sound.
- The vibration changes.
- The light ring at the bottom of the handle flashes purple.
- The warning continues until the pressure is reduced.
What Does the Purple Light Mean?
A flashing purple light ring indicates that the toothbrush has detected excessive brushing pressure.
Reduce the pressure applied to the teeth and gums.
The warning stops when the brushing pressure is reduced.
How to Turn Pressure Sensor Feedback On or Off
- Place the toothbrush handle on a plugged-in charger or charging travel case.
- Press and hold Power On/Off.
- Continue holding for approximately seven seconds.
- Release the button after hearing one beep, then two beeps, then three beeps.
- Check the confirmation signal.
A green activation confirmation indicates that Pressure Sensor Feedback is enabled.
An amber deactivation confirmation indicates that it is disabled.
BrushSync Technology
BrushSync allows compatible Philips Sonicare smart brush heads to communicate with the toothbrush handle using an integrated microchip.
The BrushSync symbol is located near the bottom of a compatible brush head.
BrushSync Functions
BrushSync supports:
- Automatic brush head mode pairing.
- Brush head replacement reminders.
Automatic Brush Head Mode Pairing
When a compatible smart brush head is attached, the toothbrush can automatically select the recommended brushing mode and intensity.
Most BrushSync smart brush heads pair with Clean mode.
Some brush heads select a different mode when that mode is available.
| Smart Brush Head | Recommended Mode |
| Most Philips Sonicare BrushSync smart brush heads | Clean |
| S2 Sensitive | Sensitive |
| W3 Premium White | White |
| W DiamondClean (North America) | White |
| G3 Premium Gum Care | Gum Health |
Changing the Automatically Selected Settings
If a different mode or intensity is preferred, the setting can be changed manually.
A compatible smart brush head remembers the selected setting for future brushing sessions.
Brush Head Replacement Reminder
BrushSync monitors brush head wear to help determine when replacement is required.
The reminder works only with compatible Philips Sonicare smart brush heads.
How the Reminder Works
- A new BrushSync smart brush head is attached to the handle.
- The toothbrush recognizes the smart brush head.
- The handle begins tracking brushing time and applied pressure.
- The toothbrush uses this information to monitor brush head wear.
- When replacement is needed, the brush head replacement reminder illuminates amber.
What Does the Amber Replacement Light Mean?
An amber brush head replacement reminder means the brush head should be replaced.
Remove the used brush head and install a genuine Philips Sonicare replacement brush head.
The reminder is enabled by default with compatible smart brush heads.
EasyStart Function
EasyStart gradually increases the toothbrush’s brushing power over the first 14 sessions.
It helps new users become familiar with the Sonicare brushing sensation.
EasyStart works with all available brushing modes.
The feature is disabled by default.
How to Activate EasyStart
- Place the toothbrush handle on a powered charger or charging travel case.
- Press and hold Power On/Off.
- Release the button after the first beep, at approximately three seconds.
- Check the confirmation lights and tones.
A green confirmation indicates activation.
An amber confirmation indicates deactivation.
EasyStart and Clinical Testing
When Philips Sonicare toothbrushes are used in clinical studies, the manufacturer specifies:
- High brushing intensity.
- A fully charged handle.
- EasyStart disabled.
Activating and Deactivating Toothbrush Features
Several functions can be enabled or disabled directly from the toothbrush handle.
Feature Control Table
| Feature | Hold Power On/Off For | Release After |
| EasyStart | Up to 3 seconds | 1 beep |
| Brush Head Replacement Reminder | Up to 5 seconds | 1 beep followed by 2 beeps |
| Pressure Sensor Feedback | Up to 7 seconds | 1 beep, then 2 beeps, then 3 beeps |
How to Change a Feature
- Place the toothbrush on a plugged-in charger or charging travel case.
- Press and hold Power On/Off.
- Continue holding until the beep sequence for the required feature is heard.
- Release the button.
- Check the confirmation indicator.
Confirmation Lights and Sounds
| Confirmation Signal | Meaning |
| Left battery LED flashes green twice with three tones rising from low to high | Feature activated |
| Left battery LED flashes amber once with three tones descending from high to low | Feature deactivated |
Important: A compatible BrushSync smart brush head must be attached when activating or deactivating the Brush Head Replacement Reminder.
Connecting the Philips Sonicare 6500 to the App
The Sonicare app connects to the toothbrush through Bluetooth.
It provides information about brushing habits and offers personalized oral care feedback.
Sonicare App Features
The app tracks:
- Daily brushing sessions.
- Time spent during each session.
- Applied brushing pressure.
- Brush head replacement needs.
- Brushing progress over time.
It also provides personalized recommendations and access to available software improvements.
How to Pair the Toothbrush with the Sonicare App
- Download the Sonicare app to a compatible smartphone.
- Turn on Bluetooth on the phone.
- Pick up the toothbrush to activate its indicator lights.
- Open the Sonicare app.
- Follow the on-screen setup instructions.
- Pair the toothbrush with the app.
- Create a Sonicare app account.
- Complete any firmware update if prompted.
- Keep the smartphone near the toothbrush during data transfer.
Manual Synchronization
Philips recommends manually connecting the toothbrush to the Sonicare app approximately every two weeks.
To synchronize:
- Turn on Bluetooth.
- Open the Sonicare app.
- Connect the toothbrush.
- Keep the smartphone close to the toothbrush.
- Allow the brushing information to update.
Automatic Synchronization
Automatic synchronization uses location permission during app setup.
When location permission is enabled, the smartphone can recognize when it is within the toothbrush’s connection range and refresh brushing information.
Bluetooth must also be enabled for data transfer.
The Sonicare Privacy Statement is available during the app setup process.
Charging the Philips Sonicare 6500 Series
The toothbrush can be charged using the USB charger.
Configurations with a charging travel case can also charge the toothbrush while traveling.
A complete initial charge may take up to 24 hours.
Charging through the travel case may take up to 48 hours.
Charging with the USB Charger
- Connect the USB charging cable to a compatible wall adapter.
- Plug the adapter into an electrical outlet.
- Connect the charger to the specified 5 V DC supply.
- Place the toothbrush handle on the charger.
- Check that the battery indicator and light ring illuminate.
- Listen for two beeps confirming the charging connection.
- Leave the toothbrush on the charger until charging finishes.
The handle’s lights illuminate upward from the bottom when charging starts.
The battery indicator flashes while charging.
Charging with the Travel Case
For configurations that include a charging travel case.
- Connect the USB cable to the charging travel case.
- Connect the cable to a compatible 5 V DC power supply.
- Place the toothbrush handle inside the charging travel case.
- Check the charging indicators.
- Leave the case connected until the battery is charged.
The handle emits two short beeps when it is positioned correctly.
The battery indicator flashes while charging.
When charging finishes, the green battery light remains illuminated for 30 seconds before switching off.
Charging through the travel case may take longer than charging with the standard charger.
Battery Life and Charging Status
The Sonicare toothbrush is designed to provide approximately 42 two-minute brushing sessions on a fully charged battery.
When brushing twice daily, this corresponds to approximately 21 days.
Battery Status While Charging
| Battery Status | Indicator Lights | Color |
| Low | 1 flashing LED | Green |
| Partially charged | 2 flashing LEDs | Green |
| Nearly full | 3 flashing LEDs | Green |
| Fully charged | Green light remains on for 30 seconds, then switches off | Green |
Battery Status When Not Charging
| Battery Status | Indicator Lights | Sound |
| Full | 3 solid green LEDs | — |
| Partially full | 2 solid green LEDs | — |
| Medium low | 1 solid green LED | — |
| Low | 1 flashing amber LED | 3 beeps after brushing |
| Empty | 1 flashing amber LED | 2 sets of 5 beeps |
The battery indicator switches off when the toothbrush is not in use to conserve energy.
What Happens When the Battery Is Empty?
When the battery becomes completely empty, the toothbrush switches off.
Place the toothbrush on the charger to recharge it.
Can the Toothbrush Stay on the Charger?
The toothbrush may remain on the charger when not in use to keep the battery charged.
Cleaning Instructions
Regular cleaning removes toothpaste residue and helps maintain the toothbrush handle, brush head connection, and charging accessories.
Important: Do not clean any part of the toothbrush or its accessories in a dishwasher.
Cleaning the Toothbrush Handle
- Remove the brush head from the handle.
- Rinse the metal shaft area using warm water.
- Rinse around the buttons to remove toothpaste residue.
- Gently clean around the rubber seal.
- Wipe the entire handle using a damp cloth.
- Dry the handle with a soft cloth or towel.
Clean the metal shaft area and buttons at least once a week, preferably after each use.
Warning: Do not push against the rubber seal around the metal shaft or buttons with sharp objects.
Do not tap the toothbrush handle against a sink to remove excess water.
Cleaning the Brush Head
- Rinse the brush head and bristles after every use.
- Remove the brush head from the handle at least once per week.
- Rinse the brush head connection using warm water.
- Allow the brush head to dry.
Cleaning the Brush Head Cap
Rinse the brush head cap whenever necessary.
Allow it to air-dry before placing it on a dry brush head.
The cap is supplied for shipping protection and is not intended for continued use.
Cleaning the USB Charger
- Disconnect the charger from the electrical outlet.
- Wipe its surface using a damp cloth.
- Dry it using a soft cloth or towel.
Make sure the charger is completely dry before reconnecting it to power.
Cleaning the Travel Case
- Rinse the travel case using warm water.
- Wipe the interior with a damp cloth.
- Allow the case to air-dry.
Cleaning the Charging Travel Case
- Disconnect the charging travel case from the electrical supply.
- Wipe its surface using a damp cloth.
- Allow it to air-dry before reconnecting it.
Make sure the toothbrush and brush head are dry before storing them in the travel case.
Maintenance Instructions
Regular maintenance includes cleaning the brush head connection, replacing worn brush heads, checking the battery, and keeping charging accessories clean.
Maintenance Schedule
| Maintenance Task | Frequency | Instructions |
| Rinse brush head | After every use | Rinse the bristles thoroughly. |
| Clean handle and buttons | At least weekly, preferably after every use | Remove toothpaste residue with warm water and a damp cloth. |
| Clean brush head connection | At least weekly | Remove brush head and rinse the connection. |
| Check brush head wear | Regularly | Look for bent or crushed bristles. |
| Replace brush head | Every 3 months or sooner if worn | Use a genuine Philips Sonicare replacement brush head. |
| Check BrushSync reminder | When amber indicator appears | Replace the smart brush head. |
| Clean charger | As needed | Unplug, wipe with a damp cloth, and dry. |
| Clean travel case | As needed | Rinse or wipe and allow to dry. |
| Synchronize with Sonicare app | Approximately every 2 weeks for manual synchronization | Connect using Bluetooth. |
Replacing the Brush Head
- Remove the existing brush head from the handle.
- Align the replacement brush head with the metal shaft.
- Push the brush head firmly downward.
- Make sure it is correctly attached.
For compatible BrushSync smart brush heads, the toothbrush recognizes the new brush head and begins tracking its wear.
Finding the Exact Toothbrush Model Number
The exact model number is printed on the bottom of the toothbrush handle.
Philips Sonicare handle model numbers begin with HX.
Use the number printed on the handle when requesting product support or replacement assistance.
Storage Instructions
If the toothbrush will not be used for an extended period:
- Disconnect the charging equipment from the electrical outlet.
- Clean the toothbrush and its accessories.
- Allow the components to dry.
- Store the toothbrush in a cool, dry place.
- Keep it away from direct sunlight.
Storage and Transportation Temperature
The specified storage and transportation temperature range is:
−10°C to +60°C (14°F to 140°F).
The operating and charging temperature range is 0°C to 40°C (32°F to 104°F).
Indicator Lights and Troubleshooting Guide
The Philips Sonicare 6500 communicates operating conditions through indicator lights, beeps, and changes in vibration.
Common Indicator Lights and Solutions
| Problem or Indicator | Meaning | Recommended Action |
| Light ring flashes purple | Excessive brushing pressure detected | Reduce brushing pressure. |
| Handle changes sound and vibration during brushing | Pressure Sensor Feedback is active | Apply less force while brushing. |
| Brush head replacement indicator illuminates amber | Smart brush head needs replacement | Install a genuine Philips Sonicare replacement brush head. |
| Battery indicator flashes amber with 3 beeps | Battery is low | Recharge the toothbrush. |
| Battery indicator flashes amber with two sets of 5 beeps | Battery is empty | Place the handle on the charger. |
| Battery indicator flashes green while charging | Battery is charging | Continue charging. |
| Battery light stays green for 30 seconds and switches off | Charging is complete | The battery is fully charged. |
| Toothbrush automatically stops at the end of brushing | SmarTimer has completed the selected cycle | The brushing session is finished. |
| Toothbrush timer resets after being paused | The pause lasted 30 seconds | Start a new brushing cycle. |
| BrushSync reminder does not operate with a brush head | Reminder requires a compatible smart brush head | Use a Philips Sonicare BrushSync smart brush head. |
| Charging or operation becomes abnormal | Possible product or battery fault | Stop using and charging the product and contact Philips. |
Why Is the Philips Sonicare Flashing Purple?
A flashing purple light ring indicates that too much pressure is being applied during brushing.
The handle also changes its sound and vibration.
Reduce brushing pressure until the warning stops.
Why Is the Battery Indicator Flashing Amber?
The amber battery indicator communicates a low or empty battery.
Three beeps after brushing: The battery is low.
Two sets of five beeps: The battery is empty.
Place the toothbrush on the charger.
Why Does the Toothbrush Stop Automatically?
SmarTimer automatically switches off the toothbrush when the selected brushing program finishes.
The total time depends on the selected mode.
If the Power On/Off button is pressed during brushing, the toothbrush pauses.
A pause lasting 30 seconds resets SmarTimer.
Why Is the Toothbrush Vibration Stronger Than Expected?
New users may notice stronger vibration than with a manual toothbrush.
Use a lower intensity during the first one to two weeks, then move to a higher intensity when comfortable.
Why Is the Brush Head Replacement Light Amber?
An amber replacement reminder indicates that BrushSync has determined that a compatible smart brush head should be replaced.
Remove the used brush head and install a genuine Philips Sonicare replacement.
Why Is Brushing Data Not Updating in the Sonicare App?
Brushing data transfers through Bluetooth.
To synchronize:
- Turn on Bluetooth on the smartphone.
- Pick up the toothbrush to activate its indicator lights.
- Open the Sonicare app.
- Connect the toothbrush.
- Keep the phone close to the toothbrush during data transfer.
Philips recommends manually synchronizing approximately every two weeks.
What Should Be Done If the Toothbrush Becomes Unusually Hot?
If the toothbrush becomes abnormally hot, produces an unusual smell, changes color, or takes longer than normal to charge:
- Stop using the toothbrush.
- Disconnect it from charging equipment.
- Do not attempt to open or repair the handle.
- Contact Philips Consumer Care.
Replacement Brush Heads and Accessories
The Philips Sonicare 6500 Series supports compatible Philips Sonicare replacement brush heads.
BrushSync-compatible smart brush heads have a symbol near the bottom that identifies the technology.
BrushSync Smart Brush Heads
| Brush Head | Recommended Mode |
| Most BrushSync smart brush heads | Clean |
| S2 Sensitive | Sensitive |
| W3 Premium White | White |
| W DiamondClean (North America) | White |
| G3 Premium Gum Care | Gum Health |
The selected mode depends on the available toothbrush modes.
When to Replace the Brush Head
Replace the brush head:
- Every three months.
- Earlier if the bristles become bent or crushed.
- When the amber BrushSync replacement reminder appears.
Use genuine Philips Sonicare replacement brush heads.
Official replacement brush head information:
https://www.philips.com/toothbrush-heads
Battery Disposal and Recycling
The toothbrush contains a rechargeable lithium-ion battery.
Electrical products and rechargeable batteries must be recycled or disposed of according to local regulations.
Do not discard the toothbrush or its battery with ordinary household waste.
Built-In Battery Removal
The built-in rechargeable battery must be removed by a qualified professional when the toothbrush is discarded.
Before removal, the battery must be completely discharged.
Instructions for professional battery removal are available from Philips support.
To find the relevant instructions:
- Visit the Philips support website.
- Enter the HX model number printed on the bottom of the toothbrush handle.
- Open the product support information.
- Locate the Troubleshooting and Repair section.
Important: Battery removal is not a routine user-maintenance procedure.
Battery Recycling Safety
After professional removal, prevent the battery terminals from contacting metal objects.
Do not wrap batteries in aluminum foil.
Cover the terminals with tape or place the batteries in a plastic bag before disposal.
If a battery is damaged or leaking, avoid contact with skin and eyes. If contact occurs, rinse immediately with water and seek medical care.
Recycling Information
| Service | Contact |
| Battery Recycling | https://www.call2recycle.org |
| Battery Recycling Telephone | 1-800-822-8837 |
| Philips Recycling | https://www.recycle.philips.com |
| Philips Product Support | https://www.philips.com/support |
Warranty Information
Two-Year Limited Warranty
Philips provides a two-year warranty beginning on the date of purchase.
The warranty covers defects caused by faulty materials or workmanship.
Philips may repair or replace a qualifying defective product at its expense when acceptable proof of purchase is provided during the warranty period.
Warranty Exclusions
The warranty does not cover:
- In-mouth attachments, including brush heads and nozzles.
- Damage caused by unauthorized replacement parts.
- Damage caused by unauthorized brush heads.
- Damage resulting from misuse or abuse.
- Damage caused by neglect.
- Unauthorized modifications.
- Unauthorized repairs.
- Normal wear and tear, including chips, scratches, abrasions, discoloration, and fading.
Using non-genuine replacement brush heads may damage the toothbrush and limit warranty protection.
Warranty Limitations
The warranty limits the duration of certain implied warranties to the express warranty period where permitted by law.
The warranty also excludes certain special, incidental, and consequential damages where such limitations are permitted.
Consumer rights may vary depending on the applicable state or jurisdiction.
Customer Support Information
Philips provides product assistance, warranty service, and replacement brush head information through its official support channels.
| Support Service | Contact |
| Philips Product Support | https://www.philips.com/support |
| Philips Sonicare Website | https://www.philips.com/Sonicare |
| Philips Sonicare Canada | https://www.philips.ca/sonicare |
| Replacement Brush Heads | https://www.philips.com/toothbrush-heads |
| North America Consumer Care | 1-800-682-7664 |
| Battery Recycling | https://www.call2recycle.org |
| Philips Recycling | https://www.recycle.philips.com |
Manufacturer Information
Philips Oral Healthcare, LLC
22100 Bothell Everett Highway
Bothell, WA 98021
United States
When contacting support, use the exact HX model number printed on the bottom of the toothbrush handle.
Frequently Asked Questions
How do I use the Philips Sonicare 6500 Series toothbrush?
Attach the brush head, wet the bristles, and apply toothpaste. Hold the brush against the teeth at approximately 45 degrees and press Power On/Off. Move the brush gently along the teeth and gumline, following the BrushPacer signals. The toothbrush automatically stops when the selected brushing program finishes.
How do I change the brushing mode on the Philips Sonicare 6500?
Switch off the toothbrush and press the Mode/Intensity button to cycle through the available brushing modes. Stop when the preferred mode is selected, then press Power On/Off to begin brushing.
What does the purple light mean on the Philips Sonicare 6500?
A flashing purple light ring indicates excessive brushing pressure. The toothbrush also changes its sound and vibration. Reduce the pressure applied to the teeth and gums until the warning stops.
How do I change the intensity on the Sonicare 6500?
Switch on the toothbrush and press the Mode/Intensity button. One illuminated light indicates Low, two indicate Medium, and three indicate High. The intensity can only be changed while the toothbrush is operating.
How long does the Philips Sonicare 6500 take to charge?
A full charge may take up to 24 hours using the USB charger. Charging through a compatible charging travel case may take up to 48 hours. The battery indicator flashes green while charging and remains green for 30 seconds after charging is complete before switching off.
How long does the Philips Sonicare 6500 battery last?
A fully charged battery is designed to provide approximately 42 two-minute brushing sessions. When used twice daily for two minutes, this corresponds to approximately 21 days of brushing.
How do I connect the Philips Sonicare 6500 to my phone?
Download the Sonicare app, enable Bluetooth, and pick up the toothbrush to activate its lights. Open the app, follow the pairing instructions, and create an account. Keep the phone close to the toothbrush during synchronization.
How do I activate EasyStart or turn off the pressure sensor?
Place the toothbrush on a powered charger. Hold Power On/Off for approximately three seconds to change EasyStart or seven seconds to change Pressure Sensor Feedback. Release the button after the corresponding beep sequence. Green confirmation indicates activation, while amber confirmation indicates deactivation.