| Field | Details |
| Document Title | Razer Blade 16 Master Guide |
| Document Type | Master Guide |
| Brand Name | Razer |
| Product Name | Blade 16 |
| Model Number(s) | RZ09-0581 |
| PDF File Size | 1 MB |
| Number of Pages | 37 |
| Languages | English |
Razer Blade 16 RZ09-0581
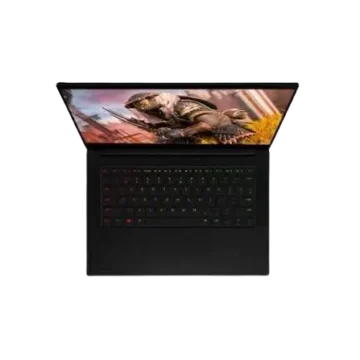
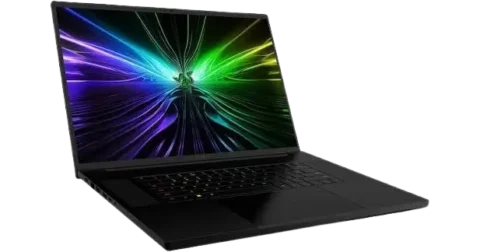
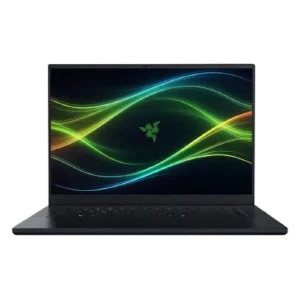
The Razer Blade 16 (model RZ09-0581) is a 16-inch laptop equipped with a QHD+ OLED display, per-key RGB keyboard, precision glass touchpad, and six speakers powered by THX Spatial Audio. It features a Full HD webcam, dual microphone array, Thunderbolt 5 and Thunderbolt 4 connectivity, and an internal rechargeable lithium-ion battery.
The laptop uses Windows 11 and supports advanced configuration through Razer Synapse. The software allows users to change keyboard assignments, performance modes, fan speeds, GPU settings, display refresh rates, audio preferences, battery charging limits, and Razer Chroma lighting effects.
Product Features
The Blade 16 includes the following features and capabilities:
- 16-inch QHD+ OLED display.
- Full HD webcam with infrared sensor/LED and webcam status indicator.
- Dual microphone array.
- Six integrated speakers powered by THX Spatial Audio.
- Per-key RGB keyboard with configurable lighting.
- Precision glass touchpad.
- Thunderbolt 5 and Thunderbolt 4 USB Type-C ports.
- USB 3.2 Gen 2 Type-A ports.
- HDMI 2.1 video output.
- UHS-II SD card reader.
- 3.5 mm headphone/microphone combination port.
- USB Power Delivery 3.0 charging support at 20V, up to 100W, and DisplayPort 2.1 support through the specified USB Type-C ports.
- System performance, fan, display, and battery configuration through Razer Synapse.
- Custom keyboard assignments, Razer Hypershift, Snap Tap, macros, and application profiles.
- Razer Chroma lighting effects and synchronization with supported devices.
What’s Included in the Box
The Razer Blade 16 package contains the laptop and its initial setup accessories.
| Item | Description |
| Razer Blade 16 | Laptop, model RZ09-0581 |
| Power adapter | Supplies external power to the laptop |
| Regional power cord | Connects the power adapter to an appropriate electrical outlet |
| Important Product Information Guide | Contains important information about the product |
Parts and Components
The Razer Blade 16 includes integrated audio, camera, input, connection, and power components.
Display, Camera, and Input Components
| Component | Description |
| 16-inch QHD+ OLED display | Main laptop screen |
| Full HD webcam | Integrated video camera |
| Infrared sensor/LED | Sensor and indicator component near the webcam |
| Webcam on/off indicator | Shows webcam activity status |
| Dual microphone array | Captures audio input |
| Six speakers | Built-in speakers powered by THX Spatial Audio |
| Power button | Turns on the laptop |
| Per-key RGB keyboard | Keyboard with individually configurable lighting |
| Precision glass touchpad | Built-in touch-sensitive pointing surface |
| Power indicator | Displays power and low-battery status |
Connection Ports
| Port or Component | Function |
| Thunderbolt 5 (USB Type-C) | Connection for compatible Thunderbolt and USB Type-C devices |
| Thunderbolt 4 (USB Type-C) | Connection for compatible Thunderbolt and USB Type-C devices |
| USB 3.2 Gen 2 Type-A ports | Connections for compatible USB devices |
| HDMI 2.1 port | Video connection for a compatible external display |
| UHS-II SD card reader | Accepts compatible SD memory cards |
| 3.5 mm headphone/microphone combo port | Connects compatible headphones, microphones, or headsets |
| Power port | Connects the supplied power adapter |
| Lock slot | Connection point for a compatible security lock |
Both listed Thunderbolt USB Type-C ports support 20V USB Power Delivery 3.0 charging up to 100W and DisplayPort 2.1.
Technical Specifications
The following specifications apply to the Razer Blade 16 model RZ09-0581.
| Specification | Details |
| Brand | Razer |
| Model number | RZ09-0581 |
| Product type | Laptop |
| Display size | 16 inches |
| Display | QHD+ OLED |
| Webcam | Full HD |
| Camera sensor | Infrared sensor/LED |
| Microphone | Dual microphone array |
| Speakers | 6, powered by THX Spatial Audio |
| Keyboard | Per-key RGB |
| Pointing device | Precision glass touchpad |
| USB Type-C connectivity | Thunderbolt 5, Thunderbolt 4 |
| USB Type-A connectivity | USB 3.2 Gen 2 |
| Video connection | HDMI 2.1 |
| USB Type-C display support | DisplayPort 2.1 |
| USB charging support | 20V USB PD 3.0, up to 100W |
| Memory card reader | UHS-II SD |
| Audio connection | 3.5 mm headphone/microphone combo |
| Battery type | Internal rechargeable lithium-ion |
| Operating system setup | Windows 11 |
| Configuration software | Razer Synapse |
| Operating temperature | 0°C to 40°C (32°F to 104°F) |
| Full charging time | At least 2 hours |
| Limited manufacturer’s warranty | 1 year, subject to regional terms |
| Limited battery warranty | 2 years |
Safety Instructions
The Razer Blade 16 must be operated within its specified environmental conditions and handled carefully to avoid overheating, electrical damage, battery hazards, and personal injury.
General Safety Precautions
- Do not disassemble the laptop. Disassembly may void its warranty.
- Do not operate the laptop during power fluctuations.
- Keep the device away from liquids, moisture, and humidity.
- Use the laptop only within an operating temperature range of 0°C to 40°C (32°F to 104°F).
- If the operating temperature exceeds this range, switch off and/or unplug the device until its temperature stabilizes.
- Keep the laptop more than 6 inches (15 cm) away from other electronic devices to reduce potential electromagnetic interference.
- Maintain a distance of more than 12 inches (30 cm) from wireless chargers.
- Disconnect the power adapter before transporting the laptop.
- Do not place the laptop inside a bag or enclosed space while its power adapter is connected.
Warning: Transporting the laptop while the power adapter remains connected may cause overheating, electrical damage, or fire, particularly if the device is dropped or compressed.
If operating problems continue after the available troubleshooting steps have been followed, disconnect the device from power and contact Razer Support.
Lithium-Ion Battery Safety
The Blade 16 contains an internal rechargeable lithium-ion battery.
The following safety precautions apply:
- Do not open, damage, or tamper with the battery.
- Do not expose it to metal or other conducting materials.
- Keep the battery away from moisture, liquids, fire, and heat.
- Do not use or charge the battery if it is leaking, discolored, or deformed.
- Do not leave the battery discharged or unused for extended periods.
- Dispose of used batteries according to local regulations.
Warning: Improper handling of the lithium-ion battery may cause leakage or explosion, resulting in personal injury.
Comfort and Ergonomic Safety
Extended periods of repetitive movement, poor positioning, and incorrect posture can contribute to physical discomfort.
Razer provides the following guidance for comfortable laptop operation:
- Position the laptop directly in front of the user.
- Keep an external mouse beside the laptop and within comfortable reach.
- Position the elbows near the body while using the keyboard and mouse.
- Adjust the chair and table so the laptop is at or below elbow height.
- Keep the feet supported, back straight, and shoulders relaxed.
- Maintain a straight wrist position while typing or gaming.
- Avoid repetitive bending, stretching, or twisting of the hands for long periods.
- Avoid resting the wrists on hard surfaces for extended periods.
- Use a wrist rest when operating an external mouse.
- Take regular breaks to stand, move, and stretch the arms, shoulders, neck, and legs.
If pain, numbness, tingling, or other discomfort develops in the hands, wrists, elbows, shoulders, neck, or back, consult a qualified medical doctor immediately.
Before First Use
Before starting the Blade 16 for the first time, prepare the power connection and laptop.
- Remove the laptop and included accessories from the packaging.
- Identify the supplied power adapter and regional power cord.
- Position the laptop in a suitable operating environment away from moisture and excessive heat.
- Check that the power cord is appropriate for the region.
- Connect the power cord to the power adapter.
- Prepare to connect the adapter to the laptop’s dedicated power port.
For first-time use, Razer recommends fully charging the laptop before turning it on or keeping it connected to an electrical outlet during setup.
A complete charge requires at least 2 hours.
Setup and Installation Instructions
How to Connect the Power Adapter
The Blade 16 uses the supplied power adapter and regional power cord for its initial power connection.
- Connect the appropriate regional power cord to the power adapter.
- Insert the AC plug into an electrical outlet.
- Connect the adapter’s laptop connector to the Blade 16 power port.
- Allow the battery to charge before initial use, or keep the adapter connected while setting up the laptop.
How to Turn On the Blade 16
- Connect the power adapter if necessary.
- Locate the Power button on the keyboard area.
- Press the Power button.
- Check the power indicator to identify the laptop’s status.
- Follow the initial Windows setup screens.
How to Complete Windows 11 Setup
After powering on the laptop for the first time:
- Follow the Windows 11 onscreen setup instructions.
- Complete the required initial configuration.
- Connect to a wireless network with an active internet connection when prompted, as recommended by Razer.
- Continue following the onscreen instructions until Windows setup is complete.
After Windows setup, Razer Synapse can be used to configure the laptop’s supported device settings.
Power Indicator Lights
The Blade 16 uses its power indicator to display the current power condition and low-battery status.
| Power Indicator | Meaning |
| White indicator | Sleep |
| Green indicator | Laptop is on |
| Red indicator | Low battery, approximately 10% remaining |
| Red flashing-style indicator | Low battery, approximately 3% remaining |
The 3% battery condition is shown by a different red indicator pattern from the 10% low-battery condition.
Installing Drivers and Razer Synapse
Razer Synapse provides controls for the Blade 16’s supported features, including device settings, keyboard assignments, lighting effects, and firmware-related functions.
How to Install the Required Drivers
- Connect the laptop to the internet.
- Enter Windows 11.
- Allow Razer Synapse to start automatically.
- Create a Razer ID account or sign in with an existing account.
- Alternatively, continue using Razer Synapse as a guest.
- Allow the software to download and install the necessary drivers.
Razer ID and Guest Mode
Signing in with a Razer ID allows supported customized settings to be stored in the cloud and accessed from another computer.
Guest mode allows Razer Synapse to be used without an account, but custom settings cannot be saved to the cloud.
The new Razer Synapse requires internet access for installation, updates, and cloud-based features.
Available options may change according to the software version, connected Razer devices, and installed modules.
Operating Instructions
The Blade 16 provides keyboard shortcuts for Windows controls, audio, screen brightness, system performance, and supported Razer Synapse functions.
Keyboard Features and Shortcuts
| Keyboard Feature | Function |
| Windows key | Opens the Windows Start menu |
| Copilot key | Launches Windows Copilot in supported markets |
| Performance mode shortcut | Switches between system performance modes through Razer Synapse |
| Gaming Mode shortcut | Disables selected Windows shortcuts according to the Razer Synapse configuration |
| Microphone mute shortcut | Mutes or unmutes the microphone |
Windows Copilot features may vary by market.
Secondary Function Keys
The fn key activates secondary keyboard functions when pressed together with the corresponding function keys.
| Secondary Function | Description |
| Audio mute | Mutes or restores audio output |
| Volume down | Reduces audio volume |
| Volume up | Increases audio volume |
| Monitor output | Switches the monitor output |
| Previous track | Returns to the previous media track |
| Play/Pause | Plays or pauses the current media track |
| Next track | Skips to the next media track |
| Screen brightness down | Reduces display brightness |
| Screen brightness up | Increases display brightness |
| Keyboard brightness down | Reduces keyboard LED brightness |
| Keyboard brightness up | Increases keyboard LED brightness |
| M1–M5 | Performs assigned actions configured through Razer Synapse |
| Context menu | Opens a context menu within an application |
The M1–M5 functions require configuration through Razer Synapse.
Configuring the Blade 16 With Razer Synapse
Razer Synapse provides the main software interface for changing the Blade 16’s supported settings.
The application includes separate areas for device customization, performance, display configuration, sound, battery charging, lighting, macros, linked games, and application preferences.
Razer Synapse Navigation Controls
The Synapse tab appears by default when the application starts.
| Control | Function |
| Minimize | Minimizes the application while keeping it running in the background |
| Maximize | Expands the application window |
| Close | Closes the relevant tabs and exits the application |
| Previous Tab | Returns to the previously visited tab |
| Next Tab | Moves forward after returning to a previous tab |
| Refresh Tab | Reloads the current page |
| Download Update | Provides access to an available application update |
| More | Opens access to Devices, Modules, and Other Installed Apps |
| Settings | Opens application settings |
| Profile | Displays account and application options |
| Info | Displays information about a feature or function |
The Profile menu includes options such as Log In, Feedback, Rate This Software, Add WiFi Device, and Exit.
Dashboard
The Dashboard provides an overview of Razer Synapse.
It displays connected Razer devices, installed modules, and available online services.
Gamer Room
The Gamer Room section displays devices supporting the Razer Aether Light feature.
Two sections are available:
- Synapse Override: Allows supported lighting to be configured through Razer Synapse and respond to compatible Chroma-enabled games and Chroma Connect applications.
- Controlled by Gamer Room App: Displays supported devices that are being controlled remotely through the Gamer Room application.
Devices and Modules
The Devices & Modules section displays installed Razer Synapse modules and other modules available for installation.
Global Shortcuts
Global Shortcuts allows supported Razer Synapse operations to be assigned to custom key combinations.
These shortcuts can function across device profiles.
Only input from Razer Synapse-enabled devices is recognized.
Blade 16 Device Configuration
The BLADE 16 tab contains the laptop’s device-specific configuration options.
It provides access to profiles, keyboard assignments, Gaming Mode, touchpad settings, system performance, audio, battery features, and lighting.
Changes made under the device tab are saved automatically to the local system and cloud storage, subject to the applicable sign-in and cloud-feature requirements.
Profiles
Profiles store device settings and allow different configurations to be selected.
By default, a profile is named according to the system name.
The Profiles Dropdown Bar displays the available profiles.
The Miscellaneous menu supports the following actions:
- Add a profile.
- Import a profile.
- Rename a profile.
- Duplicate a profile.
- Export a profile.
- Delete a profile.
System Performance Bar
When the laptop is connected to power, the System Performance Bar displays real-time system information.
It includes:
- CPU usage.
- GPU usage.
- Fan speed.
- Memory usage.
- Storage usage.
The Miscellaneous button provides options for changing or hiding the performance bar.
Keyboard Customization and Key Assignments
The Customize section allows keyboard functions to be changed through Razer Synapse.
It includes key assignments, Hypershift, Gaming Mode, Snap Tap, and primary function key behavior.
How to Remap a Keyboard Key
- Open Razer Synapse.
- Select the BLADE 16 tab.
- Open Customize.
- Select the key that needs a different assignment.
- Open the Remap Menu to view the available assignments.
- Choose the required assignment category.
- Select the preferred function.
The Remap Menu displays the keyboard’s existing assignments.
A particular assignment can also be selected directly from the Customize screen.
Available Key Assignment Categories
| Assignment | Function |
| Default | Restores the key’s original function |
| Keyboard Function | Assigns a keyboard command |
| Mouse Function | Assigns a mouse action |
| Macro | Executes a recorded sequence of commands |
| Inter-device | Controls supported features on another Razer Synapse-enabled device |
| Switch Profile | Changes the active device profile |
| Switch Chroma Effect | Changes the active Chroma Effect Profile |
| Razer Hypershift | Activates the secondary keyboard assignment layer |
| Launch | Opens a selected application or website |
| Multimedia | Assigns media playback and audio controls |
| Windows Shortcuts | Assigns Windows operating system shortcuts |
| Text Function | Inserts predefined text |
| Disable | Deactivates the selected key |
The Macro assignment is available when the Macro module is installed. Switch Chroma Effect requires the Chroma Studio module.
Keyboard Function
Keyboard Function allows a selected key to perform a different keyboard command.
Supported assignments can also use Turbo mode.
When Turbo mode is enabled, the assigned keyboard function is repeatedly activated while the key remains held down.
Mouse Function
Mouse Function allows a keyboard key to perform mouse actions.
Available assignments include:
- Left Click.
- Right Click.
- Scroll Click.
- Double Click.
- Scroll Up.
- Scroll Down.
- Scroll Left.
- Scroll Right.
- Mouse Button 4.
- Mouse Button 5.
- Repeat Scroll Up.
- Repeat Scroll Down.
- Repeat Scroll Left.
- Repeat Scroll Right.
Mouse Button 4 and Mouse Button 5 perform backward and forward commands in most web browsers.
The repeat-scrolling functions continuously perform their assigned actions while the corresponding key is pressed.
Some mouse functions also support Turbo mode.
Multimedia Assignments
The Multimedia category allows keys to perform audio and playback actions.
Available functions include:
| Function | Action |
| Volume Down | Decreases audio output |
| Volume Up | Increases audio output |
| Mute Volume | Mutes audio output |
| Mic Volume Up | Increases microphone volume |
| Mic Volume Down | Decreases microphone volume |
| Mute Mic | Mutes microphone input |
| Mute All | Mutes microphone input and audio output |
| Play/Pause | Plays, pauses, or resumes media |
| Previous Track | Plays the previous media track |
| Next Track | Plays the next media track |
Launch Program
The Launch assignment allows a selected key to open a program or website.
When this assignment is selected, Razer Synapse provides options for choosing an application or entering a website address.
Text Function
Text Function allows a selected key to type stored text.
The function supports Unicode characters and special symbols.
Disable
The Disable assignment makes the selected key inactive.
This can be used when a particular key is not needed or interferes with gameplay.
Razer Hypershift
Razer Hypershift provides a secondary set of keyboard assignments.
When the designated Hypershift key is held down, the secondary assignments become active.
The fn key is assigned as the default Hypershift key.
Another key can also be assigned to activate Hypershift mode.
How to Configure Hypershift
- Open Razer Synapse.
- Select the BLADE 16 tab.
- Open Customize.
- Switch to the Hypershift assignment layer.
- Select the key that needs a secondary function.
- Assign the required action.
To use an assigned Hypershift function, hold the designated Hypershift key while activating the corresponding key.
Gaming Mode
Gaming Mode allows selected Windows shortcuts to be disabled while gaming.
Depending on the configuration, supported keys and shortcuts include:
- Windows key.
- Copilot key.
- Alt + Tab.
- Alt + F4.
How to Configure Gaming Mode
- Open Razer Synapse.
- Select the BLADE 16 tab.
- Open Customize.
- Locate Gaming Mode.
- Choose which supported keys or shortcuts should be disabled when Gaming Mode is active.
Snap Tap
Snap Tap changes the behavior of two selected keys when they are pressed together.
It prevents both preferred keys from being registered simultaneously by giving priority to the most recent key input.
The first key does not need to be released before the second input takes priority.
Snap Tap settings are available in the Customize section of Razer Synapse.
Function Key Primary
Function Key Primary changes whether the keyboard’s F1–F12 keys perform standard functions or multimedia actions by default.
| Setting | Behavior |
| Function Keys | Standard F1–F12 operation; the fn key is required for secondary functions |
| Multimedia Keys | Secondary multimedia actions work with a single key press |
The keyboard uses Function Keys as its default setting.
Touchpad Settings
The Trackpad option in Razer Synapse provides links to the laptop’s advanced pointing settings.
These include:
- Scroll behavior.
- Touchpad delay.
- Touchpad gestures.
- Cursor pointing options.
- Other advanced touchpad controls.
System Performance Settings
The Performance section allows users to change how the laptop manages system performance, power consumption, and cooling.
Adjustments can affect system clock speeds, power usage, and temperatures.
Performance Modes
Performance Modes provides a selection of system configurations for different tasks.
These configurations adjust performance, fan speed, and power consumption.
To select a performance mode:
- Open Razer Synapse.
- Select the BLADE 16 tab.
- Open Performance.
- Locate Performance Modes.
- Select the preferred available configuration.
Fan Control
Fan Control provides three operating options.
| Fan Setting | Description |
| Auto | Adjusts fan speed according to system temperature |
| Fixed | Maintains the selected fan speed in RPM |
| Manual fan curve | Allows fan speed to be customized according to CPU and GPU temperatures |
The Manual fan curve option provides control over fan behavior in relation to the monitored processor temperatures.
Display Settings
The Display section in Razer Synapse provides controls for screen resolution information, refresh rate, GPU mode, external display settings, calibration, and color profiles.
Laptop Display
Laptop Display shows the current screen resolution.
It also provides options for:
- Switching between available refresh rates.
- Automatically switching refresh rates while the laptop operates on battery power.
GPU Mode
GPU Mode allows users to switch between NVIDIA Optimus and Dedicated GPU-only operation.
| GPU Mode | Description |
| NVIDIA Optimus | Graphics operating mode available for balancing performance and battery life |
| Dedicated GPU-only | Uses the dedicated GPU operating mode |
Certain screen refresh rates are available only in Dedicated GPU-only mode.
How to Change the GPU Mode
- Open Razer Synapse.
- Select the BLADE 16 tab.
- Open Display.
- Locate GPU Mode.
- Select NVIDIA Optimus or Dedicated GPU-only.
- Restart the laptop.
Important: The system must be restarted for any GPU mode change to take effect.
External Display
The External Display option opens Windows Display Settings.
This provides access to additional Windows display configuration controls.
Laptop Display Calibration
The Laptop Display Calibration section provides access to a calibration report.
The report indicates whether the display has met the Calman-verified criteria.
Color Profile
Color Profile allows the display’s available color profiles to be selected and managed.
Windows Color Management can also be used to:
- Add color profiles.
- Remove color profiles.
- Manage existing profiles.
- Access advanced color settings.
Sound and Audio Settings
The Sound section in Razer Synapse provides options for changing audio output and supported sound-processing features.
Audio Equalizer
The Audio Equalizer provides presets for different listening activities, including:
- Gaming.
- Watching movies.
- Listening to music.
- Improving vocal clarity.
The equalizer can also be adjusted manually.
When a preset is changed manually, Razer Synapse automatically identifies the configuration as Custom.
Volume
The Volume setting controls the device’s audio output.
Windows Volume Mixer can also be used to adjust the overall system volume or individual application volumes.
Sound Properties
Sound Properties opens the Windows sound configuration window.
It provides access to:
- Playback device settings.
- Recording device settings.
- Sound schemes.
- Default communication settings.
Sound Normalization
Sound Normalization increases the volume of quieter sounds without affecting the louder parts in the same way.
Voice Clarity
Voice Clarity processes incoming dialogue from communication applications to make speech clearer and easier to understand.
Battery Settings and Charging Management
The Battery section in Razer Synapse provides controls for managing the laptop’s charging level.
Battery Charge Limit
The Battery feature allows a maximum charging level to be selected.
Limiting the charge level is intended to help extend battery life.
To configure the charging limit:
- Open Razer Synapse.
- Select the BLADE 16 tab.
- Open Battery.
- Locate the charge limit control.
- Select the preferred available charging level.
One-Time Full Charge
The Battery section also includes an option to fully charge the laptop once.
This option is intended for situations when the laptop will be used away from an external power source for an extended period.
Razer Chroma RGB Lighting Settings
The Lighting section allows the Blade 16’s supported lighting features to be configured.
Available settings include lighting brightness, automatic switch-off behavior, effects, synchronization, and startup animation.
System Lighting
System Lighting provides brightness controls for operation while connected to power and while using the battery.
The available functions include:
- Enabling or disabling lighting.
- Adjusting brightness using the slider.
- Linking brightness settings.
- Changing logo lighting through the available dropdown menu.
The Link option allows a single brightness configuration to be used.
Switch Off Lighting
Switch Off Lighting provides options for automatically turning lighting off under selected conditions.
These conditions include:
- The laptop display turning off.
- The laptop remaining idle for a configured period.
- The battery level falling below a selected percentage.
The Link option can be used to apply a single switch-off configuration.
RGB Lighting Effects
Razer Synapse provides the following lighting effects for the Blade 16.
| Lighting Effect | Description | Configuration |
| Ambient Awareness | Reflects the average color of a selected screen region | Select or customize a screen region |
| Audio Meter | Changes LED lighting according to audio levels | Select a Color Boost level |
| Breathing | Gradually fades selected colors in and out | Select up to two colors or random colors |
| Fire | Produces moving warm-colored lighting resembling flames | No further configuration |
| Reactive | Illuminates a key when pressed and fades afterward | Select a color and duration |
| Ripple | Produces a lighting ripple away from the pressed key | Select a color |
| Spectrum Cycling | Continuously cycles through 16.8 million colors | No further configuration |
| Starlight | Makes individual LEDs fade in and out randomly | Select colors and duration |
| Static | Keeps LEDs illuminated in one color | Select a color |
| Tidal | Moves lighting inward or outward across the device | Select colors and direction |
| Wave | Moves lighting across the device | Select left-to-right or right-to-left |
| Wheel | Rotates the lighting through a color spectrum | Select clockwise or counterclockwise rotation |
How to Change a Lighting Effect
- Open Razer Synapse.
- Select the BLADE 16 tab.
- Open Lighting.
- Locate the Effects section.
- Select the preferred lighting effect.
- Configure its available colors, direction, duration, or other settings.
The selected lighting effect operates according to its configuration.
Chroma Sync
Chroma Sync allows lighting effects to be synchronized with other compatible Razer Chroma-enabled devices.
To use synchronization:
- Open the Lighting section.
- Select the required lighting effect.
- Click Chroma Sync.
- Apply the effect to supported devices.
Only devices that support the selected lighting effect can synchronize with it.
Advanced Effects
Advanced Effects allows users to select a Chroma Effect Profile.
The Launch Chroma Studio button opens Chroma Studio for creating custom lighting profiles.
Startup Animation
Startup Animation controls a ripple lighting effect that runs across the laptop keyboard during startup.
The effect can be enabled or disabled through Razer Synapse.
Macro Recording and Configuration
Razer Synapse supports macros, which are recorded sequences of keyboard actions, button presses, and cursor movements.
Macros can be assigned to supported keys or buttons and executed when required.
My Macros
The My Macros section provides controls for creating, editing, and organizing recorded commands.
Available functions include:
- Creating new macros.
- Searching existing macros.
- Sorting macros.
- Organizing macros into folders.
- Renaming macros.
- Duplicating macros.
- Deleting macros.
The Macro Dropdown Bar displays available macros and provides access to their management options.
How to Record a Macro
- Open Razer Synapse.
- Access the Macro module.
- Open My Macros.
- Select New Macro.
- Configure the recording options if required.
- Click Record.
- Perform the keyboard, mouse, or button actions that should be recorded.
- Click Stop when recording is complete.
A recording can also be stopped using its configured shortcut key.
Macro Recording Options
| Option | Function |
| Start Delay | Sets a delay of 1–5 seconds before recording starts |
| Shortcut Key | Assigns a key for starting macro recording while Synapse is running in the background |
| Delay Settings | Controls the time between recorded commands |
| Mouse Movement Tracking | Enables mouse movement recording and controls how movements are captured |
Editing a Recorded Macro
After recording, the commands appear in sequence, with the first action at the top.
Individual actions can be selected for editing.
The Insert menu provides options for adding:
- Delays.
- Keystrokes.
- Button presses.
- Existing macro groups.
- Application launch actions.
- Commands.
- Text input.
- Command loops.
Assigning a Macro to a Key
The Key Binds section displays shortcut keys associated with the selected macro.
To assign a macro:
- Open the Macro module.
- Select the required recorded macro.
- Open Key Binds.
- Select Assign Macro To Your Devices.
- Choose the supported key or button for the macro assignment.
The macro can then be executed through its assigned key or button.
Linked Games and Application Profiles
The Linked Games section allows applications and games to be associated with Razer device profiles.
When a linked application launches, Razer Synapse automatically activates the selected profile.
Managing Applications
The Linked Games section allows users to:
- View listed applications.
- Search for applications.
- Add applications manually.
- Scan for installed applications.
- View peripherals linked to applications.
- Sort applications alphabetically.
- Sort by last played or most played.
Applications may appear in the list even when they are not linked to a Razer device.
How to Link a Game or Application to a Profile
- Open Linked Games in Razer Synapse.
- Find the required application.
- Use Add or Scan if it is not listed.
- Select the application.
- Choose the Razer device that should be associated with it.
- Select the required device profile.
Razer Synapse will automatically activate the linked profile when the selected application starts.
Razer Synapse Application Settings
The Settings tab provides controls for the Razer Synapse application itself.
Synapse Settings
| Setting | Function |
| Auto Launch | Controls the application’s startup behavior |
| Notifications | Allows onscreen notifications, including while full-screen applications are running |
| Recommendations | Displays relevant products and features on the Dashboard based on installed devices and linked games |
| Tutorials Reset | Reactivates the application’s instructional tutorials |
| Profile Migration | Transfers supported settings from Synapse 3 |
| Device Lighting | Selects which application controls device lighting |
Profile Migration
Profile Migration transfers supported configuration information from Razer Synapse 3 to the new Razer Synapse.
Supported information includes:
- Device profiles.
- Macros.
- Chroma effects.
General Settings
The General section provides additional application preferences.
Language: Changes the display language used by Razer Synapse.
About: Displays the current software version, copyright information, and links to Razer’s terms of use and online communities.
Feedback
The Feedback tab allows users to send comments, suggestions, and information about software problems to Razer.
The application also provides access to Razer’s bug reporting features.
Battery Maintenance Instructions
The Razer Blade 16 uses an internal rechargeable lithium-ion battery.
Battery life depends on usage conditions and charging practices.
Charging a Low Battery
If the battery has a low charge, connect the laptop to an appropriate charging source.
If the battery does not recharge after several attempts, it may no longer be operational.
Do not attempt to open or repair the internal battery.
Battery Charge Management
Razer Synapse provides controls for limiting the maximum battery charge level.
The Battery section also provides an option to complete a one-time full charge when extended use away from a power source is expected.
Battery Care Precautions
- Do not expose the battery to heat, fire, liquid, moisture, or conducting materials.
- Do not attempt to open, modify, or damage the battery.
- Do not use or charge a battery that is leaking, discolored, or deformed.
- Do not leave the battery discharged for an extended period.
- Follow applicable local regulations when disposing of a used battery.
Storage and Transport Instructions
The Blade 16 requires appropriate storage practices, particularly when it will not be used for an extended period.
Long-Term Battery Storage
If the battery will not be used for more than 30 days, Razer instructs users to store it in a fully charged state.
Avoid leaving the rechargeable battery discharged or unused for extended periods.
Transport Precautions
Before transporting the laptop:
- Disconnect the power adapter.
- Keep the laptop away from liquids and moisture.
- Do not place the device in a bag or enclosed space with the power adapter connected.
Warning: Leaving the power adapter connected while transporting the laptop may result in overheating, electrical damage, or fire, particularly if the device is compressed or dropped.
Troubleshooting Guide
The following table summarizes operating conditions and corrective actions supported by the Razer Blade 16 Master Guide.
| Problem or Situation | Possible Explanation | Recommended Action |
| Battery charge is low | Battery is discharged | Connect the laptop to an appropriate charging source |
| Battery does not recharge after several attempts | Battery may no longer be operational | Do not open or tamper with the battery; contact Razer Support |
| Razer Synapse page does not display correctly | The application page may need to reload | Use the Refresh Tab control |
| Custom settings are not saved to the cloud | Razer Synapse is operating in guest mode | Sign in with a Razer ID to access supported cloud storage features |
| GPU mode change has not taken effect | The required system restart has not been completed | Restart the laptop after changing GPU Mode |
| A macro assignment is unavailable | The Macro module may not be installed | Install the required Macro module through Razer Synapse |
| Switch Chroma Effect is unavailable | The Chroma Studio module may not be installed | Install the required Chroma Studio module |
| Lighting does not synchronize with another Razer device | The other device may not support the selected lighting effect | Use a supported effect with compatible Razer Chroma-enabled devices |
| The laptop cannot be operated correctly after troubleshooting | The operating issue remains unresolved | Disconnect the laptop from power and contact Razer Support |
Important: Do not disassemble the laptop, tamper with its battery, or attempt unsupported electrical repairs. If normal operation cannot be restored through the available user controls, disconnect the device and seek assistance from Razer Support.
Warranty Information
The Razer Blade 16 includes limited manufacturer and battery warranty coverage.
| Warranty Type | Coverage Period |
| Limited manufacturer’s warranty | 1 year |
| Limited battery warranty | 2 years |
Warranty coverage may vary by region and is subject to applicable local law.
The warranty is not valid outside the product’s intended region.
If the laptop cannot be operated correctly and the available troubleshooting procedures do not resolve the problem, disconnect the device from power and contact Razer Support.
Frequently Asked Questions
How do I set up the Razer Blade 16 RZ09-0581 for the first time?
Connect the supplied power adapter using the appropriate regional power cord. Fully charge the laptop before first use or leave it connected to an electrical outlet. Press the Power button and follow the Windows 11 setup instructions. Razer recommends connecting to a wireless network with an active internet connection during setup.
How long does the Razer Blade 16 take to charge?
The Razer Blade 16 requires at least 2 hours to charge fully, according to the Master Guide. For first-time use, Razer recommends fully charging the laptop or connecting it to external power before turning it on.
How do I change the Razer Blade 16 keyboard lighting?
Open Razer Synapse, select the BLADE 16 tab, and open Lighting. Adjust the brightness or select an available Chroma lighting effect, such as Static, Breathing, Ripple, Wave, or Spectrum Cycling. Additional customization options depend on the selected effect.
How do I switch between NVIDIA Optimus and Dedicated GPU-only mode?
Open Razer Synapse and select BLADE 16, then Display. Locate GPU Mode and select NVIDIA Optimus or Dedicated GPU-only. Restart the laptop to apply the change. Certain refresh rates are available only in Dedicated GPU-only mode.
How do I create and assign macros on the Razer Blade 16?
Open the Macro module in Razer Synapse and create a new macro. Use the Record control to capture the required keystrokes, button presses, or cursor movements. Stop recording, edit the commands if needed, and assign the macro to a supported key or button through Key Binds.
How do I limit the Razer Blade 16 battery charging level?
Open Razer Synapse, select BLADE 16, and go to Battery. Use the available charging limit control to select the preferred maximum charge level. The Battery section also includes an option to fully charge the laptop once when needed.
What should I do if the Razer Blade 16 battery is not charging?
Connect the laptop to an appropriate charging source and attempt to recharge it. If the battery does not recharge after several attempts, it may no longer be operational. Do not open or tamper with the internal battery. Contact Razer Support for assistance.
What warranty does the Razer Blade 16 RZ09-0581 have?
The Razer Blade 16 includes a 1-year limited manufacturer’s warranty and 2-year limited battery warranty coverage. Warranty terms may vary by region and applicable local law.