| Field | Details |
| Document Title | Jump Starter/Power Pack |
| Document Type | Owner’s Manual |
| Brand Name | Schumacher |
| Product Name | Jump Starter/Power Pack |
| Model Number(s) | SL1643 |
| PDF File Size | 536.55 KB |
| Total Number of Pages | 32 |
| Languages Covered | English, Spanish, French |
Schumacher Jump Starter SL1643
The Schumacher SL1643 is a portable 12V jump starter and power pack designed to assist with starting vehicles that have discharged batteries. It provides 2000 peak amps of jump-starting power and contains a 59.2 Wh lithium-ion polymer battery.
In addition to vehicle jump-starting, the SL1643 includes two USB charging outputs, a 10W Qi-compatible wireless charging pad, and a built-in LED light with steady, SOS, and strobe modes.
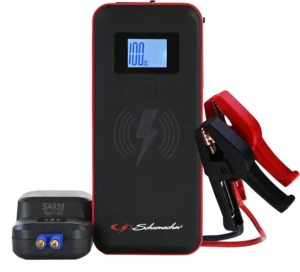
The power pack features an LCD display that shows the internal battery percentage, charging status, and operating information. Its removable smart jumper cable provides connection indicators and protective functions for reversed battery connections, short circuits, and temperature-related conditions.
Product Features
The Schumacher SL1643 combines portable jump-starting equipment with mobile-device charging and emergency lighting functions.
Its main features include:
- 2000A peak jump-starting current.
- 59.2 Wh lithium-ion polymer internal battery.
- 12V vehicle jump-starting capability.
- Smart jumper cable with protective indicators.
- LCD battery percentage and charging display.
- Standard USB output rated at 5V DC, 2.4A.
- USB Fast Charging output with multiple voltage settings.
- 10W Qi wireless charging pad.
- Built-in LED light.
- Steady, SOS, and strobe lighting modes.
- USB input for recharging the internal battery.
- Automatic USB output shutoff after inactivity.
- Smart cable automatic shutoff and reset functions.
- Carrying bag for transportation and storage.
Technical Specifications
| Specification | Details |
| Brand | Schumacher |
| Model Number | SL1643 |
| Product Type | Jump Starter/Power Pack |
| Internal Battery Type | Lithium-ion polymer |
| Battery Capacity | 59.2 Wh |
| Peak Jump-Starting Current | 2000A |
| Vehicle Battery Voltage | 12V |
| USB Charging Input | 2A |
| Standard USB Output | 5V DC, 2.4A |
| USB Fast Charging Output | 5V DC, 3A / 9V DC, 2A / 12V DC, 1.5A |
| Wireless Charging Output | 10W |
| Recommended USB Charger | 2A USB charger (not included) |
| Approximate Full Charging Time | 7–8 hours |
| Minimum Internal Charge for Jump-Starting | 40% |
| Maximum Engine Cranking Duration | 5–8 seconds |
| Minimum Waiting Time Between Attempts | 1 minute |
| Maximum Consecutive Jump-Start Attempts | 3 |
| USB Automatic Shutoff | 30 seconds without a connected device |
| Smart Cable Automatic Shutoff | 90 seconds without activity |
| Charging Temperature | 32°F to 113°F (0°C to 45°C) |
| Discharging Temperature | -4°F to 140°F (-20°C to 60°C) |
| Storage Temperature | 14°F to 113°F (-10°C to 45°C) |
| Warranty | One-year limited warranty |
Parts and Components
The Schumacher SL1643 has an LCD display, charging ports, removable jumper cable, LED light, and wireless charging pad.
Component Identification
| No. | Component | Function |
| 1 | Display Button | Checks battery status and operates the LED light |
| 2 | LCD Display | Shows battery percentage, charging status, and operating information |
| 3 | Jump Start Output Socket | Connects the smart jumper cable assembly |
| 4 | LED Light | Provides steady and flashing illumination |
| 5 | 2A USB Input Port | Recharges the internal battery |
| 6 | 2.4A USB Output Port | Charges compatible USB devices |
| 7 | 3A USB Output Port | Provides USB Fast Charging |
| 8 | Wireless Charging Pad | Charges compatible Qi-enabled devices |
| 9 | Battery Clamps/Smart Cable | Connects the jump starter to a vehicle battery |
| 10 | USB Charging Cable | Connects the jump starter to a USB charging source |
| 11 | Carrying Bag | Stores and transports the unit and accessories |
Package Accessories
The manual’s component list identifies the following accessories:
- Battery clamps with smart jumper cable.
- USB charging cable.
- Carrying bag.
A separate 2A USB charger is required for recharging the internal battery and is not included.
Battery Clamps and Smart Cable
The smart jumper cable is connected to the jump starter’s output socket before the clamps are attached to a vehicle battery.
The cable assembly includes:
- Positive red battery clamp.
- Negative black battery clamp.
- Green Ready LED.
- Red Fault LED.
- Red Clamp Reverse LED.
- Audible warning alarm.
The indicators show connection status and selected protective conditions during jump-starting.
LCD Display and Button Functions
The SL1643 uses a single Display button for checking the internal battery and operating the LED light.
Display Button Functions
| Action | Function |
| Press Display button | Show internal battery percentage |
| Press and hold for 2 seconds | Turn on the LED light |
| Press and release while the light is on | Change the lighting mode |
| Press and hold while the light is on | Turn off the LED light |
LCD Display Indicators
| Display or Indicator | Meaning |
| Battery percentage | Remaining internal battery charge |
| 100% | Internal battery fully charged |
| Flashing percentage with IN | Internal battery charging |
| Flashing thermometer symbol | Jump starter temperature is too high or too low |
| USB port indication | Shows the USB output being used |
The LCD battery percentage is checked before jump-starting to confirm that sufficient internal battery power is available.
Important Safety Instructions
Warning: Risk of explosive gases, electrical shock, fire, and serious injury.
Lead-acid batteries release explosive gases during normal operation. Sparks near a vehicle battery can cause an explosion.
The jump starter must be used according to the manufacturer’s instructions and the vehicle battery manufacturer’s safety precautions.
General Safety Precautions
- Read the operating instructions before using the unit.
- Keep the jump starter away from children.
- Do not insert fingers or hands into the output sockets.
- Do not expose the unit to rain or snow.
- Use only recommended attachments, including the SA939 jump cable.
- Do not use damaged battery cables or clamps.
- Do not operate a unit that has been dropped, struck, or otherwise damaged.
- Do not disassemble or modify the power pack.
- Do not place the unit on carpeting, paper, cardboard, upholstery, or other flammable materials.
- Never position the jump starter directly above the battery being started.
- Never operate the jump starter while its internal battery is charging.
- Keep the clamps from touching each other or the same metal surface.
- Disconnect the power source before cleaning or servicing.
- Have internal repairs performed by qualified service personnel.
- Use identical replacement parts during authorized servicing.
Personal Safety Precautions
When working around a lead-acid battery:
- Wear safety goggles and suitable protective clothing.
- Remove rings, necklaces, watches, bracelets, and other metal jewelry.
- Keep cigarettes, flames, and sparks away from the battery.
- Avoid dropping metal tools onto the battery.
- Have another person nearby who can provide assistance.
- Keep clean water, soap, and baking soda available.
- Avoid touching the eyes while handling batteries or cleaning terminals.
- Keep metal objects away from the battery connections.
A lead-acid battery can produce enough short-circuit current to heat metal jewelry and cause severe burns.
Battery Acid Safety
Vehicle battery acid contains highly corrosive sulfuric acid.
If acid contacts skin or clothing, wash the affected area immediately with soap and water.
If acid enters the eyes, flush them immediately with running water and seek medical assistance.
If battery acid is swallowed, do not induce vomiting and obtain emergency medical care.
Battery acid spills must be neutralized thoroughly with baking soda before cleanup.
Lithium-Ion Battery Safety
The SL1643 contains a lithium-ion battery.
- Do not expose the power pack to fire or temperatures above 265°F (130°C).
- Never charge a frozen battery.
- Do not use a damaged or modified battery pack.
- Avoid contact with liquid released from a damaged battery.
- Do not attempt to open or replace internal battery components.
- Allow qualified personnel to perform repairs.
Battery Fire Precautions
The manual identifies water, foam, Halon, CO₂, ABC dry chemical, powdered graphite, copper powder, and sodium carbonate as extinguishing agents that may be used for a lithium-ion battery fire.
After extinguishing, the product must be cooled to prevent reignition.
Warning: Never attempt to pick up or move a power pack that is hot, smoking, or burning.
Outdoor Use Precautions
Temporary outdoor use is permitted when suitable precautions are followed.
The unit must:
- Be stored indoors.
- Be protected from environmental conditions.
- Not be charged outdoors.
- Be protected from rain, snow, sleet, and other moisture during outdoor operation.
Before First Use
The internal battery must be charged before the jump starter is used.
Initial Preparation
- Remove the jump starter and accessories from the packaging.
- Inspect the unit, jumper cable, clamps, and charging cable for damage.
- Charge the internal battery fully.
- Check the LCD display for a 100% charge.
- Confirm that the vehicle uses a 12V battery system.
- Read the vehicle manufacturer’s battery and jump-starting instructions.
- Identify the positive and negative battery terminals.
- Make sure the battery terminal connections are clean and secure.
Preparing the Vehicle Battery
Before connecting the jump starter:
- Work in a well-ventilated area.
- Clean corrosion from the battery terminals.
- Keep corrosion particles away from the eyes, nose, and mouth.
- Use baking soda and water to neutralize battery acid during terminal cleaning.
- Verify the vehicle battery voltage using the vehicle owner’s manual.
- Confirm that the jumper clamps can make secure connections.
Charging the Schumacher SL1643
The internal battery must be recharged regularly to maintain jump-starting performance.
When to Recharge
Schumacher recommends recharging:
- Immediately after purchase.
- After every use.
- Every 30 days.
- Whenever the battery percentage falls below 85%.
How to Check the Battery Percentage
- Press the Display button.
- Read the battery percentage shown on the LCD.
- If the percentage is below 85%, recharge the jump starter.
A fully charged battery displays 100%.
How to Charge the Internal Battery
A compatible 2A USB charger is recommended for charging the SL1643.
The charger is sold separately.
- Connect the supplied USB charging cable to the jump starter’s USB charging input.
- Connect the other end of the cable to a compatible USB charger.
- Plug the charger into an active AC or DC power source.
- Check the LCD display.
- The display illuminates, the battery percentage begins flashing, and IN appears to indicate charging.
- Allow the battery to charge.
- When fully charged, the display shows 100%.
- Disconnect the charger from the electrical outlet.
- Remove the charging cable from the charger and the jump starter.
Charging Time
| Charging Method | Approximate Charging Time |
| Recommended 2A USB charger | 7–8 hours |
Charging must take place in a well-ventilated area.
Do not block the unit’s ventilation during charging.
Important: The jump starter must not be used to start a vehicle while the internal battery is charging.
Connecting the SL1643 to a Vehicle Battery
Correct clamp connections are necessary for safe jump-starting.
Connection Precautions
Before attaching the clamps:
- Verify that the vehicle has a 12V battery system.
- Check the battery terminal markings.
- Identify the grounded battery terminal.
- Keep the DC cables away from engine fans, belts, pulleys, and hot components.
- Plug the smart jumper cable into the output socket on the jump starter.
- Follow the appropriate battery connection sequence.
Battery Terminal Identification
| Terminal | Markings | Clamp |
| Positive | POS, P, + | Red |
| Negative | NEG, N, – | Black |
The positive terminal usually has a larger diameter than the negative terminal.
Connecting to a Negative-Ground Vehicle
Most vehicles use a negative-ground electrical system.
- Connect the red positive (+) clamp to the positive battery terminal.
- Connect the black negative (-) clamp to a heavy-gauge metal section of the vehicle chassis or engine block, away from the battery.
- Check that both clamps are securely connected.
Do not connect the chassis clamp to fuel lines, the carburetor, or thin sheet-metal body components.
Connecting to a Positive-Ground Vehicle
For a positive-ground electrical system:
- Connect the black negative (-) clamp to the negative battery terminal.
- Connect the red positive (+) clamp to a heavy-gauge metal part of the vehicle chassis or engine block, away from the battery.
- Verify that the clamps are secure.
Do not use fuel lines, carburetor components, or thin sheet-metal body panels as grounding points.
Cable Positioning
Battery cables must remain clear of:
- Cooling fans.
- Engine belts.
- Pulleys.
- Moving engine components.
- Hot surfaces.
- Vehicle hood and door edges.
If the vehicle hood must be closed, it must not touch the metal battery clamps or cut the cable insulation.
How to Jump Start a Vehicle with the SL1643
The Schumacher SL1643 must have at least 40% internal battery charge before jump-starting.
Important: A vehicle battery must remain installed during jump-starting. Using the jump starter without a vehicle battery can damage the vehicle’s electrical system.
Step-by-Step Jump-Starting Instructions
- Check the battery percentage. Press the Display button and confirm that the SL1643 has at least 40% charge.
- Turn off the vehicle’s electrical accessories. Switch off the lights and other electrical equipment.
- Connect the smart jumper cable. Insert the SA939 smart jumper cable into the jump starter’s output socket.
- Position the cables safely. Keep the cables away from fans, belts, pulleys, and other moving engine parts.
- Connect the battery clamps. Follow the negative-ground or positive-ground procedure for the vehicle.
- Check the smart cable indicator. The green Ready LED should illuminate when the connection is correct.
- Start the engine. Attempt to crank the vehicle.
- Observe the cranking limit. If the engine does not start within 5–8 seconds, stop cranking.
- Wait before trying again. Allow at least one minute before another attempt.
- Check for warnings if starting fails. If the second attempt is unsuccessful, inspect the smart cable indicators and listen for warning beeps.
- Disconnect after the engine starts. Unplug the smart jumper cable from the jump starter output socket.
- Remove the clamps. For a negative-ground vehicle, remove the black negative clamp first, followed by the red positive clamp.
- Recharge the jump starter. Recharge the internal battery as soon as possible after use.
Jump-Starting Limits
| Operation | Limit |
| Minimum Internal Battery Charge | 40% |
| Maximum Cranking Time | 5–8 seconds |
| Minimum Wait Between Attempts | 1 minute |
| Maximum Consecutive Attempts | 3 |
Warning: Do not attempt to jump start a vehicle more than three consecutive times. If the vehicle does not start after three attempts, consult a qualified service technician.
Smart Cable Short-Circuit Protection
If the vehicle battery is extremely discharged, the initial current draw may activate the smart cable’s short-circuit protection.
When the underlying condition is corrected, the smart cable resets automatically.
Jump Starting in Cold Weather
Low temperatures can affect the jump starter’s lithium-ion battery performance.
If the starter produces only a clicking sound and the engine does not turn over, the manual provides a battery-warming procedure.
Cold-Weather Jump-Starting Procedure
- Connect the jump starter correctly to the vehicle battery.
- Confirm that the green Ready LED is illuminated.
- Turn on the vehicle’s lights and electrical accessories for one minute.
- Allow the electrical load to draw current from the jump starter and warm the internal battery.
- Attempt to start the engine.
- If the engine does not turn over, repeat the battery-warming procedure as necessary.
Extremely cold conditions may require two or three warming cycles before the engine starts.
The maximum limit of three consecutive jump-starting attempts still applies.
Automatic Smart Cable Shutoff
The smart jumper cable automatically shuts off after approximately 90 seconds without activity.
When this occurs:
- The red LED remains solid.
- The green LED remains solid.
To reset the smart cable:
- Disconnect the battery clamps from the vehicle battery.
- Reconnect the clamps following the correct connection sequence.
Using the USB Charging Ports
The Schumacher SL1643 has two USB output ports for charging compatible mobile devices.
USB Output Specifications
| USB Output | Voltage | Current |
| Standard USB | 5V DC | 2.4A |
| Fast Charging USB | 5V | 3A |
| Fast Charging USB | 9V | 2A |
| Fast Charging USB | 12V | 1.5A |
The Fast Charging port requires a suitable charging cable, which is not included.
Charging a Mobile Device
- Check the mobile device manufacturer’s charging requirements.
- Select the appropriate USB output port.
- Connect the mobile device’s charging cable to the jump starter.
- Connect the other end of the cable to the mobile device.
- Charging should begin automatically.
- Check the LCD display for the port-use indication.
- When charging is complete, disconnect the cable from the mobile device.
- Disconnect the cable from the jump starter.
- Recharge the SL1643 after use.
Charging time depends on the connected device’s battery capacity and the USB output used.
Some compatible devices may charge at a slower rate.
USB Automatic Shutoff
If no USB device is connected, power to the USB outputs automatically shuts off after approximately 30 seconds.
Using the 10W Qi Wireless Charging Pad
The SL1643 includes a wireless charging pad designed for compatible Qi-enabled mobile devices.
Wireless Charging Specifications
| Feature | Details |
| Wireless Charging Standard | Qi-compatible |
| Maximum Wireless Charging Power | 10W |
| Device Position | Face-up on charging pad |
| Charging Activation | Automatic with a compatible device |
Wireless Charging Instructions
- Verify that the mobile device supports Qi wireless charging.
- Position the mobile device face-up on the wireless charging pad.
- Charging should begin automatically.
- Leave the device on the pad while charging.
- Remove the device when charging is complete.
- Recharge the SL1643 after use.
Using the Built-In LED Light
The SL1643 includes a built-in LED light that can provide continuous or flashing illumination.
Available LED Light Modes
| Mode | Function |
| Steady Glow | Continuous illumination |
| SOS | Flashing emergency SOS signal |
| Strobe | Repeated flashing light |
Turning On the LED Light
- Press and hold the Display button for approximately 2 seconds.
- Release the button when the LED light switches on.
Changing the Light Mode
While the LED light is on, press and release the Display button to move through the available lighting modes.
Turning Off the LED Light
Press and hold the Display button until the LED light switches off.
Recharge the jump starter after using the LED light.
Maintenance and Cleaning Instructions
The SL1643 requires routine external cleaning and battery maintenance.
Cleaning After Use
- Disconnect the jump starter from the vehicle and external power.
- Unplug the USB charging cable before maintenance.
- Use a dry cloth to wipe the battery clamps.
- Remove battery corrosion, dirt, and oil from the clamps.
- Wipe the cables and external housing with a dry cloth.
- Store the jumper cable and accessories appropriately.
Maintenance Precautions
- Do not open the jump starter housing.
- Do not attempt internal repairs.
- Disconnect charging equipment before cleaning.
- Avoid damaging the battery clamps and cables.
- Do not use damaged or modified equipment.
- Have servicing performed by qualified personnel.
The unit contains no user-serviceable internal parts.
Storage Instructions
The SL1643 must be stored with its internal battery fully charged.
Recommended Storage Conditions
| Requirement | Instruction |
| Storage Temperature | 14°F to 113°F (-10°C to 45°C) |
| Battery Condition | Fully charged before storage |
| Recharge After Use | Required |
| Recharge During Infrequent Use | At least once every month |
| Complete Battery Discharge | Must be avoided |
Long-Term Storage Procedure
- Charge the internal battery to 100%.
- Disconnect all charging cables and external devices.
- Place the unit and accessories in a protected indoor location.
- Keep the temperature within the specified storage range.
- Do not allow the battery to discharge completely.
- Recharge at least once every month.
- Recharge whenever the battery percentage drops below 85%.
Troubleshooting Guide
The following troubleshooting procedures address common operating problems, charging issues, and smart cable warning conditions.
Schumacher SL1643 Troubleshooting Table
| Problem | Possible Cause or Condition | Recommended Solution |
| LCD display does not turn on | Internal battery may be discharged | Charge the unit and connect it to a power source to reset |
| Thermometer symbol is flashing | Jump starter is too hot or too cold | Allow the temperature condition to clear |
| Jump starter will not recharge | Charging power source is inactive | Check that the power source is live |
| Jump starter turns on but will not start vehicle | Clamp or cable connection problem | Check all connections |
| Jump starter turns on but will not start vehicle | Internal charge below required level | Recharge to at least 40% |
| Vehicle does not start after three attempts | Vehicle or battery may require service | Stop attempting and consult a qualified technician |
| Smart cable green LED blinks with correct battery connections, red LED off, and no beep | Apparent high battery voltage detected without reverse-charge protection activating | The manual permits a starting attempt under this specific indication |
| Smart cable red LEDs illuminate with rapid beeping | Reverse-polarity protection | Correct the clamp connections |
| Red Fault LED illuminates with rapid beeping | Short-circuit protection | Correct the short-circuit condition |
| Red Fault and green Ready LEDs illuminate with one beep per second | Temperature protection | Allow the temperature condition to clear |
LCD Display Will Not Turn On
- Check the internal battery charge.
- Connect the jump starter to a compatible power source.
- Allow the unit to charge.
- Check whether the LCD display activates.
Flashing Thermometer Symbol
A flashing thermometer symbol indicates that the jump starter is operating outside its acceptable temperature condition.
Allow the unit to return to an appropriate operating temperature.
The thermometer symbol disappears when the condition is corrected.
Jump Starter Will Not Recharge
Check that the charging source is active and supplying power.
Use the recommended USB charging setup and verify that the charging cable is connected.
Jump Starter Will Not Start the Vehicle
- Check the clamp connections.
- Confirm the jumper cable is connected securely to the output socket.
- Check the LCD battery percentage.
- Make sure the internal battery has at least 40% charge.
- Inspect the smart cable indicator lights.
- Correct any indicated connection or protection issue.
If the vehicle does not start after three consecutive attempts, stop using the jump starter and consult a qualified service technician.
Smart Cable LED Indicators and Alarm Sounds
The smart jumper cable uses green and red LEDs with audible alarms to identify its operating condition.
Smart Cable LED and Buzzer Table
| Indicator and Alarm Behavior | Meaning |
| Green Ready LED blinking, red Fault and Clamp Reverse LEDs off, no beep | Smart cable connected to jump starter only |
| Green Ready LED solid, red LEDs off, no beep | Correct connection to jump starter and vehicle battery |
| Red Fault and Clamp Reverse LEDs solid, green Ready LED off, rapid beeping | Reverse-polarity protection |
| No LEDs illuminated and no beep | Battery exhausted or poor connection |
| Red Fault LED solid, green Ready and red Clamp Reverse LEDs off, rapid beeping | Short-circuit protection |
| Red Fault and green Ready LEDs solid, red Clamp Reverse LED off, one beep per second | Temperature protection |
The smart cable automatically resets when the fault condition is corrected.
Reverse-Polarity Warning
If the red Fault and Clamp Reverse indicators remain illuminated with rapid beeping:
- Check the battery clamp positions.
- Disconnect the clamps.
- Identify the correct positive and negative connection points.
- Reconnect according to the vehicle’s grounding system.
Short-Circuit Warning
A solid red Fault LED with rapid beeping indicates short-circuit protection.
Check for an incorrect or shorted connection and correct the condition before continuing.
Temperature Protection Warning
When the red Fault and green Ready LEDs remain solid and the buzzer sounds once per second, temperature protection is active.
The unit should be allowed to return to a suitable operating temperature.
Green Ready LED Flashing with Correct Connections
The troubleshooting instructions identify a condition in which:
- The jumper cable is connected correctly to both the vehicle battery and jump starter.
- The green Ready LED flashes.
- The red Fault LED remains off.
- No beep is heard.
This can occur when an apparent high battery voltage is detected without activating reverse-charge protection.
The manual permits the vehicle to be started under this specific condition after the connections have been verified.
Replacement Parts and Accessories
The manufacturer identifies the following replacement components for the SL1643.
| Replacement Part | Part Number |
| Battery Clamps/Smart Cable | 94500939Z |
| USB Charging Cable | 3899004188Z |
The recommended smart jumper cable model is SA939.
Replacement parts can be obtained through Schumacher.
Only suitable replacement parts should be used, and internal servicing must be performed by qualified personnel.
FCC Compliance Information
The Schumacher SL1643 has been tested against the limits for a Class B digital device under Part 15 of the FCC Rules.
The equipment may generate and radiate radio-frequency energy.
If interference affects radio or television reception, the following actions may help:
- Reorient or relocate the receiving antenna.
- Increase the distance between the jump starter and receiving equipment.
- Connect the affected equipment to a different electrical circuit.
- Consult an experienced radio or television technician.
Unauthorized modifications may void the user’s authority to operate the device.
Warranty Information
The Schumacher SL1643 is covered by a one-year limited warranty.
Detailed warranty terms can be obtained from Schumacher Electric Corporation.
Warranty and Service Details
| Item | Details |
| Manufacturer | Schumacher Electric Corporation |
| Warranty Type | Limited Warranty |
| Warranty Period | One Year |
| Customer Support Phone | 1-800-621-5485 |
| Official Website | schumacherelectric.com |
| Repairs and Returns | 365rma.com |
| Product Registration | schumacherelectric.com |
Customer Support and Repairs
For repairs, returns, replacement parts, or warranty assistance, use the following Schumacher support resources:
- Repairs and Returns: 365rma.com
- Replacement Parts: schumacherelectric.com
- Warranty Assistance: 1-800-621-5485
- Product Registration: schumacherelectric.com
Internal repairs should be completed by qualified service personnel using identical replacement parts.
Frequently Asked Questions
1. How many amps does the Schumacher SL1643 jump starter provide?
The Schumacher SL1643 provides up to 2000 peak amps of jump-starting power. It is designed for compatible 12V vehicle battery systems and uses a 59.2 Wh lithium-ion polymer internal battery.
2. How long does it take to charge the Schumacher SL1643?
The SL1643 takes approximately 7–8 hours to recharge fully using the recommended 2A USB charger. When charging is complete, the LCD display shows 100%.
3. How much battery charge is required to jump start a vehicle?
The SL1643 requires at least 40% internal battery charge before jump-starting. The battery percentage can be checked by pressing the Display button.
4. What does the flashing thermometer symbol mean on the SL1643?
A flashing thermometer symbol indicates that the jump starter is too hot or too cold. The symbol disappears once the temperature condition has been corrected.
5. Can the Schumacher SL1643 charge a smartphone wirelessly?
Yes. The SL1643 includes a 10W Qi-compatible wireless charging pad. A compatible device should be placed face-up on the pad, and charging should begin automatically.
6. Why is the Schumacher SL1643 smart cable beeping?
Rapid beeping with both red Fault and Clamp Reverse LEDs illuminated indicates reversed polarity. Rapid beeping with only the red Fault LED illuminated indicates short-circuit protection. One beep per second with the red Fault and green Ready LEDs illuminated indicates temperature protection.
7. How many times can the Schumacher SL1643 attempt to start a vehicle?
The jump starter must not be used for more than three consecutive starting attempts. Each engine-cranking attempt should last no more than 5–8 seconds, with at least one minute between attempts.
8. How often should the Schumacher SL1643 be recharged?
The internal battery should be recharged immediately after purchase, after every use, at least every 30 days, and whenever the battery level drops below 85%. The battery should be fully charged before storage and must not be allowed to discharge completely.