
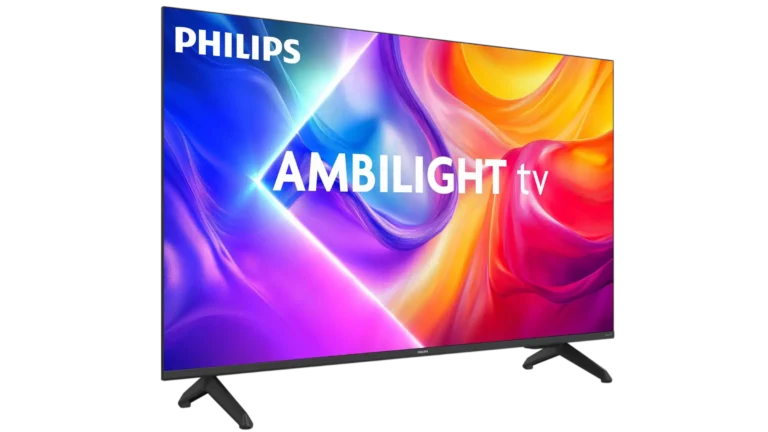
Philips Ambilight Roku TV Series 7875
This Philips television combines the Roku TV smart platform with Philips Ambilight, which analyzes the colors on screen in real time and projects them onto the wall behind the TV. Once the TV is set up and linked to a free Roku account, you can stream free and paid channels, watch over-the-air or cable channels through the built-in tuner, switch between connected devices from one Home screen, and pause live digital TV for up to 90 minutes on models that support it. A built-in wireless LAN adapter handles Wi-Fi, and some models add an Ethernet jack, Bluetooth private listening and HDMI 2.1 inputs. Features and buttons vary by model, so check what your own TV has before following a step.
Safety and Placement
Large-screen TVs are heavy, so two people are required to carry and handle this one. Hold the upper and bottom frames firmly, and set the TV in a horizontal, stable position.
Choosing a Location
- Keep the TV out of direct sunlight and away from dust and strong vibration.
- Operating temperature is 41°F (5°C) to 104°F (40°C). Avoid places with rapid temperature changes. The TV has not been evaluated for tropical environments.
- Leave at least 4 in. (10 cm) of ventilation space around the TV. Do not place it in a built-in cabinet or rack, and do not cover the vents with a tablecloth, curtain or newspaper.
- Do not place anything directly on or under the TV, especially lighted candles or other flaming objects.
- Keep the TV away from water, oil and grease, such as near a bathtub, sink, swimming pool, kitchen exhaust fan or in a damp basement.
- If external devices cause noise or picture or sound disturbance, move them farther from the TV.
- The TV may warm up slightly depending on the environment. This is not a malfunction.
- Never use a gas duster on this TV. Gas trapped inside the unit may cause ignition and explosion.
Preventing Tip-Over
A TV in an unstable location can fall and cause serious injury or death. To reduce the risk, especially for children:
- Use cabinets or stands recommended by the TV manufacturer, and only furniture that can safely support the TV.
- Do not let the TV overhang the edge of the furniture.
- Do not place the TV on tall furniture, such as a cupboard or bookcase, unless both the furniture and the TV are anchored to a suitable support.
- Do not place the TV on cloth or other material between the TV and the furniture.
- Teach children not to climb on furniture to reach the TV or its controls.
The TV must be securely attached to the furniture or wall in accordance with the instructions. Do not place it on furniture that a child and an adult could tilt by leaning, pulling, standing or climbing on it.
Wall Mounting
The TV meets the VESA standard for wall mounting. The recommended wall mount bracket kit is sold separately, and the bracket must be installed by experts.
| Screen size | Bracket brand and model | Screw dimension |
| 65″, 55″ | SANUS VLT6-B1 | M8 x 0.39″~0.63″ (10~16 mm) |
| 50″, 43″ | SANUS VLT6-B1 | M6 x 0.35″~0.39″ (9~10 mm) |
- Install the bracket on a sturdy vertical wall. A ceiling or slanted wall may let the TV and bracket fall and cause severe injury.
- Do not use screws longer or shorter than the specified length. Screws that are too long can damage the TV internally, and screws that are too short can let the TV fall.
- Do not tighten the screws with excessive force.
- Use two people to mount the TV.
- Do not mount the TV while it is plugged in or turned on, which can cause an electric shock.
- When installing on a wall, leave 11.8 in. (30 cm) above the TV, 5.9 in. (15 cm) on the left and right sides, and 3.9 in. (10 cm) below.
Power, Moving and Batteries
- Do not plug the AC power cord into the outlet until all connections are made, and keep the cord and outlet easy to reach.
- Press the power button to turn the TV on and to put it in standby. To turn it off completely, unplug the AC power plug. Unplug it when there is trouble or when the TV is not in use.
- Before moving the TV, unplug it and disconnect attached cables, especially at the tuner. Take care not to pinch the power cord under the unit.
- When packing the TV, do not pack the stand on the same side as the screen.
- Remote control batteries: there is a danger of explosion if a battery is replaced incorrectly. Replace only with the same or an equivalent type. Do not expose batteries to excessive heat, do not mix old and new batteries, and do not mix alkaline, standard (carbon-zinc) and rechargeable batteries.
- Do not open the TV or remove covers. No components are user serviceable, and repairs should be done only by service centers and official repair shops.
Connecting Antenna, Devices and Audio
Refer to the Quick Start Guide or other documentation that came with the TV for model-specific details about attaching the base or a wall mount and about connectors, because jacks vary by model.
Antenna, Cable or Satellite Box
Connect a 75-ohm coaxial cable (not provided) from the antenna, CATV cable, or a cable or satellite box that has only an antenna output to the ANT/CABLE input. An antenna with 300-ohm twin-lead cable needs a 300-to-75-ohm adapter (not provided). If a cable or satellite box offers HDMI, use it for digital HD and SD video. An AV input (certain models only) carries analog SD video.
HDMI Devices
Use HDMI cables (not provided) where possible. They give the best video quality and carry audio on the same cable. High Speed HDMI cables are recommended for better picture quality, and you may need to set the device to send its signal through HDMI.
- HDMI (ARC): can send digital audio back to a receiver or soundbar through the audio return channel.
- HDMI (eARC), certain models only: does the same and can also pass full-resolution formats such as Dolby Atmos and DTS:X to and from devices that support them.
HDMI 2.1 Inputs (Certain Models)
Inputs that accept 4K 120Hz are marked with a bounding box, a 120Hz label and a game controller icon. With HDMI 2.1 equipment such as game systems, they support Variable Refresh Rate (VRR), Auto Low Latency Mode (ALLM), Quick Frame Transport (QFT) and Quick Media Switching (QMS). To use all HDMI 2.1 features, connect with an Ultra High Speed HDMI cable.
Composite AV (Certain Models)
Certain models accept a composite AV cable (not provided). Match the plugs to the connectors on both devices: yellow is video, red is right audio, and white or black is left audio. Some models have an AV input shaped like a headphone jack and need a breakout cable (not included). Some models have no AV input.
Headphones and Analog Soundbars (Certain Models)
Plugging into the headphone jack disables the TV’s built-in speakers. Loud noise can damage hearing, so use the lowest headphone volume that lets you hear the sound. Certain models also have an audio line out that is not affected by TV volume or mute and does not disable the TV speakers. To turn off the built-in speakers, go to Settings > Audio > TV speakers. Some models have no headphone or line-out jack.
AV Receiver or Digital Soundbar
For Dolby Audio multichannel sound, connect a digital amplifier or soundbar (not provided) in one of these ways:
- Optical (S/PDIF): connect a TOSLINK optical cable to the receiver’s Optical input.
- HDMI ARC: connect an HDMI cable from HDMI (ARC) on the TV to the receiver’s HDMI input, then set up audio output as described under Audio Output and Digital Audio.
- HDMI eARC, certain models only: connect from HDMI (eARC) to the receiver’s HDMI (ARC) or HDMI (eARC) input. If the receiver does not support eARC, the TV’s eARC port still works with its ARC port.
Network and Power
The TV has a built-in wireless LAN adapter and supports only that internal adapter, not a USB network adapter. Models with a wired connection use an RJ-45 Ethernet cable (not provided) from the TV to your router or switch, which supports 10 Base-T and 100 Base-T automatically. After all connections are made, plug the TV into a power outlet.
Remote Control and Panel Buttons
Remote buttons and features vary somewhat by model, so your remote may not have every button listed here.
Roku TV Remote
| Button | What it does |
| POWER | Turns the TV on and off. If Backdrops is enabled, a short press starts Backdrops. Hold POWER for a few seconds to turn the TV off. |
| BACK | In a menu, goes to the previous menu or screen. While watching live TV or a TV input, returns to the Home screen. While playing streaming content, stops the stream and returns to the previous screen. While browsing streaming content, goes up one level. |
| HOME | Returns to the Home screen immediately. |
| Directional pad and OK | Arrows move the highlight and OK chooses the highlighted option. While watching live TV, UP and DOWN change the channel, LEFT opens the Live TV Channel Guide, and OK shows program information. In the channel list, LEFT and RIGHT switch between All Channels and Favorites. When a program is paused with Live TV Pause, LEFT and RIGHT jump back or forward about 10 seconds. |
| REPLAY | Live TV: jumps to the previously tuned channel (with Live TV Pause enabled, it jumps back a few seconds with each press). Program guide: returns to the current day and time. On-screen keyboard: backspaces. Streaming: depends on the channel. |
| REWIND, PLAY/PAUSE, FAST FWD | Scan backward, pause, play and scan forward in streaming content, and in live TV if Live TV Pause is enabled. Press REWIND or FAST FWD one, two or three times to change speed. They also page through long lists such as the channel list or guide. |
| STAR (*) | Shows additional options when available. On-screen hints show when it is active. |
| Channel shortcut buttons | Show the logo of a preset streaming provider and vary by model and region. A press turns on the TV and opens that channel’s main page if it is on your Home screen, or its sign-up page if not. |
| Volume UP, DOWN and MUTE | On the right edge of the remote. Raise or lower volume and mute the TV sound. |
Panel Buttons
Panel buttons on the side, bottom or back of the TV perform simple functions and do not replace the remote. If you cannot find them, check the bottom center of the TV behind the status indicator LED, or the back panel near the lower right or left side. Find your TV’s button design in this table.
| Panel design | Functions |
| Single button | Short press (under 2 seconds) powers on. Long press (over 2 seconds) powers off. Short press while the TV is on opens the Input List. Short press again while the list is shown to select the next input, then wait. If you do nothing, the list is dismissed. |
| Two buttons | The lower button works like the single button above. A short press (under 2 seconds) of the middle button powers off. Pressing both buttons for at least five seconds factory resets the TV. |
| Three buttons | Middle button: long press (over 2 seconds) opens the Input List, and a short press while the TV is on also opens it. With the list not displayed, the right button selects the next input and the left button dismisses the input list. With the list displayed, the right button highlights the next input, the left button highlights the previous input, and the middle button (or waiting) selects the highlighted input. The middle button also powers the TV on and off. |
| Game pad style (5 buttons) | Up and down buttons increase and decrease volume. Left and right buttons open the Input List and, while it is displayed, select an input (then wait). POWER powers on and off. |
| Four discrete buttons | INPUT opens the Input List and, while it is displayed, selects the next input (then wait). VOLUME + and VOLUME – adjust volume. POWER powers on and off. |
| Five discrete buttons (with mute) | The same as four buttons, plus MUTE. |
| Five discrete buttons (without mute) | INPUT + or INPUT – opens the Input List. While it is displayed, INPUT + selects the next input and INPUT – selects the previous input (then wait). VOLUME + and VOLUME – adjust volume. POWER powers on and off. |
| Seven discrete buttons | CHANNEL + and CHANNEL – select the next and previous channel while viewing Live TV. INPUT opens the Input List. While it is displayed, INPUT or CHANNEL + selects the next input and CHANNEL – selects the previous input (then wait). VOLUME + and VOLUME – adjust volume, and MUTE mutes. |
Guided Setup
The first time you turn the TV on, Guided Setup configures it before use. It asks a few questions, collects network information, installs a software update, links the TV to your Roku account and helps you connect devices. It normally runs only once. To run it again, you must factory reset the TV.
Starting the TV
Press POWER on the remote. The status indicator blinks while the TV is busy, and a startup screen with a TV brand logo appears for a few seconds while the status indicator blinks slowly. Guided Setup then begins at the Language screen.
Setup Steps
- On the Language screen, press DOWN to highlight your language and press OK. If you chose English, you can turn the screen reader on or off by pressing STAR (*) four times in rapid succession. The key is directly below the purple directional pad on the right side of the remote. Choosing any language other than English turns the screen reader off.
- Some models show a country screen. If yours does, select your country and press OK.
- Press OK to select Set up for home use. This is the right choice at home and includes energy saving options and all TV features. Set up for store use configures retail display with screen overlays, is not recommended for any other use, and limits many features. Switching between the two modes requires a factory reset and a repeat of Guided Setup.
- On models that show the Connect to the Internet screen, choose Set up new wireless connection, Connect to wired network, or (certain models only) Connect to the Internet later. Wired setup connects to your network, the local network and the Internet right away. If you skip the Internet, Guided Setup moves on to device setup, and you can still watch live TV and use connected devices.
- For wireless setup, the TV lists networks in range with the strongest first. Press UP or DOWN to highlight yours and press OK. Networks with a padlock icon ask for a password.
- If your network does not appear, use Scan again or Scan again to see all networks. If the name is hidden, choose Private network and type the network name (SSID), which is usually on a label on the router. Highlighting a scan option shows the TV’s MAC address, which you need if your router uses MAC address filtering.
- Enter the password with the on-screen keyboard (purple directional pad to move, OK to select a character), press DOWN to select Connect, then press OK. Networks in dorms and hotels may require terms, a code or identifying information, and the TV guides you through that using your smartphone or tablet.
- Only if the TV cannot get the correct time zone from your network, select your time zone on the Choose your time zone screen.
- After the TV restarts, activate it. Either scan the QR code on the screen with a smartphone or tablet and follow the link, or enter your email address on the TV and follow the instructions in the email you receive. Roku never charges for activation support, so beware of scams.
- When prompted, connect all the devices you plan to use, turn them on, and select Everything is plugged in and turned on. The TV steps through each input and asks what kind of device is connected. Highlight the matching label and press OK, or select Nothing for an unused input, which then does not appear on the Home screen. To use your own name and icon, choose Set name & icon.
- In the Philips Ambilight options, select Wall color and choose the wall color that most closely matches the wall behind the TV. You can also adjust Brightness and Saturation.
- Press HOME to exit setup and return to the Home screen.
If you set a custom name for an input, voice commands may not reliably switch to it. Voice commands typically switch only among inputs with built-in names such as AV, Cable Box and DVR.
Why a Roku Account Is Needed
A free Roku account links you, your TV and your other Roku devices to the Roku Store and billing service, tells streaming providers they may send content to your TV, and lets Roku update the TV with new features. Linking also enables Guest Mode, the Roku mobile app and Live TV Pause. After activation, the TV adds your selected and existing streaming channels from other Roku devices on the same account, which can take a few moments.
Ambilight Settings
Ambilight extends the colors on screen onto the wall behind the TV. After Guided Setup, a pop-up points you to the Ambilight settings, and you can open them at any time at Settings > Philips Ambilight. Use the remote’s LEFT, RIGHT, UP and DOWN buttons to move through options and OK to select.
Placement Tips for Ambilight
- Place the TV where light does not shine directly on the screen, and dim the room lights for the best Ambilight effect.
- The ideal viewing distance is two to five times the screen’s diagonal size, with your eyes level with the center of the screen when seated.
- Wall mounted: position the TV 3-4 inches (7 to 10 cm) from the wall.
- On a TV stand: position the TV 4-8 inches (10 to 20 cm) from the wall, depending on the size of the stand.
Main Ambilight Menu
- Ambilight: turns the feature On or Off.
- Brightness: adjusts the brightness of the light projection. The default is 100%. Choose a lower level to reduce the effect.
- Saturation: controls color intensity. The default is 60%. Choose a higher level for richer, deeper colors.
- Wall color: shifts the light spectrum so colors look accurate regardless of the color of your wall.
- Lounge light: sets a room ambiance when the TV is off (see below).
- Reset settings: returns all Ambilight settings to their original values. Select Yes, reset Ambilight settings when the confirmation prompt appears.
Ambilight Modes
The Mode menu sets how Ambilight reacts to what is playing.
| Mode | What it does | Styles and adjustments |
| Follow video (default) | Syncs Ambilight to the video on screen and extends the action to the wall behind. | Standard (everyday viewing), Cinema (smoother color transitions for movies and shows), Sports (backlighting changes faster with the action), Gaming (maximum immersion). Brightness and saturation can be adjusted. |
| Follow audio | For music videos or apps without moving video. Effects follow volume and rhythm. | Lumina (least reactive, still keyed to the screen but brighter or dimmer with volume, best for live performances and music videos), Rhythm (lights pulse to the beat and go dark between beats), Disco (colors and patterns change with the beat regardless of the screen). Brightness and saturation can be adjusted. |
| Fixed color | A static glow that does not respond to content. | Color, brightness and saturation can all be adjusted. |
Adjusting Ambilight While Watching
Press STAR (*) while video is playing, go to Philips Ambilight and press OK. The pop-up menu offers the same options (mode and style, brightness, saturation, wall color and reset) except Lounge light, which can only be enabled or changed in the main settings menu under Philips Ambilight.
Lounge Light
Lounge light sets the ambiance of a room even when the TV is turned off. You can choose the light’s color, brightness and saturation, how long the effect lasts (duration), and one of three modes:
- Auto: the lounge light turns on as soon as the TV is turned off. Press the * key on the remote to switch the effect off.
- Manual: lounge mode stays on, but when you turn the TV off the effect does not start until you press the * key on the remote.
- Off: lounge mode is off entirely, and the effect does not start when the TV is off, even if you press the * button.
Watching Live TV
The built-in tuner covers antenna DTV (ATSC) and analog (NTSC) on VHF 2-13 and UHF 14-69, and cable DTV (QAM) and analog (NTSC) on channels 2-135. You only need to set up the tuner if you use an antenna or cable connected to ANT/CABLE. If you do not, you can remove the Live TV input from the Home screen.
Setting Up the TV Tuner
- Make sure your antenna or TV cable (not provided) is connected to the ANT/CABLE input.
- On the Home screen, select the Live TV input. If it is not there, add it under Settings > TV Inputs. If you have already scanned, highlight the Live TV tile, press STAR (*) and select Scan for channels.
- If you have scanned before, choose Scan again (adds channels and keeps your favorites) or Start over (clears your channels and replaces them with a new list).
- Choose Streaming TV only (adds only Roku live streaming channels), Antenna, Cable, or Antenna & cable. Antenna and cable choices also add Roku live streaming channels.
- Wait while the TV scans, which can take several minutes. The screen then shows how many channels were found.
Repeat the scan from time to time, and whenever you change cable providers, reorient the antenna or move to a different city, because broadcasters add, remove and move channels. To rescan, highlight the Live TV input, press STAR (*), select Rescan for channels and press OK. Removing and re-adding the Live TV input, or a factory reset, also means scanning again. The manual says in one place that a rescan preserves hidden channels and in another that it unhides them, so check your hidden channels after scanning.
Changing Channels and Viewing Information
- Press UP for the next higher channel and DOWN for the next lower channel.
- Press LEFT to open the Live TV Channel Guide, select a channel or program and press OK. Press REWIND or FAST FWD to move a page at a time. Press BACK to leave without changing channels.
- If Live TV Pause is not enabled, press REPLAY to jump to the previous channel, and press it again to return.
- Press OK while watching to show the program information banner.
- Press STAR (*) to open the TV settings menu for picture and sound options.
Live TV Channel Guide
The guide lists the channels you receive, except those you hide, plus live streaming programs, and shows what is on now and for the next 14 days. Pressing OK on a past or future program does nothing. Press REPLAY to return to the current time slot. By default the list is sorted as Roku recommends from your viewing habits and streaming channel numbers are hidden.
- Categories: navigate left past the channel list to choose All Channels, Recents, Antenna or Favorites, plus curated categories if you have not hidden streaming channels. The category you choose is temporary, and the guide returns to All Channels next time.
- Channel options: in the guide, move left to the channel number column and press STAR (*). You can favorite or unfavorite a channel, hide or unhide it, sort by As recommended by Roku or By channel number (which shows all channel numbers), or open Manage channels.
- More Ways to Watch: a purple star (*) beside a program means streaming channels offer it. Highlight it and press STAR (*) to see options such as Watch from beginning, See more episodes, More like this and View full description.
Pausing Live TV (Certain Models)
Live TV Pause lets you pause, play, fast forward and rewind digital live TV received on the ANT input for up to 90 minutes.
You need:
- a TV connected to a Roku account
- your own USB flash drive of at least 16 GB, with 15 Mbps read/write speed, USB 2.0 compliant (a larger drive is fine but does not extend the 90 minutes, and a flash drive is recommended over an externally powered hard drive)
- the drive plugged into the TV’s USB port, with nothing connected to the other USB ports while you enable the feature
Enabling Live TV Pause erases everything on the USB drive, after warning you and giving you a chance to cancel. Start setup by choosing Set up Live TV Pause after a channel scan, pressing PLAY/PAUSE while watching live TV, or highlighting the Live TV input, pressing STAR (*) and selecting Enable Live TV Pause. A USB hub is not supported.
While watching a digital channel, press PLAY/PAUSE to pause or play, REWIND to go back up to where you started watching, and FAST FWD to move ahead. Press FAST FWD or REWIND repeatedly to cycle 1x, 2x and 3x speeds, press REPLAY to replay the last several seconds, and press LEFT or RIGHT while paused to move about 10 seconds per press.
The pause buffer works only with digital broadcast and cable channels on the ANT input (ATSC and Clear QAM). Changing channels, returning to the Home screen, switching inputs, turning off the TV or disconnecting the USB drive erases and resets the buffer.
Everyday Use, Power and Home Screen
Status Indicator
The TV has a single status indicator that shows what the TV is doing.
| TV condition | Indicator | Meaning |
| On (screen active) or screensaver | Off | The screen shows the TV is on. |
| Off (no power) | Off | The TV is not connected to power. |
| Off (standby) | On | The TV has power and is ready to use. |
| Starting up from off | Slow pulsing blink until startup completes | The TV is doing something. |
| On, receiving an update from USB | Slow pulsing blink until the update completes | The TV is doing something. |
| Remote command received | Dims on and off once | The TV received your command. |
| Network connection lost | Two short blinks, pause, repeat | The TV was connected and paired with a Roku account and now has no network connection. |
| Powering down to standby | Slow pulsing blink until standby is reached | The TV is doing something. |
To turn the indicator off in standby, go to Settings > System > Power, select Standby LED, press RIGHT and choose Off or On. Some TVs ship with it on in standby and others with it off. Regardless of the setting, the indicator still shows its other states.
Power Settings
Go to Settings > System > Power.
- Power on: choose what the TV shows when you turn it on.
- Auto power savings: Reduce power after 15 minutes turns off the screen and sound after 15 minutes with no video or audio activity and no user interaction. Turn off after 4 hours puts the TV in standby after 4 hours of the same inactivity. Both are on from the factory.
- Fast TV start (certain models): starts the TV almost instantly and lets you say “Hey Roku, turn on my TV” to a Roku Voice Remote. It uses significantly more power than normal standby and overrides default power settings. Turn it on under Settings > System > Power > Fast TV Start.
- System restart: restarts the TV (see Restart, Reset and Update).
With maximum power savings, turning the TV off keeps it in a higher power mode for a few minutes before very low power standby. Turning it on before then is immediate, and after that startup takes a few seconds. On certain models the remote can charge from the TV’s USB ports, and System > USB settings can keep the port powered for four hours even with Auto power savings on.
The Home Screen
Press HOME to return to the Home screen. It shows the Home Screen Menu on the left, a Recommended row, your apps and streaming channels, and your TV inputs. Press RIGHT to see the next screen. What you see varies by location, theme, enabled inputs and installed channels.
- Switch inputs: highlight an input and press OK. The TV detects a new HDMI device when it is connected and powered on, adds the input, and names it and sets its icon to suit the device.
- Add a TV input: go to Settings > TV inputs, highlight an input under Inputs not used, press RIGHT to Set up input and press OK.
- Add streaming channels: choose Streaming Store in the Home Screen Menu to browse the Roku Store.
- Rename an input: highlight it, press STAR (*), select Rename input and choose a name and icon, or use Settings > TV inputs > Rename. Choose Set name & icon for a custom name.
- Move an input or channel: highlight the tile, press STAR (*), select Move input or Move channel, use the directional pad, then press OK to lock it in place.
- Remove an input or channel: highlight it, press STAR (*), select Remove input or Remove channel and confirm. Removing the Live TV input deletes your channel list.
- Themes: Settings > Theme offers theme packs, wallpapers, screensavers, sounds, screensaver start time and Restore default theme.
- Home screen layout: Settings > Home screen lets you hide or show menu items and recommendation rows and pick a three-column or four-column grid.
- Menu volume: Settings > Audio > Menu volume (High, Medium, Low or Off).
Backdrops
In supported regions, Backdrops shows curated art or your own photos when you turn the TV off. Open the Backdrops tile (or Settings > Backdrops > Open the Backdrops app), choose art or a collection, select Set as Backdrop or Add to My Favorites, then press POWER on the remote to start. To turn the TV fully off while Backdrops is enabled, hold POWER for a few seconds until Powering off appears. While a Backdrop shows, RIGHT and LEFT change images, UP and DOWN show image information, STAR (*) opens Backdrops settings, and HOME returns to the Home screen. You can add your own photos from the Roku mobile app (Add your photos) or at backdrops.roku.com.
Smart TV Experience and Privacy
The first time you select live TV, an HDMI input or the AV input, the TV offers to enable the Smart TV experience, which uses automatic content recognition (ACR) to analyze what you watch for recommendations and more relevant ads. You can change this later under Settings > Privacy > Smart TV experience by clearing Use info from TV inputs, or clear Enable auto notifications to stop notifications while keeping the feature. Previously collected information is retained and not deleted when you opt out. The TV has no built-in microphone. Streaming channel access to the microphone on a Roku Voice remote or the Roku mobile app is controlled under Settings > Privacy > Voice > Microphone access, where the default is Prompt.
Picture and Sound Settings
Press STAR (*) while watching to open the TV settings menu: Sleep timer, Picture settings, Sound settings, Manage channels, Accessibility & language and Picture off. Settings generally apply only to the input you are using. Live TV, each HDMI input and the AV input remember their own, and streaming content has its own. Some streaming channels use STAR (*) for something else, in which case use a different channel such as The Roku Channel. The menu closes after a few seconds, or press STAR (*) again.
Picture Settings
- TV brightness: Settings > TV picture settings. On models with an ambient light sensor the setting has an Auto option, selected by default. Choose another option to disable the sensor.
- Picture mode: presets such as Vivid and Movie. Letting the TV decide with Roku Smart Picture is recommended.
- Customize picture: Backlight (overall light intensity), Brightness (dark level), Contrast (white level), Sharpness, Color (0 removes all color), Tint, Picture size (Auto usually gives the best picture), Game mode (HDMI and AV inputs only, less processing and lag) and Auto low latency mode (certain models).
- Expert settings (certain models and names vary): Dynamic contrast, Local dimming, Micro contrast, Action Smoothing, Natural Cinema, Action Clarity, LED Motion Clarity (inserts black frames and lowers brightness), Gamma correction, Noise reduction, Color temperature and Color space. The 11-point white balance and color space adjustments need special equipment and are not recommended without it.
- Reset and apply: Reset ‘mode name’ settings returns the current mode to defaults, and Apply settings to all inputs copies your current mode settings to every input.
- Variable refresh rate (VRR, certain models): requires VRR turned On in the input’s HDMI settings (Off by default), HDMI mode set to Auto or HDMI 2.0, Game mode enabled, and a connected device that supports VRR.
- HDMI mode (UHD models, not QHD (2K)): under Settings > TV inputs > the HDMI input. Auto is recommended. Standard is HDMI 2.0 (60 Hz at full UHD, required for HDR from that input). Compatibility is HDMI 1.4 (30 Hz at full UHD) and works with most devices.
Sound Settings
The Sound settings menu is unavailable during private listening through the Roku mobile app or (certain models) Bluetooth headphones, and most settings do not affect a connected receiver or headphones.
- Sound mode: choose Auto (recommended) or a preset. Customize sound mode offers the features your model has, which can include Dolby Audio Processing (virtual surround, dialog enhancer, volume leveling), DTS TruSurround or Studio Sound, Sonic Emotion Premium, or Volume mode (Off, Leveling, Night).
- Dolby Atmos decoding works only through the built-in TV speakers, not external speakers.
- Roku premium audio products (sold separately) connect to any Roku TV, and the Sound settings menu then controls their settings.
- Picture off: select Picture off to turn off the screen and keep the sound. Press OK to bring the picture back.
Audio Output and Digital Audio
Under Settings > Audio > Audio output choose Auto, ARC/eARC (HDMI n), Built-in speakers or Optical. ARC/eARC and Optical turn off the built-in speakers. The TV automatically mutes the active output when you plug in headphones, use wireless private listening, or (certain models) connect a Bluetooth headphone or speaker.
- HDMI ARC or eARC: connect an HDMI-certified cable between the TV’s HDMI ARC or eARC connector and the amplifier’s, and select Auto or ARC/eARC.
- S/PDIF optical: connect a TOSLINK cable and set Audio output to Optical so the output is reliable. Dolby Digital Plus is not available over optical, only HDMI ARC. Also connecting an HDMI cable between the ARC ports helps the TV detect more audio formats.
- Digital output format (Settings > Audio > Digital output format): Auto transcodes to a compatible format, Passthrough sends the input audio unchanged (sometimes better for high-end formats), Stereo always outputs stereo, and Custom adds Dolby and DTS options. DTS is meant for ARC, eARC or S/PDIF to a DTS-capable receiver, and enabling it with the TV speakers may produce no audio.
- Wall-mounted TV and Flush-mounted TV (certain models): Settings > Audio > Wall-mounted TV optimizes built-in speaker sound on a wall, and Settings > Audio > Flush-mounted TV changes the flat-against-wall choice made in setup.
- Audio delay: in the Roku mobile app (version 8.7.0 or higher) Remote screen, touch Settings, select Adjust audio delay and follow the prompts.
Parental Controls, Guest Mode and Network Settings
Parental Controls
Parental controls block broadcast TV programs from the TV tuner, based on rating data in the broadcast signal, unless the correct PIN is entered. They do not block content on other TV inputs or on streaming channels you add. Rating standards differ by country.
- Go to Settings > Parental controls. The first time, a numeric keypad appears.
- Press RIGHT to highlight the number pad, enter a four-digit code and press OK, then enter the same PIN again and press OK.
- In the Parental controls screen, go to TV tuner and make sure the Enable parental controls check box is selected. Clearing it unblocks everything without losing your rating settings, and selecting it again restores them.
- Under TV tuner, choose the ratings to block: TV ratings, Movie ratings, Canadian English ratings, Canadian French ratings, or Block all unrated programs.
Blocking a rating also blocks every higher rating, and unblocking a rating also unblocks lower ones. US TV ratings are split into two independent groups: a youth group (TV-Y, TV-Y7) and a main group (TV-G, TV-PG, TV-14, TV-MA). In the main group you can also block individual content types, and blocking a content type in one rating blocks it in all higher ratings. Movie (MPAA) ratings are G, PG, PG-13, R and NC-17 (blocking NC-17 also blocks the obsolete X rating). Canadian English ratings are C, C8, G, PG, 14+ and 18+. Canadian French ratings are G, 8+, 13+, 16+ and 18+. If a station introduces a new rating table, the TV downloads it and adds an Other ratings option.
A blocked program loses both picture and sound, and program data at the bottom of the screen is also blocked. Programs are blocked when you change to a channel whose program exceeds your settings, or when a new program starts on the channel you are watching. To watch one, press OK to select Unblock, enter your PIN with the directional pad and select Unblock everything. Press STAR (*) to hide the highlighted numbers while you enter it. After unblocking, all blocking is disabled for two hours or until you turn off the TV.
To change the PIN, open Parental controls, enter the current PIN, highlight Change PIN and enter a new four-digit code twice. Reset parental controls erases all parental control settings and also erases the PIN.
Guest Mode
Guest Mode lets guests sign in to their own subscription channels, and their credentials are removed automatically on the date they choose. Guests cannot use your streaming accounts or make purchases with your Roku account.
- Go to Settings > Guest Mode and select Enter Guest Mode.
- Enter your Roku Account PIN with the on-screen keypad.
- Select OK to confirm.
To end it, press HOME, go to Settings > Guest Mode, select Exit Guest Mode, enter your Roku Account PIN and confirm. Your original settings return and your channels are reinstalled, though you may need to sign in to some subscription channels again and game data stored on the TV is not restored. You can also turn Guest Mode on or off at my.roku.com under My linked devices.
Roku Account PIN
A Roku Account PIN can be required for purchases and Roku Store additions, used for parental controls on The Roku Channel, and used to enable or disable Guest Mode. To create or change it, or if you forgot it, sign in at my.roku.com, click Update under PIN preference, set your options and click Save Changes.
Network, ZIP Code and Time
- Network (Settings > Network): About shows connection details such as status, type, IP and MAC addresses; Check connection retests the connection; Set up connection starts a new setup (needed if you change your network name or password); Bandwidth saver, when On, asks whether to keep streaming after four hours without remote use and stops streaming if you do not respond.
- ZIP Code (Settings > System > ZIP Code): enter your correct code for accurate channels and guide data, because the TV’s automatic estimate is not always accurate.
- Time (Settings > System > Time): Sleep timer, Time zone (automatic or manual) and Clock format (12-hour, 24-hour or off).
- Control by mobile apps (Settings > System > Advanced system settings > Control by mobile apps > Network access): Default allows connections only from private network addresses and suits the Roku mobile app, Permissive allows connections under all conditions but accepts commands only from your home network and may be needed for third-party apps, and Disabled blocks all external control including the Roku mobile app.
- Restricted public networks: in a hotel or dorm, choose I am at a hotel or college dorm when prompted, connect your phone, tablet or computer to the network named on the TV, enter the password shown, then open a web browser on that device and provide what the network asks for. This requires Enable ‘Device connect’ in Settings > System > Advanced system settings, which is on by default.
Bluetooth, Mirroring and Smart Home Features
Bluetooth Headphones (Certain Models)
On models with Bluetooth, you can pair headphones or most Bluetooth speakers and listen privately. If you do not see Wireless headphones under Settings > Remotes & devices, your TV does not have Bluetooth.
- Go to Settings > Remotes & devices > Wireless headphones and select Add new wireless headphones.
- Put your headphones in pairing mode following their instructions. Scanning can take up to 30 seconds.
- Select your headphones from the list.
To connect later, press STAR (*) while a program plays and select Wireless headphones, or use Settings > Remotes & devices > Wireless headphones, then select your headphones and Connect. The TV mutes its speakers and other audio outputs until you disconnect. You can pair several headphones but connect only one set at a time, and separate left and right earbuds count as one device. To disconnect, turn the headphones off or choose Disconnect. Under the headphones’ entry, Auto detect can be set On or Off.
Playing Phone, Tablet or Computer Audio (Certain Models)
Go to Settings > Remotes & devices > Smartphones & tablets and select Add a new smartphone or tablet, then pick the TV in your device’s Bluetooth list. The TV is listed under the name shown on its Searching screen. A check mark beside your device means it is connected. Volume and mute can be controlled from your device or the TV remote, and the remote’s REWIND, FAST FWD and PLAY/PAUSE may control playback depending on your device.
Screen Mirroring
Screen mirroring shows your compatible smartphone or tablet on the TV. By default the mode is Prompt, which offers Always allow, Allow, Block and Always block for each request. Change it at Settings > System > Screen mirroring to Always allow or Never allow, and manage saved devices under Screen mirroring devices. Compatibility with every source device is not guaranteed.
Apple AirPlay and HomeKit
AirPlay shares video, photos and music from an iPhone, iPad or Mac on the same wireless network (iOS 12.3 or later, macOS Mojave 10.14.5 or later). Set AirPlay security under Settings > Apple AirPlay and HomeKit. To add the TV to the Apple Home app, select Set Up under HomeKit in that menu, then in the Home app choose Add Accessory and scan the QR code on the TV. AirPlay 2 and HomeKit are supported by all Roku TVs except hardware IDs beginning with 6 (6XXXX) or 5 (5XXXX), shown under Settings > About.
Voice Assistants and the Roku Mobile App
The Roku mobile app (free for compatible iOS and Android devices) works as a second remote with voice and keyboard search, private listening through headphones connected to your phone, and more. Google Assistant and Amazon Alexa can control the TV after you link your Roku account, and Siri works through Apple Home. Roku Voice commands support English, French, Spanish, Portuguese and German when the matching TV language is selected. Say a command like “Go to 7 point 3” to open channel 7.3, “Show Guide” to open the guide, or “Turn the TV off in 30 minutes” to set a sleep timer. You can program a cable or satellite universal remote to control the TV by following your provider’s instructions.
Restart, Reset and Update
The manual’s FAQ page refers readers to the Roku support website (go.roku.com/support) for current answers, and the documented recovery steps are the restart and reset options below.
Restarting the TV
Restarting has the same effect as unplugging the TV and plugging it back in. Go to Settings > System > Power, select System restart, highlight Restart and press OK. The screen goes dark for a few seconds, shows the startup screen for a few more, and then displays the activity chosen in Power on settings.
Resetting Picture and Audio Settings
Go to Settings > System > Advanced system settings > Factory reset and highlight Reset TV audio/picture settings. Read the on-screen information, then press PLAY/PAUSE three times in a row to proceed.
Factory Reset Everything
A full factory reset returns the TV to its state when first unpacked and removes personally identifiable information. Afterward you must repeat Guided Setup, reconnect to the Internet, relink your Roku account, reload streaming channels, and repeat live TV setup and input configuration. It is recommended when transferring the TV to another owner and is the only way to switch from Store mode to Home mode.
- Go to Settings > System > Advanced system settings > Factory reset.
- Highlight Factory reset everything and read the on-screen information.
- Use the on-screen number pad to enter the code shown on the screen, then select OK.
When it finishes, the TV restarts and shows the first Guided Setup screen.
If You Cannot Reach the Factory Reset Option
- TVs with a recessed RESET button on the back panel: using a straightened paper clip or ball-point pen, press and hold the button on the connector panel for approximately 12 seconds. When the reset cycle completes, the status indicator comes on dim. Release the button, which leaves the TV powered off, then turn it on and go through Guided Setup.
- TVs with two panel buttons, one shaped like a Roku remote: hold both buttons for at least five seconds.
- TVs with no RESET button and without those two buttons: hold the TV’s POWER button for 10 seconds.
- Recovery Mode (certain models): hold the RESET button for at least 20 seconds. The manual refers to the Roku support article on using Recovery Mode for the model list and instructions.
Network Connection Reset
To remove only your network information, go to Settings > System > Advanced system settings > Network connection reset and select Reset connection. The TV removes your wireless network name (SSID) and password and restarts, keeping all other settings and its Roku account association. Then use Settings > Network > Set up connection to reconnect.
Updating the TV
The TV updates itself from time to time. To check manually, go to Settings > System > Software update and select Check now, then follow the on-screen instructions if an update is available. To see the current software version, go to Settings > System > About. A current User Guide can be downloaded at go.roku.com/tvmanual.
If the TV is not connected to the Internet, you can update from a USB flash drive (FAT-16 or FAT-32) using a computer:
- On the TV, go to Settings > System > Software update and select I can’t connect (or select Connect to the Internet, which is recommended if possible).
- On an Internet-connected computer, open the web site shown on the Software update screen, select the correct brand and model, and click Next.
- Click Download Software and save the file (usually under 100 MB) to the root folder of the flash drive.
- Plug the drive into the TV’s USB port. The TV validates the files and shows a 12-digit code. Write down the code and the web address.
- On the computer, enter the 12-digit code on the 12-digit code page and click Next. Write down the 6-digit code that appears.
- On the TV, select Next, enter the 6-digit code with the on-screen keyboard and select OK. The update begins. Do not remove the USB drive until the TV restarts.
Using the TV Without an Internet Connection
Some models cannot function without an Internet connection. If you chose Connect to the Internet later, you can connect any time through the Connect Now message on the Home screen, through Settings > Network > Connect and activate now, or by factory resetting and repeating Guided Setup. Without a connection you lose features including The Roku Channel, the Roku Store, voice control, Live TV Pause, Backdrops, Guest Mode, the Roku mobile app, Bluetooth features, Roku Media Player and the full-featured Live TV Channel Guide. To switch to favorite channels while watching live TV, press LEFT for the channel list and then LEFT or RIGHT once.
Warranty and Support
The TV carries a Limited Warranty of one (1) year from the date of original purchase from an Authorized Dealer, issued to the original purchaser or the person receiving the product as a gift. The original sales receipt showing the product name and purchase date is the proof of purchase.
- Coverage: defects in materials and workmanship, if a valid claim is received within the warranty period. At its option the company will repair the product at no charge, exchange it for a new or comparable product, or refund the original purchase price. Replacement products or parts are covered for 90 days or the remainder of the original warranty, whichever is longer. Refurbished or renewed products carry a 90-day limited warranty.
- Not covered, among other items: shipping charges to return a defective product; labor for installation, setup or adjustment of customer controls; repairs caused by improper installation or maintenance, improper voltage, power line surge, lightning damage, retained images or screen markings from viewing fixed stationary content for extended periods, unauthorized repair, or failure to operate per the user manual; commercial or institutional use; and software, including programs or data lost.
- No components are user serviceable. Opening the product or making adjustments or assembly procedures not recommended in the manual can void the warranty.
- Support: call the Philips Customer Care Center at 1-833-978-3323 in the U.S.A., Canada, Puerto Rico or the U.S. Virgin Islands, chat through the Philips website, or visit www.philips.com/support. Warranty service address: Skyworth USA Corporation Service, 2950 Toy Road, Groveport, OH 43125, USA.
The LCD panel has a high number of color pixels. Black dots or bright points of light (red, green or blue) may appear constantly on the screen. This is a structural property of the display within common industry standards and is not a malfunction. Skyworth USA Corporation is the warrantor, and the Philips trademark is used under license.
Frequently Asked Questions
How do I set the wall color so Ambilight looks accurate?
Go to Settings > Philips Ambilight, select Wall color, and choose the option that most closely matches the wall behind the TV, then press OK. The TV shifts the light spectrum so colors look accurate whatever your wall color. You are also prompted for this at the end of Guided Setup. For the best effect, keep direct light off the screen and dim the room, and keep the TV 3-4 inches (7 to 10 cm) from the wall if it is wall mounted, or 4-8 inches (10 to 20 cm) if it sits on a stand.
What is the difference between the Ambilight modes?
Follow video is the default and syncs the wall light to the picture, with Standard, Cinema, Sports and Gaming styles. Follow audio reacts to volume and rhythm instead, which suits music videos and apps without moving video, with Lumina, Rhythm and Disco styles. Fixed color gives a steady glow that ignores the content, and you can set its color, brightness and saturation. While video is playing, press STAR (*), choose Philips Ambilight and press OK to switch modes without leaving the program.
How can I make Ambilight light the wall when the TV is off?
Use Lounge light, which is found only in the main menu at Settings > Philips Ambilight. Pick the color, brightness, saturation and duration, then choose a mode. Auto starts the effect the moment you turn the TV off, and you can stop it by pressing the * key on the remote. Manual keeps lounge mode on but waits until you press the * key after turning the TV off. Off disables it, even if you press the * key.
How do I run Guided Setup again or leave Store mode?
Guided Setup normally runs only once, so you must factory reset the TV to see it again. The same reset is the only way to move from Store mode to Home mode if you picked Set up for store use by mistake. Go to Settings > System > Advanced system settings > Factory reset, highlight Factory reset everything, enter the code shown on the screen and select OK. Expect to reconnect to the Internet, relink your Roku account, reload your channels and repeat live TV and input setup.
What do the status indicator blinks mean?
A slow pulsing blink means the TV is busy: starting up, installing an update from USB, or powering down to standby. A single dim flash means it received a remote command. Two short blinks, a pause, and then the pattern repeating means a TV that was connected and paired with a Roku account has lost its network connection. In standby the light normally stays on, and you can turn that off at Settings > System > Power > Standby LED.
Why do I need to scan for channels, and how often?
The TV only shows antenna or cable channels after it scans the ANT/CABLE input and keeps those with a good signal. Select the Live TV input and choose Antenna, Cable or Antenna & cable. To rescan, highlight Live TV, press STAR (*) and select Rescan for channels. Rescan whenever you change cable providers, reorient the antenna or move, and from time to time because broadcasters add and move channels. Scan again adds channels and keeps your favorites. The manual is not consistent about hidden channels, saying in one place that they are preserved and in another that a rescan unhides them, so check your hidden channels after scanning.
What do I need to pause live TV, and what are the limits?
On models with Live TV Pause, you need a Roku account and your own USB flash drive that is at least 16 GB, 15 Mbps read/write and USB 2.0, plugged into the TV with nothing else in the other USB ports. Enabling the feature erases everything on the drive, so back it up first, and a USB hub does not work. You can pause digital channels on the ANT input for up to 90 minutes. Changing channels, going Home, switching inputs, turning off the TV or unplugging the drive clears the buffer.
How do I pair and use Bluetooth headphones?
On models with Bluetooth, go to Settings > Remotes & devices > Wireless headphones and select Add new wireless headphones. Put the headphones in pairing mode, wait up to 30 seconds for the scan, and choose them from the list. To listen later, press STAR (*) during a program, select Wireless headphones, pick your headphones and select Connect. The TV mutes its speakers and any soundbar until you disconnect. If you do not see Wireless headphones in the menu, the TV has no Bluetooth.
What can I do if the menus won’t open and I can’t factory reset?
Use a hardware method that matches your TV. If it has a recessed RESET button on the back, hold it with a straightened paper clip or ball-point pen for about 12 seconds until the status indicator comes on dim, release it, then turn the TV on. If it has two panel buttons and one is shaped like a Roku remote, hold both for at least five seconds. If it has neither, hold the TV’s POWER button for 10 seconds. Afterward, you go through Guided Setup again.
Why is there no sound from my soundbar or receiver?
Check Settings > Audio > Audio output. Auto picks the optical port, HDMI ARC or eARC, wireless speakers or the built-in speakers by itself, ARC/eARC and Optical send sound only to that connection, and Built-in speakers keeps sound in the TV. For HDMI, use a certified cable on the TV’s HDMI ARC or eARC port and choose Auto or ARC/eARC. For optical, set Audio output to Optical so it works reliably. Also remember that plugging in headphones, using private listening or connecting Bluetooth headphones automatically mutes the active output.
How do I unblock a program that parental controls blocked?
Press OK on the blocked message to select Unblock, enter your four-digit parental control PIN with the directional pad, and select Unblock everything. All blocking then stays off for two hours or until you turn off the TV. Press STAR (*) before entering the PIN to hide the highlighted numbers if others are watching. Remember that these controls cover only tuner programs, not other inputs or streaming channels, and that Reset parental controls erases the PIN along with all settings.
How do I update the TV software without an Internet connection?
Open Settings > System > Software update and select I can’t connect, although connecting is recommended if you can. On a computer, open the web address the TV shows, choose your brand and model and download the file to the root folder of a FAT-16 or FAT-32 USB flash drive. Plug the drive into the TV, note the 12-digit code it shows, enter it on the website, and then type the 6-digit code from the website into the TV. Do not remove the drive until the TV restarts, then check the version at Settings > System > About.