
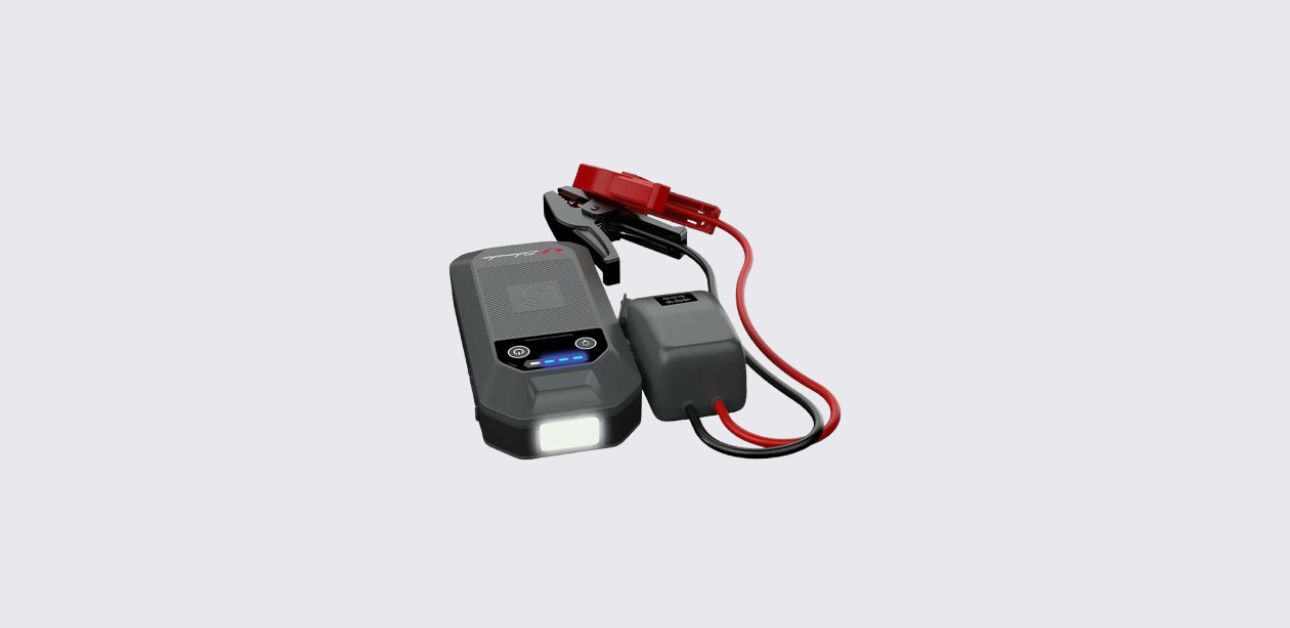
The Schumacher SL1672 Lithium Jump Starter is a compact emergency power solution designed for vehicle jump starting, mobile device charging, and portable power needs. It combines a powerful lithium-ion battery, smart safety protections, USB charging ports, wireless charging capability, and an integrated LED flashlight in one portable device.
This guide explains how to use the Schumacher SL1672 safely and effectively. It covers product features, setup instructions, charging procedures, jump-starting operations, maintenance, troubleshooting, specifications, and support information.
Whether the unit is used for emergency vehicle starting, charging mobile devices, or powering accessories while traveling, understanding its features helps improve performance and extend battery life.
Schumacher SL1672 Product Overview
The Schumacher SL1672 is a 12-volt lithium jump starter and portable power pack designed for vehicles with 12V battery systems. Unlike traditional jump starters that are bulky and heavy, this model uses lithium-ion polymer battery technology to provide strong starting power in a compact package.
The unit offers several useful functions beyond jump starting. It includes wireless charging for compatible smartphones, USB-A and USB-C charging ports for electronic devices, and a built-in LED emergency flashlight with multiple lighting modes.
The jump starter features smart protection systems that help prevent common user mistakes such as reverse polarity connections, short circuits, overheating, and improper battery connections. These safety features make it easier for beginners to operate the device safely.
The SL1672 is suitable for:
- Cars
- SUVs
- Pickup trucks
- Motorcycles
- Boats with 12V systems
- ATVs and utility vehicles
Because of its compact size, it can be stored in a glove box, trunk, toolbox, or emergency vehicle kit without taking up much space.
What’s Included in the Box
The package includes the main components needed to operate the jump starter.
Included Components
| Item | Description |
| Schumacher SL1672 Jump Starter | Main power unit |
| Smart Jumper Cable Assembly | Battery connection cable |
| USB-A to USB-C Charging Cable | Used for charging the unit |
| User Manual | Product instructions |
The smart jumper cable contains built-in safety electronics that monitor connections and provide status indicators during jump-starting operations.
Schumacher SL1672 Parts and Features
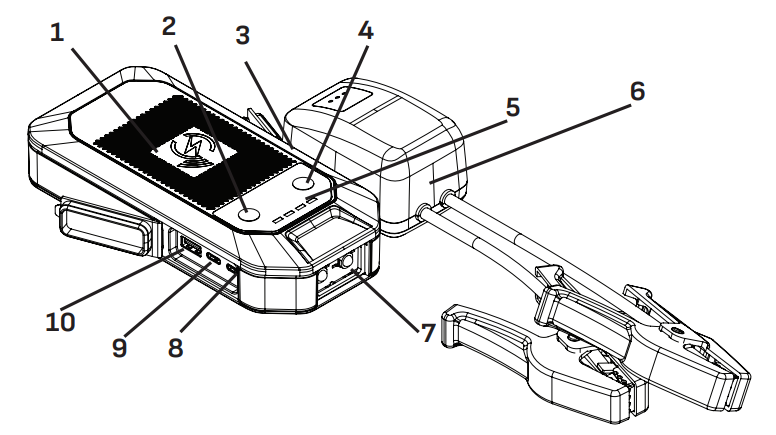
Understanding each component helps users operate the unit correctly.
Main Components
| Part | Function |
| Wireless Charging Pad | Charges compatible smartphones |
| Power Button | Turns power functions on and off |
| Jump Start Output Socket | Connects smart jumper cables |
| Light Button | Controls LED flashlight |
| Battery Status LEDs | Display battery charge level |
| Smart Jumper Cable Assembly | Vehicle battery connection |
| LED Light | Emergency flashlight |
| USB-C Input | Recharges internal battery |
| USB-C Output | Charges external devices |
| USB-A Output | Charges external devices |
The wireless charging pad allows convenient cable-free charging for compatible devices. The USB ports support various charging speeds depending on the connected device.
Important Safety Information
Safety should always be the top priority when using a jump starter.
Battery Safety
Lead-acid batteries generate explosive gases during normal operation. Sparks, flames, or incorrect connections can cause serious injury or damage. Always work in a well-ventilated area and keep flames and sparks away from batteries.
Before connecting the jump starter:
- Turn off the vehicle ignition.
- Remove metal jewelry.
- Wear eye protection.
- Inspect battery terminals.
- Verify battery voltage is 12 volts.
Never attempt to jump start a frozen battery. Never allow the jumper clamps to touch each other during operation.
Electrical Safety
To reduce the risk of electric shock:
- Do not expose the unit to rain or snow.
- Do not use damaged cables.
- Do not disassemble the product.
- Use only approved accessories.
- Keep children away from the unit.
The manufacturer recommends servicing only through qualified technicians.
Lithium Battery Safety
The SL1672 contains a lithium-ion polymer battery. Avoid exposing the unit to temperatures above 265°F (130°C). Never attempt to modify or repair the battery pack.
Understanding the Control Panel
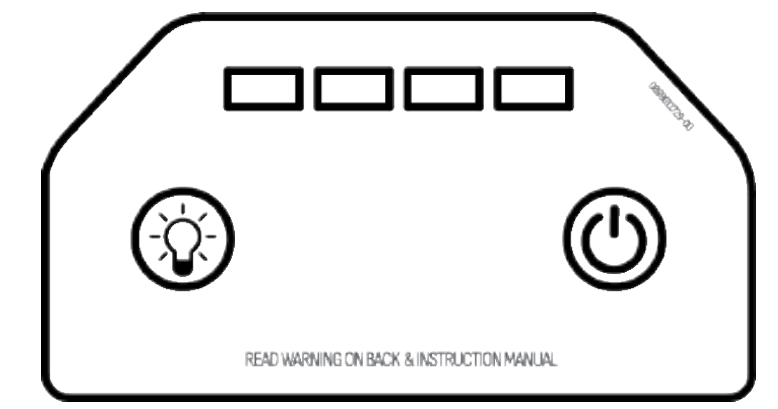
The control panel uses LED indicators to display battery status and operating conditions.
Battery Status Indicators
| LED Display | Battery Level |
| Four LEDs | 100% |
| Three LEDs | 75% |
| Two LEDs | 50% |
| One LED | 25% |
Press the Power button to check the current battery charge level.
LED Warning Patterns
| Indicator Pattern | Meaning |
| All LEDs blinking every 0.5 seconds | Over-temperature protection |
| Four LEDs solid | Fully charged |
| Alternating LED patterns | Charging aborted |
These indicators help users quickly identify operating conditions without connecting additional equipment.
Smart Jumper Cable Indicators
The smart jumper cable includes its own safety monitoring system.
LED Functions
| LED | Purpose |
| Ready LED | Correct connection status |
| Fault LED | Error indication |
| Clamp Reverse LED | Reverse polarity warning |
| Override Button | Manual low-voltage start |
Cable Status Guide
| Indicator Status | Meaning |
| Green Ready LED blinking | Connected to jump starter only |
| Green Ready LED solid | Proper battery connection |
| Fault + Reverse LEDs on | Reverse polarity detected |
| Fault LED on | Short circuit protection |
| Fault + Ready LEDs on | Temperature protection |
| No LEDs | Battery exhausted or poor connection |
When the problem is corrected, the cable automatically resets itself.
Charging the Schumacher SL1672
Keeping the internal battery fully charged is important for reliable performance.
The manufacturer recommends charging:
- Immediately after purchase
- After every use
- Every 30 days during storage
- Whenever battery level drops below 75%
Regular charging helps maximize battery life and ensures the jump starter is ready when needed.
How to Charge the Internal Battery
- Obtain an 18W USB charger.
- Connect the USB charging cable to the charger.
- Connect the cable to the jump starter’s USB-C input.
- Plug the charger into a powered outlet.
- Allow the unit to charge fully.
- Disconnect the charger after charging completes.
Charging Times
| Model | Approximate Charge Time |
| SL1672 | 2–3 Hours |
| SL1673 | 2–3 Hours |
| SL1674 | 4–5 Hours |
Using chargers below 18 watts will increase charging time.
How to Connect the Jump Starter to a Vehicle Battery
Correct battery connections are critical for safe operation.
For Negative-Ground Vehicles
Most modern vehicles use a negative-ground electrical system.
- Connect the red clamp to the positive battery terminal.
- Connect the black clamp to the vehicle chassis or engine block.
- Keep the black clamp away from the battery itself.
- Verify connections are secure.
For Positive-Ground Vehicles
- Connect the black clamp to the negative battery terminal.
- Connect the red clamp to the vehicle chassis or engine block.
- Ensure secure metal contact.
Never connect clamps to:
- Fuel lines
- Carburetors
- Thin sheet metal
- Moving engine parts
Always connect to a heavy metal section of the frame or engine block.
How to Jump Start a Vehicle
The SL1672 delivers up to 1000 peak amps for emergency vehicle starting.
Before Starting
Make sure:
- Vehicle ignition is off.
- Jump starter battery is at least 50% charged.
- All vehicle accessories are turned off.
- Smart jumper cable is connected.
Jump Starting Procedure
- Connect the jumper cable to the jump starter.
- Connect battery clamps correctly.
- Verify the green Ready LED is illuminated.
- Start the vehicle.
- Crank for no more than 5–8 seconds.
- If the engine does not start, wait at least one minute.
- Try again.
Do not attempt more than three consecutive starting attempts. If the vehicle still does not start, seek professional service.
After the Engine Starts
- Disconnect the jumper cable from the jump starter.
- Remove the black clamp.
- Remove the red clamp.
- Recharge the jump starter immediately.
This procedure helps preserve battery life and ensures readiness for future use.
Using Override Mode for Low-Voltage Batteries
Some batteries become so deeply discharged that the jump starter cannot automatically detect them.
The SL1672 includes a manual override function for these situations.
How to Use Override Mode
- Connect the clamps correctly.
- Press and hold the Override button for 3 seconds.
- Wait for the Ready LED to remain solid.
- Start the vehicle.
Important Warning
Override mode bypasses certain safety protections. Incorrect connections can cause:
- Sparking
- Battery damage
- Vehicle electrical damage
- Jump starter damage
Always verify clamp polarity before using Override Mode.
Wireless Charging Function
The integrated wireless charging pad delivers up to 10 watts of charging power.
Using Wireless Charging
- Confirm device compatibility with wireless charging.
- Place the device face-up on the charging pad.
- Press the Power button.
- Wait for charging to begin.
- Remove the device after charging completes.
The jump starter automatically powers down after approximately 15 seconds if left inactive.
Charging Devices Through USB Ports
The SL1672 functions as a portable power bank for phones, tablets, and other electronics.
USB Output Specifications
| Port | Output |
| USB-A | 5V/3A, 9V/2A, 12V/1.5A |
| USB-C | 5V/3A, 9V/2A, 12V/1.5A |
When both ports operate simultaneously, each provides up to 5V/2.2A.
USB Charging Procedure
- Connect the charging cable.
- Plug into the desired USB port.
- Press the Power button.
- Allow charging to complete.
- Disconnect the cable.
If no USB device is connected, power automatically shuts off after 15 seconds to conserve battery capacity.
Using the Built-In LED Flashlight
The SL1672 includes a powerful LED emergency flashlight.
Turning the Light On
- Press and hold the Light button for 2 seconds.
- The light activates in steady mode.
Available Light Modes
| Mode | Purpose |
| Steady Light | General illumination |
| SOS Flash | Emergency signaling |
| Strobe Flash | Roadside visibility |
Press the Light button repeatedly to cycle through the available modes. Hold the button again to switch the light off.
Maintenance Instructions
Routine maintenance helps keep the jump starter operating properly.
Cleaning the Unit
After each use:
- Disconnect all cables.
- Wipe the exterior using a dry cloth.
- Remove dirt, grease, and corrosion from battery clamps.
- Inspect cables for damage.
Never use excessive moisture or harsh cleaning chemicals.
Service Requirements
The unit contains no user-serviceable internal components. Do not open the housing or attempt internal repairs. Any repair work should be performed by qualified service personnel.
Storage Guidelines
Proper storage protects the internal lithium battery and extends product life.
Recommended Storage Conditions
| Requirement | Recommendation |
| Storage Temperature | -4°F to 113°F (-20°C to 45°C) |
| Charge Before Storage | Fully charge |
| Maintenance Charging | Every month |
Storage Best Practices
Always store the jump starter indoors in a dry location. Avoid direct sunlight, excessive heat, and freezing conditions.
Never store the unit with a completely discharged battery. Recharge after every use and perform monthly maintenance charging during long-term storage.
Schumacher SL1672 Troubleshooting Guide
Jump Starter Will Not Start Vehicle
Possible causes include:
- Low internal battery charge
- Incorrect battery connections
- Vehicle battery failure
- Damaged vehicle starter system
Solutions:
- Recharge the jump starter.
- Verify battery charge exceeds 50%.
- Check clamp connections.
- Limit attempts to three starts.
Four LEDs Flashing
Cause:
- High temperature condition
Solution:
- Allow the unit to cool.
- LEDs should stop flashing within approximately 30 seconds.
Unit Will Not Recharge
Possible causes:
- Dead outlet
- Faulty charger
- Damaged charging cable
Solutions:
- Verify power source operation.
- Test another charger.
- Inspect charging cable.
Ready LED Blinking During Connection
This condition may indicate a falsely detected high battery voltage. The vehicle can generally still be started normally according to the manufacturer.
Schumacher SL1672 Specifications
General Specifications
| Specification | Value |
| Battery Type | Lithium-Ion Polymer |
| Wireless Charging | 10W Maximum |
| USB-C Input | 5V/3A, 9V/2A |
| USB-A Output | 5V/3A, 9V/2A, 12V/1.5A |
| USB-C Output | 5V/3A, 9V/2A, 12V/1.5A |
| Charging Temperature | 32°F to 113°F |
| Discharging Temperature | -4°F to 122°F |
SL1672 Performance Specifications
| Feature | Specification |
| Battery Capacity | 23.68Wh |
| Peak Jump Starting Current | 1000A |
These specifications make the SL1672 suitable for emergency starting and portable charging applications.
Replacement Parts
The manufacturer provides replacement components when needed.
| Part | Part Number |
| Smart Jumper Cable Assembly | 94500946Z |
| USB-A to USB-C Charging Cable | 3899004188Z |
Using genuine replacement parts helps maintain safe operation and compatibility.
Warranty and Customer Support
Schumacher Electric provides a two-year limited warranty for the SL1672 jump starter. Warranty coverage details, repairs, and return information are available directly from the manufacturer.
Support Contact Information
Schumacher Electric Corporation
Phone: 1-800-621-5485
Website: schumacherelectric.com
Customers should have the model number available when contacting support for warranty claims, troubleshooting assistance, replacement parts, or technical questions.