| Field | Details |
| Document Title | IdeaPad 1 Series — User Guide |
| Document Type | User Guide |
| Brand Name | Lenovo |
| Product Name | IdeaPad 1 Series Laptop |
| Model Number(s) | 14ADA7, 14ALC7, 14AMN7, 14IAU7, 14IGL7, 14IJL7, 15ADA7, 15ALC7, 15AMN7, 15IAU7, 15IGL7, 15IJL7, 15IRU7, including specified subvariants |
| PDF File Size | 2.98 MB |
| Number of Pages | 31 |
| Languages Covered | English, with a brief French notice for Quebec consumers |
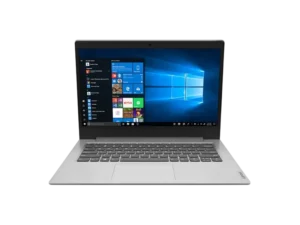
Lenovo IdeaPad 1 Series 14ADA7
The Lenovo IdeaPad 1 Series consists of 14-inch and 15-inch laptops designed for everyday computing, including working with Windows applications, browsing the internet, connecting external devices, using multimedia, and managing personal files.
Depending on the specific model, the laptop includes a built-in camera with a privacy cover, microphones, wireless LAN and Bluetooth connectivity, a touchpad, a keyboard with shortcut keys, and an optional fingerprint reader.
The laptop also provides several physical connections, including USB-A, USB-C, HDMI, a 3.5 mm combo audio jack, and an SD memory card slot. The USB-C connection supports data transfer and power output to compatible connected devices but does not support an external display.
The IdeaPad 1 Series uses a built-in rechargeable battery and an AC power adapter. The user can check battery status through Windows, adjust power plans, change performance modes, and access selected hardware settings through Lenovo Vantage or Lenovo PC Manager.
For advanced configuration, the computer provides a UEFI/BIOS setup utility. This allows changes to the startup sequence, hotkey behavior, and supported security settings. A dedicated Novo button also provides access to the BIOS setup utility, boot menu, and Windows startup options.
Features, specifications, and hardware configurations vary among the supported IdeaPad 1 models. Some functions, including touchscreen input, the fingerprint reader, numeric keypad, and keyboard backlight, are only available on selected configurations.
Supported Models and Machine Types
The IdeaPad 1 Series user guide covers the following laptop models and their corresponding machine types.
| Laptop Model | Machine Type (MT) |
| IdeaPad 1 14ADA7 | 82R0 |
| IdeaPad 1 14ALC7 | 82R3 |
| IdeaPad 1 14AMN7 | 82VF |
| IdeaPad 1 14IAU7 | 82QC |
| IdeaPad 1 14IGL7 | 82V6 |
| IdeaPad 1 14IJL7 | 82LV |
| IdeaPad 1 15ADA7 | 82R1 |
| IdeaPad 1 15ALC7 | 82R4 |
| IdeaPad 1 15AMN7 | 82VG, 82X5 |
| IdeaPad 1 15IAU7 | 82QD |
| IdeaPad 1 15IGL7 | 82V7 |
| IdeaPad 1 15IJL7 | 82LX |
| IdeaPad 1 15IRU7 | 83B4 |
The supported model list also includes variations identified by suffixes such as 1, 2, Ua, Ub, and Uc, as well as alternate model names such as IdeaPad 14 ALC7, IdeaPad 14 IAU7, IdeaPad 15 ALC7, and IdeaPad 15 IAU7.
Hardware specifications and available features depend on the exact configuration.
Laptop Parts and Components
The computer includes several built-in components for input, communication, display, and connectivity.
Front Components
| Component | Function |
| Wireless Antennas | Transmit and receive wireless LAN and Bluetooth signals. |
| Microphones | Capture sound and voice for audio recording and communication. |
| Camera | Captures photos and videos and supports video communication. |
| Camera Cover Slider | Covers or uncovers the camera lens for privacy. |
| Camera Light | Illuminates when the camera is being used. |
| Display | Shows text, graphics, and video; touchscreen capability is available on selected models. |
Wireless Antennas
The built-in wireless antennas support communication through the wireless LAN and Bluetooth module.
The antennas are not visible from outside the laptop.
If the antennas are located within 20 cm of the body, the applicable Specific Absorption Rate (SAR) information is provided in the Setup Guide.
Camera and Privacy Cover
The built-in camera supports:
- Taking photographs
- Recording videos
- Video conferencing
The camera cover slider physically covers or uncovers the camera lens.
Moving the slider over the camera lens provides additional privacy when the camera is not needed.
Camera Indicator Light
The camera light turns on when the camera is in use.
Display
The laptop’s built-in display shows Windows applications, documents, images, and video.
Selected configurations support multi-touch input.
Keyboard and Touchpad
The keyboard provides standard character input, function keys, and shortcut keys.
The touchpad supports pointer movement and multi-touch operations.
Power Button and Fingerprint Reader
The power button turns on the laptop or puts it into sleep mode.
Selected models include a fingerprint reader integrated with the power button for user authentication.
Power Indicator
The power indicator displays the laptop’s current power state.
| Power Light Status | Meaning |
| On | Computer is powered on. |
| Off | Computer is turned off or in hibernation. |
| Blinking | Computer is in sleep mode. |
Left-Side Ports and Connections
The left side contains the power connector and several ports for external devices.
| Port or Component | Function |
| Power Connector | Connects the supplied power adapter. |
| Charging Indicator | Shows AC power connection and charging status. |
| USB 3.2 Gen 1 Type-A | Connects compatible USB peripherals. |
| HDMI 1.4 | Connects an external digital display or compatible audio/video device. |
| USB-C | Connects compatible external storage and data devices. |
| Combo Audio Jack | Connects headphones or headsets using a 3.5 mm four-pole plug. |
Power Connector
The power connector is used with the included AC adapter and power cord to supply power and charge the laptop battery.
Charging Indicator Light
| Charging Light | Battery or Power Status |
| Solid White | AC power connected; battery capacity 91–100%. |
| Solid Amber | AC power connected; battery capacity 1–90%. |
| Off | AC power is not connected. |
USB 3.2 Gen 1 Type-A Port
This port can connect compatible devices such as:
- USB keyboards
- USB mice
- USB storage drives
- USB printers
HDMI 1.4 Port
The HDMI connector supports compatible external digital displays and audio/video devices, including televisions.
The specified maximum HDMI 1.4 output is 3840 × 2160 pixels at 30 Hz with 24 bits per pixel.
USB-C Port
The USB-C connector supports external storage and other data devices.
Its specified functions include:
| Feature | Specification |
| USB Data Transfer | Up to 5 Gbps with USB 3.2 Gen 1 on applicable models |
| Power Output | Up to 5V, 3A |
| External Display Output | Not supported |
An appropriate adapter may be required when connecting certain devices.
Important: The USB-C connector cannot be used to connect an external display.
Combo Audio Jack
The 3.5 mm combo audio jack supports headphones and headsets that use a single four-pole plug.
Standalone external microphones are not supported through this jack.
Right-Side Ports and Connections
The right side contains the Novo button hole, memory card slot, and USB 2.0 connector.
| Component | Function |
| Power Indicator | Displays the laptop’s power state. |
| Novo Button Hole | Opens the Novo Button menu. |
| SD Card Slot | Accepts SD cards and MultiMediaCards for storage and data transfer. |
| USB 2.0 Port | Connects compatible USB peripherals. |
Novo Button Hole
The Novo button provides access to startup and recovery-related options.
It can be used to open:
- UEFI/BIOS Setup Utility
- Boot Device Selection Menu
- Windows Startup Options
SD Card Slot
The card slot accepts SD cards and MultiMediaCards (MMC).
These cards can be used for storing and transferring files.
USB 2.0 Port
The USB 2.0 connector supports compatible peripherals such as mice, storage drives, and printers.
Technical Specifications
Dimensions
The IdeaPad 1 Series is available in 14-inch and 15-inch configurations.
| Dimension | 14-Inch Models | 15-Inch Models |
| Width | 325.3 mm (12.8 in) | 360.2 mm (14.2 in) |
| Depth | 216.5 mm (8.5 in) | 236 mm (9.3 in) |
| Thickness | 17.9 mm (0.7 in) | 17.9 mm (0.7 in) |
AC Power Adapter
The included AC adapter specifications vary according to the model family.
| Specification | Details |
| Input Voltage | 100–240V AC |
| Input Frequency | 50–60 Hz |
| Output Voltage | 20V DC |
| 65W Adapter Output | 3.25A |
| 45W Adapter Output | 2.25A |
Power Adapter by Model Family
| Model Family | Adapter Power |
| ADA Series | 65W |
| ALC Series | 65W |
| AMN Series | 65W |
| IAU Series | 65W |
| IRU Series | 65W |
| IGL Series | 45W |
| IJL Series | 45W |
Battery Specifications
| Specification | Details |
| Battery Type | Built-In Rechargeable Battery Pack |
| Typical Capacity | 42 Wh |
| Number of Cells | 3 |
| Approximate Full Charging Time | 2–4 Hours |
| Recommended Charging Temperature | 10–35°C (50–95°F) |
Actual battery capacity and charging time depend on operating conditions.
Memory
| Specification | Details |
| Memory Type | DDR4 |
| AMN Models | LPDDR5 |
| Physical Memory Slots Listed | 1 |
Memory configuration varies according to model.
Storage
| Storage Feature | Details |
| Main Storage Type | Solid-State Drive |
| SSD Form Factor | M.2 2242 or M.2 2280 on selected configurations |
| SSD Bus | PCI Express |
| Additional Storage Type on ADA, IGL and IJL Models | Embedded MultiMediaCard (eMMC) |
Display Specifications
| Specification | 14-Inch Models | 15-Inch Models |
| Screen Size | 355.6 mm (14 in) | 381 mm (15 in) |
| HD Resolution | 1366 × 768 | 1366 × 768 |
| Full HD Resolution | 1920 × 1080 | 1920 × 1080 |
| Full HD IPS Resolution | 1920 × 1080 | 1920 × 1080 |
| Full HD IPS OnCell Touch | Available on selected ALC, AMN and IAU models | Available on selected ALC, AMN, IAU and IRU models |
The actual display type depends on the model configuration.
Wireless Connectivity
The laptop supports:
- Wireless LAN
- Bluetooth
USB Data Transfer Rates
| USB Standard | Specified Data Rate |
| USB 2.0 | 0.48 Gbps |
| USB 3.2 Gen 1 | 5 Gbps |
Actual transfer speeds depend on connected devices, file characteristics, computer configuration, and operating conditions.
How to Check Processor Information
- Open the Windows search box.
- Type System Information.
- Press Enter.
- Review the processor information shown by Windows.
Operating Environment
The laptop must be operated and stored within the environmental limits specified for the product.
Temperature and Altitude
| Condition | Specification |
| Maximum Altitude Without Pressurization | 3,048 m (10,000 ft) |
| Operating Temperature up to 2,438 m | 5–35°C (41–95°F) |
| Storage Temperature up to 2,438 m | 5–43°C (41–109°F) |
| Maximum Operating Temperature Above 2,438 m | 31.3°C (88°F) |
| Minimum Battery Charging Temperature | 10°C (50°F) |
Relative Humidity
| Condition | Relative Humidity |
| Operating | 8–95% at a wet-bulb temperature of 23°C (73°F) |
| Storage | 5–95% at a wet-bulb temperature of 27°C (81°F) |
Important Safety Instructions
Avoid Prolonged Contact with Hot Surfaces
During operation, the bottom surface of the laptop can become warm.
The computer should be placed on a hard, flat surface rather than directly against bare skin.
Prolonged contact with the underside can cause discomfort or injury, even when the temperature remains within the limits specified by IEC 62368-1.
Avoid direct contact with the bottom surface for more than one minute.
Battery Charging Precautions
The battery should be charged only within the recommended temperature range of 10–35°C (50–95°F).
Charging can be affected by the battery’s temperature and the operating environment.
Liquid Spill Precautions
If liquid is spilled on the computer:
- Unplug the AC power adapter carefully.
- Turn off the computer immediately.
- Do not continue using the computer while liquid remains inside.
- Wait until the liquid is completely dry before turning it on again.
Caution: Do not turn the computer upside down to drain liquid. If the model has drainage holes, liquid can drain through them.
Security Precautions
UEFI/BIOS administrator and hard disk passwords must be stored securely.
Forgetting certain passwords can result in hardware replacement or permanent loss of access to stored data.
Before First Use
Before starting the laptop, read the Safety and Warranty Guide, Setup Guide, and applicable safety notices.
Connect the Power Adapter
- Position the computer on a hard, flat surface.
- Connect the included power adapter to the laptop’s power connector.
- Connect the power cord to a suitable electrical outlet.
- Check the charging indicator.
Turn On the Laptop
Press the power button.
The computer starts and loads the operating system.
Identify Optional Features
Some features depend on the exact model, including:
- Fingerprint reader
- Touchscreen
- Numeric keypad
- Keyboard backlight
The available configuration can be checked using Windows System Information, Lenovo Vantage, or Lenovo PC Manager.
Getting Started with Windows
The laptop uses Windows features for everyday settings, internet connectivity, and device management.
Access Windows Settings
- Open Windows Search.
- Type the name of the required setting.
- Select the matching result.
- Follow the displayed instructions.
Common Windows Settings
| Setting | Search Term | Purpose |
| Control Panel | Control Panel | Manage hardware and software settings. |
| WiFi | Wi-Fi | Connect to wireless networks. |
| Airplane Mode | Airplane mode | Enable or disable wireless communication. |
| Night Light | Night light | Adjust display colors to reduce blue light. |
| Windows Update | Windows Updates | Check for applicable operating system updates. |
| Fingerprint Sign-In | Sign-in options | Configure fingerprint authentication on supported models. |
How to Connect to WiFi
- Open Windows.
- Select the network icon in the notification area.
- Choose the required wireless network.
- Connect using the network’s credentials.
Some wireless standards may be restricted by regional regulations.
Airplane Mode
Airplane Mode allows wireless communications to be enabled or disabled together.
It may be required when traveling by airplane.
Night Light
Night Light changes the screen to warmer colors and reduces emitted blue light.
The color temperature can be adjusted through Windows Night Light settings.
Windows Updates
Windows periodically downloads feature and security updates when the computer is connected to the internet.
When an update requires a restart, Windows prompts the user to restart.
Updates can also be checked manually.
Important: Operating system updates should be installed through Windows Update. Updates from other sources may introduce security risks.
Lenovo Vantage and Lenovo PC Manager
Lenovo provides software tools for viewing product information, managing settings, and checking updates.
Available Functions
| Function | Lenovo Vantage | Lenovo PC Manager |
| View Product Information | Yes | Yes |
| View System Status | Yes | Yes |
| Change Device Settings | Yes | Yes |
| Check for System Updates | Yes | Driver updates |
| Install System Updates | Yes | Driver updates |
The availability of individual functions depends on the product and software version.
How to Open Lenovo Vantage or Lenovo PC Manager
- Open Windows Search.
- Type Lenovo Vantage or Lenovo PC Manager.
- Select the application.
Depending on the region, one application may already be installed.
Lenovo Vantage can be downloaded from the Microsoft Store.
How to Use the Novo Button
The Novo Button menu provides access to startup configuration and Windows recovery options.
Opening the Novo Button Menu
- Turn off the laptop.
- Open the display.
- Press the Novo button.
The Novo Button menu appears before Windows starts.
Alternative Keyboard Method
The Novo Button menu can also be opened by turning off the laptop, then pressing Fn + Power Button.
Novo Menu Options
| Option | Function |
| BIOS/UEFI Setup | Opens firmware configuration. |
| Boot Menu | Allows selection of a startup device. |
| Windows Startup Options | Opens Windows startup and recovery functions. |
The Windows startup options can be used to access a recovery drive, reset Windows, or open advanced startup options.
Keyboard Shortcuts and Function Keys
The IdeaPad 1 keyboard includes shortcut keys, also called hotkeys, for controlling common computer functions.
Some shortcuts can be pressed directly, while others must be used with the Fn key.
Keyboard Hotkey Functions
| Shortcut Function | Description |
| Mute/Unmute Audio | Turns the computer sound on or off. |
| Decrease/Increase Volume | Adjusts system volume. |
| Mute/Unmute Microphone | Enables or disables microphone audio. |
| Refresh | Reloads a webpage or refreshes the screen. |
| Touchpad Control | Enables or disables the touchpad. |
| Airplane Mode | Turns Airplane Mode on or off. |
| Windows Settings | Opens the Windows Settings application. |
| Calculator | Opens Windows Calculator. |
| Snipping Tool | Opens the Windows screenshot tool. |
| Task View | Displays thumbnails of open applications. |
| Voice Assistant | Opens a voice assistant application where supported. |
| Lenovo Utility | Opens Lenovo Vantage, Lenovo PC Manager, or an application launch bar. |
| Camera Control | Enables or disables the integrated camera. |
| Lock Screen | Locks the computer screen. |
| Display Switching | Switches between connected display devices. |
| Screen Brightness | Increases or decreases display brightness. |
| Play/Pause | Controls media playback. |
| Stop Playback | Stops media playback. |
| Next Track | Advances to the next media file. |
| Previous Track | Returns to the previous media file. |
| Keyboard Backlight | Turns the backlight on or off or adjusts brightness where supported. |
The voice assistant and keyboard backlight shortcuts are not available on every model. These particular shortcuts must be used with Fn when present.
How Hotkey Mode Works
Some hotkeys share the same physical keys as F1–F12.
The Hotkey Mode setting in UEFI/BIOS determines whether the hotkey or function-key behavior is activated directly.
| Hotkey Mode | Using Hotkeys | Using F1–F12 |
| Enabled | Press the hotkey directly. | Hold Fn and press the required function key. |
| Disabled | Hold Fn and press the hotkey. | Press the function key directly. |
Hotkeys that do not share keys with the function keys are not affected by Hotkey Mode.
How to Use the Numeric Keypad
Selected 15-inch models include a numeric keypad on the right side of the keyboard.
The numeric keypad allows numbers and mathematical operators to be entered quickly.
Press NumLock to enable or disable it.
Touchscreen Gestures
Selected IdeaPad 1 models include a touchscreen.
These models allow interaction with Windows and compatible applications using finger gestures.
Multi-Touch Gesture Guide
| Gesture | Function |
| Tap | Select an item. |
| Double Tap | Double-click an item. |
| Tap and Hold | Right-click an item. |
| Pinch Two Fingers Together | Zoom out. |
| Spread Two Fingers Apart | Zoom in. |
| Gesture from Left Edge | Display open applications. |
The touchscreen also supports interaction with Windows notification and Action Center features.
Not all gestures are supported by every application.
How to Check Battery Status
The current battery status can be checked through Windows.
Checking the Battery Level
- Locate the battery icon in the Windows notification area.
- Select the battery icon.
- Review the remaining battery percentage.
- Access the available power settings if required.
Windows displays a warning when the battery level becomes low.
How to Charge the Battery
The IdeaPad 1 uses a built-in rechargeable battery.
Battery Charging Instructions
- Connect the included AC power adapter to the laptop.
- Connect the power adapter to an electrical outlet.
- Check the charging indicator.
- Allow the battery to charge.
The battery normally reaches full charge in approximately 2–4 hours.
Charging time depends on battery capacity, temperature, operating conditions, and whether the laptop is being used.
Recommended Charging Temperature
Battery charging is recommended at temperatures between:
10–35°C (50–95°F)
The battery temperature can be checked through Lenovo Vantage or Lenovo PC Manager.
Battery Charging Behavior
To help maximize battery life, the computer may prevent the battery from charging again immediately after reaching full charge.
Once fully charged, the battery may need to discharge to 94% or lower before charging resumes.
This behavior is part of the battery management system.
Battery Capacity Optimization
The battery may adjust its available full-charge capacity according to usage patterns.
After an extended period of limited use, full capacity may not be available until the battery has discharged to approximately 20% and then been recharged completely.
Additional battery information is available in the power management section of Lenovo Vantage.
How to Change Power Button Behavior
By default, pressing the power button puts the computer into sleep mode.
The behavior can be changed through Windows Control Panel.
Changing the Power Button Function
- Open Windows Search.
- Type Control Panel.
- Press Enter.
- Open Control Panel.
- Change the view to Large Icons or Small Icons.
- Select Power Options.
- Choose Choose what the power button does.
- Configure the preferred behavior.
Windows Power Plans
A power plan determines how Windows manages computer power consumption.
It controls settings such as:
- Display timeout
- Sleep timeout
- Power-saving behavior
The default plan identified for the computer is Balanced.
Default Display and Sleep Timeouts
The following table summarizes the model-family settings identified in the user guide.
| Model Family | Display Off on Battery | Display Off on AC | Sleep on Battery | Sleep on AC |
| ADA | 10 min | 10 min | 20 min | 20 min |
| ALC | 10 min | 10 min | 30 min | 30 min |
| AMN | 4 min | 10 min | 4 min | 20 min |
| IAU | 4 min | 10 min | 4 min | 10 min |
| IGL / IJL | 10 min | 10 min | 30 min | 30 min |
| 15IRU7 | 3 min | 5 min | 3 min | 5 min |
These are the documented default settings. Windows configuration may differ after customization or updates.
How to Change a Power Plan
- Open Windows Search.
- Type Power Plan.
- Press Enter.
- Open the matching power settings.
- Adjust the preferred power plan.
How to Wake the Laptop from Sleep
Press the power button or any key on the keyboard to wake the computer from sleep.
How to Change Performance Mode
The computer supports different performance modes.
These modes affect both system performance and power consumption.
Changing Performance Mode
Press:
Fn + Q
Pressing the shortcut cycles through the available performance modes.
The appropriate mode can be selected according to the required balance between performance and power efficiency.
UEFI/BIOS Setup Utility
The laptop includes a UEFI/BIOS setup utility for configuring supported firmware settings.
UEFI/BIOS initializes the hardware when the computer starts and loads the operating system.
The setup utility can be used to change selected startup, security, and keyboard settings.
How to Open UEFI/BIOS
- Turn on or restart the computer.
- Wait for the Lenovo logo.
- Press F2 repeatedly.
If Hotkey Mode is enabled, press Fn + F2 instead.
Alternative BIOS Access
The BIOS setup utility can also be accessed through the Novo Button menu.
How to Change the Startup Sequence
The startup sequence determines which device the computer attempts to start from first.
This setting can be changed when starting from a different storage device or a supported network location.
Changing Boot Priority
- Open the UEFI/BIOS setup utility.
- Navigate to the Boot menu.
- Locate Boot Priority Order.
- Follow the displayed instructions to change the device order.
Temporary Boot Device Selection
A temporary boot device can be selected without permanently changing the BIOS startup order.
- Turn on or restart the computer.
- When the Lenovo logo appears, press F12 repeatedly.
- If required by Hotkey Mode, use Fn + F12.
- Select the required startup device.
How to Change Hotkey Mode in BIOS
The Hotkey Mode setting determines how the shared hotkey and F1–F12 keys operate.
Changing Hotkey Mode
- Open UEFI/BIOS.
- Select Configuration > Hotkey Mode.
- Press Enter.
- Select Enabled or Disabled.
- Select Exit > Exit Saving Changes.
The new setting takes effect after the change is saved.
UEFI/BIOS Password Types
The laptop supports several firmware password types.
These passwords protect BIOS settings, startup access, or stored data.
| Password Type | Prerequisite | Purpose |
| Administrator Password | None | Controls access to the UEFI/BIOS setup utility. |
| User Password | Administrator password must already be set. | Allows limited access to the setup utility. |
| Master Hard Disk Password | None | Protects access to the operating system and stored data. |
| User Hard Disk Password | Master hard disk password must already be set. | Allows authorized access to the operating system. |
All passwords created through the setup utility must contain only letters and numbers.
How to Set an Administrator Password
An administrator password helps prevent unauthorized changes to BIOS settings.
Administrator Password Setup
- Open UEFI/BIOS.
- Select Security > Set Administrator Password.
- Press Enter.
- Enter a password containing letters and numbers.
- Press Enter.
- Enter the password again for confirmation.
- Select Exit > Exit Saving Changes.
The administrator password must be entered when accessing BIOS setup.
Important: If the administrator password is forgotten, Lenovo authorized service personnel cannot reset it. The system board must be replaced by authorized service personnel. Proof of purchase is required, and charges apply for parts and service.
How to Change or Remove the Administrator Password
Only an administrator can change or remove this password.
Changing the Password
- Enter UEFI/BIOS using the administrator password.
- Select Security > Set Administrator Password.
- Enter the current password.
- Enter the new password.
- Confirm the new password.
- Select Exit > Exit Saving Changes.
Removing the Password
Follow the same procedure, but leave both new password fields empty and press Enter.
Removing the administrator password also removes the user password.
How to Set a User Password
The administrator password must be configured before a user password can be created.
User Password Setup
- Open UEFI/BIOS using the administrator password.
- Select Security > Set User Password.
- Press Enter.
- Enter a password containing letters and numbers.
- Make sure it differs from the administrator password.
- Confirm the password.
- Select Exit > Exit Saving Changes.
A user password provides access to the setup utility with limited configuration permissions.
How to Enable a Power-On Password
The Power-On Password function requires a password whenever the computer starts.
An administrator password must already be configured.
Enabling Power-On Password
- Open UEFI/BIOS.
- Select Security > Power on Password.
- Press Enter.
- Change the setting to Enabled.
- Select Exit > Exit Saving Changes.
Once enabled, the computer requests the administrator or user password during startup.
How to Set a Hard Disk Password
A hard disk password protects data from unauthorized access.
The BIOS supports master and user hard disk passwords.
Hard Disk Password Setup
- Open UEFI/BIOS.
- Select Security > Set Hard Disk Password.
- Press Enter.
- Follow the displayed instructions to set the master and user hard disk passwords.
- Select Exit > Exit Saving Changes.
The master and user hard disk passwords must be created together.
A hard disk password cannot be configured when BIOS is opened using only a user password.
Hard Disk Password Warning
Forgetting the hard disk password can result in permanent loss of access to stored data.
Lenovo authorized service personnel cannot reset a forgotten hard disk password or recover the data.
The storage drive must be replaced by an authorized technician.
Proof of purchase is required, and service charges apply.
How to Change or Remove a Hard Disk Password
- Open UEFI/BIOS.
- Select Security.
- Choose the applicable password option.
- Follow the on-screen instructions.
- Select Exit > Exit Saving Changes.
Master Hard Disk Password
Select Change Master Password.
Removing the master hard disk password also removes the user hard disk password.
User Hard Disk Password
Select Change User Password.
The user hard disk password cannot be removed separately.
Troubleshooting Guide
The following procedures address common laptop problems, Windows recovery needs, and hardware support issues.
Quick Troubleshooting Table
| Problem | Recommended Action |
| Laptop stops responding. | Hold the power button until the computer turns off, then restart it. |
| Liquid is spilled on the laptop. | Disconnect the AC adapter, turn off the computer immediately, and wait until completely dry. |
| Windows recovery is required. | Use Windows recovery options or the Novo Button menu. |
| Latest drivers or BIOS are needed. | Use Lenovo Vantage, Lenovo PC Manager, or Lenovo Support. |
| Hardware problem needs diagnosis. | Use Lenovo diagnostic tools or contact Lenovo Customer Support. |
Laptop Stops Responding
If the computer becomes unresponsive:
- Press and hold the power button.
- Wait until the computer turns off.
- Restart the computer.
Liquid Spilled on the Computer
If liquid enters the laptop:
- Carefully disconnect the AC adapter.
- Turn off the computer immediately.
- Allow all liquid to dry completely before turning the laptop on again.
Warning: Do not turn the computer upside down to drain liquid.
If drainage holes are present, liquid can drain through those openings.
Windows Recovery and Reset
Windows and Lenovo recovery tools can be used when the operating system needs to be restored.
Lenovo Recovery Resources
Visit:
https://support.lenovo.com/HowToCreateLenovoRecovery
Follow the provided recovery instructions.
Windows Recovery Options
- Open https://pcsupport.lenovo.com.
- Detect the laptop or select its model manually.
- Select Diagnostics > Operating System Diagnostics.
- Follow the displayed instructions.
Finding the Latest Drivers and BIOS
Updated drivers and firmware can be obtained from:
- Lenovo Vantage
- Lenovo PC Manager
- https://support.lenovo.com
Lenovo Vantage supports system updates, while Lenovo PC Manager provides driver update functions.
Replacement Parts and Customer Replaceable Units
Lenovo identifies certain components as Customer Replaceable Units (CRUs).
These are parts that can be installed or replaced by the customer, subject to their CRU classification.
Types of CRUs
| CRU Type | Description |
| Self-Service CRU | A component that can be installed or replaced relatively easily by the customer or a technician. |
| Optional-Service CRU | A component that may require greater technical skill for customer replacement. |
Customer Replaceable Parts for the IdeaPad 1 Series
| Component | CRU Classification |
| Power Cord | Self-Service CRU |
| AC Power Adapter | Self-Service CRU |
Other Hardware Components
Parts not identified as CRUs, including the built-in rechargeable battery, must be replaced by a Lenovo-authorized repair facility or technician.
Authorized service locations can be found at:
https://support.lenovo.com/partnerlocation
CRU Replacement Conditions
If Lenovo supplies a replacement CRU, the defective part may need to be returned.
When a return is required, Lenovo provides return instructions, a prepaid shipping label, and a shipping container.
If the defective CRU is not returned within 30 days of receiving the replacement, a charge may apply.
Warranty Information
Warranty coverage for the IdeaPad 1 Series depends on the applicable Lenovo warranty terms and the specific product.
Warranty documentation is provided separately through the Safety and Warranty Guide.
Lenovo Limited Warranty
The applicable warranty terms can be reviewed at:
https://www.lenovo.com/warranty/llw_02
Services During the Warranty Period
Lenovo provides the following types of support, subject to the applicable warranty.
| Service | Description |
| Problem Determination | Assistance with diagnosing hardware problems. |
| Lenovo Hardware Repair | Applicable repair service for covered Lenovo hardware defects. |
| Engineering Changes | Selected hardware changes made available by Lenovo or authorized resellers. |
Services Not Covered by Standard Warranty Support
The guide identifies several services outside the listed warranty coverage, including:
- Replacement or use of non-Lenovo or non-warranted parts
- Identification of software problem sources
- BIOS configuration during installation or upgrades
- Driver modifications or upgrades
- Network operating system installation and maintenance
- Application installation and maintenance
Additional Warranty and Service Options
Additional services may be purchased during or after the warranty period.
Visit:
https://pcsupport.lenovo.com/warrantyupgrade
Service availability depends on the country or region.
Customer Support Information
Lenovo provides technical assistance, driver downloads, diagnostics, product documentation, and warranty information through its support website.
Lenovo Support Resources
| Support Resource | Website |
| Lenovo Support | https://support.lenovo.com |
| Product Support | https://pcsupport.lenovo.com |
| Support Telephone Directory | https://pcsupport.lenovo.com/supportphonelist |
| Lenovo Community Forums | https://forums.lenovo.com |
| Lenovo Tips and Troubleshooting | https://www.lenovo.com/tips |
| Accessibility Information | https://www.lenovo.com/accessibility |
| Authorized Service Locations | https://support.lenovo.com/partnerlocation |
| Warranty Upgrades | https://pcsupport.lenovo.com/warrantyupgrade |
How to Find Product Documentation
- Visit https://support.lenovo.com.
- Allow the website to detect the laptop or select the model manually.
- Select Documentation.
- Find the required guide or notice.
Available documents include the Setup Guide, Safety and Warranty Guide, User Guide, Regulatory Notice, and Generic Safety and Compliance Notices.
Before Contacting Lenovo Support
The following information should be collected before contacting Lenovo.
| Product Information | Problem Details |
| Product Name | Description of the problem |
| Machine Type | Whether the problem is continuous or intermittent |
| Serial Number | Error message or error code |
| Operating System | Operating system version |
| Model Information | Applications running when the issue occurred |
It is also helpful to determine whether the problem can be reproduced.
How to Find the Serial Number
The product name and serial number are usually printed on a label or etched onto the bottom cover of the laptop.
Lenovo Customer Support Center
During the warranty period, Lenovo Customer Support can assist with covered hardware problems.
Telephone numbers vary by country and region.
The current directory is available at:
If the required telephone number is unavailable, contact a Lenovo reseller or local Lenovo representative.
Additional Consumer Information for Quebec
For consumers in Quebec, Lenovo states that it does not guarantee the availability of replacement parts, repair services, or information required to maintain or repair the product under Section 79.18 of Quebec’s consumer protection regulations.
Current information about technical support and parts availability can be obtained through:
French-language support information is available at:
Frequently Asked Questions
1. How do I access BIOS on the Lenovo IdeaPad 1 Series?
Turn on or restart the laptop. When the Lenovo logo appears, press F2 repeatedly. If Hotkey Mode is enabled, use Fn + F2 instead. BIOS can also be accessed through the Novo Button menu.
2. How do I open the boot menu on an IdeaPad 1 laptop?
Restart the computer and press F12 repeatedly when the Lenovo logo appears. If required by Hotkey Mode, use Fn + F12. The boot menu allows selection of a startup device without permanently changing the BIOS startup order.
3. How long does the Lenovo IdeaPad 1 battery take to charge?
The battery normally takes approximately 2–4 hours to reach full charge. Charging time depends on battery capacity, temperature, operating conditions, and whether the computer is being used. The recommended charging temperature is 10–35°C (50–95°F).
4. Why is my Lenovo IdeaPad 1 not charging when the battery is above 94%?
The laptop may prevent charging immediately after the battery reaches full capacity. According to the battery management instructions, the battery may need to discharge to 94% or lower before charging resumes. This behavior helps manage battery life.
5. Can the Lenovo IdeaPad 1 USB-C port connect to an external monitor?
No. The USB-C connector described in this guide supports compatible data devices and power output of up to 5V and 3A, but it does not support external displays. A compatible external monitor can be connected using the HDMI 1.4 port.
6. What does the Novo button do on a Lenovo IdeaPad 1?
The Novo button opens a startup menu before Windows loads. It provides access to the UEFI/BIOS setup utility, boot device selection, and Windows startup options. It can be opened by turning off the computer and pressing the Novo button, or by using Fn + Power Button.
7. How do I reset or recover Windows on the Lenovo IdeaPad 1?
Windows startup and recovery options can be accessed through the Novo Button menu. Lenovo also provides recovery resources at support.lenovo.com/HowToCreateLenovoRecovery. Additional operating system diagnostics are available through Lenovo’s product support website.
8. What should I do if my Lenovo IdeaPad 1 stops responding?
Press and hold the power button until the computer turns off, then restart it. If the problem continues, Lenovo Vantage, Lenovo PC Manager, and Lenovo’s online diagnostics can help identify hardware or software issues. For unresolved hardware problems, contact Lenovo Customer Support.