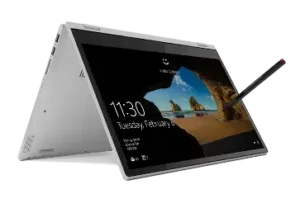
| Field | Details |
| Document Title | Lenovo IdeaPad C340-14API User Guide |
| Document Type | User Guide |
| Brand Name | Lenovo |
| Product Name | IdeaPad C340-14API |
| Model Number(s) | C340-14API, Machine Type 81N6 |
| PDF File Size | 9.66 MiB |
| Number of Pages | 70 |
| Languages Covered | English |
Lenovo IdeaPad C340-14API 81N6
The Lenovo IdeaPad C340-14API is a convertible laptop computer with a 14-inch multi-touch display, a 360-degree hinge, and Windows 10 operating system support. It combines the functions of a traditional notebook with touchscreen-based operation, allowing the computer to be used in Notebook, Stand, Tent, and Tablet modes.
The IdeaPad C340-14API, machine type 81N6, features a 45 Wh rechargeable battery, DDR4 memory, M.2 PCIe solid-state storage, wireless LAN, Bluetooth, integrated speakers, microphones, and a built-in camera with a privacy shutter. Depending on the configuration, the computer may also include a fingerprint reader, keyboard backlighting, and support for the Lenovo Digital Pen.
The computer provides HDMI, USB-C, USB 3.1 Gen 1, and audio connections for external devices. Its USB-C port supports data transfer at up to 5 Gbps and supplies 5 V/3 A power to compatible accessories.
The Windows 10 interface supports touchscreen gestures, keyboard hotkeys, power management, wireless connections, and accessibility options. Lenovo Vantage provides additional tools for hardware settings, driver updates, diagnostics, and support.
The computer also includes a Novo button, which allows access to BIOS Setup, startup options, and system recovery when Windows cannot start normally.
Product Overview and Features
| Feature | Description |
| Product Type | Convertible 2-in-1 laptop |
| Machine Type | 81N6 |
| Display Size | 14 inches |
| Touchscreen | Multi-touch |
| Convertible Hinge | 360-degree rotation |
| Operating Modes | Notebook, Stand, Tent, Tablet |
| Operating System Referenced | Windows 10 |
| Memory Technology | DDR4 |
| Storage | M.2 PCIe solid-state drive |
| Battery | 45 Wh |
| Wireless Connectivity | Wi-Fi and Bluetooth |
| Camera | Integrated camera with privacy shutter |
| Fingerprint Reader | Available on select models |
| Keyboard Backlight | Available on select models |
| Digital Pen | Lenovo Digital Pen on select models |
| Video Output | HDMI |
| USB Connectivity | USB-C and USB 3.1 Gen 1 |
| Security Functions | BIOS passwords, Windows sign-in, optional fingerprint reader |
| Recovery Functions | Windows recovery tools and recovery USB |
| Lenovo Software | Lenovo Vantage |
Technical Specifications
General Specifications
| Specification | Details |
| Brand | Lenovo |
| Model | IdeaPad C340-14API |
| Machine Type | 81N6 |
| Product Category | Convertible Notebook Computer |
| Length | 328 mm (12.9 inches) |
| Width | 229 mm (9.0 inches) |
| Thickness | 17.9 mm (0.7 inches) |
| Display Size | 355.6 mm (14.0 inches) |
| Display Resolution Options | 1366 × 768 or 1920 × 1080 pixels |
| Display Technology | Multi-touch |
| Hinge Rotation | Up to 360 degrees |
| Battery Capacity | 45 Wh |
| Storage Type | M.2 PCIe SSD |
| Memory | DDR4 SODIMM and onboard memory configurations |
| Keyboard | Six-row keyboard |
| Keyboard Backlighting | Select models |
| Fingerprint Reader | Select models |
| Wireless | Wireless LAN, Bluetooth |
| Built-in Camera | Yes |
| Built-in Microphones | Yes |
| Speakers | Integrated stereo speakers |
| Operating System Instructions | Windows 10 |
Power Specifications
| Specification | Value |
| AC Adapter Input Voltage | 100–240 V AC |
| Input Frequency | 50–60 Hz |
| Battery Capacity | 45 Wh |
| Full Battery Charging Time | Approximately 4–8 hours |
| Rapid Charge | Up to 80% in approximately 1 hour with a supported adapter |
| Recommended Battery Charging Temperature | 10–35°C (50–95°F) |
The actual charging time depends on battery capacity, environmental conditions, and whether the laptop is being used while charging.
Display Specifications
| Display Feature | Details |
| Screen Size | 14 inches |
| Supported Resolution | HD 1366 × 768 or FHD 1920 × 1080 |
| Touch Input | Multi-touch |
| Hinge | 360-degree |
| External HDMI Output | Up to 3840 × 2160 at 30 Hz |
| Wireless Display | Miracast on compatible devices |
Ports and Connections
| Connection | Quantity or Function |
| Power Connector | 1 |
| HDMI | 1 |
| USB-C | 1 |
| USB 3.1 Gen 1 | 2 |
| Always On USB 3.1 Gen 1 | 1 of the two USB-A ports |
| 3.5 mm Audio Connector | 1 |
| Media Card Slot | 1 |
USB-C Specifications
The USB-C connector supports:
- Data transfer at up to 5 Gbps.
- Charging compatible USB-C devices with a 5 V, 3 A output.
- Compatible USB-C accessories.
When the laptop battery charge falls below 10%, connected USB-C accessories may not function correctly.
The computer uses its separate power connector for the AC power adapter.
Parts and Components
The Lenovo IdeaPad C340-14API has components on the front, keyboard base, left side, and right side.
Front Components
| Component | Function |
| Microphones | Capture voice and sound |
| Integrated Camera | Takes photographs and records video |
| Camera Privacy Shutter | Covers or uncovers the camera lens |
| Camera Indicator Light | Indicates that the camera is active |
| Multi-Touch Screen | Displays content and supports touch input |
| Wireless LAN/Bluetooth Antennas | Send and receive wireless signals |
Integrated Camera
The built-in camera can be used for:
- Taking photographs
- Recording videos
- Video conferencing
- Video communication through supported applications
The camera starts automatically when a compatible application activates a function that requires it.
Camera Privacy Shutter
The camera includes a sliding privacy shutter.
To cover the camera lens, slide the shutter into the closed position.
To use the camera, slide the shutter to uncover the lens.
Camera Indicator Light
The camera indicator illuminates when the camera is being used.
Wireless Antennas
The built-in antennas support wireless LAN and Bluetooth communication.
The antennas are positioned internally and are not visible from outside the computer.
Keyboard Base Components
The keyboard base contains the physical keyboard, touchpad, and optional fingerprint reader.
| Component | Function |
| Keyboard | Provides typing and hotkey functions |
| Touchpad | Moves the pointer and performs mouse actions |
| Fingerprint Reader | Allows fingerprint sign-in on supported models |
Touchpad
The touchpad provides the functions of a traditional mouse.
It supports pointing, clicking, and finger gestures.
Fingerprint Reader
Select models include a fingerprint reader.
After fingerprints are enrolled through Windows sign-in settings, the reader can be used to sign in to the computer.
Left-Side Ports
The left side includes the power connector, charging indicator, HDMI port, USB-C connector, audio connector, and speaker.
| Component | Description |
| Power Connector | Connects the AC power adapter |
| Battery/Charging Indicator | Displays AC power and battery charge status |
| HDMI Connector | Connects an external monitor or digital audio/video device |
| USB-C Connector | Connects compatible USB-C devices |
| Audio Connector | Connects headphones or compatible headsets |
| Speaker | Produces sound |
Battery/Charging Status Indicator
| Indicator | Meaning |
| Solid White | Connected to AC power; battery charge 91–100% |
| Solid Amber | Connected to AC power; battery charge 1–90% |
| Off | Not connected to AC power |
HDMI Connector
The HDMI port connects the laptop to compatible external displays, including monitors and HDTVs.
USB-C Connector
The USB-C connector supports data transfer and charging compatible external devices.
Audio Connector
The audio connector supports headphones and headsets with a 3.5 mm, four-pole plug.
Conventional standalone microphones are not supported through this connector.
Right-Side Ports and Controls
| Component | Function |
| Speaker | Produces audio output |
| Novo Button | Opens recovery, BIOS Setup, or boot menu |
| Power Button | Turns on the laptop or puts it into sleep mode |
| Media Card Slot | Accepts a supported flash memory card |
| USB 3.1 Gen 1 | Connects compatible USB devices |
| Always On USB 3.1 Gen 1 | Supports USB device charging while the laptop is in supported power states |
Novo Button
The Novo button provides access to startup and recovery functions.
When the laptop is turned off, press the Novo button to open:
- System Recovery
- BIOS Setup
- Boot Menu
Power Button
The Power button turns on the computer or puts it into sleep mode.
Its indicator also shows the current power state.
Power Button Indicator
| Indicator Status | System Condition |
| Solid White or Amber | Computer powered on |
| Slowly Blinking | Sleep mode |
| Off | Computer off or in hibernation mode |
Always On USB Port
The Always On USB port can charge compatible USB devices while the laptop is:
- Turned off
- In sleep mode
- In hibernation mode
The Always On USB function must be enabled for this behavior.
Important Safety Instructions
Electrical and Power Safety
Use only power cords and AC adapters supplied or approved by the manufacturer.
- Do not use damaged power cords or adapters.
- Do not bend or modify power plugs.
- Do not use corroded electrical outlets.
- Keep power connections away from liquids.
- Do not overload extension cords or power strips.
- Connect the adapter to a properly wired electrical outlet.
- Do not wrap the power cord around the adapter during use.
Overheating Prevention
The laptop and AC adapter generate heat during operation.
To reduce the risk of burns and overheating:
- Avoid prolonged contact between the laptop’s hot surfaces and the body.
- Do not use the laptop on surfaces that block ventilation.
- Keep ventilation openings clear.
- Do not cover the AC adapter while connected to power.
- Do not operate or charge the computer near flammable materials.
- Do not use the computer inside enclosed furniture that restricts airflow.
The temperature of air entering the computer should not exceed 35°C (95°F).
Battery Safety
The battery must not be opened, crushed, punctured, modified, short-circuited, or exposed to fire or water.
Do not attempt to remove or replace the built-in rechargeable battery.
Battery replacement must be performed by a Lenovo-authorized repair facility or technician.
Display and Hinge Safety
The laptop display can rotate up to 360 degrees.
Do not apply excessive force to the display or hinges.
Do not place pressure on the upper-left or upper-right corners of the display while rotating it.
Liquid Spill Safety
If liquid is spilled on the laptop:
- Disconnect the AC power adapter.
- Turn off the computer immediately.
- Do not attempt to drain the liquid by turning the computer upside down.
- Wait until the computer is completely dry before turning it on.
Safety Conditions Requiring Service
Stop using the laptop and contact Lenovo Support if:
- The power cord or adapter is damaged.
- Smoke, sparks, or unusual odors are detected.
- The battery is damaged or leaking.
- Liquid enters the computer.
- The computer has been dropped or damaged.
- The computer produces unusual electrical sounds.
- The computer does not operate normally after following the instructions.
Before First Use
The IdeaPad C340-14API uses Windows 10.
Before operating the computer for the first time:
- Read the included safety documentation.
- Connect the AC power adapter if battery charging is required.
- Turn on the laptop.
- Follow the Windows 10 initial setup screens.
- Create or sign in to a Windows account.
- Connect to a wireless network if required.
- Configure the preferred system settings.
- Open Lenovo Vantage to check available hardware settings and updates.
Setting Up a Windows 10 Account
Windows requires a user account.
The computer supports a local Windows account or a Microsoft account.
Creating a Windows User Account
During initial setup, Windows prompts the user to create an account.
The first Windows user account is an Administrator account.
To add another account:
- Open the Start menu.
- Select Settings → Accounts → Family & other people.
- Follow the on-screen instructions.
Using a Microsoft Account
A Microsoft account can be used to sign in to Windows.
It also supports personalized settings across compatible Windows devices and sign-in to Microsoft services.
Understanding the Windows 10 Interface
The Windows desktop includes several controls for accessing applications and system settings.
| Interface Element | Function |
| Start Button | Opens the Start menu |
| Windows Search | Searches files, apps, settings, and online content |
| Settings | Opens Windows system settings |
| Power | Shuts down, restarts, or puts the laptop to sleep |
| Task View | Displays open applications |
| Notification Area | Displays system status and notifications |
| Battery Icon | Shows battery condition and power settings |
| Network Icon | Displays wireless network status |
| Action Center | Provides notifications and quick settings |
Opening the Start Menu
Use either method:
- Click the Start button.
- Press the Windows logo key.
Accessing Control Panel
Open:
Start → Windows System → Control Panel
Control Panel can also be located using Windows Search.
Launching an Application
- Open the Start menu.
- Select the application.
Alternatively, enter the application’s name in Windows Search.
Connecting to Wi-Fi
The IdeaPad C340-14API supports wireless LAN connections.
How to Connect to a Wireless Network
- Click the network icon in the Windows notification area.
- Wait for the available wireless networks to appear.
- Select the desired network.
- Enter the network password if requested.
- Complete the connection.
Using Lenovo Vantage
Lenovo Vantage provides tools for maintaining and configuring the laptop.
How to Open Lenovo Vantage
- Open the Start menu.
- Select Lenovo Vantage.
The application can also be located through Windows Search.
Lenovo Vantage Functions
| Feature | Description |
| System Update | Downloads and installs firmware and driver updates |
| Hardware Settings | Configures supported computer hardware |
| Health & Support | Provides diagnostics and support information |
| Warranty Status | Checks warranty information online |
| User Guide | Opens product documentation |
| Security Advisor | Provides computer security information |
Configurable Hardware Settings
Depending on the computer configuration, Lenovo Vantage can provide controls for:
- Always On USB
- Battery
- Camera
- Display
- Keyboard
- Microphone
- Speakers
- Touchpad
Keyboard Hotkeys and Function Keys
The Lenovo C340-14API includes keyboard hotkeys for common system operations.
Hotkey Functions
| Hotkey Function | Description |
| Mute | Turns audio off or on |
| Volume Down | Decreases sound volume |
| Volume Up | Increases sound volume |
| Microphone | Enables or disables the microphones |
| Refresh | Refreshes the current window |
| Touchpad | Enables or disables the touchpad |
| Airplane Mode | Turns Airplane Mode on or off |
| Camera | Enables or disables the camera |
| Account Lock | Locks the current Windows account |
| External Display | Changes external display settings |
| Brightness Down | Reduces display brightness |
| Brightness Up | Increases display brightness |
Fn Key Combinations
| Shortcut | Function |
| Fn + B | Break |
| Fn + P | Pause |
| Fn + S | System Request |
| Fn + K | Scroll Lock |
| Fn + Q | Switches between Auto, Performance, and Quiet modes |
Hotkey Mode
Hotkey Mode determines how the function keys and hotkeys operate.
| Setting | Hotkey Operation | F1–F12 Operation |
| Enabled | Press the hotkey directly | Hold Fn and press the function key |
| Disabled | Hold Fn and press the hotkey | Press the function key directly |
Hotkeys that do not share a key with F1–F12 continue to require Fn.
Touchscreen Gestures
The multi-touch display supports finger gestures for navigating Windows.
| Gesture | Function |
| Single Tap | Selects an item or performs an action |
| Double Tap | Opens an app or desktop item |
| Tap and Hold | Opens a shortcut menu |
| Slide | Scrolls lists, pages, or photos |
| Drag | Moves an item |
| Pinch In | Zooms out |
| Spread Fingers Apart | Zooms in |
| Swipe From Right | Opens Action Center |
| Swipe From Left | Opens Task View |
| Swipe Down From Top | Displays a hidden title bar or closes an app in Tablet Mode |
Some gestures may not be available in every application.
Operating Modes
The IdeaPad C340-14API has a 360-degree hinge.
It supports four operating positions.
Notebook Mode
Notebook Mode uses the laptop in a conventional keyboard-and-screen arrangement.
The keyboard and touchpad remain available.
Stand Mode
Stand Mode positions the screen for touchscreen-based use.
The keyboard and touchpad are automatically disabled.
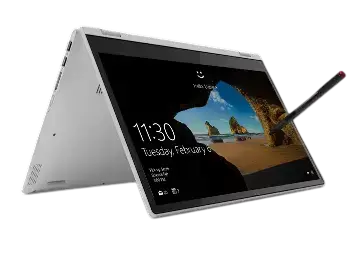
Tent Mode
Tent Mode positions the laptop in an inverted V-shaped arrangement.
The touchscreen is used for interaction.
Tablet Mode
Tablet Mode folds the display back against the keyboard base.
The keyboard and touchpad are disabled.
Operating Mode Comparison
| Mode | Keyboard and Touchpad | Main Input |
| Notebook | Enabled | Keyboard, touchpad, touchscreen |
| Stand | Disabled | Touchscreen |
| Tent | Disabled | Touchscreen |
| Tablet | Disabled | Touchscreen |
Caution: Do not force the display or apply excessive pressure to its corners during rotation.
Using the Lenovo Digital Pen
Select IdeaPad C340-14API configurations include the Lenovo Digital Pen.
The pen supports touch input, selection, right-click actions, and ink erasing.
Digital Pen Battery
The Lenovo Digital Pen uses one AAAA battery.
The battery is supplied in some countries or regions.
Pen Controls
| Control | Function |
| Pen Tip | Selects items and provides touch input |
| Click Button | Supports right-click actions |
| Eraser Button | Erases supported digital ink |
How to Use the Digital Pen
Single Click: Tap the screen once with the pen.
Double Click: Tap twice without pausing.
Right Click: Hold the pen tip against the screen for one second, or hold the Click button while tapping.
Erase: Hold the Eraser button, touch the screen, and drag across the ink to remove.
Digital Pen Precautions
The Lenovo Digital Pen is not waterproof.
Keep it away from water and excessive moisture.
Using the Camera
The built-in camera can capture photographs and video.
Taking Photographs
- Open the Start menu.
- Select Camera.
- Click the photo capture icon.
Recording Video
- Open Camera.
- Select the video mode control.
- Click the video recording icon.
Changing Camera Settings
Open:
Start → Lenovo Vantage → Hardware Settings → Audio/Visual
Locate Camera and follow the on-screen instructions.
Audio Settings
The laptop supports its integrated speakers and compatible headphones or headsets.
Changing Sound Settings
- Open Control Panel.
- Select Category view.
- Open Hardware and Sound → Sound.
- Adjust the preferred sound settings.
The audio connector supports compatible 3.5 mm, four-pole headsets.
Connecting an External Display
The computer supports wired HDMI displays and compatible Miracast wireless displays.
Connecting an HDMI Monitor
- Connect the monitor to the laptop’s HDMI connector.
- Connect the monitor to electrical power.
- Turn on the monitor.
If Windows does not detect the monitor:
- Right-click an empty area of the desktop.
- Open Display settings.
- Select Detect.
Maximum HDMI Resolution
| Connection | Supported Output |
| HDMI | Up to 3840 × 2160 pixels at 30 Hz |
The connected display must also support the selected resolution.
Connecting a Wireless Display
For compatible Miracast displays:
- Open Settings.
- Select Devices → Bluetooth & other devices.
- Click Add Bluetooth or other device.
- Select Wireless display or dock.
- Follow the on-screen instructions.
A wireless display can also be selected through Action Center → Connect.
External Display Modes
| Display Mode | Function |
| PC Screen Only | Uses the laptop display |
| Duplicate | Shows the same image on both displays |
| Extend | Extends the desktop across two displays |
| Second Screen Only | Uses the external display |
Use the external display hotkey to change the display mode.
Battery and Power Management
The IdeaPad C340-14API includes a 45 Wh rechargeable battery.
Windows provides battery status information and power-management controls.
Checking Battery Status
- Locate the battery icon in the Windows notification area.
- Click the icon.
- Review the remaining battery percentage.
- Adjust the power mode if required.
Windows displays a warning when battery charge becomes low.
Charging the Battery
Connect the computer to the AC power adapter.
Charging time depends on battery condition, computer usage, and the charging environment.
| Charging Condition | Approximate Time |
| Standard Full Charge | 4–8 hours |
| Supported Rapid Charge | Approximately 80% in 1 hour |
Charging Temperature
The recommended battery temperature during charging is:
10–35°C (50–95°F)
The laptop does not begin recharging when the remaining battery capacity is above 95%.
Checking Battery Temperature
- Open Lenovo Vantage.
- Select Hardware Settings → Power.
- Locate Power Status.
- Click Show Details.
Maximizing Battery Life
The guide recommends the following battery-management practices:
- Reduce display brightness.
- Turn off wireless functions when not needed.
- Use battery power until the charge is depleted.
- Recharge the battery fully before continued use.
Configuring Power Button Behavior
The Power button can be configured to perform different actions.
How to Change Power Button Settings
- Right-click the battery icon in the Windows notification area.
- Select Power Options.
- Choose Choose what the power button does.
- Adjust the settings.
Available actions include shutting down, sleeping, and hibernating, depending on the selected Windows configuration.
Configuring the Power Plan
Windows power settings control how long the laptop remains active when idle.
Default AC Power Plan
For ENERGY STAR-compliant configurations:
| Action | Default Time |
| Turn Off Display | After 10 minutes |
| Enter Sleep Mode | After 30 minutes |
Changing Power Plan Settings
- Right-click the battery icon.
- Select Power Options.
- Click Change plan setting.
- Adjust the settings.
Connecting Bluetooth Devices
The laptop supports Bluetooth connections with compatible devices.
These may include:
- Wireless mice
- Keyboards
- Smartphones
- Speakers
Bluetooth devices generally need to be within approximately 10 meters (33 feet).
How to Pair a Bluetooth Device
- Open the Start menu.
- Select Settings → Devices → Bluetooth & other devices.
- Turn Bluetooth on.
- Select Add Bluetooth or other device.
- Choose Bluetooth.
- Select the required device.
- Follow the pairing instructions.
Previously paired devices can reconnect automatically when Bluetooth is enabled and both devices are within range.
Using a Media Card
The laptop includes a flash media card slot.
Inserting a Media Card
- Locate the card slot on the right side.
- Position the card with its metal contacts facing downward and toward the slot.
- Insert the card firmly.
Removing a Media Card
Before removing the card, eject it through Windows.
- Open the hidden icons in the notification area.
- Right-click Safely Remove Hardware and Eject Media.
- Select the corresponding storage device.
- Eject the card through Windows.
- Press the card and remove it.
Removing a card before ejecting it may corrupt or erase stored data.
Airplane Mode
Airplane Mode disables wireless functions.
How to Enable or Disable Airplane Mode
- Open the Start menu.
- Select Settings → Network & Internet → Airplane mode.
- Turn the switch on or off.
The keyboard Airplane Mode hotkey can also be used.
Securing the Computer
The IdeaPad C340-14API includes BIOS password functions and Windows security features.
BIOS Password Types
| Password | Function |
| Administrator Password | Restricts access to BIOS Setup |
| User Password | Allows limited BIOS Setup access |
| Master Hard Disk Password | Protects access to the storage device |
| User Hard Disk Password | Provides another authorized storage access password |
| Power-On Password | Requires a password during computer startup |
BIOS passwords use letters and numbers.
Setting an Administrator Password
- Open BIOS Setup.
- Select Security → Set Administrator Password.
- Press Enter.
- Enter the new password.
- Press Enter.
- Confirm the password.
- Select Exit → Exit Saving Changes.
Important: If the administrator password is forgotten, Lenovo-authorized service personnel cannot reset it. System board replacement may be required, with proof of purchase and service charges.
Changing or Removing the Administrator Password
- Open BIOS Setup using the administrator password.
- Select Security → Set Administrator Password.
- Enter the current password.
- Enter a new password and confirm it.
To remove the password, leave both new-password fields empty and press Enter.
Save the changes before exiting.
Removing the administrator password also removes the user password.
Setting a User Password
An administrator password must already exist.
- Open BIOS Setup using the administrator password.
- Select Security → Set User Password.
- Enter a new alphanumeric password.
- Confirm it.
- Save the changes.
The user password must differ from the administrator password.
Enabling the Power-On Password
- Open BIOS Setup.
- Select Security → Power on Password.
- Change the option to Enabled.
- Save and exit.
The computer then requires the appropriate password when starting.
Setting a Hard Disk Password
- Open BIOS Setup with administrator privileges.
- Select Security → Set Hard Disk Password.
- Follow the instructions to configure the master and user passwords.
- Save the changes.
The master and user hard disk passwords must be configured together.
Warning: Forgotten hard disk passwords cannot be reset by Lenovo service personnel, and stored data cannot be recovered through the documented service procedure. Storage replacement may be required.
Using the Fingerprint Reader
Select configurations include a fingerprint reader.
Enrolling a Fingerprint
- Open the Start menu.
- Select Settings → Accounts → Sign-in options.
- Follow the fingerprint enrollment instructions.
A Windows password must be configured before fingerprint enrollment.
Lenovo recommends enrolling more than one fingerprint.
Fingerprint Reader Care
- Do not scratch the reader with hard objects.
- Do not use it with wet or dirty fingers.
- Avoid using injured or wrinkled fingers when authentication fails.
Firewall and Antivirus Protection
The laptop may include firewall software.
The firewall helps protect against unauthorized access, network intrusions, and internet attacks.
The document also identifies antivirus software supplied with a free 30-day subscription.
After the subscription period, the license must be renewed to continue receiving antivirus updates.
Accessing UEFI/BIOS Setup
UEFI/BIOS initializes the computer hardware and starts the operating system.
The setup utility allows supported firmware settings to be changed.
How to Enter BIOS Using the Novo Button
- Turn off the computer.
- Locate the Novo button on the right side.
- Press the button with a straightened paper clip or similar slender object.
- Select BIOS Setup from the Novo Button Menu.
BIOS Keyboard Controls
| Key | Function |
| F1 | General Help |
| F5 | Decrease selected value |
| F6 | Increase selected value |
| F9 | Restore default settings |
| F10 | Save settings and exit |
| Up/Down | Select an item |
| Left/Right | Select a tab |
| Enter | Open the selected item |
| Esc | Return to the previous menu |
Changing the Startup Sequence
The startup sequence determines which device the laptop attempts to boot from.
Changing the Permanent Boot Order
- Open BIOS Setup.
- Select the Boot menu.
- Locate the startup device list.
- Arrange the devices in the desired order.
- Press F10 to save and restart.
Temporarily Selecting a Boot Device
- Restart the computer.
- When the Lenovo logo appears, press F12.
- If Hotkey Mode is enabled, use Fn + F12.
- Select the required boot device.
- Press Enter.
Changing BIOS Date and Time
- Open BIOS Setup.
- Select Configuration → System Time / System Date.
- Set the correct date and time.
- Press F10 to save and exit.
Enabling or Disabling Hotkey Mode
- Enter BIOS Setup.
- Select Configuration → Hotkey Mode.
- Press Enter.
- Choose Enabled or Disabled.
- Select Exit → Exit Saving Changes.
Enabling or Disabling Always On USB
- Open BIOS Setup.
- Select Configuration → Always On USB.
- Press Enter.
- Choose Enabled or Disabled.
- Save the changes.
When enabled, the supported USB port can provide charging power to compatible accessories during selected low-power or off states.
Updating UEFI/BIOS
The laptop firmware can be updated through Lenovo Vantage or Lenovo Support.
Updating BIOS With Lenovo Vantage
- Open Lenovo Vantage.
- Select System Update.
- Click Check for Updates.
- Review available update packages.
- Select the applicable BIOS update.
- Click Install Selected.
Updating BIOS Through Lenovo Support
- Visit https://support.lenovo.com.
- Locate IdeaPad C340-14API.
- Download the appropriate UEFI/BIOS update package.
- Follow the supplied instructions.
Windows Recovery and Reset
Windows 10 includes recovery tools for repairing system problems.
Warning: Recovery and reset operations may remove files or applications. Back up important data before proceeding.
How to Reset the Computer
- Open the Start menu.
- Select Settings → Update & Security → Recovery.
- Locate Reset This PC.
- Click Get Started.
- Choose the appropriate recovery option.
- Follow the on-screen instructions.
Windows provides options to keep files or remove them during the reset process.
Advanced Recovery Options
The Advanced Startup menu includes additional repair tools.
Opening Advanced Startup
- Open Settings.
- Select Update & Security → Recovery.
- Under Advanced Startup, click Restart Now.
- Select Troubleshoot → Advanced options.
Recovery Tools
| Recovery Option | Function |
| System Restore | Restores Windows using a saved restore point |
| Startup Repair | Repairs problems preventing Windows from starting |
| Go Back to Previous Version | Returns to a previous Windows version where available |
| Command Prompt | Opens advanced command-line troubleshooting |
| System Image Recovery | Restores Windows from a system image |
| UEFI Firmware Settings | Opens firmware configuration |
| Startup Settings | Changes Windows startup behavior |
Windows Automatic Recovery
If Windows fails to start twice consecutively, the Windows Recovery Environment may start automatically.
The recovery environment operates separately from Windows.
Use the on-screen repair or recovery options to address startup problems.
Keep the computer connected to AC power during recovery.
Creating a Recovery USB Drive
A recovery USB drive can be used when the installed Windows recovery tools are damaged or unavailable.
Recovery USB Requirements
| Requirement | Details |
| USB Storage Capacity | At least 16 GB |
| Power | AC adapter connected |
| Data Warning | Existing USB files will be deleted |
How to Create a Recovery USB
- Connect the laptop to AC power.
- Prepare a USB drive with at least 16 GB of storage.
- Connect the USB drive.
- Type recovery in Windows Search.
- Select Create a recovery drive.
- Approve the User Account Control prompt.
- Follow the Recovery Drive instructions.
Back up existing USB drive data before beginning.
Using a Recovery USB Drive
- Connect the laptop to AC power.
- Insert the recovery USB drive.
- Turn on or restart the computer.
- When the Lenovo logo appears, press F12.
- Select the USB recovery drive.
- Press Enter.
- Select Troubleshoot.
- Choose the required recovery option.
- Follow the on-screen instructions.
Troubleshooting Guide
The following procedures address common problems and service situations described for the Lenovo IdeaPad C340-14API.
Common Problems and Solutions
| Problem | Recommended Action |
| Laptop stops responding | Hold the Power button until it turns off, then restart |
| Windows does not start | Use Startup Repair or Windows Recovery |
| Laptop fails to boot normally | Check BIOS startup sequence |
| Battery does not charge immediately above 95% | Normal battery charging behavior |
| Bluetooth device will not connect | Check Bluetooth settings and pairing |
| External display not detected | Open Display Settings and select Detect |
| Touchpad does not respond | Check touchpad hotkey and hardware settings |
| Wi-Fi is unavailable | Check Airplane Mode and wireless connection settings |
| Storage card cannot be removed safely | Use Windows Safely Remove Hardware |
| BIOS password forgotten | Contact authorized Lenovo service |
| Hard disk password forgotten | Authorized storage replacement may be required |
| Fingerprint reader does not recognize a finger | Check finger condition and enrollment |
| Laptop becomes wet | Disconnect power and shut down immediately |
| USB-C accessory stops working | Check whether battery charge is below 10% |
Computer Stops Responding
If the computer becomes unresponsive:
- Press and hold the Power button until it turns off.
- Restart the laptop.
External Display Is Not Detected
- Confirm that the display is connected.
- Check that it is powered on.
- Right-click an empty area of the desktop.
- Open Display Settings.
- Select Detect.
Touchpad Is Disabled
Use the touchpad hotkey to enable the touchpad.
Touchpad functions can also be configured through Lenovo Vantage where supported.
Fingerprint Reader Does Not Work Correctly
Check that the enrolled finger is:
- Clean
- Dry
- Not injured
Do not use hard objects to clean or press the reader.
Battery Charging Appears to Stop Above 95%
The charging system does not begin recharging when the battery has more than 95% charge remaining.
This is normal battery-management behavior.
Computer Does Not Start Windows
Use the Windows Recovery Environment or a prepared recovery USB drive to access repair tools.
The available options include Startup Repair, System Restore, and System Image Recovery.
Liquid Is Spilled on the Laptop
- Disconnect AC power.
- Turn off the computer immediately.
- Do not turn the computer upside down to drain the liquid.
- Wait until all liquid has dried before attempting to turn it on.
Cleaning and Maintenance
Regular cleaning helps maintain the laptop’s appearance and operating condition.
Cleaning the Laptop Cover
Use a lint-free cloth lightly dampened with mild soap and water.
Do not apply liquid directly to the cover.
Cleaning the Keyboard
- Use a lint-free cloth dampened with mild soap and water.
- Wipe individual keys carefully.
- Avoid wiping across several keys in a way that may catch their edges.
- Remove loose dust with a camera blower or cool air from a hair dryer.
Do not spray cleaning fluid directly onto the keyboard.
Cleaning the Touchscreen
- Turn off the computer.
- Use a dry, soft, lint-free cloth.
- Gently remove fingerprints and dust.
- For persistent marks, lightly moisten the cloth with water or eyeglass cleaner.
- Let the screen dry before closing it.
Do not apply liquid directly to the screen.
Do not use metallic objects, fingernails, or excessive pressure on the touchscreen.
Maintaining Ventilation
- Keep ventilation openings clear.
- Regularly remove dust from vents.
- Avoid placing the laptop on soft surfaces that block airflow.
- Do not operate the computer in enclosed furniture without adequate ventilation.
Operating and Storage Conditions
| Environmental Specification | Value |
| Maximum Unpressurized Altitude | 3048 m (10,000 ft) |
| Operating Temperature up to 2438 m | 5–35°C (41–95°F) |
| Storage Temperature | 5–43°C (41–109°F) |
| Maximum Operating Temperature Above 2438 m | 31.3°C (88°F) |
| Operating Relative Humidity | 8–95% at 23°C wet-bulb temperature |
| Storage Relative Humidity | 5–95% at 27°C wet-bulb temperature |
Long-Term Battery Storage
For rechargeable batteries or products containing rechargeable batteries, Lenovo recommends:
- Storing at room temperature.
- Maintaining approximately 30–50% battery charge.
- Charging approximately once per year to prevent overdischarge.
Ergonomic and Accessibility Features
Windows 10 provides tools for users with visual, hearing, and mobility requirements.
Accessibility Shortcuts
| Shortcut | Function |
| Windows + U | Open Ease of Access Center |
| Right Shift for 8 seconds | Enable or disable Filter Keys |
| Shift pressed 5 times | Enable or disable Sticky Keys |
| Left Alt + Left Shift + PrtSc | Enable or disable High Contrast |
Accessibility Tools
Available Windows accessibility features include:
- Magnifier
- Narrator
- On-Screen Keyboard
- High Contrast
- Keyboard customization
- Mouse customization
- Speech Recognition
Display Comfort
For comfortable use, Lenovo recommends positioning the display approximately 510–760 mm (20–30 inches) from the eyes.
Adjust screen brightness and seating posture to reduce discomfort.
Take frequent short breaks during prolonged computer use.
Replacement Parts and Accessories
Lenovo provides compatible accessories and support information through its website.
| Accessory or Component | Information |
| Lenovo Digital Pen | Available for supported models |
| AC Power Adapter | Compatible Lenovo power adapter |
| USB-C Accessories | Compatible USB-C peripheral devices |
| External Displays | Compatible HDMI or Miracast displays |
| Bluetooth Accessories | Supported wireless input and audio devices |
| Battery Replacement | Lenovo-authorized technician |
| Internal Components | Approved service provider or documented CRU procedure |
Compatible accessories can be found at:
https://www.lenovo.com/accessories
Warranty Information
The Lenovo IdeaPad C340-14API is subject to the Lenovo Limited Warranty applicable to the product.
The warranty terms, duration, and service level depend on the purchased configuration and region.
Warranty coverage and conditions are described in the Safety and Warranty Guide supplied with the computer.
Warranty Services
During the applicable warranty period, Lenovo support services may include:
- Problem determination
- Authorized Lenovo hardware repair
- Applicable engineering changes
Services Not Included in Standard Warranty Support
The guide identifies examples of services that are not covered, including:
- Nonwarranted parts
- Identifying software problem sources
- BIOS configuration for installation or upgrades
- Driver changes and upgrades
- Network operating system installation
- Application installation and maintenance
Additional paid services may be available through Lenovo.
Customer Support Information
| Support Information | Details |
| Brand | Lenovo |
| Product | IdeaPad C340-14API |
| Machine Type | 81N6 |
| Official Support Website | https://support.lenovo.com |
| Support Phone Directory | https://pcsupport.lenovo.com/supportphonelist |
| Accessories | https://www.lenovo.com/accessories |
| Additional Services | https://www.lenovo.com/services |
| Accessibility Support | https://www.lenovo.com/accessibility |
| Recycling Information | https://www.lenovo.com/recycling |
Preparing to Contact Lenovo Support
Before contacting the Lenovo Customer Support Center, prepare:
- Product name
- Machine type
- Serial number
- Operating system and version
- Description of the problem
- Error messages or error codes
- Applications running when the problem occurred
- Information about whether the problem can be reproduced
The machine type and serial number are identified on the computer’s product label.
Lenovo Self-Help Resources
Lenovo Support provides access to:
- Product documentation
- Device drivers and software
- Firmware updates
- Diagnostic tools
- Warranty information
- Parts information
- Frequently asked questions
Environmental and Recycling Information
The IdeaPad C340-14API is subject to applicable regional environmental and electronic waste regulations.
Electronic Waste Disposal
Electronic equipment should be recycled through approved collection or recycling programs.
Do not dispose of regulated electronic products as ordinary municipal waste.
Battery Recycling
Rechargeable batteries must be disposed of according to local laws and regulations.
Built-in batteries should be removed or replaced only by authorized service personnel.
Lenovo recycling information is available at:
https://www.lenovo.com/recycling
Frequently Asked Questions
1. What are the specifications of the Lenovo IdeaPad C340-14API 81N6?
The Lenovo IdeaPad C340-14API has a 14-inch multi-touch display with 1366 × 768 or 1920 × 1080 resolution, a 360-degree hinge, a 45 Wh battery, DDR4 memory configurations, M.2 PCIe SSD storage, Wi-Fi, Bluetooth, HDMI, USB-C, and two USB 3.1 Gen 1 ports. Some configurations also include a fingerprint reader, keyboard backlight, and Lenovo Digital Pen.
2. How do I enter BIOS on the Lenovo IdeaPad C340-14API?
Turn off the laptop and press the Novo button on the right side using a straightened paper clip or similar slender object. Select BIOS Setup from the Novo Button Menu.
3. How do I factory reset the Lenovo IdeaPad C340-14API?
Open Settings → Update & Security → Recovery. Under Reset This PC, select Get Started. Choose whether to keep personal files or remove them, then follow the Windows instructions. Back up important data before resetting.
4. How do I switch the Lenovo C340-14API into Tablet Mode?
Rotate the touchscreen backward using the 360-degree hinge until the display is folded into the tablet position. The keyboard and touchpad are automatically disabled in Tablet Mode. The touchscreen remains available for input.
5. How long does the Lenovo IdeaPad C340-14API take to charge?
A full charge typically takes approximately four to eight hours. If the supplied power adapter supports rapid charging, the battery can reach approximately 80% in one hour. Actual charging time depends on operating conditions and computer usage.
6. How do I enable the fingerprint reader on the Lenovo C340-14API?
Open Settings → Accounts → Sign-in options and follow the instructions to enroll a fingerprint. A Windows password must be configured before fingerprint enrollment. Fingerprint reader availability depends on the laptop configuration.
7. How do I boot the Lenovo IdeaPad C340-14API from a USB drive?
Connect the bootable USB drive, restart the laptop, and press F12 when the Lenovo logo appears. If Hotkey Mode is enabled, press Fn + F12. Select the USB drive from the Boot Menu and press Enter.
8. How do I fix a Lenovo IdeaPad C340-14API that will not start Windows?
If Windows cannot start normally, use Windows Recovery to access Startup Repair, System Restore, or other advanced recovery tools. A previously created recovery USB can also be used. Connect the AC adapter during recovery and back up important files whenever possible before performing a reset or system restoration.