| Field | Details |
| Document Title | Lenovo 10w User Guide |
| Document Type | User Guide |
| Brand Name | Lenovo |
| Product Name | Lenovo 10w Tablet |
| Model Number(s) | Machine Types 82SU and 82ST |
| Compliance ID | LN0002W |
| PDF File Size | 13.37 MB |
| Number of Pages | 38 |
| Languages Covered | English |
Lenovo 10w Tablet 82SU / 82ST
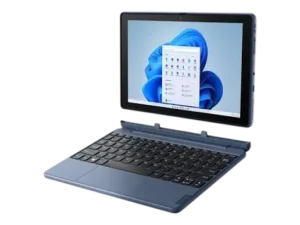
The Lenovo 10w is a Windows tablet designed for everyday computing, digital learning, internet access, video communication, and touchscreen interaction. It features a multi-touch IPS display, front and rear cameras, built-in microphones, speakers, wireless connectivity, and a USB-C port that supports charging, data transfer, and external displays.
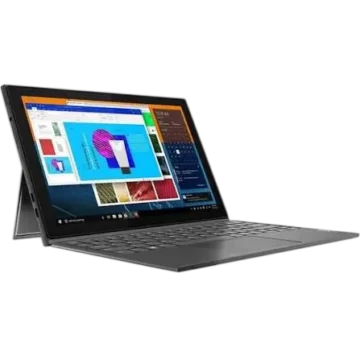
The Lenovo 10w is available under machine types 82SU and 82ST. Depending on the configuration, the tablet may include a Lenovo 10w Detachable Keyboard and a rechargeable Lenovo Integrated Pen for writing, sketching, and touchscreen control.
The tablet uses a 16:10 IPS display with a resolution of 1200 × 1920 pixels. It supports up to 8 GB of onboard LPDDR4X memory and up to 128 GB of eMMC storage. The installed Windows operating system provides access to wireless networking, Bluetooth devices, display settings, power management, and recovery tools.
The Lenovo 10w also includes UEFI BIOS settings for managing startup options, keyboard behavior, compatible USB power features, and security passwords.
The following instructions cover the tablet’s components, technical specifications, initial setup, keyboard attachment, touchscreen gestures, pen charging, wireless connections, power management, BIOS configuration, maintenance, troubleshooting, and Lenovo support services.
Technical Specifications
| Specification | Details |
| Brand | Lenovo |
| Product Name | Lenovo 10w |
| Product Type | Windows Tablet |
| Machine Types | 82SU, 82ST |
| Compliance ID | LN0002W |
| Display Technology | IPS Color Display |
| Display Resolution | 1200 × 1920 Pixels |
| Display Aspect Ratio | 16:10 |
| Touch Input | Multi-Touch |
| Memory Type | LPDDR4X, Soldered Onboard |
| Maximum Memory Listed | Up to 8 GB |
| Storage Type | eMMC |
| Maximum Storage Listed | Up to 128 GB |
| Wireless Connectivity | Wireless LAN and Bluetooth |
| Front Camera | Yes |
| Rear Camera | Yes |
| Microphones | Built-In |
| Speakers | Built-In |
| USB Connection | USB-C 3.2 Gen 1 |
| USB-C Power Output | 5V, 3A |
| External Display Support | Through USB-C |
| Detachable Keyboard | Available on Selected Models |
| Integrated Pen | Available on Selected Models |
| Integrated Pen Model | WG 13 |
| Pen Charging | Approximately 80% in 15 Seconds; 100% in 5 Minutes |
| Security | Firmware TPM on Selected Models |
| AC Power Adapter | 45W |
| Adapter Input | 100–240V AC, 50–60 Hz |
| Adapter Output | 20V DC, 2.25A |
| Operating System Instructions | Windows |
| BIOS | UEFI BIOS |
| Operating Temperature | 5–35°C (41–95°F) |
| Maximum Operating Altitude | 3,048 m (10,000 ft) |
The exact hardware, included accessories, software features, and available functions depend on the tablet configuration.
For detailed product specifications, use Lenovo’s Product Specifications Reference at https://psref.lenovo.com.
Parts and Components
The Lenovo 10w includes physical buttons, cameras, connectors, speakers, microphones, and a touchscreen display.
Tablet Component Guide
| Component | Function |
| Lenovo Integrated Pen | Provides handwriting and sketching input on supported models. |
| Microphones | Capture voice and other audio. |
| Camera | Captures photos and video. |
| Webcam Privacy Shutter | Covers or uncovers the camera lens. |
| Touchscreen | Provides display output and touch-based interaction. |
| Power Button | Controls tablet power. |
| Volume Button | Adjusts the audio volume. |
| Audio Connector | Connects compatible audio accessories. |
| USB-C 3.2 Gen 1 Connector | Supports power, data devices, and external displays. |
| Speakers | Provide audio output. |
| Pogo Interface Connector | Connects the detachable keyboard. |
| Rear Camera | Captures images and video from the rear of the tablet. |
Front Camera and Microphones
The tablet includes a camera and microphones for capturing video and sound.
These components can be used with compatible Windows applications.
Webcam Privacy Shutter
The webcam privacy shutter provides a physical way to cover the camera lens.
To control the shutter:
- Locate the camera cover slider.
- Slide it in one direction to cover the camera.
- Move it back to uncover the lens when the camera is required.
The shutter provides additional privacy when the camera is not in use.
Rear Camera
The rear-facing camera is positioned on the back of the tablet.
Power and Volume Buttons
The Power button controls the tablet’s power state.
The Volume button provides physical adjustment of the sound level.
Speakers
The built-in speakers provide sound for media playback, Windows notifications, and other audio functions.
Pogo Interface Connector
The pogo connector is used to attach the optional Lenovo 10w Detachable Keyboard.
The keyboard attaches magnetically after its guide pins are aligned with the tablet’s corresponding connectors.
USB-C Port and Connection Specifications
The tablet includes a USB-C 3.2 Gen 1 connector.
This connection can be used with compatible USB-C devices and accessories.
USB-C Functions
| Function | Specification |
| Charging Compatible USB-C Devices | Up to 5V, 3A Output |
| USB-C to VGA | Up to 1920 × 1200 at 60 Hz |
| USB-C to DisplayPort | Up to 2560 × 1440 at 60 Hz |
| External Display Connection | Up to 2K at 60 Hz |
| Data Transfer | USB 3.2 Gen 1 |
USB Data Transfer Speed
The USB 3.2 Gen 1 standard has a specified data rate of 5 Gbps.
Actual speeds depend on the tablet’s processing capability, connected devices, files, and operating conditions.
USB-C Accessories
Compatible USB-C accessories can extend the tablet’s available connections.
An appropriate adapter may be required for specific external devices.
Lenovo accessories are available through:
https://www.lenovo.com/accessories
Important Safety Instructions
The Lenovo 10w is an electrically operated tablet. Safe use is especially important when the device is used by children.
Safety for Children and Adult Supervisors
The tablet is intended for use as a child development tool, primarily for children aged six years or older.
Adult supervision is required.
Teachers, parents, and supervisors must explain safe handling of the tablet, rechargeable battery, and power adapter.
Electrical Safety
The following precautions apply:
- Children must not handle a power adapter that is not intended for their use.
- The tablet, battery, and power adapter must not be exposed to rain or water.
- The device must not be immersed in water during cleaning.
- The tablet and accessories must not be dropped, crushed, stepped on, or otherwise abused.
- Damaged components must be reported to a parent, teacher, or adult supervisor.
- Power cables must be positioned to reduce tripping hazards.
- The tablet, battery, and power adapter must be inspected periodically for damage.
Danger: The Lenovo 10w is an electrically operated product and is not recommended for children under three years of age.
Avoid Prolonged Skin Contact
The tablet should not remain in direct contact with a child’s bare skin for extended periods.
When the device is being used for more than a few minutes, it should be placed on a flat surface, such as a desk.
Safe Charging
Only certified power adapters and cords that meet the applicable national standards should be used.
Lenovo recommends using Lenovo-qualified power adapters.
The battery temperature must be at least 10°C (50°F) during charging.
Liquid Exposure
The tablet and its accessories must be protected from water and excessive moisture.
If liquid enters the device, it must be switched off and disconnected from AC power promptly.
The tablet must not be used again until completely dry.
Operating Environment
The Lenovo 10w must be used within the specified temperature, humidity, and altitude limits.
Environmental Specifications
| Condition | Specification |
| Maximum Altitude Without Pressurization | 3,048 m (10,000 ft) |
| Operating Temperature | 5–35°C (41–95°F) |
| Storage Temperature | 5–43°C (41–109°F) |
| Minimum Temperature for Battery Charging | 10°C (50°F) |
| Operating Relative Humidity | 8–95% at a Wet-Bulb Temperature of 23°C (73°F) |
| Storage Relative Humidity | 5–95% at a Wet-Bulb Temperature of 27°C (81°F) |
Before First Use
Before operating the Lenovo 10w, the Safety and Warranty Guide, Setup Guide, and Generic Safety and Compliance Notices must be read.
Initial Preparation
- Place the tablet on a stable, flat surface.
- Check the tablet and accessories for visible damage.
- Identify the Power button and USB-C charging connector.
- Connect a suitable certified power adapter if charging is required.
- Turn on the tablet.
- Follow the Windows setup instructions displayed on the screen.
A detachable keyboard or integrated pen can be connected if included with the configuration.
How to Turn On and Shut Down the Lenovo 10w
Turning On the Tablet
Press the Power button to start the tablet.
The device begins its startup process and loads Windows.
Shutting Down the Tablet
- Open the Windows Start menu.
- Select Power.
- Choose Shut down.
The tablet completes the Windows shutdown procedure.
How to Connect the Lenovo 10w to WiFi
The tablet uses its wireless LAN connection to access available WiFi networks.
WiFi Connection Instructions
- Start Windows.
- Select the network icon in the Windows notification area.
- Locate the required WiFi network.
- Select the network.
- Enter the requested connection information.
- Follow the on-screen instructions.
After the connection is completed, the tablet can use the selected network.
How to Connect an External Display
The Lenovo 10w can connect to an external monitor or projector to extend the workspace or display presentations.
The tablet supports wired external displays through USB-C and wireless displays through Miracast when supported by both devices.
Wired External Display Connection
- Connect the compatible external display using the USB-C connector and the appropriate display cable or adapter.
- Allow Windows to identify the connected display.
- Choose the preferred display mode.
Supported External Display Resolutions
| Connection | Maximum Resolution |
| USB-C to VGA | 1920 × 1200 at 60 Hz |
| USB-C to DisplayPort | 2560 × 1440 at 60 Hz |
| USB-C 3.2 Gen 1 External Display | Up to 2K at 60 Hz |
If the External Display Is Not Detected
- Right-click an empty area on the Windows desktop.
- Select Display settings.
- Follow the Windows instructions to detect the connected monitor.
How to Connect a Wireless Display
The tablet and external display must both support Miracast.
- Turn on the compatible wireless display.
- Press Windows + K.
- Select the required wireless display.
- Follow the connection prompts.
How to Change Display Settings
- Right-click an empty area on the desktop.
- Select Display settings.
- Choose the display to configure.
- Adjust the preferred settings.
Windows allows adjustments such as:
- Main display selection
- Secondary display selection
- Display resolution
- Screen orientation
- Display mode
Lenovo 10w Detachable Keyboard
Selected Lenovo 10w configurations include a detachable keyboard.
The keyboard allows the tablet to be used in a notebook-style arrangement and includes a trackpad for pointer control.
Keyboard Components
| Component | Function |
| Pogo Interface Connector | Connects the keyboard to the tablet. |
| Keyboard | Provides physical text and command input. |
| Trackpad | Provides pointer movement and mouse-style interaction. |
| Guide Pins | Help align the keyboard during attachment. |
How to Attach the Detachable Keyboard
- Position the keyboard near the tablet’s pogo interface connector.
- Align the keyboard guide pins with the corresponding connectors on the tablet.
- Move the keyboard toward the tablet.
- Allow the magnetic connection to secure the keyboard.
- Adjust the tablet to the preferred viewing angle.
The viewing angle can be adjusted within 180 degrees.
How to Detach the Keyboard
Gently pull the keyboard away from the tablet.
The magnetic connection releases when the keyboard is separated.
Detachable Keyboard Hotkeys
The Lenovo 10w Detachable Keyboard includes shortcut keys for common Windows functions.
Hotkey Functions
| Hotkey Function | Description |
| Speaker Mute | Mutes or unmutes speaker audio. |
| Volume Down / Up | Adjusts speaker volume. |
| Microphone Mute | Mutes or unmutes the microphone. |
| Refresh | Refreshes the current window. |
| Touchpad Control | Enables or disables the touchpad. |
| Airplane Mode | Enables or disables Airplane Mode. |
| Calculator | Opens Windows Calculator. |
| Lock Account | Locks the current Windows account. |
| External Display Control | Manages connected external displays. |
| Brightness Down / Up | Adjusts screen brightness. |
| Fn + Home-Function Key | Performs the Home key function. |
If the speakers are muted and the tablet is turned off, they remain muted when the tablet is turned on again.
Hotkey Mode
The behavior of hotkeys that share keys with F1–F12 depends on the UEFI BIOS Hotkey Mode setting.
| Hotkey Mode | Operation |
| Enabled | Press Fn together with the hotkey to activate the shortcut. |
| Disabled | Press the hotkey directly. |
Touchscreen Gestures
The Lenovo 10w supports multi-touch interaction.
Touch gestures can be used to select items, scroll, zoom, and access Windows interface features.
Touchscreen Gesture Guide
| Gesture | Function |
| Tap Once | Single-click an item. |
| Tap Twice Quickly | Double-click an item. |
| Tap and Hold | Right-click an item. |
| Slide | Scroll through content. |
| Pinch | Zoom out. |
| Spread | Zoom in. |
| Swipe from Left Edge | Open the Windows 11 widget panel. |
| Swipe from Right Edge | Open the Windows 11 notification center. |
| Short Downward Swipe | Show the title bar. |
| Downward Swipe | Close the current application. |
| Drag | Move an item across the screen. |
Some gestures may not work in every application.
Lenovo Integrated Pen WG 13
Selected Lenovo 10w models support the Lenovo Integrated Pen WG 13.
The pen is a rechargeable electronic stylus designed for writing, drawing, and more precise touchscreen input.
The pen can be stored and charged in its designated slot.
Integrated Pen Components
| Component | Function |
| Pen Tip | Provides writing and touchscreen input. |
| Eraser Button | Provides the application-dependent eraser function. |
| Right-Click Button | Provides the application-dependent right-click function. |
The default button behavior may differ between applications.
How to Charge the Lenovo Integrated Pen
- Make sure the tablet is turned on or in sleep mode.
- Insert the Lenovo Integrated Pen into its storage slot.
- Allow the pen to charge.
Pen Charging Times
| Charging Duration | Approximate Charge |
| 15 Seconds | 80% |
| 5 Minutes | 100% |
Pen Safety
The Lenovo Integrated Pen is not waterproof.
It must be kept away from water and excessive moisture.
How to Configure Lenovo Integrated Pen Settings
- Visit http://www.wacomeng.com.
- Download the latest Lenovo Pen Settings software.
- Install and open Lenovo Pen Settings.
- Configure the pen functions according to the available preferences.
How to Remove the Pen Dummy
Some Lenovo 10w models include a pen dummy in place of the integrated pen.
The dummy can be removed when replacing it with a compatible Lenovo Integrated Pen.
Removal Instructions
- Read the Generic Safety and Compliance Notices before beginning.
- Use a suitable tool in the manner illustrated by Lenovo to release the pen dummy.
- Remove the pen dummy from the slot.
The pen dummy is classified as a customer-replaceable component on applicable models.
How to Use Lenovo Vantage
Lenovo Vantage is a device management application that provides information, settings, updates, and support tools for the tablet.
How to Open Lenovo Vantage
- Open Windows Search.
- Type Vantage.
- Press Enter.
- Open the matching application.
Lenovo Vantage Features
| Feature | Function |
| Device Status | Displays system and hardware information. |
| Hardware Settings | Provides access to supported configuration options. |
| Updates | Downloads and installs UEFI BIOS, firmware, and drivers. |
| Warranty Status | Checks warranty information online. |
| Documentation | Provides access to the user guide. |
| Diagnostics | Helps identify supported hardware problems. |
Available features may change through software updates and may vary by tablet model.
Disk Management Precautions
The Lenovo 10w contains several storage partitions used for BIOS and firmware functions.
Important: OEM partitions must not be deleted or modified.
Changing or deleting these partitions can prevent the tablet from starting normally and may leave the screen black during the next startup.
Battery and Power Management
The Lenovo 10w includes a built-in rechargeable battery.
Windows and Lenovo Vantage provide battery information and power management options.
How to Check Battery Status
- Open Settings.
- Select System.
- Review the battery information.
Additional battery information is available through Lenovo Vantage.
How to Charge the Lenovo 10w Tablet
The tablet supports charging through its USB-C power connector.
The specified AC power adapter is rated at 45W.
AC Adapter Specifications
| Specification | Details |
| Power | 45W |
| Input Voltage | 100–240V AC |
| Input Frequency | 50–60 Hz |
| Output Voltage | 20V DC |
| Output Current | 2.25A |
Charging Instructions
- Connect the compatible Lenovo-qualified AC adapter to the tablet’s USB-C power connector.
- Connect the adapter to an electrical outlet.
- Allow the battery to charge.
Actual charging time depends on the battery size, physical environment, and whether the tablet is being used.
Some configurations may not ship with an AC adapter or power cord.
Only certified, compatible adapters and power cords that meet applicable standards should be used.
Battery Charging Behavior
The tablet includes battery management functions intended to extend battery lifespan.
After the battery reaches full charge, it may need to discharge to 94% or lower before charging is allowed again.
The battery may also adjust its full-charge capacity based on usage patterns.
After a prolonged period of limited use, the battery may need to discharge to approximately 20% and then be recharged completely before full capacity becomes available.
How to Change Power Settings
For ENERGY STAR-compliant configurations, the guide identifies default power settings for periods of inactivity.
Default Power Settings
| Setting | Default |
| Turn Off Display | After 10 Minutes |
| Put Tablet to Sleep | After 10 Minutes |
How to Change the Power Plan
- Open Control Panel.
- Select Large Icons or Small Icons view.
- Select Power Options.
- Choose or customize the preferred power plan.
How to Change Power Button Behavior
- Open Control Panel.
- Select Large Icons or Small Icons view.
- Open Power Options.
- Select Choose what the power buttons do.
- Change the settings as required.
How to Connect Bluetooth Devices
The tablet includes Bluetooth connectivity for compatible wireless accessories.
Bluetooth can be used with devices such as:
- Keyboards
- Mice
- Smartphones
- Speakers
Bluetooth Connection Instructions
- Position the Bluetooth device within 10 meters (33 feet) of the tablet.
- Open Windows Search.
- Type Bluetooth.
- Press Enter.
- Turn on Bluetooth if it is disabled.
- Select the required Bluetooth device.
- Follow the on-screen pairing instructions.
UEFI BIOS Setup Utility
UEFI BIOS runs when the tablet starts.
It performs startup checks and provides access to supported firmware settings.
These settings include boot priority, hotkey behavior, USB power options, and BIOS security.
How to Enter UEFI BIOS
- Restart the tablet.
- Wait for the Lenovo logo screen.
- Press Fn + F2.
The UEFI BIOS setup utility opens.
How to Change the Startup Sequence
- Enter UEFI BIOS.
- Open the Boot menu.
- Locate Boot Priority Order.
- Follow the on-screen instructions to change the startup device order.
Temporary Boot Device Selection
A different startup device can be selected without permanently changing the BIOS configuration.
- Turn on the tablet.
- Wait for the Lenovo logo screen.
- Press Fn + F12.
- Select the required boot device.
How to Change Hotkey Mode
- Open UEFI BIOS.
- Select Configuration > Hotkey Mode.
- Press Enter.
- Select Enabled or Disabled.
- Select Exit > Exit Saving Changes.
How to Enable or Disable Always On USB
On models supporting the Always On USB feature:
- Enter UEFI BIOS.
- Select Configuration > Always On USB.
- Press Enter.
- Choose Enabled or Disabled.
- Select Exit > Exit Saving Changes.
The Always On USB option is available only on applicable models.
UEFI BIOS Password Types
The Lenovo 10w supports administrator and user passwords for BIOS access.
BIOS Password Types
| Password | Prerequisite | Function |
| Administrator Password | None | Controls access to UEFI BIOS settings. |
| User Password | Administrator password must already be set. | Allows access to the setup utility with limited permissions. |
BIOS passwords use alphanumeric characters.
If BIOS is opened using a user password, only selected settings can be changed.
How to Set an Administrator Password
An administrator password helps prevent unauthorized access to BIOS configuration.
Administrator Password Setup
- Enter UEFI BIOS.
- Select Security > Set Administrator Password.
- Press Enter.
- Enter a password using lowercase letters and numbers.
- Press Enter.
- Enter the password again to confirm.
- Select Exit > Exit Saving Changes.
The administrator password must be entered to access the BIOS setup utility afterward.
Important: Lenovo authorized service personnel cannot reset a forgotten administrator password. The system board must be replaced by authorized service personnel. Proof of purchase is required, and charges apply for parts and service.
How to Change or Remove the Administrator Password
Only an administrator can change or remove this password.
Changing the Password
- Enter UEFI BIOS.
- Select Security > Set Administrator Password.
- Enter the current password.
- Enter the new password.
- Confirm the new password.
- Select Exit > Exit Saving Changes.
Removing the Password
Follow the same process, but leave both new password fields empty and press Enter twice.
Removing the administrator password also removes the user password.
How to Set a User Password
An administrator password must already be configured.
User Password Setup
- Enter UEFI BIOS.
- Select Security > Set User Password.
- Press Enter.
- Enter a password containing letters and numbers.
- Make sure the user password differs from the administrator password.
- Enter the password again to confirm.
- Select Exit > Exit Saving Changes.
How to Change or Remove the User Password
Changing the User Password
- Enter UEFI BIOS.
- Select Security > Set User Password.
- Enter the current password.
- Enter a new password.
- Confirm the new password.
- Select Exit > Exit Saving Changes.
Removing the User Password
- Enter UEFI BIOS.
- Select Security > Clear User Password.
- Press Enter.
- Follow the displayed instructions.
- Save the changes before exiting.
How to Enable the Power-On Password
The Power-On Password option provides an additional security control when an administrator password is configured.
Enabling Power-On Password
- Enter UEFI BIOS.
- Select Security > Power-on Password.
- Press Enter.
- Change the setting to Enabled.
- Select Exit > Exit Saving Changes.
The user guide specifies a password requirement for subsequent access to the setup utility when this feature is enabled.
Firewall Protection
The tablet may include a preinstalled firewall application.
A firewall helps protect the tablet against:
- Unauthorized network access
- Internet-based attacks
- Network intrusions
- Other internet security threats
For detailed firewall configuration, use the help system of the installed firewall application.
Cleaning and Maintenance Instructions
Regular cleaning helps maintain the touchscreen and tablet exterior.
The device must be turned off before the touchscreen is cleaned.
How to Clean the Touchscreen
- Turn off the tablet.
- Use a dry, soft, lint-free cloth or absorbent cotton.
- Gently remove fingerprints and dust.
- Avoid pressing firmly against the glass.
- Do not use solvents on the cloth.
Touchscreen Cleaning Restrictions
The following actions must be avoided:
- Applying excessive pressure to the screen.
- Placing metal objects against the touchscreen.
- Using fingernails or unsuitable objects for screen input.
- Using solvents on the cleaning cloth.
The touchscreen consists of a glass panel covered with a plastic film.
Improper cleaning or excessive pressure may damage the touch panel.
Touchscreen Accuracy
The touchscreen should be calibrated periodically to help maintain accurate finger input.
How to Disinfect the Lenovo 10w
The guide provides a disinfecting procedure for the tablet.
Recommended Disinfecting Wipes
The manufacturer recommends:
- Hydrogen peroxide wipes
- Alcohol-based wipes
Wipes containing sodium hypochlorite (bleach) must not be used.
Step-by-Step Disinfecting Instructions
- Remove excess liquid from the disinfecting wipe or cloth before use.
- Gently wipe the tablet.
- Prevent liquid from dripping into the device.
- Do not wipe the connector pins.
- Follow the wipe manufacturer’s instructions to minimize disinfectant residue.
- Allow the tablet to dry completely before use.
The tablet must not be immersed in water.
Troubleshooting Guide
The following troubleshooting procedures address common operating, display, Windows recovery, and hardware support problems.
Quick Troubleshooting Table
| Problem | Recommended Action |
| Tablet stops responding | Hold the Power button until the tablet turns off, then restart it. |
| Liquid is spilled on the tablet | Disconnect the AC adapter, switch off immediately, and allow it to dry completely. |
| External display is not detected | Open Windows Display Settings and follow the instructions to detect the display. |
| Tablet fails after OEM partitions are modified | Avoid further partition changes and use Lenovo recovery or authorized support resources. |
| Windows must be restored | Use Lenovo recovery resources or Windows recovery options. |
| Drivers or firmware need updating | Use Lenovo Vantage or Lenovo Support. |
| Hardware problems continue | Use diagnostics and contact Lenovo Customer Support. |
Tablet Stops Responding
If the tablet becomes unresponsive:
- Press and hold the Power button.
- Wait until the tablet switches off.
- Restart the tablet.
Liquid Spilled on the Tablet
If liquid enters the device:
- Disconnect the AC adapter carefully.
- Turn off the tablet immediately.
- Allow all liquid to dry completely before attempting to use it again.
Caution: The tablet must not be turned upside down to drain liquid.
If a detachable keyboard has drainage holes, liquid can drain through them.
Windows Recovery and Reset
Lenovo and Windows recovery resources can be used when Windows needs to be restored.
Lenovo Recovery
Visit:
https://support.lenovo.com/HowToCreateLenovoRecovery
Follow the provided recovery instructions.
Windows Recovery Diagnostics
- Open https://pcsupport.lenovo.com.
- Allow the website to detect the tablet or select the model manually.
- Select Diagnostics > Operating System Diagnostics.
- Follow the on-screen instructions.
Finding Updated Drivers and BIOS
The latest available drivers and UEFI BIOS updates can be obtained through:
- Lenovo Vantage
- Lenovo Support at https://support.lenovo.com
Replacement Parts and Accessories
Lenovo identifies several components as Customer Replaceable Units (CRUs).
A CRU is a component that customers may replace or upgrade according to Lenovo’s service classification.
Customer Replaceable Unit Types
| CRU Type | Description |
| Self-Service CRU | A component that can be installed or replaced relatively easily by the customer or a technician. |
| Optional-Service CRU | A component requiring a higher level of technical skill for customer replacement. |
Lenovo 10w Customer Replaceable Parts
| Component | CRU Classification |
| AC Power Adapter | Self-Service CRU |
| Power Cord | Self-Service CRU |
| Lenovo 10w Detachable Keyboard | Self-Service CRU |
| Lenovo Integrated Pen | Self-Service CRU |
| Pen Dummy | Self-Service CRU |
These components are available as CRUs on applicable models.
Built-In Battery Replacement
The built-in rechargeable battery is not a customer-replaceable part.
Replacement must be performed by a Lenovo-authorized repair facility or technician.
CRU Return Requirements
When Lenovo supplies a replacement CRU, the defective component may need to be returned.
If a return is required, Lenovo provides:
- Return instructions
- A prepaid shipping label
- A shipping container
A charge may apply if Lenovo does not receive the defective component within 30 days after the replacement CRU is received.
Warranty Information
Warranty coverage depends on the applicable Lenovo Limited Warranty and the specific tablet configuration.
Lenovo Limited Warranty
Warranty terms are available at:
https://www.lenovo.com/warranty/llw_02
The warranty status of a specific Lenovo 10w can be checked through:
https://pcsupport.lenovo.com/warrantylookup
Available Warranty Services
During the applicable warranty period, Lenovo may provide the following services.
| Service | Description |
| Problem Determination | Assistance identifying hardware problems and appropriate corrective actions. |
| Lenovo Hardware Repair | Applicable repair service for covered Lenovo hardware problems. |
| Engineering Changes | Selected hardware changes made available by Lenovo or an authorized reseller. |
Services Not Covered by Standard Warranty Support
The user guide identifies the following services as outside the listed standard support coverage:
- Replacement or use of non-Lenovo or non-warranted components
- Identifying software problem sources
- BIOS configuration during installation or upgrades
- Device driver modifications or upgrades
- Network operating system installation and maintenance
- Application installation and maintenance
Customer Support Information
Lenovo provides technical assistance, warranty information, driver downloads, diagnostic resources, and product documentation.
Lenovo Support Resources
| Support Resource | Website |
| Lenovo Support | https://pcsupport.lenovo.com |
| Drivers and Firmware | https://support.lenovo.com |
| Product Specifications | https://psref.lenovo.com |
| Lenovo Support Phone Directory | https://pcsupport.lenovo.com/supportphonelist |
| Authorized Service Locations | https://support.lenovo.com/partnerlocation |
| Lenovo Community Forums | https://forums.lenovo.com |
| Lenovo Troubleshooting Tips | https://www.lenovo.com/tips |
| Accessibility Information | https://www.lenovo.com/accessibility |
| Warranty Information | https://www.lenovo.com/warranty/llw_02 |
| Warranty Status Lookup | https://pcsupport.lenovo.com/warrantylookup |
How to Contact Lenovo Customer Support
If a problem cannot be corrected using the available troubleshooting procedures, contact Lenovo Customer Support.
Support telephone numbers vary by country and region.
The current directory is available at:
https://pcsupport.lenovo.com/supportphonelist
Before Contacting Lenovo
The following information should be collected:
| Information | Details |
| Product Name | Lenovo 10w |
| Machine Type | 82SU or 82ST |
| Serial Number | Tablet serial number |
| Problem Description | Description of the issue |
| Error Message | Any displayed error text or code |
| Operating System | Installed Windows version |
| Running Applications | Applications open when the problem occurred |
| Reproducibility | Whether the problem can be reproduced |
Where to Find the Serial Number
The serial number and machine type are printed on a product label on the rear of the tablet.
The label can be used to identify the device when requesting service.
Regulatory and Compliance Information
Product Certification
| Item | Details |
| Product | Lenovo 10w |
| Compliance ID | LN0002W |
| Machine Types | 82SU, 82ST |
Wireless Antennas
The tablet includes two wireless LAN antennas:
- Wireless LAN Auxiliary Antenna
- Wireless LAN Main Antenna
Both are positioned near the upper part of the display assembly.
Compliance Resources
Additional product regulatory information is available at:
https://www.lenovo.com/compliance
The Generic Safety and Compliance Notices can be accessed through:
https://pcsupport.lenovo.com/docs/generic_notices
Frequently Asked Questions
1. How do I charge the Lenovo 10w tablet?
Connect a compatible certified AC adapter to the tablet’s USB-C power connector, then connect the adapter to an electrical outlet. The specified adapter provides 45W with an output of 20V DC at 2.25A. Actual charging time depends on battery size, operating conditions, and whether the tablet is being used.
2. How do I attach the Lenovo 10w Detachable Keyboard?
Align the keyboard’s guide pins with the tablet’s corresponding connectors. Move the keyboard close to the tablet until it attaches magnetically. The screen can then be adjusted to the preferred viewing angle within 180 degrees. To detach the keyboard, gently pull it away from the tablet.
3. How do I charge the Lenovo Integrated Pen WG 13?
Make sure the tablet is turned on or in sleep mode, then insert the Lenovo Integrated Pen into its storage slot. The pen reaches approximately 80% charge in 15 seconds and full charge in about five minutes.
4. Can the Lenovo 10w connect to an external monitor?
Yes. The USB-C connection supports external displays through compatible adapters. USB-C to VGA supports up to 1920 × 1200 at 60 Hz, while USB-C to DisplayPort supports up to 2560 × 1440 at 60 Hz. Miracast-compatible wireless displays can also be connected using Windows + K.
5. How do I open BIOS on the Lenovo 10w?
Restart the tablet. When the Lenovo logo appears, press Fn + F2 to enter UEFI BIOS. The setup utility provides access to settings such as boot priority, hotkey behavior, Always On USB on supported models, and BIOS security passwords.
6. Why is my Lenovo 10w battery not charging above 94%?
The tablet includes battery management behavior intended to support battery lifespan. After reaching full charge, the battery may need to discharge to 94% or lower before charging begins again. This can be normal operation.
7. How do I reset or recover Windows on the Lenovo 10w?
Lenovo provides recovery instructions at support.lenovo.com/HowToCreateLenovoRecovery. Windows recovery tools and operating system diagnostics can also be accessed through Lenovo’s product support website. The appropriate procedure depends on the problem being corrected.
8. What should I do if my Lenovo 10w freezes or stops responding?
Press and hold the Power button until the tablet switches off, then restart it. If the problem continues, Lenovo Vantage and Lenovo’s online diagnostic tools can help identify hardware or software issues. Unresolved problems can be referred to Lenovo Customer Support.