| Field | Details |
| Document Title | ThinkPad 11e and ThinkPad Yoga 11e — User Guide |
| Document Type | User Guide |
| Brand Name | Lenovo |
| Product Name | ThinkPad 11e / ThinkPad Yoga 11e |
| Model Number(s) | ThinkPad 11e, ThinkPad Yoga 11e; specific machine-type numbers vary by configuration |
| PDF File Size | 4.10 MB |
| Number of Pages | 162 |
| Languages Covered | English |
Lenovo ThinkPad 11e and ThinkPad Yoga 11e
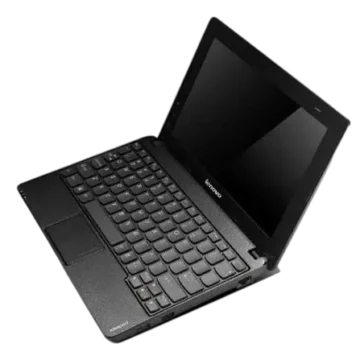
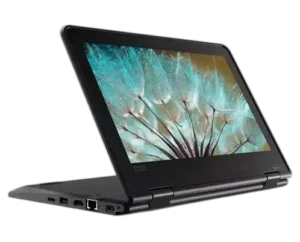
The Lenovo ThinkPad 11e and ThinkPad Yoga 11e are compact notebook computers designed for everyday computing, productivity, internet access, multimedia, and portable use. Both models feature an 11.6-inch display, integrated camera, stereo speakers, microphone, keyboard, touchpad, wireless connectivity, and multiple ports for external devices.
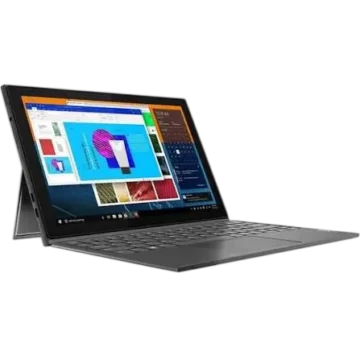
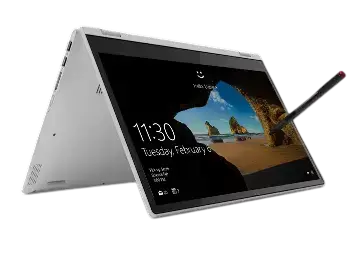
The ThinkPad 11e uses a conventional notebook design, while the ThinkPad Yoga 11e includes a 360-degree rotating display that allows operation in Notebook, Stand, Tablet, and Tent modes. The Yoga model also offers touchscreen functions, tablet controls, and motion-related sensors.
Depending on the configuration, the computers use a 2.5-inch hard disk drive or solid-state drive, DDR3 low-voltage memory, integrated wireless LAN, and Bluetooth connectivity. They support Windows 7, Windows 8.1, and Windows 10 as described in the user guide.
The computers include USB 3.0, Always On USB, HDMI, Ethernet, audio, and memory card connections. Their built-in lithium-ion batteries support portable operation, while the supplied AC power adapter provides external power and charges the battery.
The ThinkPad Setup program allows configuration of startup devices, firmware settings, security options, and power management. Lenovo recovery utilities and Windows recovery functions provide options for repairing, resetting, or restoring the operating system.
Technical Specifications
| Specification | Details |
| Brand | Lenovo |
| Product Models | ThinkPad 11e, ThinkPad Yoga 11e |
| Product Type | Notebook Computer / Convertible Notebook |
| Display Size | 11.6 Inches (294.64 mm) |
| Display Technology | TFT Color Display |
| Internal Display Resolution | Up to 1366 × 768 |
| External Display Resolution | Up to 1920 × 1080 via HDMI |
| Touchscreen | ThinkPad Yoga 11e |
| Convertible Display | 360° Rotation on Yoga 11e |
| Supported Operating Systems | Windows 7, Windows 8.1, Windows 10 |
| Memory Technology | DDR3 Low Voltage SODIMM or DDR3 LV SDRAM |
| Storage Options | Hard Disk Drive or Solid-State Drive |
| Storage Drive Form Factor | 2.5 Inches, 7 mm Height |
| Keyboard | 6-Row Keyboard |
| Pointing Device | Touchpad |
| Camera | Integrated |
| Audio | Stereo Speakers and Integrated Microphone |
| Wired Networking | RJ-45 Ethernet |
| Wireless Networking | Integrated Wireless LAN |
| Bluetooth | Integrated |
| USB Connections | USB 3.0 and Always On USB 2.0 |
| External Display Connection | HDMI |
| Audio Connector | 3.5 mm, 4-Pole |
| Memory Cards | MMC, SD, SDHC, SDXC |
| Battery Technology | Built-In Rechargeable Lithium-Ion |
| AC Adapter Input | 100–240V AC, 50–60 Hz |
| Maximum Heat Output | 45 W (154 BTU/hr) |
| Operating Temperature | 5–35°C (41–95°F) at Altitudes Up to 2438 m |
| Operating Relative Humidity | 8–80% |
| Maximum Unpressurized Altitude | 3048 m (10,000 ft) |
Dimensions and Weight
| Measurement | ThinkPad 11e | ThinkPad Yoga 11e |
| Width | 300 mm (11.81 in) | 300 mm (11.81 in) |
| Depth | 216 mm (8.50 in) | 216 mm (8.50 in) |
| Height | 22.30 mm (0.88 in) | 22.90 mm (0.90 in) |
| Maximum Weight | 1.52 kg (3.35 lb) | 1.59 kg (3.50 lb) |
Processor, installed memory, storage capacity, and certain hardware features vary by configuration.
Product Components and Controls
The ThinkPad 11e and ThinkPad Yoga 11e contain built-in controls, status indicators, and connectors positioned around the computer.
Front Components
| Component | Function |
| Microphone | Records voice and other audio. |
| Camera | Captures photographs and video. |
| Camera-in-Use Indicator | Illuminates green when the camera is active. |
| Stereo Speakers | Provide audio output. |
| System-Status Indicator | Shows the computer’s operating state. |
| Touchpad | Controls the on-screen pointer and mouse functions. |
| Proximity Sensor | Detects nearby hands on the Yoga model. |
| Windows Button | Provides Windows navigation on the Yoga model. |
| Multi-Touch Screen | Supports touch input on applicable Yoga configurations. |
Proximity Sensor — Yoga 11e
The proximity sensor is designed to operate when the ThinkPad Yoga 11e is in Tablet mode.
When nearby hands are detected, the Active Protection System is temporarily disabled. It is enabled again when the hands leave the detection area.
Right-Side Ports and Controls
| Component | Function |
| Power Button | Turns on the computer or activates the configured power function. |
| Volume Buttons | Increase or decrease speaker volume. |
| USB 3.0 Connector | Connects compatible USB devices. |
| HDMI Connector | Connects an external monitor, projector, or television. |
| Security-Lock Slot | Accepts a compatible mechanical security lock. |
Power Button
The Power button turns on the computer.
Its behavior can be changed through Windows Power Options to perform functions such as shutting down, entering Sleep mode, or entering Hibernation.
USB 3.0 Connector
The USB 3.0 port supports compatible peripheral devices, including printers and digital cameras.
When connecting a USB cable, the USB symbol must face upward to avoid damaging the connector.
HDMI Connection
The HDMI connector supports compatible digital displays and audio devices.
A VGA monitor can also be connected using an HDMI-to-VGA monitor cable.
Left-Side Ports and Connections
| Component | Function |
| Power Connector | Connects the AC adapter and charges the battery. |
| Ethernet Connector | Connects to a wired local area network. |
| Always On USB 2.0 Connector | Supports USB devices and charging selected mobile devices. |
| Audio Connector | Connects compatible headphones or headsets. |
| Media Card Slot | Accepts supported memory cards. |
Always On USB
The Always On USB connector can charge selected smartphones and mobile devices while the computer is operating or sleeping.
It also supports charging when the computer is off or hibernating while connected to AC power.
Charging while the computer is off and disconnected from AC power can be configured through Lenovo power-management software.
Audio Connector
The 3.5 mm audio connection supports:
- Headphones
- Compatible four-pole headsets with headphone and microphone functions
Conventional standalone microphones are not supported through this connector.
Rear Cooling Vents
The rear fan louvers allow air to circulate around internal components.
These openings must remain unobstructed.
Status Indicators
The computer includes several indicators that display hardware and operating conditions.
| Indicator | Meaning |
| Fn Lock | Shows whether Fn Lock is active. |
| Speaker Mute | Illuminates when the speakers are muted. |
| Microphone Mute | Illuminates when the microphone is muted. |
| Camera-in-Use | Glows green while the camera is active. |
| System Status | Indicates whether the computer is on, sleeping, or hibernating. |
| Wireless Status | Shows whether wireless functions are enabled. |
System-Status Light
| Light Behavior | Computer Status |
| Solid On | Computer is running normally. |
| Fast Blinking | Entering Hibernation. |
| Slow Blinking | Sleep Mode |
| Three Blinks | Initially connected to power. |
| Off | Powered off or hibernating. |
The system-status indicators are located in the illuminated dots of the ThinkPad logos.
Wireless Indicator
| Indicator | Meaning |
| Solid Green | Wireless functions are enabled. |
| Off | Wireless functions are disabled. |
Ethernet Indicators
A green Ethernet indicator shows that the computer is connected to a local network.
A blinking yellow indicator shows network data transmission.
Important Safety Instructions
The computer, rechargeable battery, AC power adapter, and electrical connectors must be handled carefully to reduce the risk of injury, fire, electric shock, or equipment damage.
General Safety Precautions
- Keep liquids away from the computer and power adapter.
- Do not operate damaged electrical equipment.
- Do not expose the computer to fire or excessive heat.
- Keep ventilation openings uncovered.
- Avoid prolonged skin contact with hot computer surfaces.
- Do not place heavy objects on the display or computer.
- Protect the computer against drops, impacts, and excessive vibration.
- Use approved power adapters and replacement components.
- Do not attempt unauthorized repairs.
- Disconnect electrical power before opening service covers.
- Keep plastic packaging away from children.
Power Adapter Safety
The AC power adapter generates heat during operation.
Do not cover it with clothing or place it against the body while connected to power.
Avoid wrapping the cord tightly around the adapter.
Damaged or corroded power cords, plugs, and adapters must not be used.
Battery Safety
The built-in rechargeable battery must not be opened, punctured, crushed, short-circuited, or exposed to fire or liquids.
The built-in rechargeable battery must only be replaced by a Lenovo-authorized repair facility or technician.
For extended storage, Lenovo recommends keeping rechargeable batteries at approximately 30–50% charge and recharging them about once each year.
Heat and Ventilation
The computer must not be operated on surfaces that block airflow, including beds, sofas, and carpets.
Air entering the computer must not exceed 35°C (95°F).
Electrical Safety
During electrical storms, avoid using the computer or connecting and disconnecting electrical and communication cables.
Before opening service covers, disconnect the power adapter and other attached cables.
Display Safety
The LCD contains glass and may break if the computer is dropped or handled roughly.
If LCD fluid contacts the skin or eyes, wash the affected area with water for at least 15 minutes. Seek medical attention if symptoms persist.
Headphone Safety
High headphone volume can cause hearing damage.
Use a suitable listening volume and compatible headphones or earphones.
Before First Use
The computer must be placed in a suitable operating environment and connected to power before initial setup.
Initial Preparation
- Place the computer on a stable surface.
- Make sure the ventilation openings are clear.
- Inspect the AC power adapter and power cord.
- Connect the power adapter.
- Turn on the computer.
- Follow the operating system’s initial setup instructions.
Connecting the AC Power Adapter
Connect power in the following order:
- Connect the power cord to the AC power adapter.
- Connect the AC adapter to the computer’s power connector.
- Connect the power cord to a properly wired electrical outlet.
The battery charges automatically while the computer uses AC power.
Power Management and Battery Charging
The computer can operate using its rechargeable battery or external AC power.
Checking Battery Status
The Windows notification area includes a battery-status icon.
Move the pointer over this icon to view the remaining battery percentage and estimated operating time.
Battery life depends on the amount of stored charge and computer activity, including:
- Display brightness
- Storage drive access
- Wireless networking
- Running applications
Charging the Battery
The battery should be charged when its remaining capacity becomes low.
A full charge generally requires approximately three to six hours, depending on battery size and environmental conditions.
The computer does not begin charging again when the remaining battery capacity is above 95%.
The battery temperature must be at least 10°C (50°F) before charging.
Adjusting Power Settings
- Open Control Panel.
- Change the view to Large Icons or Small Icons.
- Select Power Options.
- Choose or modify a power plan.
Power settings can balance operating performance and battery consumption.
Sleep and Hibernation Modes
The computer provides power-saving functions for periods of inactivity.
Sleep Mode
Sleep saves the current session in memory and turns off the display and storage drive activity.
The computer can return to normal operation quickly.
To enter Sleep mode:
- Windows 7: Start > Sleep
- Windows 8.1: Start screen > Power > Sleep
- Windows 10: Start > Power > Sleep
The Fn + 4 shortcut also activates Sleep mode.
Hibernation Mode
Hibernation stores open programs and files on the storage drive before switching off the computer.
When the computer resumes, the previous session can be restored.
The Power button can be configured to activate Hibernation through Windows power settings.
Wireless Power Saving
Wireless LAN and Bluetooth can be disabled when not required.
Use the wireless-control function key to turn wireless features off and reduce power consumption.
Keyboard and Function Key Controls
The computer includes a six-row keyboard with Windows, Fn, and function keys.
Function Key Guide
| Function | Operation |
| Speaker Mute | Mutes or unmutes the speakers. |
| Volume Down | Reduces speaker volume. |
| Volume Up | Increases speaker volume. |
| Microphone Mute | Mutes or unmutes the microphone. |
| Brightness Down | Darkens the display. |
| Brightness Up | Brightens the display. |
| External Display | Opens display-output selection. |
| Wireless Control | Enables or disables wireless functions. |
| Settings | Opens Control Panel or Windows Settings, depending on Windows version. |
| Search | Opens Windows Search or Cortana. |
| Open Programs | Shows active programs. |
Fn Lock
Press Fn + Esc to switch Fn Lock on or off.
When Fn Lock is enabled, the function keys operate as F1–F12 directly.
When Fn Lock is disabled, the keys activate their printed special functions directly.
Additional Keyboard Shortcuts
| Shortcut | Function |
| Fn + 4 | Sleep Mode |
| Fn + End | Insert |
| Fn + B | Break |
| Fn + K | Scroll Lock |
| Fn + P | Pause |
| Fn + S | System Request |
Customizing Function Keys
- Open Control Panel.
- Select Keyboard.
- Open the Fn and Function Keys or ThinkPad F1–F12 Keys tab.
- Select the preferred behavior.
Using the Touchpad
The touchpad provides pointer movement and mouse-style operations.
Basic Touchpad Controls
- Move a finger across the touchpad to move the pointer.
- Press the lower-left touchpad area for a left-click.
- Press the lower-right area for a right-click.
Customizing the Touchpad
- Open Control Panel.
- Select Hardware and Sound > Mouse.
- Follow the configuration instructions.
ThinkPad Yoga 11e Convertible Modes
The ThinkPad Yoga 11e features a display that can rotate up to 360 degrees.
This allows the computer to operate in four different positions.
Important: The display must be rotated gently. Excessive force may damage the screen or hinges.
Notebook Mode
Notebook mode is intended for activities that require the keyboard and touchpad.
Open the display to an angle of less than 190 degrees.
The keyboard and touchpad remain enabled.
Stand Mode
Stand mode is suitable for viewing videos, photographs, and other content requiring limited keyboard interaction.
Rotate the display to an angle between 190 and 359 degrees.
Position the computer with the keyboard behind the display.
The keyboard and touchpad are disabled automatically.
Tablet Mode
Tablet mode is designed for direct interaction with the touchscreen.
Rotate the display fully through 360 degrees.
The keyboard and touchpad are disabled, allowing the computer to be operated through touch and tablet controls.
Tent Mode
Tent mode is useful for presentations and media viewing.
Rotate the display to an angle between 190 and 359 degrees and position the computer in an inverted V shape.
The touchscreen and tablet buttons remain available.
Convertible Mode Comparison
| Mode | Display Position | Keyboard and Touchpad |
| Notebook | Less Than 190° | Enabled |
| Stand | 190–359° | Disabled |
| Tablet | 360° | Disabled |
| Tent | 190–359° | Disabled |
Yoga 11e Tablet Buttons
The ThinkPad Yoga 11e has physical buttons for operation when the keyboard is unavailable.
| Button | Function |
| Power | Turns on the computer. |
| Volume Up | Increases speaker volume. |
| Volume Down | Decreases speaker volume. |
| Windows | Opens Start or changes the Windows workspace. |
The Windows button can also wake the computer from Sleep mode.
Multi-Touch Screen Instructions
Compatible configurations include a multi-touch display.
Basic Touch Gestures
| Gesture | Function |
| Tap | Select or open an item. |
| Tap and Hold | Open a context menu. |
| Slide | Scroll through pages or lists. |
| Drag | Move an item. |
| Pinch In | Zoom out. |
| Spread Fingers | Zoom in. |
| Two-Finger Rotation | Rotate supported content. |
Windows 10 Touch Gestures
- Swipe inward from the right edge to open Action Center.
- Swipe inward from the left edge to open Task View.
- Swipe upward from the bottom to reveal the taskbar in supported full-screen applications.
- Swipe downward from the top to show hidden title controls or close applicable applications.
Touchscreen Precautions
Do not use fingernails, gloved fingers, metal objects, or excessive pressure on the screen.
Keep the touchscreen clean and calibrate touch input when necessary.
ThinkPad Active Pen
Selected ThinkPad Yoga 11e configurations include a ThinkPad Active Pen for handwriting, drawing, and precise touch input.
The pen uses one AAAA alkaline battery.
Installing the Pen Battery
- Unscrew the end cap.
- Insert the AAAA battery with its negative end facing outward.
- Replace and tighten the end cap.
Active Pen Controls
| Component | Function |
| Pen Tip | Writing, drawing, and selecting. |
| Click Button | Supports right-click operation. |
| Eraser Button | Erases digital ink. |
| End Cap | Covers the battery compartment. |
Using the Active Pen
- Tap once to select an item.
- Tap twice quickly to double-click.
- Hold the pen tip against the screen for approximately one second to right-click.
- Hold the eraser button while moving the pen across digital ink to erase it.
For best writing quality, keep the pen approximately perpendicular to the screen.
The Active Pen must not be immersed in water.
Storing the Active Pen
The supplied pen holder can be inserted into an available USB connector.
The pen can then be placed into one of the holder’s three openings.
Connecting to WiFi
The computer includes integrated wireless LAN connectivity.
Connecting to a Wireless Network
- Enable the wireless features.
- Select the wireless network icon in the Windows notification area.
- Choose an available network.
- Select the network to connect.
- Enter the network credentials if requested.
Improving Wireless Reception
For better reception:
- Reduce obstacles between the computer and the wireless access point.
- Open the laptop display slightly beyond 90 degrees.
- Avoid unnecessary simultaneous wireless activity when connection performance is reduced.
Connecting Bluetooth Devices
Bluetooth supports compatible nearby devices and short-range data transfer.
Enabling Bluetooth in Windows 10
- Open Start.
- Select Settings > Devices > Bluetooth.
- Enable Bluetooth.
Transferring Files Through Bluetooth
- Enable Bluetooth on the computer.
- Right-click the file to send.
- Select Send To > Bluetooth Devices.
- Choose the receiving device.
- Follow the on-screen instructions.
Wireless LAN performance may decrease when Bluetooth and WiFi are used simultaneously.
Connecting an External Display
The HDMI connector allows connection to compatible monitors, televisions, or projectors.
Connecting the Display
- Connect the external display to the computer’s HDMI port.
- Connect the display to electrical power.
- Turn on the external display.
- Use the display-switching function key to select the preferred display mode.
Display Modes
| Mode | Function |
| PC Screen Only | Shows content on the laptop display. |
| Duplicate | Shows the same content on both screens. |
| Extend | Expands the desktop across both screens. |
| Second Screen Only | Shows content only on the external display. |
Display resolution and orientation can be changed through Windows Display Settings.
Using the Camera and Audio
The integrated camera supports photographs, video recording, and video conferencing.
Opening the Camera
- Windows 7: Open Communications Utility.
- Windows 8.1: Select Camera from Start.
- Windows 10: Open Camera from the Start menu.
The camera indicator turns green while the camera is in use.
Audio Features
The computer supports stereo audio playback, microphone recording, and compatible headset connections.
Audio functions include playback and recording of supported digital audio formats such as MP3, MIDI, PCM, and WAV.
Using Memory Cards
The computer supports MMC, SD, SDHC, and SDXC memory cards.
Inserting a Card
- Locate the media card slot.
- Position the card with its metal contacts facing down and toward the slot.
- Press the card into the slot.
Removing a Card
- Stop the card through Windows Safely Remove Hardware.
- Press the card to release it.
- Remove it from the slot.
Do not enter Sleep or Hibernation while transferring data to or from a memory card.
Lenovo Software and Utilities
Depending on the operating system and computer configuration, Lenovo provides programs for device management, diagnostics, security, and recovery.
| Lenovo Program | Purpose |
| Lenovo Companion | Device information, support, warranty, and system updates. |
| Lenovo Settings | Power, camera, audio, and network settings. |
| Lenovo Solution Center | Diagnostics and troubleshooting. |
| Lenovo PC Experience | Access to Lenovo utilities. |
| Active Protection System | Helps protect compatible storage drives from shocks and movement. |
| Hotkey Features Integration | Supports special keyboard functions. |
| Access Connections | Manages network profiles. |
| Power Manager | Provides power management controls. |
| System Update | Downloads software and firmware updates. |
| Rescue and Recovery | Windows 7 backup and recovery functions. |
| WRITEit | Handwriting input for compatible systems. |
Program availability varies by Windows version and computer configuration.
BIOS Setup and Advanced Configuration
The ThinkPad Setup utility allows configuration of the computer’s UEFI BIOS.
How to Enter ThinkPad Setup
- Shut down or restart the computer.
- When the Lenovo logo appears, press F1.
- Use the arrow keys to select the required menu.
BIOS Controls
| Key | Function |
| F1 | Open ThinkPad Setup during startup. |
| Arrow Keys | Move between settings. |
| Enter | Select a menu item. |
| F5 | Decrease a setting value. |
| F6 | Increase a setting value. |
| F9 | Restore default settings. |
| F10 | Save settings and exit. |
| Esc | Return to the previous menu. |
BIOS Menu Overview
| Menu | Function |
| Main | Displays hardware and firmware information. |
| Config | Configures hardware and power behavior. |
| Date/Time | Sets system date and time. |
| Security | Manages passwords and security settings. |
| Startup | Controls boot devices and startup behavior. |
| Restart | Provides restart and exit options. |
Selecting a Boot Device
- Shut down the computer.
- Turn it on.
- Press F12 when the logo appears.
- Select the required startup device.
Updating UEFI BIOS
UEFI BIOS updates may be obtained from Lenovo Support.
The update instructions provided with the applicable BIOS package must be followed carefully.
Incorrect firmware changes can prevent the computer from starting.
Computer Security
The computer supports several security methods to protect the device and stored information.
Power-On Password
A Power-On password prevents unauthorized users from starting the computer.
To configure it:
- Open ThinkPad Setup using F1.
- Select Security > Password > Power-on Password.
- Enter and confirm the desired password.
- Press F10 to save changes.
Supervisor Password
The Supervisor password protects BIOS configuration settings.
Only authorized administrators should configure or change it.
If the Supervisor password is forgotten, Lenovo cannot reset it. System board replacement may be required.
Hard Disk Password
A hard disk password protects access to information stored on the internal HDD or SSD.
The computer supports user and master hard disk passwords.
If the required passwords are forgotten, Lenovo cannot reset them or recover protected data. Storage drive replacement may be necessary.
Additional Security
The computer may also support:
- Windows BitLocker Drive Encryption
- Security software
- Firewall protection
- Antivirus protection
- Mechanical security locks
Before selling or disposing of the computer, stored data must be securely erased using an appropriate method.
Simply deleting files or formatting a drive does not necessarily make the original data unrecoverable.
Installing Windows and Device Drivers
The ThinkPad 11e and Yoga 11e support the Windows operating systems described in the manual.
Before Installing Windows
Back up important data before installing or reinstalling the operating system.
Warning: Operating system installation can erase files and partitions, including hidden data.
Installing Windows 8.1 or Windows 10
- Open ThinkPad Setup.
- Select Startup > Boot.
- Choose the installation device, such as a USB drive.
- Press F10 to exit.
- Connect the installation media.
- Restart the computer.
- Follow the Windows installation instructions.
- Install the required device drivers and Lenovo programs.
- Apply the applicable operating system updates.
The original UEFI/Legacy Boot setting should not be changed after installation.
Installing Drivers
Lenovo device drivers can be obtained from:
https://www.lenovo.com/ThinkPadDrivers
Select the computer model and install the required drivers according to Lenovo’s instructions.
Windows Recovery and System Reset
The recovery method depends on the installed Windows version.
Important: Important personal files must be backed up before performing operations that may erase or replace stored data.
Windows 7 Recovery
Windows 7 configurations may include Lenovo Rescue and Recovery.
The software supports:
- Creating recovery media
- Backing up the storage drive
- Restoring backup images
- Recovering selected files
- Restoring factory settings
To create recovery media, open the Lenovo Tools or recovery program and follow the displayed instructions.
The Rescue and Recovery workspace can be opened by pressing F11 during startup on supported configurations.
Windows 8.1 Recovery
Windows 8.1 provides Refresh and Reset functions.
Refresh can reinstall Windows while preserving personal files, although some applications may be removed.
Reset restores the computer to factory-default conditions.
Recovery media can be created using a USB drive with at least 8 GB of storage, depending on the recovery image size.
Windows 10 Recovery
Windows 10 includes recovery functions for repairing or resetting the computer.
How to Reset Windows 10
- Open Start.
- Select Settings > Update & Security > Recovery.
- Under Reset this PC, select Get Started.
- Choose the required reset option.
- Follow the on-screen instructions.
The reset process may offer options to keep personal files or remove them.
Advanced Startup
- Open Settings.
- Select Update & Security.
- Open Recovery.
- Select Restart Now under Advanced Startup.
- Choose Troubleshoot or another recovery option.
Creating a Windows 10 Recovery USB
A recovery USB drive requires at least 16 GB of storage.
Creating the recovery drive erases existing information on the selected USB device.
- Connect a suitable USB drive.
- Search Windows for Create a recovery drive.
- Open the Recovery Media Creator.
- Follow the on-screen instructions.
Starting from a Recovery USB
- Connect the recovery drive.
- Turn on the computer.
- Press F12 repeatedly before Windows starts.
- Select the recovery USB drive.
- Choose the keyboard layout.
- Select Troubleshoot.
- Follow the appropriate recovery procedure.
The AC power adapter must remain connected throughout the recovery process.
Cleaning and Maintenance
Routine cleaning helps protect the computer’s external surfaces, display, keyboard, and cooling system.
Cleaning the Computer Cover
- Mix one part gentle detergent with five parts water.
- Moisten a sponge with the diluted solution.
- Squeeze out excess liquid.
- Wipe the cover gently.
- Remove detergent residue with a clean, damp sponge.
- Dry the surface using a soft, lint-free cloth.
Cleaning the Keyboard
- Apply a small amount of isopropyl rubbing alcohol to a soft, dust-free cloth.
- Wipe each key individually.
- Prevent liquid from entering the keyboard.
- Allow the keyboard to dry.
A camera blower or cool air from a hair dryer can remove loose dust and crumbs.
Cleaning the Display
- Gently wipe the screen with a dry, soft, lint-free cloth.
- For persistent marks, slightly moisten the cloth with water or a 50/50 mixture of water and isopropyl alcohol.
- Remove excess moisture from the cloth.
- Wipe the display carefully.
- Let the display dry before closing the laptop.
Cleaning the Touchscreen
Turn off the computer.
Use a dry, soft, lint-free cloth and wipe gently from top to bottom.
Do not apply excessive pressure or solvents.
Preventing Overheating
Keep the cooling vents clean and unobstructed.
Avoid operating the laptop on flexible surfaces that restrict airflow.
Travel and Storage Instructions
The computer must be protected against physical damage and environmental conditions during transportation and storage.
Traveling with the Computer
- Use a padded carrying case.
- Avoid tightly packing the laptop.
- Disconnect external cables before transportation.
- Shut down or enter a suitable power-saving mode before packing.
- Keep the computer protected from liquids, impacts, and excessive temperatures.
Air Travel
Check airline restrictions before using wireless features.
Airplane Mode can be enabled through Windows network settings.
During aircraft takeoff, shut down or hibernate the computer as directed.
Storage Conditions
| Condition | Requirement |
| Temperature | 5–43°C (41–109°F) |
| Relative Humidity | 5–95% |
| Battery Storage Charge | Approximately 30–50% |
For long storage periods, Lenovo recommends recharging the battery approximately once per year.
Troubleshooting Guide
The computer may display error messages, produce beep codes, or show operating symptoms that indicate hardware or software problems.
Lenovo Solution Center can be used to diagnose supported hardware and system issues.
Common Problems and Solutions
| Problem | Possible Cause or Recommended Action |
| Computer does not respond | Hold the Power button until shutdown. Disconnect the adapter and follow the power-reset procedure if necessary. |
| Computer does not start | Check the AC connection, remove external devices, and run available diagnostics. |
| Screen remains blank | Check power state, brightness, and display settings. |
| Wireless network does not connect | Check wireless status, network credentials, and connection settings. |
| Ethernet connection fails | Check the network cable and adapter settings. |
| Keyboard does not respond | Check system operation and run diagnostics. |
| External monitor does not display | Check the HDMI connection and selected display mode. |
| Battery does not charge | Check the AC connection, battery condition, and operating temperature. |
| Storage drive is not detected | Check drive recognition and diagnostics. |
| Application does not start | Check application configuration, installation, and compatibility. |
| USB device is not recognized | Check the connector, device driver, and external power requirements. |
Computer Stops Responding
- Press and hold the Power button until the computer shuts down.
- Disconnect the AC adapter.
- Hold the Power button for 10 seconds.
- Reconnect the adapter.
- Attempt to restart the computer.
If the problem continues, disconnect external hardware and contact Lenovo Support.
Liquid Spills
If liquid spills onto the keyboard:
- Disconnect the AC adapter immediately.
- Turn off the computer.
- Do not restart the computer until it is completely dry.
Leaving the computer powered on after a spill can cause serious electrical damage.
Error Messages and Diagnostic Codes
The computer can display diagnostic messages during startup.
| Error Code | Meaning | Recommended Action |
| 0177 | Supervisor password data error | Have the computer serviced. |
| 0183 | Security settings checksum error | Check security settings in ThinkPad Setup, save and restart. Seek service if the error continues. |
| 0187 | EEPROM access error | Have the computer serviced. |
| 0188 | Invalid RFID serialization information | System board service required. |
| 0189 | Invalid RFID configuration information | System board service required. |
| 0190 | Critical low battery | Connect the AC adapter and charge the battery. |
| 0191 | Invalid remote security change | Verify the operation and check ThinkPad Setup. |
| 0199 | Supervisor password retry count exceeded | Verify the password and enter ThinkPad Setup. |
| 1802 | Unauthorized network card | Turn off the computer and remove the unsupported card. |
| 0270 | Real-time clock error | Have the computer serviced. |
| 0271 | Incorrect date and time | Set the date and time in ThinkPad Setup. |
| 2100 | Main storage drive detection error | Have the storage drive serviced. |
| 2110 | Main storage drive read error | Have the storage drive serviced. |
| 2200 | Invalid machine type or serial number | Have the computer serviced. |
| 2201 | Invalid machine UUID | Have the computer serviced. |
| Fan Error | Cooling fan failure | Shut down immediately and request service. |
| Thermal Sensing Error | Temperature sensor fault | Shut down immediately and request service. |
Beep Error Codes
The computer may produce beep patterns when certain hardware faults occur.
| Beep Pattern | Meaning | Recommended Action |
| 1-3-3-1 | Memory problem | Shut down and request service. |
| Four Cycles of Four Short Beeps | Trusted Computing Group-related fault | Shut down and request service. |
| Five Short Beeps, Pause, Five Short Beeps | Trusted Computing Group-related initialization problem | Continue the boot process and contact Lenovo technical support. |
Replacing and Upgrading Components
Certain components can be replaced according to Lenovo’s service instructions.
These include:
- Memory module
- Coin-cell battery
- Hard disk drive or solid-state drive
- Keyboard
- User-replaceable wireless LAN card
Replacement procedures require the computer to be turned off and disconnected from external power.
Before Replacing Components
- Back up important data.
- Shut down the computer.
- Disconnect the AC adapter and external cables.
- Allow the computer to cool.
- Disable the built-in battery through ThinkPad Setup when required.
- Follow anti-static handling precautions.
How to Disable the Built-In Battery
- Start ThinkPad Setup by pressing F1 during startup.
- Select Config > Power.
- Select Disable Built-in Battery.
- Confirm the operation.
The computer shuts down automatically.
Wait several minutes before opening the computer.
Memory Replacement
Some configurations use a replaceable memory module, while others have memory soldered directly to the system board.
Soldered memory cannot be replaced through the standard module-replacement procedure.
For replaceable memory, the service process involves removing the bottom cover, releasing the memory socket latches, removing the module, and installing a compatible replacement.
Coin-Cell Battery Replacement
The coin-cell battery maintains certain system information.
Its replacement requires the computer to be disconnected from power and opened according to Lenovo’s service procedure.
After replacement, the system date and time must be configured in ThinkPad Setup.
Storage Drive Replacement
Supported configurations use a 2.5-inch HDD or SSD.
The drive must not be removed while the computer is running, sleeping, or hibernating.
Back up stored information before replacement.
Keyboard Replacement
Keyboard replacement involves removing the bottom cover and retaining screws, releasing the keyboard from its frame, and disconnecting its internal cable.
Replacement must be performed carefully to prevent connector damage.
Wireless LAN Card Replacement
Only user-replaceable wireless LAN cards may be replaced through the described procedure.
Factory-installed wireless modules must be serviced through Lenovo.
Use only Lenovo-authorized wireless modules compatible with the computer.
When installing a replacement wireless card, the gray antenna cable connects to MAIN and the black cable connects to AUX.
Warranty Information
The Lenovo ThinkPad 11e and ThinkPad Yoga 11e are covered by the Lenovo Limited Warranty applicable to the purchased product and region.
The warranty conditions, applicable service level, and coverage details are provided in the Safety, Warranty, and Setup Guide supplied with the computer.
Warranty Service
During the applicable warranty period, Lenovo may provide:
- Hardware problem diagnosis
- Qualifying hardware repair
- Applicable engineering changes
Warranty service is performed according to Lenovo’s service terms.
Service Limitations
Services that may require separate arrangements or charges include:
- Installing or maintaining third-party software
- Configuring operating systems or applications
- Non-warranty parts replacement
- Unauthorized hardware changes
- Certain driver and firmware modifications
The warranty details should be checked for the specific machine type and serial number.
Product Registration
The computer can be registered with Lenovo.
Registration helps Lenovo contact users about important product notices and may provide faster service.
Registration Website: https://www.lenovo.com/register
Follow the on-screen instructions to complete registration.
Customer Support Information
Lenovo provides support for product documentation, device drivers, diagnostics, hardware servicing, and warranty-related issues.
| Support Resource | Details |
| Manufacturer | Lenovo |
| Product Models | ThinkPad 11e, ThinkPad Yoga 11e |
| Official Support | https://www.lenovo.com/support |
| Drivers and Firmware | https://www.lenovo.com/ThinkPadDrivers |
| Product Registration | https://www.lenovo.com/register |
| Regional Support Numbers | https://www.lenovo.com/support/phone |
| Accessories | https://www.lenovo.com/essentials |
| Accessibility Information | https://www.lenovo.com/accessibility |
Before Contacting Lenovo
Prepare the following information:
- Machine type and model
- Serial number
- Description of the problem
- Exact wording of any error messages
- Hardware and software configuration
- Results of diagnostic tests
- Proof of purchase when required
The machine type and model identification label is located on the bottom of the computer.
Frequently Asked Questions
1. What is the difference between the Lenovo ThinkPad 11e and ThinkPad Yoga 11e?
The ThinkPad 11e is a conventional notebook computer. The ThinkPad Yoga 11e includes a rotating display and supports Notebook, Stand, Tablet, and Tent modes. The Yoga model also provides touchscreen-related features and additional tablet controls.
2. How do I enter BIOS on the ThinkPad 11e or Yoga 11e?
Turn on the computer and press F1 when the Lenovo logo appears. This opens ThinkPad Setup, where supported startup, security, hardware, and power settings can be configured. Press F10 to save changes and exit.
3. How do I use Tablet mode on the ThinkPad Yoga 11e?
Rotate the display carefully until it reaches 360 degrees. The keyboard and touchpad are disabled automatically, allowing the computer to be controlled through the touchscreen and tablet buttons.
4. How long does the ThinkPad 11e battery take to charge?
The manual gives an approximate charging time of three to six hours, depending on battery size and operating conditions. Charging requires a battery temperature of at least 10°C (50°F), and charging does not restart when the remaining battery level is above 95%.
5. How do I connect the ThinkPad 11e to WiFi?
Enable wireless networking, select the network icon in the Windows notification area, choose the required wireless network, and enter its password if prompted. The built-in wireless LAN adapter supports compatible wireless networks.
6. How do I reset Windows 10 on the ThinkPad 11e?
Open Settings, select Update & Security, and open Recovery. Under Reset this PC, select Get Started. Follow the displayed instructions to choose the appropriate reset method. Back up important data before resetting the computer.
7. What should I do if the ThinkPad 11e will not turn on?
Check the AC power connection and disconnect external devices. With the computer off and disconnected from the adapter, hold the Power button for 10 seconds. Reconnect the adapter and attempt to start the computer. If the problem remains, contact Lenovo Support.
8. Can I upgrade the RAM or SSD in the ThinkPad 11e?
The manual provides procedures for replacing compatible memory modules and 2.5-inch storage drives. However, some configurations have memory soldered onto the system board, which cannot be replaced using the standard memory module procedure. Check the specific hardware configuration before purchasing replacement components.