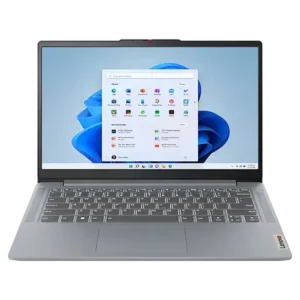
| Field | Details |
| Document Title | IdeaPad 3, IdeaPad 3i, IdeaPad Slim 3, IdeaPad Slim 3i Series |
| Document Type | Setup Guide |
| Brand Name | Lenovo |
| Product Name | IdeaPad 3 / IdeaPad 3i / IdeaPad Slim 3 / IdeaPad Slim 3i |
| Model Number(s) Identified | 14ABA7, 14IAU7, 15ABA7, 15IAU7, 17ABA7, 17IAU7, 17IRU7 (listed under IdeaPad 3 in the regulatory table) |
| PDF File Size | 1.29 MB |
| Number of Pages | 10 |
| Languages Covered | English, Spanish, Bulgarian, Portuguese (Brazil), Polish, Portuguese (Portugal) |
Lenovo IdeaPad 3
The Lenovo IdeaPad 3, IdeaPad 3i, IdeaPad Slim 3 and IdeaPad Slim 3i series are laptop computers featuring an integrated camera, microphones, keyboard, touchpad, wireless networking, and connections for external devices.
The laptops include a dedicated power connector, USB Type-C connector, USB Type-A ports, HDMI output, combo audio jack, SD card slot, and a Novo button hole. Selected models feature a fingerprint reader integrated into the Power button.
The setup procedure involves connecting the power adapter to the computer, connecting it to an electrical outlet, and pressing the Power button. The hardware diagrams identify the main components and their locations to help with initial setup and connecting accessories.
The series supports wireless LAN and Bluetooth technologies, with available frequencies determined by the specific hardware configuration and regional regulations.
This guide covers first-time setup, hardware identification, power connections, optional fingerprint hardware, USB and HDMI ports, the Novo button location, radio-frequency specifications, and wireless exposure information.
Supported Models and Product Variants
The setup guide covers the following Lenovo laptop series:
- IdeaPad 3
- IdeaPad 3i
- IdeaPad Slim 3
- IdeaPad Slim 3i
The radio-frequency exposure specifications identify the following IdeaPad 3 model variants:
| Model Reference | Product Identification |
| 14ABA7 | IdeaPad 3 14ABA7 |
| 14IAU7 | IdeaPad 3 14IAU7 |
| 15ABA7 | IdeaPad 3 15ABA7 |
| 15IAU7 | IdeaPad 3 15IAU7 |
| 17ABA7 | IdeaPad 3 17ABA7 |
| 17IAU7 | IdeaPad 3 17IAU7 |
| 17IRU7 | IdeaPad 3 17IRU7 |
The illustrations represent the product series and may differ from an individual laptop’s physical configuration.
Technical Specifications
| Specification | Details |
| Brand | Lenovo |
| Product Series | IdeaPad 3, IdeaPad 3i, IdeaPad Slim 3, IdeaPad Slim 3i |
| Product Type | Laptop Computer |
| Input Devices | Keyboard and Touchpad |
| Camera | Integrated Camera with Camera Cover |
| Microphones | Integrated |
| Power Button | Integrated |
| Fingerprint Reader | Built into Power Button on Selected Models |
| Power Connection | Dedicated Power Connector |
| USB Type-C | Multi-Purpose USB Type-C Connector |
| USB Type-A | USB 2.0 and USB 3.2 Gen 1 |
| External Display Connector | HDMI |
| Audio Connection | Combo Audio Jack |
| Memory Card Connection | SD Card Slot |
| Novo Button | Novo Button Hole |
| Wireless LAN | 802.11b/g/n/ax and 802.11a/n/ac/ax |
| Additional WLAN Standard | 802.11ax in 5945–6425 MHz Band |
| Bluetooth | BR/EDR/LE |
| Body-Worn SAR Limit | 2 W/kg, Averaged Over 10 g |
| Limb SAR Limit | 4 W/kg, Averaged Over 10 g |
Wireless band availability varies according to product configuration.
Parts and Components
The laptop includes built-in controls and connectors around the display, keyboard, and side edges.
Main Laptop Components
| Component | Function |
| Camera Cover | Covers the integrated camera. |
| Integrated Camera | Camera hardware positioned at the top of the display. |
| Microphones | Capture audio. |
| Power Button | Starts the computer. |
| Fingerprint Reader | Integrated into the Power button on selected models. |
| Touchpad | Provides pointer and input control. |
| Keyboard | Provides typing and other computer input. |
| Display | Shows applications and visual information. |
Camera Cover and Microphones
The camera cover is positioned at the upper edge of the display.
The camera is located near the microphones, as identified in the front-view illustration.
Power Button and Fingerprint Reader
The Power button is positioned near the upper-right area of the keyboard.
On selected configurations, this button also contains an integrated fingerprint reader.
The fingerprint feature depends on the purchased laptop model.
Touchpad
The touchpad is located below the keyboard.
It provides pointer control and supports computer input without requiring a separate mouse.
Laptop Ports and Connections
The laptops include several connections for external devices, removable storage, power, and audiovisual equipment.
Novo Button Hole, SD Card Slot and USB 2.0 Port
The hardware illustration identifies these components on one side of the laptop.
| Component | Description |
| Novo Button Hole | Recessed opening for the Novo button. |
| SD Card Slot | Provides a connection for compatible SD cards. |
| USB 2.0 Port | Connects compatible USB devices. |
Combo Audio Jack
The combo audio jack provides a connection for compatible audio equipment.
It is identified by a headset symbol in the side-view diagram.
Multi-Purpose USB Type-C Connector
The laptop includes a multi-purpose USB Type-C connector.
The connector is separate from the dedicated power connector shown in the setup guide.
Its supported functions and transfer-rate details depend on the specific product configuration.
HDMI Connector
The HDMI connector provides a connection for compatible HDMI equipment, including external displays.
USB 3.2 Gen 1 Port
The laptop includes a USB 3.2 Gen 1 Type-A port for compatible USB devices.
Dedicated Power Connector
The dedicated power connector is used for the initial power connection shown in the setup instructions.
Port Identification Table
| Port or Connector | Type |
| Power Connector | Dedicated Power Input |
| USB Type-C | Multi-Purpose USB Type-C |
| HDMI | Digital Display Connection |
| USB 3.2 Gen 1 | USB Type-A |
| USB 2.0 | USB Type-A |
| Combo Audio Jack | Audio |
| SD Card Slot | Removable Memory Card |
| Novo Button Hole | Recessed Button |
Before First Use
Before starting the computer, prepare the laptop and its power adapter.
The initial setup diagram shows four numbered actions.
Step 1: Prepare the Power Adapter
Connect the power cable to the power adapter as shown in the installation illustration.
Step 2: Connect the Adapter to the Laptop
Locate the dedicated power connector on the computer.
Insert the power adapter connector into this port.
Step 3: Connect to Electrical Power
Connect the power adapter’s plug to an electrical outlet.
Step 4: Turn On the Laptop
Locate the Power button near the upper-right corner of the keyboard.
Press the button to start the computer.
After startup, continue with any instructions displayed by the installed operating system.
How to Turn On the Laptop
The Power button is the primary control for starting the computer.
Startup Instructions
- Connect the power adapter to the dedicated power connector.
- Connect the adapter to the electrical outlet.
- Press the Power button.
- Allow the computer to begin its startup process.
Fingerprint-Enabled Power Button
Some models include an embedded fingerprint reader in the Power button.
This hardware configuration is identified by the fingerprint symbol in the product overview illustration.
Novo Button Location
The laptop includes a recessed Novo button hole.
The side-view diagram identifies the Novo button hole separately from the SD card slot and USB 2.0 port.
The Novo button location can be identified using the hardware illustration when accessing the functions available on the specific laptop configuration.
Using External Devices
The laptop offers USB, audio, removable storage, and display connections.
Connecting USB Devices
Compatible USB devices can be connected to the appropriate USB Type-A or USB Type-C connector.
The laptop includes USB 2.0 and USB 3.2 Gen 1 Type-A ports, along with a multi-purpose USB Type-C connector.
Connecting an External Display
The HDMI connector provides a connection for compatible HDMI displays.
Using an SD Memory Card
The SD card slot allows a compatible SD card to be inserted.
Connecting Audio Equipment
The combo audio jack supports compatible audio accessories.
USB Transfer Rate Information
USB transfer-rate information depends on the device, USB connector, and applicable product specifications.
The setup guide provides a QR code for accessing the complete Lenovo User Guide, which includes the statement concerning USB transfer rates.
How to Access USB Transfer Rate Details
- Locate the User Guide QR code printed on the setup document.
- Scan the code using a compatible device.
- Open the available Lenovo User Guide.
- Read the USB transfer-rate statement for the laptop.
Wireless LAN and Bluetooth Specifications
The laptop series supports wireless LAN and Bluetooth radio technologies.
Radio Frequency Bands and Maximum Transmit Power
| Wireless Technology | Frequency Band | Maximum Transmit Power |
| WLAN 802.11b/g/n/ax | 2400–2483.5 MHz | Less Than 20 dBm |
| WLAN 802.11a/n/ac/ax | 5150–5725 MHz | Less Than 23 dBm |
| WLAN 802.11a/n/ac/ax | 5725–5875 MHz | Less Than 13.98 dBm |
| WLAN 802.11ax | 5945–6425 MHz | Less Than 23 dBm |
| Bluetooth BR/EDR/LE | 2400–2483.5 MHz | Less Than 20 dBm |
Not every wireless band is necessarily enabled on every product configuration.
Indoor Wireless Usage Restrictions
Use of the wireless equipment is restricted to indoor locations when operating in these frequency ranges:
- 5150–5350 MHz
- 5945–6425 MHz
These restrictions are identified in the European Union and United Kingdom wireless regulatory information.
Specific Absorption Rate (SAR)
The Lenovo IdeaPad series complies with the international radio-wave exposure guidelines identified in the setup guide.
Specific Absorption Rate, or SAR, measures the rate at which radio-frequency energy is absorbed by body tissue.
SAR values are expressed in watts per kilogram (W/kg).
SAR Limits
| Measurement | 10g SAR Limit |
| Body-Worn SAR | 2 W/kg |
| Limb SAR | 4 W/kg |
Maximum Reported SAR Values by Model
| Model | Maximum Body-Worn SAR | Maximum Limb SAR |
| IdeaPad 3 14ABA7 | 0.926 W/kg | 0.926 W/kg |
| IdeaPad 3 14IAU7 | 0.926 W/kg | 0.926 W/kg |
| IdeaPad 3 15ABA7 | 1.108 W/kg | 1.108 W/kg |
| IdeaPad 3 15IAU7 | 1.108 W/kg | 1.108 W/kg |
| IdeaPad 3 17ABA7 | 0.974 W/kg | 0.974 W/kg |
| IdeaPad 3 17IAU7 | 1.064 W/kg | 1.064 W/kg |
| IdeaPad 3 17IRU7 | 1.347 W/kg | 1.347 W/kg |
The reported maximum SAR values are measured at a separation distance of 0 mm.
All listed values are below the specified 10g SAR limits.
Wireless Safety and Regulatory Information
The wireless equipment must be operated according to applicable regional frequency restrictions.
European Union and United Kingdom Requirements
The setup document identifies the permitted radio-frequency bands and their maximum transmit power for the European Union and United Kingdom.
When operating wireless equipment:
- Use only frequency bands supported by the product configuration.
- Observe the indoor-use restrictions for the specified bands.
- Follow applicable local radio-frequency regulations.
Additional SAR Safety Information
Further SAR information is provided in the Lenovo Safety and Warranty Guide supplied with the computer.
The Safety and Warranty Guide contains the additional safety information associated with the laptop.
Product Documentation and Support
The laptop’s setup document includes a QR code for accessing the full Lenovo User Guide.
Accessing the Complete User Guide
- Locate the QR code printed alongside the laptop hardware diagrams.
- Scan the code using a compatible device.
- Open the linked Lenovo User Guide.
- Select the information needed for the specific laptop configuration.
The complete User Guide provides additional product information, including USB transfer-rate details.
Frequently Asked Questions
1. How do I set up a Lenovo IdeaPad 3 or IdeaPad Slim 3 laptop for the first time?
Connect the power cable to the AC adapter, connect the adapter to the laptop’s dedicated power connector, and plug it into an electrical outlet. Press the Power button to start the computer and follow any instructions displayed by the installed operating system.
2. Where is the Power button on the Lenovo IdeaPad 3 series?
The Power button is located near the upper-right area of the keyboard in the product overview diagram. On selected models, it also contains an integrated fingerprint reader.
3. Does the Lenovo IdeaPad 3 or Slim 3 have a fingerprint reader?
An embedded fingerprint reader is available in the Power button on selected configurations. Availability depends on the purchased model.
4. What ports are available on the Lenovo IdeaPad 3 and Slim 3 series?
The setup guide identifies a dedicated power connector, multi-purpose USB Type-C connector, USB 3.2 Gen 1 port, USB 2.0 port, HDMI connector, combo audio jack, SD card slot, and Novo button hole.
5. Does the Lenovo IdeaPad 3 series support WiFi 6?
The listed wireless hardware supports WLAN 802.11ax, along with other wireless LAN standards. The supported bands and enabled wireless features depend on the laptop configuration.
6. What is the Novo button hole on the Lenovo IdeaPad 3?
The Novo button hole is a recessed button location identified in the laptop’s side-view illustration. It is separate from the SD card slot and USB 2.0 port.
7. Where can I find the Lenovo IdeaPad 3 USB transfer speeds?
The setup guide includes a QR code that opens the full Lenovo User Guide. The USB transfer-rate statement is available in that document.
8. Are there restrictions on using the Lenovo IdeaPad 3 wireless connection outdoors?
Yes. The radio information restricts operation to indoor locations for the 5150–5350 MHz and 5945–6425 MHz frequency bands. The available wireless bands depend on the product configuration.