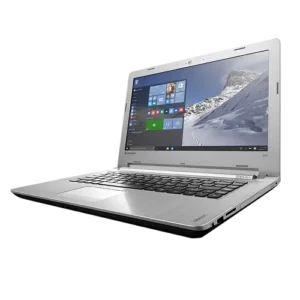
| Field | Details |
| Document Title | Lenovo Ideapad 300-14IBR / Ideapad 300-15IBR User Guide |
| Document Type | User Guide |
| Brand Name | Lenovo |
| Product Name | IdeaPad 300 Laptop |
| Model Number(s) | 300-14IBR, 300-15IBR |
| PDF File Size | 4.83 MB |
| Number of Pages | 42 |
| Languages Covered | English |
Lenovo IdeaPad 300-14IBR
The Lenovo IdeaPad 300-14IBR and IdeaPad 300-15IBR are laptop computers designed for everyday computing, internet access, document management, multimedia playback, and communication. Both models feature an integrated camera, built-in microphone, wireless LAN connectivity, keyboard, touchpad, stereo speakers, and multiple external device connections.
The laptops support Windows 10, including its Start menu, wireless networking, power management, Task View, and virtual desktop functions. A dedicated Novo button provides access to the BIOS Setup Utility, boot menu, and Lenovo OneKey Recovery System.
The computers include USB connections, VGA and HDMI video outputs, an Ethernet port, and a memory card reader. Selected configurations also include an optical drive for reading and writing compatible discs.
The IdeaPad 300-15IBR includes a separate numeric keypad, while the IdeaPad 300-14IBR uses a keyboard without a dedicated numeric keypad. Both models provide hotkeys for adjusting volume, screen brightness, wireless communication, and other common settings.
The Lenovo OneKey Recovery System allows the system partition to be backed up and restored if Windows develops problems. The computer also supports customer-replaceable components, including the hard disk drive, memory, keyboard, and optical drive where fitted.
Technical Specifications
| Specification | Details |
| Brand | Lenovo |
| Product Series | IdeaPad 300 |
| Model Numbers | 300-14IBR, 300-15IBR |
| Product Type | Laptop Computer |
| Operating System Covered | Windows 10 |
| Display | Built-In Computer Display |
| Integrated Camera | Yes |
| Built-In Microphone | Yes |
| Speakers | Stereo |
| Keyboard | Standard Laptop Keyboard |
| Numeric Keypad | IdeaPad 300-15IBR |
| Pointing Device | Touchpad with Left and Right Mouse Functions |
| Wireless Networking | Wireless LAN |
| Wired Networking | RJ-45 Ethernet |
| USB Connections | 3 USB Ports |
| USB 3.0 | Supported; Blue USB Port |
| External Display Connections | VGA and HDMI |
| Audio Connection | Combo Audio Jack |
| Memory Card Reader | SD, SDHC, SDXC, MMC |
| Optical Drive | Available on Selected Models |
| Security Lock | Kensington Lock Slot |
| Memory Upgrade Type | DDR3 SDRAM |
| Internal Storage | Hard Disk Drive |
| Power Connection | AC Power Adapter Jack |
| System Recovery | Lenovo OneKey Recovery System |
| Firmware Configuration | BIOS Setup Utility |
| Maximum Display Opening Angle | 130° |
| Customer Replaceable Components | Hard Disk Drive, Memory, Keyboard, Optical Drive, Bottom Access Covers |
Individual hardware specifications and installed components may vary by computer configuration.
Parts and Components
The IdeaPad 300-14IBR and 300-15IBR include external components on the top, left, right, front, and bottom of the computer.
Top Components
| Component | Function |
| Integrated Camera | Captures photographs and supports video communication. |
| Built-In Microphone | Records sound for video calls, voice narration, and audio recording. |
| Wireless LAN Antennas | Transmit and receive wireless network signals. |
| Computer Display | Displays applications, documents, and visual content. |
| Power Button | Turns on the computer. |
| Touchpad | Controls pointer movement and provides mouse-style functions. |
Integrated Camera
The integrated camera can be used for video communication or taking photographs through compatible applications.
Built-In Microphone
The microphone captures sound for supported applications, including video conferencing and audio recording.
Wireless LAN Antennas
The wireless LAN antennas communicate with the internal wireless adapter to transmit and receive wireless signals.
Touchpad
The touchpad provides mouse-style navigation.
To move the pointer, slide a fingertip across the touchpad in the desired direction.
The left and right touchpad buttons perform the functions of conventional mouse buttons.
The touchpad can be enabled or disabled using the corresponding keyboard hotkey.
Left-Side Ports and Connections
The left side of the laptop contains the power connection, Novo button, ventilation openings, display outputs, network port, USB connection, and memory card reader.
| Component | Function |
| AC Power Adapter Jack | Connects the laptop to its AC power adapter. |
| Novo Button | Opens system recovery, BIOS Setup, or the boot menu. |
| Ventilation Slots | Release internal heat. |
| VGA Port | Connects compatible external display devices. |
| RJ-45 Port | Connects an Ethernet network cable. |
| HDMI Port | Connects a television or compatible external display. |
| USB Port | Connects compatible USB devices. |
| Memory Card Slot | Accepts supported memory cards. |
AC Power Adapter Jack
The power adapter connects to the dedicated AC power jack.
The adapter supplies electrical power to the computer and supports battery charging.
Novo Button
The Novo button is located beside the AC power adapter jack.
It can be pressed when the computer is turned off or in Hibernation mode.
The button provides access to:
- Lenovo OneKey Recovery System
- BIOS Setup Utility
- Boot Menu
A straightened paper clip or similar blunt-tipped object can be used to press the recessed button gently.
Ventilation Slots
The ventilation openings help dissipate heat from the computer.
Important: Ventilation slots must remain unobstructed to prevent overheating.
VGA and HDMI Ports
The VGA and HDMI connectors allow compatible external displays to be connected.
The HDMI connector supports devices with HDMI input, including televisions and external monitors.
RJ-45 Ethernet Port
The RJ-45 port allows a wired Ethernet network connection.
The connector includes a hinged cover that must be pressed downward when inserting a network cable.
Right-Side Components
The right side includes the combo audio jack, USB port, optical drive on selected models, and Kensington security-lock slot.
| Component | Function |
| Combo Audio Jack | Connects compatible headsets. |
| USB Port | Connects USB devices. |
| Optical Drive | Reads and writes compatible optical discs on selected models. |
| Kensington Lock Slot | Accepts a compatible security lock. |
Combo Audio Jack
The combo audio jack supports compatible headsets.
Conventional standalone microphones are not supported by default.
Some third-party headphones or headsets may not support recording because of differences in industry standards.
Optical Drive
Selected models include an optical drive capable of reading and writing compatible discs.
Kensington Lock Slot
A compatible security lock can be attached to help prevent unauthorized removal of the laptop.
Before purchasing a security lock, verify that it fits the computer’s security slot.
Front Status Indicators
The front of the laptop includes indicators for power and battery status.
Power Indicator
| Indicator Status | Meaning |
| Solid White | Computer is powered on. |
| Blinking | Computer is in Sleep mode. |
| Off | Computer is powered off. |
Battery Indicator
| Indicator Status | Charging Condition | Meaning |
| Solid White | Charging | Battery charge is above 80%. |
| Solid White | Discharging | Battery charge is above 20%. |
| Solid Amber | Discharging | Battery charge is between 5% and 20%. |
| Slowly Blinking White | Charging | Battery charge is between 20% and 80%. |
| Slowly Blinking Amber | Charging | Battery charge is below 20%. |
| Quickly Blinking Amber | Charging or Discharging | Battery charge is below 5%. |
During charging, the slowly blinking amber indicator changes to white when the battery reaches 20%.
When the battery reaches 80%, the white indicator stops blinking. Charging continues until the battery is fully charged.
Bottom Components
The bottom of the laptop includes stereo speakers and cooling louvers.
Stereo Speakers
The built-in speakers provide audio output.
The exact speaker locations and sound characteristics may vary by model.
Cooling Louvers
The cooling louvers allow air to enter the computer.
These openings must remain clear during operation.
Important Safety Instructions
The Lenovo Safety and General Information Guide contains the full safety precautions for the computer.
The following operating precautions are important for protecting the laptop and preventing damage.
Display Safety
The display must not be opened beyond 130 degrees.
Do not force the display beyond its intended opening angle.
Before closing the laptop, check that no pens or other objects remain between the keyboard and display.
Objects trapped between the two surfaces may damage the screen.
Ventilation Safety
The computer’s ventilation slots and cooling louvers must remain unobstructed during operation.
Blocked openings may cause overheating.
External Device Safety
Do not connect or disconnect external device cables other than USB cables while the computer is powered on.
Connecting or removing these cables during operation may damage the computer.
External USB devices that require substantial power should use their own power adapters.
Storage Drive Safety
Before replacing or removing the hard disk drive:
- Shut down the computer.
- Disconnect external power.
- Back up important data.
- Protect the drive from physical shocks.
- Do not apply pressure to the drive cover.
- Do not touch the drive connector.
Never remove the hard disk while the computer is operating or in Sleep mode.
Sleep Mode and Transportation
Before moving the laptop after selecting Sleep mode, wait until the Power indicator starts blinking.
Moving the computer while the hard disk is spinning may damage the drive and cause data loss.
Before First Use
The computer may require initial Windows configuration when it is turned on for the first time.
Initial Preparation
- Place the laptop on a suitable surface.
- Make sure the cooling openings are not blocked.
- Connect the AC power adapter.
- Press the Power button.
- Follow the Windows setup instructions.
Windows 10 Initial Configuration
The initial Windows configuration may include:
- Accepting the end-user license agreement
- Configuring an internet connection
- Registering the operating system
- Creating a user account
The available setup screens depend on the installed Windows configuration.
How to Use the Keyboard
Both IdeaPad 300 models include function keys and hotkeys.
The IdeaPad 300-15IBR also has a separate numeric keypad.
Numeric Keypad — IdeaPad 300-15IBR
Press Num Lock to enable or disable the numeric keypad.
Function Key Combinations
To activate an Fn combination, hold the Fn key and press the corresponding key.
| Key Combination | IdeaPad 300-14IBR | IdeaPad 300-15IBR |
| Fn + Home | Pause | Pause |
| Fn + End | Break | Break |
| Fn + PgUp | Enable/Disable Scroll Lock | Enable/Disable Scroll Lock |
| Fn + PgDn | Insert | System Request |
Keyboard Hotkeys
The keyboard provides direct access to common system functions.
| Hotkey | Function |
| F1 | Mutes or unmutes sound. |
| F2 | Decreases speaker volume. |
| F3 | Increases speaker volume. |
| F4 | Closes the currently active window. |
| F5 | Refreshes the desktop or active window. |
| F6 | Enables or disables the touchpad. |
| F7 | Enables or disables Airplane Mode. |
| F8 | Displays active applications. |
| F9 | Turns the LCD backlight on or off. |
| F10 | Switches between the laptop display and an external display. |
| F11 | Decreases screen brightness. |
| F12 | Increases screen brightness. |
Changing Hotkey Mode
By default, the hotkey functions can be activated by pressing the corresponding key.
To disable Hotkey Mode:
- Shut down the computer.
- Press the Novo button.
- Select BIOS Setup.
- Open the Configuration menu.
- Change HotKey Mode from Enabled to Disabled.
- Open the Exit menu.
- Select Exit Saving Changes.
When Hotkey Mode is disabled, hold Fn while pressing the appropriate hotkey.
Connecting USB Devices
The IdeaPad 300-14IBR and 300-15IBR include three USB ports.
The blue USB connector identifies the USB 3.0 port.
How to Connect a USB Device
- Insert the compatible USB connector into an available port.
- Allow Windows to detect the device.
- Wait for Windows to install the required driver.
After the driver has been installed, the device can normally be disconnected and reconnected without repeating the installation.
Some USB devices require drivers to be installed before connection. Follow the device manufacturer’s instructions when applicable.
How to Safely Remove USB Storage
- Wait until all data transfers are complete.
- Select Safely Remove Hardware and Eject Media in the Windows notification area.
- Eject the device.
- Disconnect it from the USB port.
Connecting an Ethernet Cable
The RJ-45 connector supports wired networking.
Ethernet Connection Instructions
- Locate the RJ-45 port on the left side.
- Use the Ethernet cable connector to press the port cover downward gently.
- Insert the cable connector into the RJ-45 port.
For software configuration, follow the instructions provided by the internet service provider.
Using the Memory Card Reader
The laptop supports several memory card formats.
Supported Memory Cards
| Memory Card Type | Supported |
| Secure Digital (SD) | Yes |
| Secure Digital High Capacity (SDHC) | Yes |
| Secure Digital eXtended Capacity (SDXC) | Yes |
| MultiMediaCard (MMC) | Yes |
| SDIO Devices | No |
Only one memory card should be inserted at a time.
Inserting a Memory Card
Insert the compatible card into the slot until it reaches the bottom.
Removing a Memory Card
- Use Windows Safely Remove Hardware and Eject Media to disable the card.
- Gently pull the card out of the slot.
Disabling the card before removal helps prevent data corruption.
Windows 10 Start Menu and Settings
Windows 10 includes the Start menu for accessing installed applications and system settings.
Opening the Start Menu
Use either method:
- Press the Windows key.
- Select Start in the lower-left corner of the desktop.
Main Windows Controls
| Control | Function |
| Start Button | Opens the Start menu. |
| Settings | Opens Windows settings. |
| Power | Provides Sleep and Shutdown options. |
| All Apps | Displays installed applications. |
| Search Box | Searches for applications and settings. |
| Task View | Displays open applications and desktops. |
| Get Started | Opens introductory Windows instructions. |
Opening Settings
- Open Start.
- Select Settings.
The search box in Settings can be used to find additional configuration options.
Pinning Applications to Start
- Open Start.
- Select All Apps.
- Right-click the desired application.
- Select Pin to Start.
Applications can also be dragged from the Most Used or All Apps list into the Start menu.
Sleep Mode and Shutdown
The computer supports Sleep mode for short periods of inactivity and Shutdown when it will not be used for a longer period.
Entering Sleep Mode
Use any of the following methods:
- Close the display lid.
- Press the Power button.
- Open Start > Power > Sleep.
Waking the Computer
Press any key on the keyboard or press the Power button.
Shutting Down Windows
Method 1
- Open Start.
- Select Power.
- Select Shut down.
Method 2
- Right-click the Start button.
- Select Shut down or sign out.
- Select Shut down.
Windows Task View and Virtual Desktops
Windows 10 provides Task View for managing open applications and multiple desktops.
Opening Task View
Use either method:
- Select the Task View button on the taskbar.
- Press Windows + Tab.
Creating a Virtual Desktop
- Open Task View.
- Select New desktop.
Alternatively, press:
Windows + Ctrl + D
Switching Between Desktops
Open Task View and select the required desktop.
The following keyboard shortcuts can also be used:
| Shortcut | Function |
| Windows + Ctrl + Left Arrow | Switches to the previous desktop. |
| Windows + Ctrl + Right Arrow | Switches to the next desktop. |
How to Connect to WiFi
The laptop supports wireless LAN connections.
Enabling Wireless Networking
- Press F7 to disable Airplane Mode.
- Select the network icon in the lower-right corner of the Windows taskbar.
Windows scans for available wireless networks.
Connecting to a Wireless Network
- Select the required network from the list.
- Click Connect.
- Enter the network security key or passphrase if prompted.
If the network password is unavailable, contact the network administrator or internet service provider.
Windows 10 Get Started App
Windows 10 includes a Get Started application that introduces operating system features.
Opening Get Started
Use either method:
- Open Start and select Get Started.
- Press Fn + F1, depending on the keyboard layout.
Novo Button and BIOS Setup
The Novo button provides access to startup and recovery functions when the laptop is turned off or in Hibernation mode.
Novo Button Menu
| Option | Function |
| BIOS Setup | Opens the BIOS configuration utility. |
| Boot Menu | Allows selection of a startup device. |
| System Recovery | Opens Lenovo OneKey Recovery System. |
How to Enter BIOS Setup
- Shut down the computer.
- Press the Novo button.
- Select BIOS Setup.
BIOS Setup Functions
The BIOS Setup Utility displays basic computer information and provides configuration options for:
- Boot devices
- Security settings
- Hardware operating modes
- Other system preferences
Changing the Boot Mode
The computer supports two boot modes:
| Boot Mode | Description |
| UEFI | Default boot mode. |
| Legacy Support | Used when installing supported legacy operating systems. |
To change the boot mode:
- Open BIOS Setup through the Novo button.
- Select the Boot menu.
- Change the boot mode to UEFI or Legacy Support as required.
The guide specifies Legacy Support when installing an older operating system that requires legacy startup.
Selecting a Startup Device
- Turn off the computer.
- Press the Novo button.
- Select Boot Menu.
- Choose the required startup device.
Lenovo OneKey Recovery System
Lenovo OneKey Recovery System allows the computer’s system partition to be backed up and restored.
The recovery software uses a hidden partition containing the system image and program files.
Because this hidden partition occupies storage space, the available disk capacity may appear smaller than the drive’s stated capacity.
The recovery system is unavailable on computers preinstalled with GNU/Linux.
How to Back Up the System Partition
- Start Windows normally.
- Press the Novo button or double-click the OneKey Recovery icon.
- Select System Backup.
- Choose the backup location.
- Select Next.
- Wait for the backup process to finish.
Backup Storage Locations
The backup image can be stored on:
- The local hard disk drive
- An external storage device
Before starting OneKey Recovery, remove any removable hard disk drive as directed by Lenovo to avoid possible data loss.
System Backup is available only when Windows starts normally.
How to Restore Windows
- Start Windows.
- Press the Novo button or open the OneKey Recovery application.
- Select System Recovery.
- Allow the computer to restart into the recovery environment.
- Follow the on-screen instructions.
The system partition can be restored to its original factory condition or to a previously created backup point.
Important: Recovery is irreversible. Back up all important information before beginning restoration.
The AC power adapter must remain connected during recovery.
Restoring Windows When It Cannot Start
- Shut down the computer.
- Press the Novo button.
- Select System Recovery from the Novo Button Menu.
- Press Enter.
- Follow the recovery instructions.
Troubleshooting Guide
The following troubleshooting procedures cover display, Sleep mode, battery, sound, storage, and recovery problems.
Common Problems and Solutions
| Problem | Recommended Action |
| Nothing appears on the screen at startup. | Check the AC adapter, outlet, and Power button. |
| White cursor appears on a blank screen. | Restore Windows using OneKey Recovery. |
| Screen goes blank during operation. | Exit Sleep mode or the screen saver and check the LCD backlight. |
| Screen is too dim. | Press F12 to increase brightness. |
| Screen is distorted or unreadable. | Check display drivers, resolution, color quality, and monitor type. |
| Incorrect characters appear. | Check the operating system and application installation. |
| No sound from the speakers. | Check Mute, the audio jack, and playback-device selection. |
| Critical low-battery warning appears. | Connect the AC power adapter. |
| Computer enters Sleep immediately after startup. | Check battery charge and operating temperature. |
| Computer does not resume from Sleep. | Connect AC power and press a key or the Power button. |
| Battery level behaves unexpectedly. | Discharge and recharge the battery pack. |
| Computer does not operate with a fully charged battery. | Turn it off for one minute, then restart it. |
| Hard disk does not work. | Check that the drive appears correctly in the BIOS Boot menu. |
| System backup cannot be created. | Confirm Windows is running and sufficient backup storage is available. |
| Factory recovery fails. | Check whether the system partition size or drive capacity has been modified. |
| External device does not work. | Check connections and external power requirements. |
Blank Screen at Startup
If nothing appears when the computer starts:
- Confirm that the AC adapter is connected to the laptop.
- Check that the power cord is connected to a working outlet.
- Press the Power button to confirm that the computer is on.
If the screen remains blank, the computer requires service.
Display Brightness and Backlight Problems
If the computer is powered on but the display remains blank:
- Press F12 to increase brightness.
- Press F9 to check whether the LCD backlight has been turned off.
- Press Power if the computer is in Sleep mode.
Computer Does Not Respond
If the computer freezes or cannot be turned off:
- Press and hold the Power button for four seconds or longer.
- If the computer still does not respond, disconnect the AC adapter.
Unsaved data may be lost during a forced shutdown.
Battery Indicator Problems
If the computer shuts down before the battery indicator shows empty, or continues operating after the indicator shows empty, discharge and recharge the battery pack.
If the laptop does not operate despite a fully charged battery, turn it off for one minute to reset the battery pack’s surge protector, then restart it.
OneKey Recovery Backup Failure
If a backup starts but fails:
- Close all open programs.
- Restart the backup process.
- Check the backup destination for damage.
- Select another storage location if necessary.
A backup also requires sufficient free storage space.
Forgotten BIOS and Hard Disk Passwords
The manual provides different procedures depending on the type of forgotten password.
Forgotten User Password
Contact the system administrator to clear the user password.
Forgotten Hard Disk Password
A Lenovo authorized service provider cannot reset a forgotten hard disk password or recover protected information.
The hard disk drive must be replaced by an authorized service provider or Lenovo representative.
Proof of purchase is required, and service charges apply.
Forgotten Administrator Password
A forgotten administrator password cannot be reset by a Lenovo authorized service provider.
The system board must be replaced through authorized service.
Proof of purchase is required, and parts and service charges apply.
Customer Replaceable Units
The Lenovo IdeaPad 300-14IBR and 300-15IBR support replacement of certain components.
The guide identifies these Customer Replaceable Units (CRUs):
| Component | Replacement Information |
| AC Power Adapter | Safety, Warranty, and Setup Guide |
| Power Cord | Safety, Warranty, and Setup Guide |
| Bottom Access Covers | User Guide |
| Hard Disk Drive | User Guide |
| Memory | User Guide |
| Keyboard | User Guide |
| Optical Drive | User Guide |
CRU service is applicable only in certain countries.
Preparing the Laptop for Hardware Replacement
Important: Before replacing a customer-replaceable component, the built-in battery must be placed in Ship Mode.
How to Activate Ship Mode
- Turn off the computer.
- Disconnect the AC power adapter.
- Press Fn + S + V.
- Press the Power button to verify that Ship Mode has been activated.
When Ship Mode is active, the battery does not supply power to the computer.
How to Exit Ship Mode
Connect the AC power adapter to the laptop.
This wakes the battery from Ship Mode.
How to Replace the Hard Disk Drive
The hard disk drive can be replaced with a compatible drive of greater storage capacity or replaced when repair is required.
Important Drive Handling Precautions
- Back up all important files before replacement.
- Do not drop the hard disk.
- Protect the drive from physical shocks.
- Do not press on the drive cover.
- Do not touch the connector.
- Do not remove the drive while the computer is operating or sleeping.
Hard Disk Replacement Procedure
- Shut down the computer and disconnect the AC adapter and all cables.
- Close the display.
- Turn the laptop over.
- Remove the screws securing the main compartment cover.
- Remove the compartment cover.
- Remove the screws securing the hard disk frame.
- Pull the hard disk in the direction shown in the removal diagram.
- Lift out the hard disk and its metal frame.
- Remove the screws attaching the frame to the drive.
- Attach the metal frame to the replacement drive and tighten the screws.
- Position the replacement drive in the drive bay with the connectors aligned.
- Push the drive firmly into position.
- Reinstall the frame screws.
- Refit the compartment cover and tighten its screws.
- Turn the computer upright and reconnect the power adapter and cables.
A replacement drive does not include Lenovo’s preinstalled software.
How to Replace or Upgrade Memory
The computer supports DDR3 SDRAM memory.
Only compatible memory modules must be installed.
Some configurations may have only one memory slot.
Memory Replacement Instructions
- Touch a grounded metal object to reduce static electricity.
- Shut down the computer and disconnect all cables.
- Close the display and turn the laptop over.
- Remove the main compartment cover.
- Release the memory socket latches.
- Remove the existing memory module.
- Align the notch of the replacement DDR3 SDRAM module with the socket.
- Insert the module at an angle of approximately 30–45 degrees.
- Push the module inward and downward until the latches close.
- Reinstall the compartment cover and tighten the screws.
- Turn the computer upright and reconnect power.
The computer must be restarted after the first reboot following a memory replacement.
How to Verify Installed Memory
- Shut down the computer.
- Press the Novo button.
- Select BIOS Setup.
- Locate System Memory.
The System Memory value displays the total installed memory.
An unsupported or incorrectly installed memory module may cause a warning beep during startup.
How to Replace the Keyboard
The keyboard is identified as a customer-replaceable component.
Keyboard Replacement Procedure
- Turn off the computer and disconnect external cables.
- Close the display and turn the computer over.
- Remove the screws securing the keyboard.
- Turn the laptop upright and open the display.
- Carefully loosen the keyboard using a suitable prying tool.
- Lift the keyboard slightly.
- Disconnect the keyboard connector.
- Remove the keyboard.
- Connect the replacement keyboard.
- Press it gently into position until it clicks.
- Close the display and turn the computer over.
- Reinstall and tighten the keyboard screws.
- Reinstall the compartment cover and tighten its screws.
- Reconnect the AC adapter and cables.
The keyboard connector must be securely attached before the computer is reassembled.
How to Remove the Optical Drive
The optical drive is included on selected laptop configurations.
Optical Drive Removal Instructions
- Remove the keyboard using the keyboard replacement procedure.
- Remove the optical drive retaining screw.
- Gently pull the optical drive out of the computer.
- Remove the screw securing the optical drive bracket.
- Detach the bracket.
- Carefully remove the optical drive bezel.
The removal procedure is illustrated in the customer-replaceable unit section of the guide.
Warranty Information
Warranty coverage depends on the computer’s applicable Lenovo warranty terms.
How to Check Warranty Status
Visit:
https://support.lenovo.com/warrantystatus
Enter the applicable computer information to check its warranty status.
The Lenovo Safety and General Information Guide contains additional warranty and service instructions.
Customer Support Information
Lenovo provides support for hardware problems, warranty inquiries, drivers, and preinstalled software.
| Support Resource | Details |
| Brand | Lenovo |
| Product | IdeaPad 300 |
| Models | 300-14IBR, 300-15IBR |
| Official Support | https://support.lenovo.com |
| Warranty Status | https://support.lenovo.com/warrantystatus |
| Safety Documentation | Lenovo Safety and General Information Guide |
Finding Preinstalled Software
Lenovo does not supply installation discs for the preinstalled desktop software described in this guide.
Software installation files may be stored on the D partition of the hard disk.
If the required installation program is unavailable there, it may be downloaded from Lenovo Support.
Finding Device Drivers
For computers supplied with Windows, Lenovo provides hardware drivers on the D partition.
Updated drivers can also be obtained through Lenovo Support.
Getting Technical Assistance
For assistance with computer problems, refer to the Getting Help and Service section of the Lenovo Safety and General Information Guide.
Frequently Asked Questions
1. How do I enter BIOS on the Lenovo IdeaPad 300-14IBR or 300-15IBR?
Shut down the laptop, press the Novo button, and select BIOS Setup. The BIOS Setup Utility provides access to boot devices, security options, hardware modes, and other configuration settings.
2. How do I connect the Lenovo IdeaPad 300 to WiFi?
Press F7 to disable Airplane Mode. Select the network icon on the Windows taskbar, choose an available wireless network, and click Connect. Enter the network password if requested.
3. How do I enable or disable the touchpad?
Press F6 to turn the touchpad on or off. If Hotkey Mode has been disabled in BIOS, hold Fn while pressing F6.
4. How do I restore Windows using Lenovo OneKey Recovery?
When Windows starts normally, open OneKey Recovery and select System Recovery. If Windows cannot start, shut down the computer, press the Novo button, and select System Recovery. Follow the instructions to restore the system partition. Back up important data first because recovery is irreversible.
5. Why is the Lenovo IdeaPad 300 screen black?
A blank screen may result from Sleep mode, disabled LCD backlighting, or low brightness. Press Power to resume, F9 to check the backlight, and F12 to increase brightness. If the display remains blank after the recommended checks, the computer may require service.
6. What do the amber and white battery indicator lights mean?
A slowly blinking amber light during charging means the battery is below 20%. A slowly blinking white light means it is between 20% and 80%. A solid amber light while discharging indicates 5–20%, while quickly blinking amber indicates less than 5%.
7. Can the RAM and hard disk be upgraded on the Lenovo IdeaPad 300?
Yes. The guide includes instructions for replacing compatible DDR3 SDRAM memory and the hard disk drive. Before replacement, back up important data, disconnect external power, and place the built-in battery in Ship Mode using Fn + S + V.
8. What should I do if the Lenovo IdeaPad 300 stops responding?
Press and hold the Power button for at least four seconds. If the laptop remains unresponsive, disconnect the AC adapter. A forced shutdown may cause unsaved data to be lost.