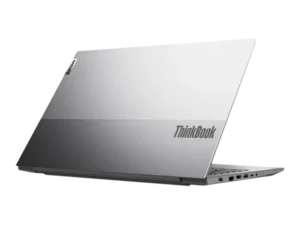
| Field | Details |
| Document Title | Lenovo ThinkBook 15p User Guide |
| Document Type | User Guide |
| Brand Name | Lenovo |
| Product Name | ThinkBook 15p IMH |
| Model Number(s) | 20V3 |
| PDF File Size | 4 MB |
| Number of Pages | 58 |
| Languages | English |
Lenovo ThinkBook 15p IMH 20V3
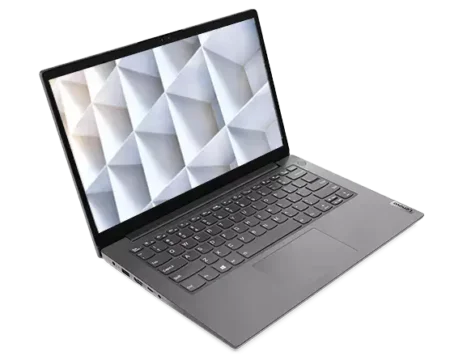
The Lenovo ThinkBook 15p IMH is a 15.6-inch notebook computer designed for everyday computing, productivity, and applications that require additional processing and graphics performance. Machine type 20V3 features a full-size keyboard with a numeric keypad, touchpad, integrated camera, wireless connectivity, and multiple external device connections.
The computer is available with Full HD (1920 × 1080) or Ultra HD (3840 × 2160) displays. It supports DDR4 memory through two memory slots, PCI Express solid-state storage, a 57 Wh rechargeable battery, and a 135 W AC power adapter.
The ThinkBook 15p includes HDMI, USB-A, USB-C, Ethernet, an SD card reader, and a combined audio jack. Selected configurations also include a fingerprint reader integrated into the Power button.
Product Overview
The ThinkBook 15p IMH combines a 15.6-inch display with a conventional notebook keyboard and several connectivity options. It supports wired and wireless networks, external displays, removable storage devices, and compatible USB peripherals.
The computer includes a camera privacy cover, built-in microphones, speakers, and a touchpad with multi-touch functionality. Lenovo Vantage or Lenovo PC Manager provides access to hardware settings, system information, updates, and diagnostics.
Main Features
- 15.6-inch display with FHD or UHD resolution.
- DDR4 memory with two memory slots.
- PCI Express M.2 solid-state storage.
- Full-size keyboard with numeric keypad.
- Multi-touch touchpad.
- Built-in camera with a physical privacy cover.
- Integrated microphones and speakers.
- Fingerprint reader on selected models.
- Two USB 3.2 Gen 1 Type-A connectors.
- USB-C data connector.
- HDMI external display connection.
- Gigabit Ethernet connection.
- SD and MultiMediaCard support.
- Bluetooth and wireless LAN.
- 57 Wh rechargeable battery.
- 135 W AC power adapter.
- FnLock and keyboard hotkeys.
- Fn + Q performance mode selection.
- Novo Button menu for BIOS, boot, recovery, and diagnostics.
- UEFI/BIOS password protection.
- Lenovo Vantage and Lenovo PC Manager support.
Technical Specifications
General Specifications
| Specification | Details |
| Brand | Lenovo |
| Product Name | ThinkBook 15p IMH |
| Machine Type | 20V3 |
| Product Type | Notebook Computer |
| Display Size | 15.6 inches (396.24 mm) |
| FHD Resolution | 1920 × 1080 |
| UHD Resolution | 3840 × 2160 |
| Memory Type | DDR4 |
| Memory Slots | 2 |
| Storage Type | Solid-State Drive |
| Storage Interface | PCI Express |
| SSD Form Factors | M.2 2280, M.2 2242 |
| Keyboard | Full-Size Keyboard with Numeric Keypad |
| Pointing Device | Multi-Touch Touchpad |
| Camera | Integrated Camera with Privacy Cover |
| Audio | Built-In Microphones, Speakers, Combo Audio Jack |
| Wireless Connectivity | Wi-Fi, Bluetooth |
| Wired Network | 10/100/1000 Mbps Ethernet |
| USB-A | 2 × USB 3.2 Gen 1 |
| USB-C | USB 3.2 Gen 1 |
| Video Output | HDMI |
| Card Reader | SD Card, MultiMediaCard |
| Fingerprint Reader | Selected Models |
| Security Lock | Kensington MiniSaver-Compatible Slot |
| Battery | 57 Wh, 3-Cell |
| Power Adapter | 135 W |
Physical Dimensions
| Dimension | Measurement |
| Width | 359 mm (14.13 inches) |
| Depth | 249.5 mm (9.82 inches) |
| Thickness | 19.9 mm (0.78 inches) |
Power Specifications
| Specification | Details |
| AC Adapter Input | 100–240 V AC |
| Input Frequency | 50–60 Hz |
| Adapter Output | 20 V DC |
| Output Current | 6.75 A |
| Adapter Power | 135 W |
| Battery Capacity | 57 Wh |
| Battery Cells | 3 |
| Approximate Charging Time | 2–4 hours |
| Recommended Charging Temperature | 10°C–35°C (50°F–95°F) |
The 57 Wh battery capacity represents a typical value measured under specified test conditions. Actual measured capacity can vary with the operating environment.
USB Specifications
| Connector | Supported Function |
| USB 3.2 Gen 1 Type-A | Data transfer and USB peripherals |
| USB-C | Data transfer and compatible external devices |
| USB-C Maximum Data Rate | 5 Gbps |
| USB-C Power Output | Up to 5 V, 1.5 A |
| HDMI | External digital audio and video output |
Important: The USB-C connector does not support connecting external displays. External monitors should be connected through the HDMI port.
Actual USB data transfer speeds depend on the connected device, file characteristics, computer configuration, and operating conditions.
Parts and Components
Front Components
| Component | Function |
| Microphones | Capture voice and other sounds |
| Camera | Captures photographs and videos |
| Camera Cover Slider | Covers or uncovers the camera lens |
| Camera Light | Indicates when the camera is in use |
| Screen | Displays applications, text, images, and video |
Camera Privacy Cover
The computer has a physical camera cover controlled by a slider.
To use the camera:
- Locate the camera cover slider above the display.
- Move the slider to uncover the camera lens.
- Open the camera application or a compatible video communication program.
- Move the slider back to cover the camera when finished.
The camera light turns on when the camera is active.
Keyboard Base Components
| Component | Function |
| Wireless Antennas | Send and receive wireless LAN and Bluetooth signals |
| Ventilation Outlets | Release heat from internal components |
| Power Button | Turns on the computer or places it into sleep mode |
| Fingerprint Reader | Supports fingerprint authentication on selected models |
| Numeric Keypad | Provides number and operator input |
| Touchpad | Controls the pointer and supports gestures |
| Keyboard | Enters text and provides shortcuts |
Power Button
The Power button is located near the upper-right area of the keyboard.
Pressing the button turns on the notebook. By default, pressing it while Windows is running puts the computer into sleep mode.
The Power button can be configured through Windows Control Panel.
Ports and Connectors
Left-Side Ports
| Port or Component | Description |
| Power Connector | Connects the AC power adapter |
| Charging Light | Shows power connection and battery charging status |
| Ethernet Connector | Connects a wired local area network |
| HDMI Connector | Connects a compatible digital display or audio device |
| USB 3.2 Gen 1 Type-A | Connects USB-compatible accessories |
| USB-C Connector | Supports data transfer and compatible peripherals |
| Combo Audio Jack | Connects compatible headphones or headsets |
| Novo Button Hole | Opens startup and recovery options |
| Power Light | Shows the computer’s power status |
Ethernet Connector
The built-in Ethernet connector supports 10/100/1000 Mbps wired networking.
An Ethernet cable can be connected directly to a compatible network device.
HDMI Connector
The HDMI connector supports compatible digital monitors, televisions, and audio/video devices.
USB-C Connector
The USB-C port supports USB 3.2 Gen 1 data transfer up to 5 Gbps and provides power output up to 5 V and 1.5 A.
It can be used to connect compatible storage devices and other USB-C data peripherals.
The connector does not provide external display output.
Combo Audio Jack
The 3.5 mm four-pole combo audio jack supports compatible headphones and headsets.
A standalone external microphone is not supported through this jack.
For a headset with a microphone, use a compatible headset with a single combined plug.
Right-Side Ports
| Component | Function |
| SD Card Slot | Accepts SD cards and MultiMediaCards |
| USB 3.2 Gen 1 Type-A | Connects USB peripherals |
| Ventilation Outlet | Releases internal heat |
| Mini Security-Lock Slot | Supports a compatible security cable |
Security-Lock Slot
The Mini security-lock slot supports Kensington MiniSaver cable locks using Cleat locking technology.
A compatible lock can secure the notebook to a desk or another fixed object.
Bottom Components
| Component | Function |
| Ventilation Inlets | Allow air to enter for internal cooling |
| Speakers | Provide sound output |
The ventilation openings must remain clear to prevent overheating.
Indicator Light Guide
Power Button and Power Light
| Light Status | Computer Status |
| On | Computer is turned on |
| Blinking | Computer is in sleep mode |
| Off | Computer is turned off or hibernating |
Battery Charging Indicator
| Light Status | Meaning |
| Solid White | Connected to AC power; battery capacity 91%–100% |
| Solid Amber | Connected to AC power; battery capacity 1%–90% |
| Off | Not connected to AC power |
Other Indicators
| Indicator | Meaning |
| Camera Light On | Camera is being used |
| Num Lock Light On | Numeric keypad is enabled |
| FnLock Light On | Standard function key behavior is active |
Safety Instructions
Read the safety instructions before connecting, operating, transporting, or servicing the notebook.
Electrical Safety
- Use the power cords and adapters supplied by the manufacturer.
- Connect power equipment to a properly wired and grounded outlet.
- Do not use damaged or corroded cords, plugs, or adapters.
- Keep liquids away from the computer and electrical accessories.
- Do not overload power strips or electrical outlets.
- Avoid connecting or disconnecting cables during electrical storms.
- Never remove the cover of a power supply.
- Disconnect power before opening device covers unless the applicable service instructions state otherwise.
- Do not operate the computer with exposed internal parts.
Battery Safety
The computer contains a rechargeable battery that requires careful handling.
- Use only Lenovo-approved replacement batteries.
- Do not open, crush, puncture, or disassemble the battery.
- Do not short-circuit battery terminals.
- Keep batteries away from water and fire.
- Stop using a battery that is damaged, leaking, or showing unusual deposits.
- Keep batteries away from children.
- Follow local regulations for battery disposal.
Danger: The built-in rechargeable battery must be removed or replaced only by a Lenovo-authorized repair facility or technician. Unauthorized battery servicing can cause overheating, fire, or explosion.
Heat and Ventilation
The notebook and its power adapter generate heat during operation and charging.
- Avoid prolonged contact between hot computer surfaces and the body.
- Do not cover the power adapter with clothing or other objects.
- Keep the ventilation inlets and outlets clear.
- Do not use the computer on soft surfaces that block airflow.
- Avoid operating or charging the computer near flammable materials.
- Keep the computer in a ventilated area.
- Do not allow incoming airflow temperature to exceed 35°C (95°F).
Conditions Requiring Immediate Action
Stop using the notebook, disconnect power when safe, and contact Lenovo Support if any of the following occurs:
- Smoke, sparks, or signs of fire.
- Strong or unusual odors.
- Cracking, popping, or hissing sounds.
- Damaged electrical cords or adapters.
- Visible battery damage or leakage.
- Liquid entering the computer.
- Physical damage from dropping the notebook.
- Abnormal operation despite following the instructions.
Do not attempt internal repairs without authorization or applicable service instructions.
Display Safety
The LCD contains glass and may break if dropped or struck.
If broken display fluid contacts the skin or eyes, wash the affected area with water for at least 15 minutes. Obtain medical care if symptoms remain.
Audio Safety
Excessive headphone volume can cause hearing damage.
Use suitable volume settings and compatible headphones that meet applicable audio safety requirements.
Operating Environment
| Condition | Supported Range |
| Maximum Altitude Without Pressurization | 3048 m (10,000 ft) |
| Operating Temperature Up to 2438 m | 5°C–35°C (41°F–95°F) |
| Storage Temperature | 5°C–43°C (41°F–109°F) |
| Maximum Operating Temperature Above 2438 m | 31.3°C (88°F) |
| Minimum Battery Charging Temperature | 10°C (50°F) |
| Operating Relative Humidity | 8%–95% at 23°C wet-bulb temperature |
| Storage Relative Humidity | 5%–95% at 27°C wet-bulb temperature |
Initial Setup Instructions
Connecting the Power Adapter
The notebook uses a 135 W AC adapter with an output rating of 20 V DC and 6.75 A.
- Place the notebook on a stable surface with unobstructed ventilation.
- Connect the power cord to the supplied AC adapter.
- Insert the adapter connector into the computer’s power port.
- Connect the power cord to a suitable electrical outlet.
- Check the charging indicator.
- Press the Power button to turn on the notebook.
The charging light displays white or amber depending on the battery level.
Completing Windows Setup
Follow the Windows instructions displayed during the initial startup.
Once Windows is available, the computer can be configured through Control Panel, Windows Settings, Lenovo Vantage, or Lenovo PC Manager.
Connecting to Wi-Fi
- Click the network icon in the Windows notification area.
- Review the available wireless networks.
- Select the required Wi-Fi network.
- Enter the network password if requested.
- Complete the connection.
Wireless availability and supported standards depend on the installed wireless module and regional regulations.
Connecting to a Wired Network
- Connect an Ethernet cable to the notebook’s Ethernet port.
- Connect the other end to the appropriate network equipment.
- Use Windows network settings to check the connection.
Airplane Mode
Airplane Mode controls wireless communications.
To change its setting:
- Type Airplane mode in Windows Search.
- Open the matching setting.
- Turn Airplane Mode on or off.
Night Light Mode
Night Light changes the display to warmer colors and reduces emitted blue light.
To configure it:
- Search Windows for Night light.
- Open the Night Light settings.
- Turn the feature on or off.
- Adjust color temperature as preferred.
Keyboard and Hotkey Instructions
The ThinkBook 15p keyboard includes function keys, hotkeys, and a dedicated numeric keypad.
Some hotkeys work alone, while others require the Fn key.
Keyboard Hotkey Functions
| Hotkey Function | Description |
| Speaker Mute | Mutes or unmutes sound |
| Volume Down | Decreases system volume |
| Volume Up | Increases system volume |
| Microphone Mute | Mutes or unmutes the microphone |
| Brightness Down | Decreases display brightness |
| Brightness Up | Increases display brightness |
| Display Switch | Changes display output devices |
| Airplane Mode | Enables or disables Airplane Mode |
| Service Key | Opens the associated service function |
| Answer Call | Answers supported Skype for Business or Microsoft Teams calls |
| Reject Call | Rejects supported Skype for Business or Microsoft Teams calls |
| Lenovo Application | Opens Lenovo Vantage, Lenovo PC Manager, or the application launch bar |
| Calculator | Opens Windows Calculator |
| Snipping Tool | Opens the Windows screen capture tool |
| Play/Pause | Starts or pauses media playback |
| Stop | Stops media playback |
| Previous | Opens the previous media item |
| Next | Opens the next media item |
The call-control hotkeys operate with supported versions of Skype for Business and Microsoft Teams. These applications must be installed separately.
FnLock Settings
FnLock changes the behavior of function keys and their special functions.
To change FnLock:
- Press Fn + Esc.
- Check the FnLock indicator on the Esc key.
- Use the function keys according to the selected mode.
| FnLock State | Light | Default F1 Function |
| Off | Off | Mute or unmute sound |
| On | On | Standard F1 function |
The operation of a standard function key depends on the active application.
Numeric Keypad
The keyboard includes a dedicated numeric keypad on the right side.
Press Num Lock to enable or disable it.
When the Num Lock indicator is on, the numeric keypad is active.
Using the Touchpad
The notebook’s touchpad supports finger-based pointer control and multi-touch functions.
The touchpad can be used for selecting items, moving the pointer, and interacting with Windows.
Its operation depends on the active application and configured Windows settings.
Lenovo Vantage and Lenovo PC Manager
Lenovo Vantage and Lenovo PC Manager provide system management and support functions.
Available Functions
| Function | Description |
| Product Information | Displays computer information |
| Warranty Information | Shows warranty and support details |
| Hardware Scan | Diagnoses supported hardware components |
| Hardware Settings | Changes supported device settings |
| Driver Updates | Downloads available device drivers |
| BIOS Updates | Installs applicable UEFI/BIOS updates |
| Windows Updates | Provides access to supported system updates |
Opening Lenovo Vantage
- Type Lenovo Vantage in Windows Search.
- Select the application from the results.
- Use the required hardware or support function.
Lenovo PC Manager can be opened in the same way.
Lenovo Vantage is also available through the Microsoft Store.
Novo Button Menu
The ThinkBook 15p includes a Novo button that opens startup and recovery functions before the operating system loads.
Available Novo Menu Options
| Menu Option | Function |
| Normal Startup | Starts the computer normally |
| BIOS Setup | Opens firmware settings |
| Boot Menu | Opens startup-device selection |
| System Recovery | Opens available recovery functions |
| UEFI Diagnostics | Opens firmware-level diagnostic tools |
Opening the Novo Button Menu
- Turn off the notebook.
- Open the LCD screen.
- Locate the Novo button hole on the left side.
- Press the Novo button.
- Choose the required option.
Alternative Method
The Novo Button menu can also be opened by turning off the computer and pressing Fn + Power.
Power Management
The ThinkBook 15p supports configurable power management settings to balance operating performance and battery consumption.
Checking Battery Status
The battery icon in the Windows notification area displays battery information.
To view battery status:
- Click the battery icon.
- Check the remaining battery percentage.
- Review the current power mode or available power settings.
Windows displays a warning when the battery level becomes low.
Charging the Battery
- Connect the notebook to the supplied AC power adapter.
- Connect the adapter to an electrical outlet.
- Allow the battery to charge.
- Check the battery indicator or Windows battery status.
The battery normally charges fully in approximately two to four hours.
Charging time depends on battery condition, environmental temperature, and whether the computer is being used.
Battery Charging Temperature
The recommended charging temperature is 10°C–35°C (50°F–95°F).
To help maintain battery life, the notebook does not begin charging again after reaching full charge until the battery level falls to 94% or lower.
Checking Battery Temperature
In Lenovo Vantage:
- Open Lenovo Vantage.
- Select Device > My Device Settings > Power.
- Click SEE BATTERY DETAILS.
- Review the battery temperature.
In Lenovo PC Manager, select System hardware > Battery.
Changing Power Button Behavior
By default, pressing the Power button while the notebook is running places it into sleep mode.
To change this setting:
- Type Control Panel in Windows Search.
- Open Control Panel.
- Change the view to Large icons or Small icons.
- Select Power Options.
- Click Choose what the power button does.
- Configure the preferred behavior.
Creating or Changing a Power Plan
- Type power plan in Windows Search.
- Open the corresponding settings.
- Select an existing plan or configure a preferred power plan.
Performance Modes
The computer supports different performance modes that affect power consumption and performance.
Press Fn + Q to cycle through the available modes.
UEFI/BIOS Setup Instructions
The UEFI/BIOS initializes hardware components and starts the operating system.
The setup utility provides access to startup configuration and security settings.
Entering BIOS
- Turn on or restart the notebook.
- When the Lenovo logo appears, press F1 repeatedly.
- Open the required BIOS menu.
If Hotkey Mode is enabled, press Fn + F1 instead.
Changing Boot Order
- Open the UEFI/BIOS setup utility.
- Go to the Boot menu.
- Locate Boot Priority Order.
- Change the order of startup devices.
- Follow the on-screen instructions to save the changes.
Opening the Temporary Boot Menu
A temporary startup-device selection can be made without changing the BIOS boot order.
- Turn on the notebook.
- Press F12 repeatedly when the Lenovo logo appears.
- If required, use Fn + F12.
- Select the required startup device.
The Boot Menu is also accessible through the Novo Button menu.
BIOS Passwords and Security
The ThinkBook 15p supports firmware-level passwords for preventing unauthorized access to the setup utility and protected storage.
Available Password Types
| Password Type | Purpose |
| Administrator Password | Restricts access to UEFI/BIOS setup |
| User Password | Allows limited BIOS access when an administrator password exists |
| Master Hard Disk Password | Protects storage access |
| User Hard Disk Password | Allows storage access using the associated user password |
| Power-On Password | Requires authentication when starting the computer |
BIOS passwords use alphanumeric characters.
Setting an Administrator Password
- Open the UEFI/BIOS setup utility.
- Select Security > Set Administrator Password.
- Press Enter.
- Type the required password using letters and numbers.
- Enter the password again for confirmation.
- Select Exit > Exit Saving Changes.
Important: If the administrator password is forgotten, Lenovo-authorized service personnel cannot reset it. System board replacement is required, and proof of purchase and service fees may apply.
Changing an Administrator Password
- Open BIOS using the administrator password.
- Select Security > Set Administrator Password.
- Enter the current password.
- Enter a new password.
- Confirm the new password.
- Save and exit.
To remove the password, leave the new password fields blank and press Enter.
Removing the administrator password also removes the user password.
Setting a User Password
An administrator password must be configured first.
- Enter BIOS using the administrator password.
- Select Security > Set User Password.
- Enter the new user password.
- Confirm the password.
- Save the changes.
The user password must be different from the administrator password.
Enabling Power-On Password
- Open BIOS.
- Select Security > Power on Password.
- Change the setting to Enabled.
- Select Exit Saving Changes.
When enabled, the computer requests an administrator or user password during startup.
Setting a Hard Disk Password
- Enter the UEFI/BIOS setup utility.
- Select Security > Set Hard Disk Password.
- Follow the on-screen instructions.
- Set the master and user hard disk passwords.
- Save the changes.
The master and user hard disk passwords must be created together.
Warning: A forgotten hard disk password cannot be reset by Lenovo, and the protected data cannot be recovered through Lenovo service. The storage device may need replacement at the owner’s expense.
Changing or Removing Hard Disk Passwords
- Open UEFI/BIOS setup.
- Select Security.
- Choose the appropriate password setting.
- Follow the instructions.
- Save the changes.
Removing the master hard disk password also removes the user hard disk password. The user hard disk password cannot be removed separately.
Fingerprint Authentication
Selected ThinkBook 15p configurations include a fingerprint reader integrated into the Power button.
Enrolling a Fingerprint
- Type Sign-in options in Windows Search.
- Open the matching settings.
- Select the fingerprint authentication option.
- Follow the Windows enrollment instructions.
The fingerprint reader can then be used for supported sign-in authentication.
Troubleshooting Guide
Common Problems and Recommended Actions
| Problem | Recommended Action |
| Computer stops responding | Hold the Power button until it turns off, then restart |
| Liquid is spilled on the computer | Disconnect AC power, shut down immediately, and allow the liquid to dry |
| Battery is low | Connect the notebook to AC power |
| Battery stops charging near full capacity | Check the charging threshold behavior |
| Computer becomes unusually hot | Check that ventilation openings are not blocked |
| USB-C external display does not work | Connect the display through HDMI |
| Unable to enter BIOS using F1 | Use Fn + F1 when Hotkey Mode is enabled |
| Need to start from another device | Open the Boot Menu using F12 or the Novo button |
| Forgot administrator password | Contact Lenovo-authorized service for system board replacement |
| Forgot hard disk password | Contact authorized service about storage replacement |
| Need hardware diagnostics | Run Hardware Scan in Lenovo Vantage or Lenovo PC Manager |
| Need operating system recovery | Use the Novo Button menu or Lenovo recovery resources |
| Drivers or firmware require updating | Use Lenovo Vantage, Lenovo PC Manager, or Lenovo Support |
Computer Stops Responding
If the notebook becomes unresponsive:
- Press and hold the Power button until the notebook turns off.
- Release the button.
- Press the Power button again to restart.
Liquid Spilled on the Computer
Caution: Liquid entering the computer can cause electrical shorts and permanent damage.
- Carefully disconnect the AC power adapter.
- Turn off the computer immediately.
- Do not attempt to operate the notebook while moisture remains.
- Wait until all liquid is completely dry before turning the computer on.
Do not turn the notebook upside down to drain liquid.
Battery Not Charging Above 94% or 95%
The computer includes battery charging behavior designed to help maintain battery life.
After reaching full charge, the battery must discharge to 94% or lower before it starts charging again.
This behavior can explain why charging does not immediately resume when the battery remains near full capacity.
USB-C External Monitor Not Working
The USB-C connector supports data transfer but does not support external display output.
Use the HDMI connector when connecting a compatible external monitor or television.
Computer Overheating
Check that the ventilation inlets and outlets are clear.
The notebook should not be operated on soft surfaces that block airflow.
If the computer produces unusual heat, smoke, smells, or other signs of damage, stop using it and contact Lenovo Support.
Unable to Access BIOS
When the Lenovo logo appears, press F1 repeatedly.
If Hotkey Mode is enabled, use Fn + F1.
The Novo Button menu also provides an option to open BIOS Setup.
Hardware Diagnostics
Lenovo Vantage and Lenovo PC Manager include hardware diagnostic functions.
Running a Hardware Scan
- Open Lenovo Vantage or Lenovo PC Manager.
- Locate the hardware diagnostic or scan function.
- Start the scan.
- Follow the displayed instructions.
UEFI Diagnostics
UEFI Diagnostics can be accessed from the Novo Button menu.
- Turn off the notebook.
- Open the Novo Button menu.
- Select UEFI Diagnostics.
- Follow the displayed instructions.
Windows Recovery Instructions
The ThinkBook 15p provides access to Windows and Lenovo recovery resources.
Opening Recovery Through the Novo Button
- Turn off the notebook.
- Open the Novo Button menu.
- Select System Recovery.
- Follow the recovery instructions.
Lenovo Recovery Resources
Lenovo provides recovery instructions at:
https://support.lenovo.com/HowToCreateLenovoRecovery
Windows Recovery and Operating System Diagnostics
- Visit https://pcsupport.lenovo.com.
- Detect the computer or select the model manually.
- Select Diagnostics > Operating System Diagnostics.
- Follow the instructions.
Recovery operations can affect stored files. Important information should be backed up before performing procedures that remove or replace operating system data.
Maintenance and Care
Ventilation Maintenance
The ventilation openings must remain unobstructed.
- Inspect the notebook regularly for dust.
- Remove dust buildup from ventilation openings.
- Keep the computer away from soft materials that block airflow.
- Avoid operating the notebook inside enclosed furniture.
More frequent ventilation cleaning may be necessary in dusty environments.
Power Adapter and Cable Care
- Do not wrap power cords tightly around the adapter.
- Avoid excessive bending or pressure.
- Protect cords from liquids.
- Keep electrical connectors clean and free from visible damage.
- Do not use cables with signs of overheating or corrosion.
Handling and Transportation
- Use a carrying case with suitable cushioning.
- Avoid dropping, twisting, or striking the notebook.
- Do not place heavy objects on the display.
- Do not pack the computer tightly into a bag.
- Turn the notebook off or place it into sleep or hibernation before packing.
Storage Instructions
For long-term storage, keep rechargeable batteries at approximately 30%–50% capacity.
Lenovo recommends charging stored batteries at least once each year to prevent overdischarge.
Store the computer within the specified environmental limits and away from excessive heat, moisture, and physical damage.
Customer Replaceable Units
Customer Replaceable Units (CRUs) are components that Lenovo permits customers to install or replace according to the applicable service instructions.
CRUs for ThinkBook 15p IMH
| Component | CRU Classification |
| Power Cord | Self-Service CRU |
| AC Power Adapter | Self-Service CRU |
Self-Service CRUs
Self-service CRUs can be replaced by the customer following the provided instructions.
Optional-Service CRUs
Optional-service CRUs are components that may require greater technical experience or service assistance.
General Replacement Safety
Before replacing a permitted component:
- Turn off the computer.
- Disconnect the power cord.
- Disconnect attached devices when required.
- Allow hot internal components to cool.
- Follow the applicable replacement instructions.
- Reinstall all protective covers before operating the notebook.
Important: The built-in rechargeable battery is not intended for customer replacement. Battery replacement must be performed by a Lenovo-authorized service facility or technician.
CRU Returns
When Lenovo requires a defective CRU to be returned, the replacement package includes the return instructions and applicable shipping materials.
Failure to return the defective component within 30 days of receiving the replacement may result in a charge.
Warranty Information
The ThinkBook 15p IMH is covered under the applicable Lenovo Limited Warranty.
Warranty service depends on the product, location, and purchased coverage.
Warranty Services
Eligible warranty services may include:
- Hardware problem identification.
- Repair of covered Lenovo hardware.
- Applicable engineering changes.
Services Outside Standard Warranty Coverage
Examples include:
- Use or replacement of nonwarranted components.
- Identification of software problem sources.
- BIOS configuration during an installation or upgrade.
- Changes or upgrades to device drivers.
- Installation and maintenance of network operating systems.
- Installation and maintenance of software programs.
Lenovo Limited Warranty
https://www.lenovo.com/warranty/llw_02
Additional Warranty Services
Additional services may be available during or after the standard warranty period.
https://pcsupport.lenovo.com/warrantyupgrade
Customer Support Information
Lenovo provides product support, drivers, software, documentation, warranty details, and diagnostic resources.
Official Support Resources
| Resource | Website |
| Lenovo Support | https://support.lenovo.com |
| Lenovo PC Support | https://pcsupport.lenovo.com |
| Customer Support Phone Numbers | https://pcsupport.lenovo.com/supportphonelist |
| Lenovo Tips and Troubleshooting | https://www.lenovo.com/tips |
| Lenovo Community | https://forums.lenovo.com |
| Lenovo Recovery Instructions | https://support.lenovo.com/HowToCreateLenovoRecovery |
| Lenovo Warranty | https://www.lenovo.com/warranty/llw_02 |
| Additional Warranty Services | https://pcsupport.lenovo.com/warrantyupgrade |
| Microsoft Support | https://support.microsoft.com |
Before Contacting Lenovo
Prepare the following information:
| Information | Details |
| Product Name | ThinkBook 15p IMH |
| Machine Type | 20V3 |
| Serial Number | From the computer’s identification label |
| Problem Description | Symptoms and frequency |
| Error Details | Any displayed error messages or codes |
| Operating System | Installed version |
| Software | Applications running when the issue occurred |
| Reproduction Steps | How the problem can be repeated |
The product name and serial number are usually located on the bottom of the notebook.
Frequently Asked Questions
1. What are the specifications of the Lenovo ThinkBook 15p IMH 20V3?
The ThinkBook 15p IMH features a 15.6-inch FHD or UHD display, DDR4 memory with two slots, PCI Express M.2 SSD storage, a 57 Wh three-cell battery, 135 W power adapter, HDMI, USB-C, two USB-A ports, Ethernet, Wi-Fi, Bluetooth, and a numeric keypad.
2. How do I enter BIOS on the Lenovo ThinkBook 15p?
Turn on or restart the notebook and press F1 repeatedly when the Lenovo logo appears. When Hotkey Mode is enabled, press Fn + F1. BIOS Setup is also accessible from the Novo Button menu.
3. How do I open the Novo Button menu on the ThinkBook 15p?
Turn off the notebook, open the LCD screen, and press the Novo button in its dedicated hole on the left side. Alternatively, press Fn + Power while the computer is turned off.
4. How do I change performance mode on the ThinkBook 15p?
Press Fn + Q to cycle through the supported performance modes. Different modes affect computer performance and power consumption.
5. How long does the ThinkBook 15p battery take to charge?
The 57 Wh battery normally takes approximately two to four hours to charge fully. Charging time depends on battery condition, temperature, and computer activity.
6. Why is the USB-C port on my ThinkBook 15p not working with an external monitor?
The ThinkBook 15p IMH USB-C connector supports data transfer but not external display output. Compatible external displays should be connected through the HDMI port.
7. What should I do if the ThinkBook 15p stops responding?
Press and hold the Power button until the notebook shuts down. Then press the Power button again to restart it. If the issue continues, use Lenovo Vantage, PC Manager, or the Novo Button menu for diagnostics.
8. Where can I download Lenovo ThinkBook 15p IMH drivers and BIOS updates?
Drivers, firmware, BIOS updates, and product documentation are available at https://support.lenovo.com. Select the ThinkBook 15p IMH or machine type 20V3 to locate the appropriate support files.