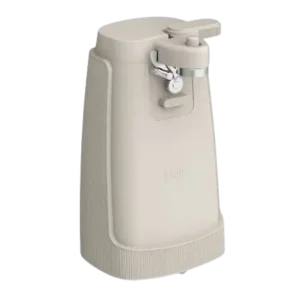
| Document Detail | Information |
| Document Title | Electric Can Opener Instruction Manual |
| Document Type | Instruction Manual |
| Brand Name | bella |
| Product Name | Electric Can Opener |
| Model Number(s) | 35195, 35207, 36208, 35209, 35210 |
| PDF File Size | 4 MB |
| Number of Pages | 16 |
| Languages | English, Spanish |
bella Electric Can Opener 35195
The bella Electric Can Opener is a countertop kitchen appliance designed to open cans automatically with minimal manual effort. It features a motorized cutting blade, a drive wheel that rotates the can during opening, a magnetic lid holder, and a removable blade bracket for cleaning.
The can opener uses a hands-free cutting mechanism. After the can is correctly positioned and the blade bracket is pressed down, the drive wheel rotates the can while the blade cuts through the lid. The appliance stops automatically when the cutting process is complete.
An integrated knife sharpener is located at the back of the appliance. The unit also includes a cord storage compartment for keeping excess power cord organized.
The can opener is intended for household use and works with compatible cans that have a suitable rim. Its instructions cover assembly, automatic can opening, supported can dimensions, knife sharpening, cleaning, maintenance, safety precautions, and warranty service.
Product Overview
The bella Electric Can Opener combines automatic can opening with a built-in knife sharpening feature.
The appliance has an upright housing with the cutting mechanism positioned near the top. A blade bracket holds the cutting blade, while the drive wheel turns the can during operation. The magnet helps hold compatible metal lids after cutting.
The removable blade bracket allows the cutting assembly to be separated from the housing for cleaning.
Main Features
- Automatic can opening: A motorized drive wheel rotates the can during cutting.
- Hands-free operation: The bracket does not need to be held down throughout the normal cutting process.
- Automatic stop: The can opener stops when the lid has been cut open.
- Magnetic lid holder: Holds compatible metal can lids.
- Removable blade bracket: Allows easier cleaning of the cutting assembly.
- Integrated knife sharpener: Located at the back of the unit.
- Cord storage: Provides space for storing excess power cord.
- Upright countertop design: Supports household can-opening tasks.
- Polarized electrical plug: Designed for compatible polarized wall outlets.
Parts and Components
The can opener has eight main components identified in the product diagram.
| Component | Function |
| Blade Bracket | Holds the cutting assembly and operates the cutting mechanism |
| Magnet | Holds compatible metal can lids |
| Blade | Cuts through the can lid |
| Drive Wheel | Rotates the can during opening |
| Front Housing | Front exterior section of the appliance |
| Knife Sharpener | Built-in sharpening slot at the back |
| Rear Housing | Rear exterior section of the appliance |
| Cord Storage | Stores excess power cord |
Blade Bracket
The blade bracket is positioned at the top front of the can opener.
It holds the cutting blade and can be raised or lowered during operation.
The bracket is removable for cleaning and must be correctly assembled before use.
Magnet
The magnet is positioned near the cutting blade.
It helps hold compatible metal lids after they have been cut from the can.
Note: Aluminum can lids do not attach to the magnet.
Cutting Blade
The cutting blade is part of the removable blade bracket assembly.
When the blade bracket is lowered with a can correctly positioned, the blade engages the can lid.
Caution: The cutting blade is sharp. Handle the bracket carefully during assembly, cleaning, and removal.
Drive Wheel
The drive wheel is positioned beneath the cutting blade.
It grips and rotates the can during the cutting process.
Front and Rear Housing
The housing supports the cutting mechanism and contains the main appliance assembly.
The front houses the can-opening components, while the rear contains the knife sharpener and cord storage area.
Knife Sharpener
The knife sharpener is located in a slot at the back of the can opener.
It is used by carefully moving a suitable knife blade through the sharpening slot.
The appliance must be unplugged before sharpening a knife.
Cord Storage
The cord storage compartment is located at the rear of the appliance.
Excess power cord can be placed inside the compartment and routed through the provided notch.
Technical Specifications
| Specification | Details |
| Brand | bella |
| Product Name | Electric Can Opener |
| Model Numbers | 35195, 35207, 36208, 35209, 35210 |
| Product Type | Electric Countertop Can Opener |
| Can Opening Mechanism | Motorized Drive Wheel and Cutting Blade |
| Operation | Automatic, Hands-Free |
| Automatic Stop | Supported |
| Magnetic Lid Holder | Included |
| Blade Bracket | Removable |
| Knife Sharpener | Built-In |
| Cord Storage | Built-In |
| Supported Can Diameter | 50–100 mm |
| Can Height Limit in English Instructions | 140 mm |
| Maximum Permitted Can Weight | Less Than 21 oz |
| Maximum Continuous Operating Time | 3 Minutes |
| Electrical Plug | Polarized |
| Intended Use | Household |
| Dishwasher-Safe | No |
| Mechanical Warranty | 2 Years |
| Non-Mechanical Parts Warranty | 90 Days |
Can size note: The English instructions state a maximum can height of 140 mm, while the Spanish instructions state 160 mm. Staying within the lower 140 mm limit follows the more restrictive instruction. The operating text also discusses supporting heavier cans, but its explicit warning restricts use to cans weighing less than 21 oz.
Important Safety Instructions
The bella Electric Can Opener contains a sharp cutting blade and electrically powered moving parts. Follow the safety precautions to reduce the risk of electric shock, injury, fire, or appliance damage.
Electrical Safety
- Read all instructions before using the can opener.
- Never immerse the can opener body, electrical cord, or plug in water or another liquid.
- Unplug the appliance when it is not in use.
- Disconnect the power cord before assembling or removing parts.
- Always unplug the can opener before cleaning.
- Grasp the plug when disconnecting the appliance. Never pull the power cord.
- Do not operate the can opener with a damaged cord or plug.
- Stop using the appliance if it malfunctions, has been dropped, or becomes damaged.
- Do not use accessories or attachments that are not recommended or sold by the manufacturer.
- Keep the power cord away from hot surfaces, including the stove.
- Do not allow the cord to hang over the edge of a table or countertop.
Warning: Do not immerse the appliance’s electrical housing in water. Contact with water can create an electric shock hazard.
Cutting Blade Safety
- Avoid contact with moving parts.
- Handle the blade bracket carefully.
- Keep fingers away from the cutting blade.
- Avoid touching the cut edges of opened cans or lids.
- Unplug the appliance before removing the cutting assembly.
- Handle sharpened knives carefully.
Caution: Both the cutting blade and the edges of opened cans can cause cuts.
Can Opening Restrictions
Do not use the appliance to open:
- Pressurized cans, including aerosol-type containers.
- Cans containing flammable liquids, such as lighter fluid.
- Rimless cans.
- Cans with angled corners.
- Cans intended to be opened using pull tabs, peel-off foil seals, or rolling keys.
The appliance is intended for compatible household cans within the specified size and weight limits.
Child Safety
The appliance must be kept away from children who cannot use it safely.
Children should be supervised to prevent them from playing with the can opener.
People with reduced physical, sensory, or mental capabilities or limited experience must receive close supervision and appropriate instructions from a person responsible for their safety.
Placement and Usage Safety
- Use the appliance indoors.
- Do not use it for commercial purposes.
- Keep it away from hot appliances and surfaces.
- Avoid contact with the moving cutting mechanism.
- Do not use it for purposes other than those described in the instructions.
- Limit continuous can-opening operation to three minutes.
Polarized Plug and Power Cord Instructions
Polarized Plug
The can opener has a polarized plug with one blade wider than the other.
This plug is designed to fit a polarized electrical outlet in only one direction.
If it does not fit completely:
- Remove the plug from the outlet.
- Reverse its orientation.
- Try inserting it again.
- If the plug still does not fit, contact a qualified electrician.
Do not modify the electrical plug.
Power Cord Requirements
The appliance includes a short power cord to reduce the risk of entanglement and tripping.
The manufacturer recommends plugging the appliance directly into a wall outlet.
Extension Cord Precautions
If a longer detachable power cord or extension cord is used:
- Its marked electrical rating must be at least equal to the rating of the appliance.
- Position the cord so it does not hang over a countertop or table.
- Keep it away from areas where children may pull it.
- Arrange it to prevent accidental tripping.
- If the appliance is of a grounded type, use a grounding-type three-wire extension cord.
Before First Use
Prepare the can opener and clean the removable cutting assembly before using it for the first time.
Initial Preparation
- Carefully remove the can opener from its packaging.
- Remove all packaging materials.
- Check that the components are present and in good condition.
- Handle the blade bracket carefully because the cutting blade is sharp.
- Wash the blade bracket in warm, soapy water.
- Rinse the bracket thoroughly.
- Dry the bracket completely.
- Wipe the motor housing with a damp cloth if necessary.
- Install the blade bracket before operating the appliance.
Important: The motor housing must not be immersed in water.
How to Assemble the bella Electric Can Opener
The blade bracket must be correctly installed before opening cans.
Step 1: Locate the Blade Bracket
Identify the removable blade bracket and the mounting area on the front of the appliance.
The bracket contains the cutting blade and connects to the can opener through matching tabs and slots.
Step 2: Align the Bracket
- Hold the blade bracket near the front mounting area.
- Locate the key tabs on the bracket assembly.
- Align the tabs with the corresponding key slots.
Step 3: Attach the Blade Bracket
Push the blade bracket into the mounting area.
Make sure the tabs enter their matching slots.
Step 4: Secure the Bracket
Press the blade bracket downward to confirm that it has been assembled correctly.
The cutting assembly is now positioned for use.
Caution: Keep fingers away from the sharp cutting blade throughout assembly.
How to Use the bella Electric Can Opener
The can opener uses a motorized cutting mechanism to rotate and open compatible cans.
Step 1: Raise the Blade Bracket
Lift the blade bracket to provide space for positioning the can.
Step 2: Connect Power
Plug the appliance into a suitable electrical outlet.
Step 3: Position the Can
- Hold the can in front of the cutting mechanism.
- Tilt the can slightly forward.
- Position the can rim beneath the locating post.
- Place the rim against the drive wheel.
Correct positioning allows the blade to engage the can lid.
Step 4: Lower the Blade Bracket
Press the blade bracket downward.
Make sure the cutting blade is positioned inside the can rim.
Step 5: Allow Automatic Cutting
Once engaged:
- The drive wheel begins rotating the can.
- The cutting blade cuts through the lid.
- The can rotates as the cutting action continues.
During normal operation, the hands-free mechanism holds the cutting assembly in position.
There is no need to continue pressing down on the blade bracket or supporting the can while it is being opened.
Step 6: Wait for Automatic Stop
The can opener stops automatically when the cutting process is complete.
Step 7: Remove the Can
- Hold the opened can with one hand.
- Lift the blade bracket with the other hand.
- Carefully remove the can from the opener.
Step 8: Remove the Cut Lid
Carefully remove the cut lid from the magnet and discard it.
Warning: Avoid contact with the sharp cut edges of the can and lid.
Supported Can Sizes and Operating Limits
The can opener is designed for compatible cans within a specified size and weight range.
| Requirement | Limit |
| Can Diameter | 50–100 mm |
| Maximum Can Height | 140 mm (English Instructions) |
| Can Weight | Less Than 21 oz |
| Continuous Operating Time | Maximum 3 Minutes |
Can Diameter
The instructions specify a supported diameter range of 50 mm to 100 mm.
Can Height
The English operating instructions specify cans no taller than 140 mm. The Spanish section lists 160 mm. Using cans no taller than 140 mm follows the lower stated limit.
Can Weight
The explicit weight warning limits operation to cans weighing less than 21 ounces.
Continuous Operation
Do not operate the can opener continuously for more than three minutes.
Hands-Free Can Opening
The appliance is designed to open compatible cans without requiring the user to hold the cutting bracket throughout the process.
Once the can is positioned and the bracket is pressed down:
- The cutting blade engages the lid.
- The drive wheel rotates the can.
- The cutting mechanism continues automatically.
- The appliance stops after opening is complete.
This function applies to cans that meet the specified compatibility and operating requirements.
Can Opening Tips
The instructions provide additional guidance for cans with different rim designs and shapes.
Cans with Pull Tabs or Special Opening Systems
Do not use the electric can opener on cans intended to be opened using:
- Pull tabs.
- Peel-off foil seals.
- Rolling keys.
These cans are designed for another opening method.
Rimless Cans
The opener cannot cut rimless cans.
The cutting mechanism requires a suitable rim for engagement.
Cans with Angled Corners
Do not use the can opener on cans with angled corners.
Cans with Dented Rims
If the can rim is dented:
- Open the can from the opposite end, if suitable.
- Alternatively, begin cutting at a section of the rim beyond the dent.
The cutting mechanism works best when the rim is properly engaged with the drive wheel.
Cans with Heavy Seams or Uneven Rims
Cans with heavy seams, uneven rims, or unusual shapes may cause the opener to stall.
The operating instructions recommend turning the can slightly by hand to help the cutting process.
Keep fingers away from the cutting blade and other moving parts.
Cans with Aluminum Lids
Aluminum lids do not attach to the magnetic lid holder.
When opening cans with aluminum lids, the magnet will not retain the lid.
Handle the cut lid carefully because its edges may be sharp.
How to Use the Built-In Knife Sharpener
The bella Electric Can Opener includes a knife sharpening slot at the rear of the appliance.
The knife sharpener is operated with the appliance disconnected from electrical power.
Step 1: Unplug the Appliance
Remove the power plug from the electrical outlet before sharpening a knife.
Step 2: Prepare the Knife
Clean and dry the knife before sharpening.
Step 3: Locate the Sharpening Slot
Find the knife sharpener at the back of the appliance.
Step 4: Position the Knife
Carefully place the knife blade inside the sharpening slot.
Step 5: Sharpen the Blade
- Move the knife carefully through the slot.
- Draw it back and forth along the sharpening area.
- Work along the full length of the knife blade.
- Continue until the desired sharpness is achieved.
Step 6: Clean the Knife
After sharpening:
- Remove the knife from the sharpening slot.
- Wash the knife.
- Dry the blade thoroughly.
Caution: Handle the knife carefully after sharpening because its edge may be very sharp.
Knife Sharpening Safety and Tips
The instructions specify several precautions when using the built-in sharpener.
Clean and Dry Knives Before Sharpening
Knives should be clean and dry before being placed in the sharpening slot.
Do Not Sharpen Serrated Blades
The knife sharpener must not be used on serrated blades.
Sharpening serrated knives with this attachment can smooth or damage their serrated edges.
Do Not Sharpen Scissors
The knife sharpening slot is not designed for sharpening scissors.
Protect the Power Cord
Position the power cord carefully before sharpening.
Keep the cord away from knife blades to prevent damage.
How to Remove the Blade Bracket
The removable blade bracket allows the cutting assembly to be cleaned separately from the can opener housing.
Blade Bracket Removal
- Unplug the can opener.
- Raise the blade bracket.
- Carefully pull the bracket outward from the appliance.
- Remove the assembly from its mounting position.
Warning: Handle the bracket carefully because the cutting blade is sharp.
Cleaning Instructions
The can opener should be cleaned when needed to remove food residue and buildup from the blade bracket, drive wheel, and housing.
Before Cleaning
- Disconnect the power cord from the electrical outlet.
- Remove the blade bracket if necessary.
- Prepare a damp cloth or sponge for cleaning.
Cleaning the Blade Bracket
- Lift the blade bracket.
- Pull it out from the mounting position.
- Wipe the blade assembly with a damp cloth.
- Clean the assembly using a sponge.
- Dry it thoroughly.
Cleaning the Drive Wheel Area
- Remove the blade bracket.
- Wipe the area around the drive wheel with a slightly damp cloth or sponge.
- Remove food residue and other buildup.
- Dry the cleaned surfaces thoroughly.
Removing Stubborn Stains
If stubborn spots remain on the housing or surrounding areas:
- Use a nylon cloth or mesh pad with soapy water.
- Gently wipe the affected surface.
- Follow with a clean, damp cloth.
- Dry thoroughly.
Do not use abrasive cleaners because they may damage the appliance’s finish.
Cleaning the Housing
Wipe the front and rear housing using a slightly damp cloth or sponge.
Warning: Never immerse the main can opener housing in water or another liquid.
Dishwasher Safety
The bella Electric Can Opener is not dishwasher-safe.
Clean the appliance and removable cutting assembly using the methods described above.
How to Reinstall the Blade Bracket After Cleaning
After the blade bracket has been cleaned and completely dried:
- Locate the bracket mounting area.
- Align the key tabs with the matching slots.
- Push the blade bracket into position.
- Press the bracket downward.
- Check that the assembly is secured correctly.
Do not operate the can opener until the blade bracket is properly installed.
Maintenance Instructions
The can opener requires regular attention to the cutting assembly and surrounding areas.
Maintenance Guide
| Maintenance Task | Instructions |
| Clean Blade Bracket | Remove, wipe, and dry thoroughly |
| Clean Drive Wheel Area | Remove food residue using a slightly damp cloth |
| Clean Housing | Wipe with a damp cloth or sponge |
| Remove Stubborn Spots | Use a nylon cloth or mesh pad with soapy water |
| Inspect Cutting Blade | Handle carefully and avoid contact with sharp edges |
| Check Bracket Installation | Make sure key tabs are aligned and bracket is secured |
| Protect Power Cord | Keep away from hot surfaces and sharp knife blades |
| Store Excess Cord | Use rear cord storage compartment |
Protecting the Cutting Mechanism
Keep the blade bracket and drive wheel area free from food residue that may accumulate during use.
Clean the removable cutting assembly carefully.
Electrical Maintenance
Do not immerse the appliance or expose the electrical housing to water.
If the appliance becomes damaged or develops a malfunction, stop using it and contact Customer Service for information about inspection or repair.
Power Cord Storage
The can opener has a built-in compartment for storing excess electrical cord.
How to Store the Cord
- Unplug the appliance.
- Locate the cord storage area at the back.
- Place excess cord inside the compartment.
- Route the cord through the provided notch.
This allows excess cord to be organized while the can opener is stored.
Troubleshooting Guide
The following table covers operating conditions and solutions described in the instruction manual.
| Problem | Possible Cause | Recommended Action |
| Can Opener Stalls | Can Has Heavy Seams, Uneven Rim, or Unusual Shape | Turn the Can Slightly by Hand to Help Cutting, Keeping Clear of Moving Parts |
| Can Will Not Open | Can Is Rimless | Use Another Appropriate Opening Method |
| Can Will Not Open | Can Has Angled Corners | Do Not Use This Can Opener |
| Cutting Is Difficult | Can Rim Is Dented | Try the Opposite End or Start Beyond the Dent |
| Lid Does Not Attach to Magnet | Lid Is Aluminum | Remove the Lid Carefully |
| Cutting Bracket Is Not Secure | Bracket Is Incorrectly Assembled | Align the Key Tabs and Slots, Then Press the Bracket Down |
| Can Opener Is Damaged or Malfunctions | Appliance Fault | Stop Using the Appliance and Contact Customer Service |
Can Opener Stalls While Cutting
Cans with heavy seams, uneven rims, or unusual shapes can interfere with the cutting mechanism.
The instructions recommend turning the can slightly by hand to assist cutting.
Keep hands away from moving parts and the sharp blade.
Can Opener Will Not Open a Rimless Can
The cutting mechanism is not designed for rimless cans.
Use another opening method suitable for that can.
Can Has a Dented Rim
If a dent prevents normal cutting, try opening the opposite end of the can or begin cutting beyond the damaged section.
Lid Does Not Stay on the Magnet
Aluminum lids do not attach to the magnet.
Carefully remove the cut lid and avoid touching its sharp edges.
Blade Bracket Will Not Fit Correctly
Check the alignment of the mounting tabs and slots.
Push the bracket into place and press it down to secure it.
Can Opener Malfunctions
If the appliance malfunctions, has been dropped, or is damaged:
- Stop using it.
- Unplug it from the electrical outlet.
- Contact Customer Service for inspection or repair information.
Do not continue operating a damaged appliance.
Warranty Information
The bella Electric Can Opener includes a limited warranty from SENSIO Inc.
The warranty covers qualifying mechanical defects in materials and workmanship for two years from the original purchase date.
Non-mechanical parts are covered for 90 days.
Warranty Coverage
| Warranty Detail | Information |
| Warranty Provider | SENSIO Inc. |
| Mechanical Warranty | 2 Years |
| Non-Mechanical Parts Warranty | 90 Days |
| Warranty Start | Original Retail Purchase Date |
| Eligible Purchaser | Original Retail Purchaser |
| Transferability | Non-Transferable |
| Proof of Purchase | Original Sales Receipt |
| Available Remedy | Repair, Replacement, or Refund at Provider’s Discretion |
| Customer Service | 1-866-832-4843 |
What the Warranty Covers
During the applicable warranty period, SENSIO Inc. may repair or replace a product found to have a qualifying defect or issue a refund.
The remedy is determined by SENSIO Inc.
Warranty Exclusions
The warranty does not cover normal wear or damage caused by:
- Negligent use.
- Incorrect voltage or electrical current.
- Improper routine maintenance.
- Use contrary to the operating instructions.
- Unauthorized disassembly.
- Repairs or modifications performed by unauthorized personnel.
- Natural disasters such as fires, floods, hurricanes, or tornadoes.
The warranty also contains limitations on incidental and consequential damages. Applicable consumer rights and restrictions may vary by jurisdiction.
How to Request Warranty Service
- Contact Customer Service at 1-866-832-4843.
- Explain the problem to the service representative.
- Follow the telephone troubleshooting instructions.
- If the issue cannot be resolved, obtain a case number.
- Follow the instructions for returning the product.
Returning the Product for Warranty Service
If a return is required, attach a tag containing:
- Customer name.
- Customer address.
- Daytime telephone number.
- Case number.
- Description of the problem.
Include a copy of the original sales receipt.
Carefully package the product and send it to the address provided by SENSIO Inc., with shipping and insurance prepaid.
SENSIO Inc. does not accept responsibility for the returned product while it is in transit to its Customer Service Center.
Customer Support Information
Customer support for the bella Electric Can Opener is provided by SENSIO Inc., doing business as Made by Gather.
| Contact Detail | Information |
| Brand | bella |
| Company | SENSIO Inc. dba Made by Gather |
| Customer Service Phone | 1-866-832-4843 |
| Customer Service Email | help@bellahousewares.com |
| Brand Website | https://bellakitchenware.com |
| Company Location | New York, NY 10016, USA |
Product Registration
Product registration is available through https://bellakitchenware.com.
When to Contact Customer Service
Contact Customer Service if the can opener has a damaged cord or plug, has been dropped, develops a malfunction, requires professional repair, or needs warranty assistance.
Frequently Asked Questions
How do I use the bella Electric Can Opener?
Raise the blade bracket and plug the appliance into an electrical outlet. Tilt the can forward so its rim is beneath the locating post and against the drive wheel. Press the blade bracket down until the blade engages the rim. The opener rotates the can and cuts the lid automatically. Once cutting finishes, the appliance stops. Hold the can, raise the bracket, and carefully remove the lid.
How do I assemble the bella Electric Can Opener?
Align the key tabs on the blade bracket with the corresponding key slots on the can opener. Push the bracket into position, then press it downward to secure it. Handle the assembly carefully because the cutting blade is sharp.
Does the bella Electric Can Opener stop automatically?
Yes. The can opener uses a hands-free cutting mechanism and stops automatically when the can has been opened. The blade bracket does not need to be held down during normal cutting.
What size cans can the bella Electric Can Opener open?
The English instructions specify can diameters from 50 mm to 100 mm and a maximum height of 140 mm. The explicit weight warning limits use to cans weighing less than 21 ounces. Continuous can-opening operation must not exceed three minutes.
Why is my bella Electric Can Opener not opening a can?
The can may have a dented rim, a heavy seam, an uneven edge, or an incompatible shape. Rimless cans and cans with angled corners cannot be opened using this appliance. For dented rims, the instructions recommend trying the opposite end or starting the cut beyond the dent.
How do I use the knife sharpener on the bella Electric Can Opener?
Unplug the appliance first. Place a clean, dry knife blade inside the sharpening slot at the back of the unit. Carefully move the blade back and forth through the slot along its length until the desired sharpness is reached. Wash and dry the knife afterward. Do not use the sharpener for serrated knives or scissors.
How do I clean the bella Electric Can Opener?
Unplug the appliance and lift the blade bracket to remove it. Clean the blade assembly with a damp cloth and sponge, then dry thoroughly. Wipe the area around the drive wheel and the housing with a slightly damp cloth. Reinstall the bracket once it is dry. The appliance is not dishwasher-safe and must never be immersed in water.
What is the warranty on the bella Electric Can Opener?
The can opener has a two-year limited warranty covering qualifying mechanical defects and 90-day coverage for non-mechanical parts. The warranty applies to the original retail purchaser from the purchase date and requires proof of purchase. For warranty assistance, contact 1-866-832-4843 or help@bellahousewares.com.