| Field | Details |
| Document Title | Bella Rocket Blender 6-Piece Instruction Manual |
| Document Type | Instruction Manual |
| Brand Name | BELLA |
| Product Name | Rocket Blender 6-Piece |
| Model Number(s) | 35125, 35180, 35181, 35182, 35219 |
| PDF File Size | 3 MB |
| Number of Pages | 18 |
| Languages | English, Spanish |
BELLA Rocket Blender 35125
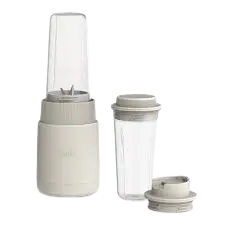
The BELLA Rocket Blender 6-Piece is a compact personal blender designed for processing ingredients in individual blending cups. It includes two 13.5-ounce cups, a removable blade collar, a motor base, a storage lid, and a To-Go lid for carrying prepared drinks.
The blender uses a twist-to-operate mechanism instead of a separate power button. A filled cup with the blade collar attached is inverted and placed on the motor base. Turning the cup clockwise to the ON position activates blending, while turning it counterclockwise to OFF stops the motor.
The blender is intended for household food preparation. Ingredients should be cut into pieces no larger than approximately 1 inch for best results. The motor must not run continuously for more than one minute and must rest for three minutes before further use.
Important: The Rocket Blender is not an ice crusher. When processing ice or solidly frozen food, at least one cup of liquid must be added first. Hot liquids must never be blended because excessive pressure inside the container can cause thermal burns.
Product Overview and Technical Specifications
The BELLA Rocket Blender is a six-piece personal blending system for preparing drinks and processing suitable food ingredients. Its compact motor base works with either of the two included processing cups.
The cups can be used for blending and then fitted with the To-Go lid or storage lid. The storage lid allows prepared drinks to be kept in the refrigerator.
| Specification | Details |
| Brand | BELLA |
| Product Name | Rocket Blender 6-Piece |
| Product Type | Personal blender |
| Electrical Supply | 120 V AC |
| Power Plug | Polarized plug |
| Processing Cup Capacity | 13.5 oz. each |
| Number of Processing Cups | 2 |
| Blade Assembly | Removable blade collar with processing blades |
| Operating Mechanism | Twist-to-operate ON/OFF |
| Maximum Continuous Operation | 1 minute |
| Required Motor Rest | 3 minutes between processing periods |
| Recommended Solid Food Size | Approximately 1 inch or smaller |
| Minimum Liquid for Ice or Frozen Food | 1 cup, added before frozen ingredients |
| Maximum Fill Limit | Marked MAX line |
| Cleaning | Processing blade, cups, and lids are top-rack dishwasher-safe |
| Cord Storage | Integrated into the motor base |
| Intended Use | Household use only |
| Country of Manufacture | China |
Main Features
The Rocket Blender includes the following features:
- Two 13.5-ounce blending cups: Allow ingredients to be processed in individual servings.
- Twist-to-operate control: Starts and stops blending by rotating the assembled cup between ON and OFF positions.
- Removable blade collar: Attaches directly to either processing cup.
- Plastic gasket seal: Helps create an airtight connection between the blade collar and cup.
- To-Go lid: Allows prepared drinks to be carried in the blending cup.
- Storage lid: Covers drinks for refrigerator storage.
- Top-rack dishwasher-safe components: The processing blade, cups, and lids can be washed in the upper dishwasher rack.
- Compact accessory storage: The cups and lids can be stacked, and the electrical cord wraps around the base.
What’s Included in the Box
The BELLA Rocket Blender comes with six components.
| Item | Quantity | Description |
| Blade Collar | 1 | Holds the processing blades and attaches to the blending cup. |
| Tall Processing Cup | 2 | Each cup holds 13.5 ounces and is used for blending ingredients. |
| Motor Housing | 1 | Contains the motor and the ON/OFF connection mechanism. |
| Storage Lid | 1 | Covers a processing cup for storing prepared drinks. |
| To-Go Lid | 1 | Fits onto a processing cup for carrying drinks. |
All components should be inspected after unpacking to confirm that they are present and in good condition.
Parts and Components
The blender consists of a motor housing, processing cups, blade collar, and interchangeable lids.
Motor Housing
The motor housing contains the electrical motor and supports the cup-and-blade assembly during operation.
The top of the housing includes ON and OFF alignment markings.
The motor starts when the assembled cup is turned clockwise until the blade collar’s arrow aligns with ON.
The motor stops when the assembly is rotated counterclockwise to OFF.
Warning: The motor housing must never be immersed in water or another liquid.
Processing Cups
Two tall processing cups are included, each with a capacity of 13.5 ounces.
The cups are used to hold ingredients during blending and can also be fitted with the To-Go or storage lid after processing.
Each cup has a marked maximum fill line.
Do not add ingredients beyond the MAX marking.
Important: Never operate the blender with an empty processing cup or use a cup that is cracked or chipped.
Blade Collar and Processing Blades
The blade collar contains the blades used to process ingredients.
It is installed directly onto the processing cup before the cup is placed on the motor housing.
The blades are extremely sharp and must be handled only by the blade collar.
Never attach the blade collar to the motor base without a processing cup properly installed.
Gasket Seal
A plastic gasket seal is fitted inside the base of the blade collar.
The gasket creates an airtight connection between the cup and blade assembly.
Before each use, check that the gasket is properly seated.
The heat generated by some dishwashers may loosen the gasket, so its position must also be checked after dishwasher cleaning.
To-Go Lid
The To-Go lid attaches to a processing cup after the blade collar has been removed.
It allows a prepared drink to be carried in the same cup used for blending.
Storage Lid
The storage lid covers a processing cup containing a prepared drink.
It is intended for keeping drinks in the refrigerator until they are needed.
ON/OFF Controls and Alignment Markings
The BELLA Rocket Blender uses a mechanical twist-to-operate control system.
It does not require separate control buttons for starting and stopping normal blending.
The blade collar and motor housing include alignment arrows marked with ON and OFF positions.
| Control or Marking | Function |
| Arrow on Blade Collar (▼) | Aligns with ON or OFF markings on the motor housing. |
| OFF | Allows the cup assembly to be inserted or removed with the motor stopped. |
| ON | Activates the motor when the assembled cup is rotated into position. |
| Clockwise Rotation | Turns the cup assembly from OFF toward ON to begin blending. |
| Counterclockwise Rotation | Returns the cup assembly to OFF to stop blending. |
How to Turn the Blender On
- Assemble the processing cup and blade collar securely.
- Invert the assembled cup.
- Insert the blade collar into the motor housing with its arrow aligned with OFF.
- Rotate the processing cup clockwise.
- Continue until the blade collar arrow aligns with ON.
The motor begins processing when the cup reaches the ON position.
How to Turn the Blender Off
- Hold the assembled processing cup.
- Rotate it counterclockwise.
- Align the blade collar arrow with OFF.
- Confirm that the motor has stopped.
- Lift the cup-and-blade assembly from the motor base.
The blender must also be unplugged when it is no longer in use.
Important Safety Instructions
The BELLA Rocket Blender contains sharp processing blades and moving mechanical components. Incorrect handling can cause cuts, electrical shock, burns, or damage to the appliance.
Electrical Safety
- Connect the blender only to a 120 V AC electrical outlet.
- Never immerse the motor housing, power cord, or plug in water or another liquid.
- Always turn the blender off before unplugging it.
- Disconnect the appliance before assembling or removing parts.
- Unplug the blender before cleaning.
- Disconnect it whenever it is not in use.
- Never pull the electrical cord to disconnect the appliance. Hold the plug instead.
- Do not operate the blender if the cord or plug is damaged.
- Do not use the appliance after a malfunction, fall, or other damage.
- Keep the electrical cord away from hot surfaces, including stovetops.
- Do not allow the cord to hang over the edge of a table or countertop.
- Do not use the blender outdoors.
If the blender falls into water, immediately disconnect it from electricity without reaching into the water.
Do not operate the appliance after it has been immersed.
Sharp Blade Safety
Warning: The processing blades are extremely sharp and can cause serious injury.
- Handle the blade assembly only by its collar.
- Never touch the cutting edges with fingers.
- Keep hands and utensils out of the processing cup during blending.
- Do not attempt to defeat the blender’s safety interlock mechanisms.
- Always assemble the cup and blade collar before placing them on the motor housing.
- Never install the blade collar directly onto the motor base without an attached cup.
- Do not remove the cup or blade assembly while the motor is running.
- A scraper may be used only when the blender is not operating.
Hot Liquid Warning
Do not blend hot liquids.
Hot liquids can create excessive pressure inside the processing cup, resulting in a risk of thermal burns.
The blender is intended for processing ingredients that do not create this pressure hazard.
Ice and Frozen Food Safety
Important: The BELLA Rocket Blender is not an ice crusher.
When processing ice or solidly frozen ingredients:
- Add at least 1 cup of liquid to the processing cup first.
- Add the frozen ingredients afterward.
- Keep the total contents below the MAX fill line.
- Assemble the cup and blade collar securely before blending.
Failure to add sufficient liquid can cause the processing cup to crack or chip.
The blender must not be used to crush ice without the required liquid.
Maximum Blending Time
The motor must not run continuously for more than 1 minute.
After a processing period, allow the motor to rest for 3 minutes before continuing.
| Operating Limit | Requirement |
| Maximum Continuous Blending | 1 minute |
| Motor Rest Between Blending Periods | 3 minutes |
Do not exceed these operating limits.
Cup and Accessory Safety
- Never operate the blender with an empty cup.
- Do not overfill the cup beyond the MAX line.
- Do not use a cracked or chipped cup.
- Check the gasket seal before every use.
- Use only accessories recommended or sold by the manufacturer.
- Do not place the cups, motor base, or accessories in a microwave oven.
- Make sure the blade collar is securely tightened before operation.
Safe Placement
Place the motor base on a flat, clean, dry, and stable countertop or table.
Do not operate the blender in an unstable position.
The manual also recommends placing nonplastic coasters or place mats between the appliance and finished countertops or furniture surfaces to prevent possible staining or damage from plasticizers.
Child Safety
Children must be supervised to prevent them from playing with the blender.
The appliance is not intended for individuals with reduced physical, sensory, or mental capabilities or insufficient experience unless they receive appropriate supervision and instruction.
Close supervision is necessary when the blender is used by or near children.
Polarized Plug Instructions
The blender includes a polarized plug with one blade wider than the other.
This plug fits into a polarized outlet in only one direction.
If the plug does not fit:
- Remove the plug from the outlet.
- Reverse its orientation.
- Try inserting it again.
- If it still does not fit, contact a qualified electrician.
Never modify the polarized plug.
Extension Cord Safety
The blender includes a short power cord to reduce the possibility of entanglement or tripping.
If a longer detachable cord or extension cord is used:
- Its electrical rating must be at least equal to the rating of the blender.
- If the appliance is grounded, the extension cord must be a grounding-type three-wire cord.
- The cord must be arranged so that it cannot be pulled by children or become a tripping hazard.
An overloaded electrical circuit may affect the blender’s operation.
The blender should be operated on a separate electrical circuit from other appliances.
Emergency Shutdown
If the blender begins malfunctioning during operation:
- Immediately turn the cup assembly to OFF.
- Remove the cup-and-blade assembly from the motor housing.
- Unplug the power cord.
- Discontinue use.
- Have the appliance examined by a qualified technician.
Do not attempt to repair a malfunctioning blender.
Before First Use
The blender and its accessories must be unpacked, inspected, and cleaned before preparing food.
First-Time Preparation
- Carefully remove the blender and accessories from their packaging.
- Remove all packaging materials.
- Check that all six components are included.
- Inspect the processing cups and blade assembly for damage.
- Handle the blade attachment only by its collar.
- Wash the To-Go and storage lids with warm, soapy water.
- Rinse and dry the lids thoroughly.
- Clean both processing cups using the water-cleaning procedure.
- Wipe the motor base with a damp cloth.
- Dry the motor base thoroughly.
Warning: Never immerse the motor base in water.
Cleaning the Cups Before First Use
The manual recommends using a short water-only blending cycle to clean each cup.
- Fill a processing cup approximately one-quarter full with clean, warm water.
- Attach the blade collar securely.
- Install the cup on the motor base using the normal operating procedure.
- Briefly operate the blender.
- Turn the cup to OFF.
- Remove the cup assembly.
- Unscrew the blade collar carefully.
- Rinse the cup thoroughly.
Repeat for the second processing cup.
Initial Motor Odor
A slight odor may occur during the first use.
The manual describes this as normal and indicates that it should disappear with use.
Assembly and Setup Instructions
The processing cup and blade collar must be completely assembled before the blender is placed on the motor base.
The gasket seal must be seated correctly to create an airtight fit.
How to Assemble the Blender Cup
- Make sure the blender is unplugged.
- Place the motor base on a flat, clean, dry surface.
- Select one of the two 13.5-ounce processing cups.
- Add the ingredients to the cup without exceeding the MAX fill line.
- Check that the plastic gasket is properly installed inside the blade collar.
- Hold the blade assembly by its collar, keeping fingers away from the blades.
- Place the blade collar onto the processing cup.
- Hold the cup firmly with one hand.
- Turn the blade collar clockwise with the other hand until it is snug.
Important: Never place the blade collar directly onto the motor base without the processing cup attached.
How to Install the Cup on the Motor Base
- Connect the blender to a 120 V AC electrical outlet.
- Invert the assembled cup so the blade collar faces downward.
- Position the cup above the motor base.
- Align the arrow on the blade collar with the OFF arrow on the motor housing.
- Insert the blade collar into the motor housing.
- Rotate the cup clockwise to ON when ready to blend.
Do not operate the blender unless the cup and blade collar are properly assembled.
Operating Instructions
The blender operates by rotating the cup assembly into its ON position.
How to Blend Ingredients
- Place the motor base on a flat, clean, dry countertop.
- Make sure the power cord is disconnected while preparing the cup.
- Select a processing cup.
- Cut suitable solid ingredients into pieces approximately 1 inch or smaller.
- Add the ingredients without exceeding the MAX fill line.
- When processing ice or solidly frozen ingredients, add at least one cup of liquid first.
- Check the gasket inside the blade collar.
- Attach the blade collar and tighten it clockwise.
- Connect the blender to a 120 V AC outlet.
- Invert the cup-and-blade assembly.
- Insert it into the motor base with the arrows aligned at OFF.
- Rotate the cup clockwise until the arrows align at ON.
- Process the ingredients for the required time, without exceeding one minute continuously.
- Rotate the cup counterclockwise to OFF.
- Allow the motor to rest for three minutes before another processing period when needed.
- Remove the assembled cup.
- Turn it upright and unscrew the blade collar.
- Attach the appropriate lid or serve the prepared drink.
- Unplug the blender when finished.
How to Stop Blending
Turn the processing cup counterclockwise until the blade collar arrow aligns with OFF.
Once the motor has stopped, the cup-and-blade assembly can be lifted from the motor housing.
How to Remove the Blade Collar
- Stop the blender.
- Align the blade collar with OFF.
- Lift the cup-and-blade assembly from the motor base.
- Turn the assembly upright.
- Hold the processing cup securely.
- Rotate the blade collar counterclockwise.
- Carefully remove it from the cup.
Keep fingers away from the sharp processing blades.
Food Processing Tips and Operating Limits
Proper ingredient preparation helps the blender process food within its designed operating limits.
Recommended Food Size
For best results, solid food pieces should not be larger than approximately 1 inch.
Cut or tear ingredients into similar-sized pieces before adding them to the processing cup.
Processing Frozen Ingredients
The Rocket Blender must not be used as a standalone ice crusher.
When adding ice or frozen-solid foods:
- Add at least one cup of liquid before the frozen ingredients.
- Add the remaining ingredients.
- Keep the contents below the MAX line.
- Assemble the cup securely.
- Blend within the motor’s maximum operating time.
Insufficient liquid may cause the cup to crack or chip.
Processing Time and Motor Rest
The motor must not operate continuously for more than one minute.
Allow three minutes of rest before continuing with another processing period.
Filling the Cup Correctly
Both processing cups have a capacity of 13.5 ounces and a marked MAX line.
Do not exceed the MAX line during ingredient preparation.
Never operate the blender with an empty cup.
Using the To-Go and Storage Lids
The two included lids provide different options for handling prepared drinks.
How to Use the To-Go Lid
- Finish blending.
- Rotate the cup to OFF and remove it from the motor base.
- Turn the cup upright.
- Carefully unscrew and remove the blade collar.
- Attach the To-Go lid to the cup.
The prepared drink can then be carried in the same cup.
How to Use the Storage Lid
- Complete the blending process.
- Remove the cup-and-blade assembly from the motor housing.
- Turn the cup upright.
- Carefully remove the blade collar.
- Fit the storage lid onto the cup.
- Place the covered drink in the refrigerator for later use.
Cleaning and Maintenance Instructions
The BELLA Rocket Blender requires regular cleaning of its processing cups, blade collar, lids, and motor housing.
Always unplug the blender before cleaning.
How to Clean the Processing Cups
- Stop the blender and unplug it.
- Remove the cup-and-blade assembly from the motor base.
- Carefully unscrew the blade collar.
- Empty any remaining contents.
- Rinse the processing cup promptly after use.
- Wash the cup using the appropriate cleaning method.
- Rinse and dry thoroughly.
Rinsing immediately after processing can make food residue easier to remove.
Quick Cleaning With Warm Water
A short water-only blending cycle can be used for quick cleaning.
- Fill the processing cup approximately one-quarter full with clean, warm water.
- Attach the blade collar securely.
- Install the cup on the motor base.
- Briefly operate the blender.
- Turn the cup to OFF.
- Remove the assembly.
- Unscrew the blade collar.
- Rinse the cup thoroughly.
Do not use hot water during this blending procedure.
How to Clean the Processing Blade
The blade attachment must always be handled by its collar.
- Unplug the blender.
- Remove the cup-and-blade assembly.
- Carefully unscrew the blade collar.
- Rinse the blade assembly after processing.
- If food remains near the blades, use a small nylon-bristle brush to remove it.
- Keep fingers away from the cutting edges.
- Allow the cleaned assembly to dry.
Warning: The blades are extremely sharp and may cause injury if touched.
How to Clean the To-Go and Storage Lids
- Remove the lids from the processing cups.
- Wash them with warm, soapy water.
- Rinse thoroughly.
- Dry before reuse or storage.
Dishwasher-Safe Components
The processing cups, blade assembly, and lids are top-rack dishwasher-safe.
| Component | Cleaning Method |
| Processing Blade Assembly | Top-rack dishwasher or careful cleaning |
| Processing Cups | Top-rack dishwasher |
| To-Go Lid | Top-rack dishwasher or warm, soapy water |
| Storage Lid | Top-rack dishwasher or warm, soapy water |
| Motor Housing | Wipe with a damp cloth or sponge |
Important: After dishwasher cleaning, check the gasket seal inside the blade collar. Heat from some dishwashers may loosen it.
How to Clean the Motor Base
The motor base contains the electrical components and must not be immersed in water.
- Unplug the blender.
- Remove the processing cup.
- Wipe the motor housing with a damp cloth or sponge.
- Dry thoroughly.
Do not use rough scouring pads or abrasive cleaning products on the plastic or metal components.
Gasket Seal Inspection and Care
The gasket inside the blade collar creates an airtight connection with the processing cups.
It should be checked before every use.
How to Check the Gasket
- Make sure the blender is unplugged.
- Remove the blade collar from the cup.
- Inspect the gasket inside the base of the collar.
- Check that the gasket is properly seated.
- Reattach the blade collar securely before blending.
Dishwasher heat may loosen the gasket, so inspection is especially important after cleaning the blade assembly in a dishwasher.
Routine Maintenance
The Rocket Blender requires little maintenance beyond cleaning and checking its removable components.
| Maintenance Task | Instructions |
| Processing Cup Cleaning | Rinse promptly after use and wash thoroughly. |
| Blade Cleaning | Handle by the collar and use a small nylon brush when necessary. |
| Gasket Inspection | Check before every use and after dishwasher cleaning. |
| Lid Cleaning | Wash in warm, soapy water and dry thoroughly. |
| Motor Base Cleaning | Wipe with a damp cloth or sponge. |
| Motor Rest | Allow 3 minutes between processing periods of up to 1 minute. |
| Power Cord Care | Avoid tight wrapping and excessive strain. |
| Electrical Servicing | Refer repairs requiring disassembly to a qualified technician. |
The blender contains no user-serviceable internal components.
Any servicing requiring disassembly beyond normal cleaning must be performed by a qualified appliance repair technician.
Storage Instructions
The BELLA Rocket Blender includes integrated cord storage and stackable accessories for compact storage.
How to Store the Blender
- Unplug the blender.
- Clean the processing cups, blade collar, and lids.
- Wipe the motor housing.
- Dry all components thoroughly.
- Wrap the power cord around the cord storage area at the bottom of the motor base.
- Stack the two processing cups together.
- Place the To-Go lid on top of the storage lid.
- Store the appliance in its original box or another clean, dry location.
Power Cord Storage
The motor base includes a cord storage area underneath.
The power cord can be wrapped around this area when the appliance is not being used.
Warning: Unwind the power cord from the base storage area before plugging the blender into an electrical outlet.
Do not wrap the cord tightly or place excessive stress on the point where it enters the motor housing.
Excessive strain can cause the cord to fray or break.
Stacking the Cups and Lids
For compact storage, the two processing cups can be stacked together.
The To-Go lid can also be stored on top of the storage lid.
Do not store the blender while it is hot or plugged into electricity.
Troubleshooting Guide
The following table covers operating conditions and corrective actions supported by the BELLA Rocket Blender instructions.
| Problem or Situation | Possible Cause or Condition | Recommended Action |
| Blender does not start when the cup is inserted | Blade collar arrow remains aligned with OFF. | Rotate the assembled cup clockwise until the arrow aligns with ON. |
| Cup-and-blade connection is not airtight | Gasket may be loose or incorrectly seated. | Check the gasket and tighten the blade collar securely. |
| Blender produces an odor during first use | A slight initial motor odor may occur. | The manual describes this as normal and indicates that it should disappear with use. |
| Blender is being used continuously for too long | Continuous operation exceeds the one-minute limit. | Stop after one minute and allow the motor to rest for three minutes. |
| Frozen ingredients or ice are being processed without sufficient liquid | Blender is not designed as an ice crusher. | Add at least one cup of liquid before ice or solidly frozen food. |
| Solid ingredients are too large | Food pieces exceed the recommended size. | Cut ingredients into approximately 1-inch pieces or smaller. |
| Cup is cracked or chipped | Processing cup is damaged. | Do not use the damaged cup. |
| Blender does not operate properly on a shared electrical circuit | Circuit may be overloaded by other appliances. | Operate the blender on a separate electrical circuit. |
| Blender malfunctions during operation | An electrical or mechanical fault has occurred. | Remove the cup assembly, unplug the blender, and discontinue use. Seek qualified service. |
BELLA Rocket Blender Not Turning On
The blender operates through the cup rotation mechanism.
To start blending:
- Make sure the cup and blade collar are completely assembled.
- Insert the assembly into the motor base.
- Align the blade collar arrow with OFF.
- Rotate the cup clockwise until the arrow aligns with ON.
If the blender malfunctions, discontinue use and contact a qualified technician.
Blender Cup Leaking or Not Sealing Properly
The blade collar contains a plastic gasket that provides an airtight connection with the cup.
If the connection does not seal correctly:
- Unplug the blender.
- Remove the cup-and-blade assembly.
- Check the gasket inside the blade collar.
- Make sure it is correctly positioned.
- Tighten the blade collar clockwise until snug.
Do not operate the blender with an improperly assembled blade collar.
Blender Producing an Odor During First Use
A slight odor may occur when the blender is operated for the first time.
The manual describes this as normal and states that it should disappear with use.
If the appliance malfunctions, stop using it and seek qualified service.
Blender Not Processing Frozen Ingredients
The Rocket Blender is not intended to function as an ice crusher.
At least one cup of liquid must be added before processing ice or solidly frozen ingredients.
Do not overfill the cup, and never exceed the MAX line.
Processing Cup Cracked or Chipped
Do not use a processing cup that is cracked or chipped.
The manual specifically warns that insufficient liquid during frozen-food processing can damage the cup.
Blender Malfunctions During Operation
If the blender begins malfunctioning:
- Turn the cup assembly to OFF.
- Remove the assembly from the motor base.
- Immediately unplug the appliance.
- Stop using it.
- Contact a qualified service technician.
Do not attempt to dismantle or repair the motor housing.
Warranty Information
The BELLA Rocket Blender 6-Piece includes a limited two-year warranty provided by SENSIO Inc.
The warranty begins on the date of purchase and applies only to the original retail purchaser.
Limited Warranty Coverage
| Warranty Detail | Coverage |
| Warranty Provider | SENSIO Inc. |
| Mechanical Defects | 2 years from the purchase date |
| Non-Mechanical Parts | 90 days |
| Warranty Start Date | Original retail purchase date |
| Eligible Purchaser | Original retail purchaser |
| Transferability | Non-transferable |
| Proof of Purchase | Original sales receipt required |
| Available Remedies | Repair, replacement, or refund at SENSIO Inc.’s discretion |
The two-year warranty covers mechanical defects in materials and workmanship.
Non-mechanical parts are covered for 90 days.
During the applicable warranty period, SENSIO Inc. may repair or replace a defective blender or issue a refund.
Warranty Exclusions
The limited warranty does not cover normal wear or damage resulting from:
- Negligent product use.
- Incorrect electrical voltage or current.
- Improper routine maintenance.
- Operation contrary to the instructions.
- Unauthorized disassembly.
- Repairs or modifications performed by anyone other than qualified SENSIO Inc. personnel.
- Natural disasters, including fires, floods, hurricanes, and tornadoes.
The warranty also contains limitations concerning incidental and consequential damages and implied warranties.
Some limitations may not apply in every state, province, or jurisdiction. Specific legal rights may vary.
How to Request Warranty Service
- Contact Customer Service at 1-866-832-4843.
- Describe the problem with the Rocket Blender.
- Follow the troubleshooting assistance provided by the representative.
- If the issue cannot be resolved by telephone, obtain a case number and return instructions.
- Attach a label containing the purchaser’s name, address, daytime telephone number, case number, and a description of the problem.
- Include a copy of the original sales receipt.
- Carefully package the blender with the required documentation.
- Return it according to the supplied instructions, with shipping and insurance prepaid.
SENSIO Inc. does not accept responsibility or liability for the returned product while it is in transit to its customer service center.
Customer Support and Contact Information
BELLA provides customer support for product questions, operating problems, and warranty assistance.
| Contact Type | Details |
| Brand | BELLA |
| Company | SENSIO Inc. dba Made by Gather |
| Customer Service Phone | 1-866-832-4843 |
| Customer Service Email | help@bellahousewares.com |
| Website | https://bellakitchenware.com |
| Company Location | New York, NY 10016, USA |
| Country of Manufacture | China |
Product Registration
The instruction manual provides a product registration option through the BELLA website.
Registration can be accessed at https://bellakitchenware.com.
Retain the original sales receipt because proof of purchase is required for warranty validation.
Frequently Asked Questions
How do you use the BELLA Rocket Blender 6-Piece?
Add ingredients to one of the 13.5-ounce processing cups without exceeding the MAX line. Attach the blade collar securely, invert the assembled cup, and insert it into the motor base with the arrows aligned at OFF. Rotate the cup clockwise to ON to begin blending. Turn it counterclockwise to OFF to stop. Never operate continuously for more than one minute, and allow three minutes of motor rest before continuing.
Why is the BELLA Rocket Blender not turning on?
The blender uses a twist-to-operate mechanism. The cup must be completely assembled with the blade collar, inserted into the motor housing, and rotated clockwise until the arrow aligns with ON. If the appliance malfunctions or has a damaged power cord, discontinue use and seek qualified service.
How many pieces come with the BELLA Rocket Blender?
The six-piece set contains one blade collar, two 13.5-ounce processing cups, one motor housing, one storage lid, and one To-Go lid. The cups can be used for blending and then fitted with the appropriate lid.
Can the BELLA Rocket Blender crush ice?
The blender is not designed as an ice crusher. When processing ice or solidly frozen ingredients, the manual requires at least one cup of liquid to be added before the frozen ingredients. The cup must not be filled beyond the MAX line.
How long can the BELLA Rocket Blender run continuously?
The motor must not operate continuously for more than one minute. After a processing period, allow the motor to rest for three minutes before continuing.
Are the BELLA Rocket Blender cups dishwasher-safe?
Yes. The processing cups, processing blade, and lids are top-rack dishwasher-safe. After washing the blade assembly, check that the gasket inside the blade collar remains correctly seated because dishwasher heat may loosen it. Never place the motor base in water or a dishwasher.
How do you clean the BELLA Rocket Blender?
Unplug the appliance and remove the cup-and-blade assembly. Rinse the cups promptly after use and wash the lids in warm, soapy water. A quick cleaning cycle can be performed by blending a cup approximately one-quarter full of clean, warm water, followed by thorough rinsing. Use a small nylon-bristle brush to remove food near the blades. Wipe the motor base with a damp cloth.
What is the warranty on the BELLA Rocket Blender 6-Piece?
The blender includes a limited two-year warranty covering mechanical defects in materials and workmanship and 90 days of coverage for non-mechanical parts. The warranty begins on the original retail purchase date and requires proof of purchase. For assistance, contact Customer Service at 1-866-832-4843 or help@bellahousewares.com.