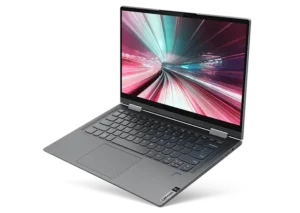
| Field | Details |
| Document Title | User Guide — IdeaPad 4G (14″, 05), IdeaPad 5G (14″, 05), IdeaPad 14m 4G 2021, IdeaPad 14m 5G 2021, IdeaPad 14m 4G 2021 DM and IdeaPad 14m 5G 2021 DM |
| Document Type | User Guide |
| Brand Name | Lenovo |
| Product Name | IdeaPad 4G / IdeaPad 5G / IdeaPad 14m 4G / IdeaPad 14m 5G |
| Model Number(s) | 14Q8C05, 14Q8X05, 14mQ8C 4G 2021, 14mQ8X 5G 2021 |
| Machine Type(s) | 82KE, 82KF, 82EF, 82KG, 82EG, 82KH |
| PDF File Size | 4.50 MB |
| Number of Pages | 54 |
| Languages Covered | English (main guide |
Lenovo IdeaPad 5G 14Q8C05
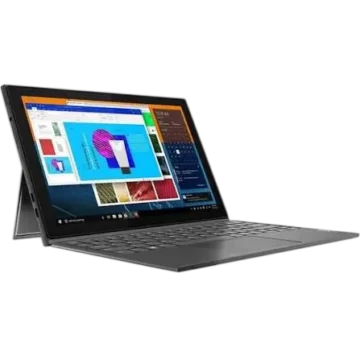
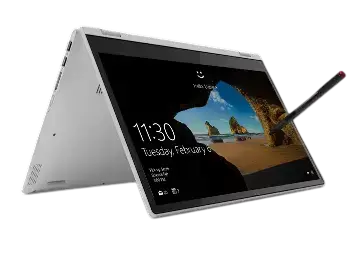
The Lenovo IdeaPad 4G and IdeaPad 5G are 14-inch laptop computers designed for everyday computing, communication, productivity, and wireless connectivity. The series includes the IdeaPad 4G (14″, 05), IdeaPad 5G (14″, 05), IdeaPad 14m 4G 2021, and IdeaPad 14m 5G 2021 variants, including their DM versions.
The computers feature a 14-inch Full HD display, built-in camera with infrared facial authentication, integrated microphones, stereo speakers, keyboard, touchpad, and wireless LAN and WAN connectivity. A nano SIM card slot allows supported models to connect to a mobile broadband network.
The laptops include a 51 Wh rechargeable battery, two USB-C connections, an Always-On USB Type-A connector, and a 3.5 mm combo audio jack. The USB-C ports support charging, data transfer, and DisplayPort video output.
Depending on the model, the computer supports 4G or 5G mobile broadband through its wireless WAN module. Wireless LAN and Bluetooth are also available for local networking and connecting compatible devices.
The keyboard provides hotkeys for adjusting volume, screen brightness, Airplane Mode, display output, and other Windows functions. The Novo button allows access to the UEFI/BIOS Setup Utility, startup device selection, and Windows startup options.
The computer also includes power-management settings, UEFI/BIOS security features, and Windows recovery options.
Supported Models and Machine Types
| Product Model | Model Identifier | Machine Type |
| IdeaPad 4G (14″, 05) | 14Q8C05 | 82KE |
| IdeaPad 5G (14″, 05) | 14Q8X05 | 82KF |
| IdeaPad 14m 4G 2021 | 14mQ8C | 82EF, 82KG |
| IdeaPad 14m 5G 2021 | 14mQ8X | 82EG, 82KH |
The product family also includes IdeaPad 14m 4G 2021 DM and IdeaPad 14m 5G 2021 DM naming variants.
Hardware configurations and available features may differ between models.
Technical Specifications
| Specification | Details |
| Brand | Lenovo |
| Product Series | IdeaPad 4G / IdeaPad 5G |
| Product Type | Laptop Computer |
| Display Size | 14 inches (355.6 mm) |
| Display Resolution | 1920 × 1080 pixels (Full HD) |
| Processor | Varies by Configuration |
| Memory Type | LPDDR4X |
| Memory Slots | 0 |
| Storage Type | Solid-State Drive |
| SSD Form Factor | M.2 2280 |
| Storage Interface | PCI Express |
| Keyboard | Built-In Keyboard with Function Keys and Hotkeys |
| Keyboard Backlight | Supported |
| Pointing Device | Multi-Touch Touchpad |
| Camera | Integrated Camera |
| Facial Authentication | Infrared Camera with Windows Hello |
| Microphones | Integrated |
| Speakers | Stereo |
| Wireless Connectivity | Wireless LAN, Bluetooth, Wireless WAN |
| Mobile Broadband | 4G or 5G, Depending on Model |
| SIM Card Type | Nano SIM |
| USB-C Ports | 2 |
| USB-C Data Transfer | USB 3.2 Gen 1, Up to 5 Gbps |
| USB-C Power Output | Up to 5V, 3A |
| USB-C Video Output | DisplayPort |
| USB-A Port | USB 3.2 Gen 1 with Always-On Function |
| Audio Connection | 3.5 mm, 4-Pole Combo Audio Jack |
| Battery Capacity | 51 Wh |
| Battery Cells | 4 |
| AC Adapter Power | 45 W |
| AC Adapter Output | 20V DC, 2.25A |
| AC Adapter Input | 100–240V AC, 50–60 Hz |
| Firmware | UEFI/BIOS |
| Startup Options | Novo Button Menu |
Dimensions
| Measurement | Specification |
| Width | 321.7 mm (12.66 inches) |
| Depth | 207 mm (8.14 inches) |
| Thickness | 14.9 mm (0.58 inches) |
Operating Environment
| Condition | Requirement |
| Maximum Unpressurized Altitude | 3048 m (10,000 ft) |
| Operating Temperature Up to 2438 m | 5–35°C (41–95°F) |
| Storage Temperature | 5–43°C (41–109°F) |
| Maximum Operating Temperature Above 2438 m | 31.3°C (88°F) |
| Minimum Battery Charging Temperature | 15°C (59°F) |
| Operating Relative Humidity | 8–95%, at 23°C Wet-Bulb Temperature |
| Storage Relative Humidity | 5–95%, at 27°C Wet-Bulb Temperature |
Parts and Components
The IdeaPad 4G and 5G series includes components around the display, keyboard, left and right sides, and bottom cover.
Front Components
| Component | Function |
| Microphones | Capture sound for voice recording and communication. |
| Integrated Camera | Captures photographs and video and supports facial authentication. |
| Infrared LED | Emits infrared light for face authentication. |
| Camera Indicator Light | Illuminates when the camera is operating. |
| Display | Shows text, graphics, videos, and applications. |
Integrated Camera
The camera supports:
- Taking photographs
- Recording videos
- Video communication
- Windows Hello facial authentication
Infrared Camera and Windows Hello
The infrared LED supports facial recognition through Windows Hello.
The computer can use enrolled facial information to authenticate the user during Windows sign-in.
Camera Indicator Light
The camera indicator illuminates when the camera is in use.
Integrated Microphones
The microphones capture voice and other audio for applications.
Keyboard, Speakers and Touchpad
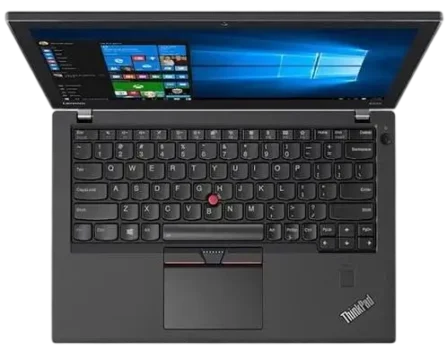
The keyboard, speakers, and touchpad are integrated into the main computer base.
| Component | Function |
| Keyboard | Provides text input and keyboard shortcuts. |
| Stereo Speakers | Produce audio output. |
| Touchpad | Provides pointer control and multi-touch input. |
| WiFi Antennas | Send and receive wireless LAN and Bluetooth signals. |
| Wireless WAN Antennas | Send and receive mobile broadband signals. |
Wireless Antenna Locations
The WiFi and wireless WAN antennas are located internally.
They are not visible from the outside of the computer.
Wireless WAN antenna locations vary by model.
Touchpad Operation
The touchpad provides functions similar to a traditional mouse.
It supports finger movement and multi-touch gestures for interacting with Windows applications.
Left-Side Ports and Connections
The left side contains the charging indicator, two USB-C connections, and combo audio jack.
Left-Side Components
| Component | Function |
| Charging Indicator | Displays AC power and charging status. |
| USB-C Connectors (2) | Connect the AC adapter and compatible external devices. |
| Combo Audio Jack | Connects compatible headphones or headsets. |
USB-C Ports
The two USB-C connectors support several functions.
| Function | Specification |
| AC Power Input | Connects the supplied charging adapter. |
| USB Data Transfer | Up to 5 Gbps using USB 3.2 Gen 1 |
| Power Output | Up to 5V, 3A |
| Display Output | DisplayPort |
| Peripheral Connection | External display, storage, or data devices |
A compatible adapter may be required when connecting certain external equipment.
Combo Audio Jack
The 3.5 mm combo audio jack supports headphones and headsets with a four-pole plug.
Important: The jack does not support standalone external microphones.
For a headset with microphone functionality, use a compatible headset with a single combined plug.
Right-Side Ports and Controls
The right side includes the nano SIM card slot, Power indicator, Power button, and Always-On USB-A port.
| Component | Function |
| Nano SIM Card Slot | Accepts a nano SIM card for mobile broadband. |
| Power Indicator | Shows whether the computer is on, sleeping, or off. |
| Power Button | Turns on the computer or activates Sleep mode. |
| Always-On USB 3.2 Gen 1 Type-A | Connects USB devices and supports external-device charging. |
Power Button
Press the Power button to turn on the computer.
By default, pressing the Power button while Windows is running puts the computer into Sleep mode.
The button behavior can be changed through Windows Power Options.
Always-On USB Port
The Always-On USB-A connector can charge compatible external devices when the computer is:
- Powered off
- In Sleep mode
- In Hibernation mode
The Always-On function can be enabled or disabled through the UEFI/BIOS Setup Utility.
Bottom Components
The bottom of the computer includes the Novo button hole.
Novo Button Hole
The Novo button provides access to startup and recovery functions before Windows starts.
The available menu options include:
- UEFI/BIOS Setup Utility
- Boot device selection
- Windows startup options
Indicator Lights
The laptop includes separate charging and power indicators.
Charging Indicator
| Indicator Status | Meaning |
| Solid White | Connected to AC power; battery capacity is 91–100%. |
| Solid Amber | Connected to AC power; battery capacity is 1–90%. |
| Off | Computer is not connected to AC power. |
Power Indicator
| Indicator Status | Meaning |
| On | Computer is turned on. |
| Blinking | Computer is in Sleep mode. |
| Off | Computer is turned off or in Hibernation mode. |
Important Safety Instructions
The computer, rechargeable battery, power adapter, and connected accessories must be handled carefully to reduce the risk of injury, fire, electrical shock, or equipment damage.
General Safety Precautions
- Keep liquids away from the computer and its electrical connections.
- Do not operate damaged power adapters, plugs, or cables.
- Keep ventilation openings clear.
- Avoid placing heavy objects on the display or computer.
- Protect the laptop from drops, impacts, and excessive vibration.
- Do not operate the computer with internal circuits exposed.
- Avoid prolonged contact with surfaces that become hot during operation.
- Keep children away from small components and plastic packaging.
- Disconnect power before any authorized service or replacement procedure.
Power Adapter Safety
The AC power adapter generates heat while connected to electrical power.
Do not cover the adapter with clothing or other objects.
Do not place the adapter against the body during use.
Never wrap the power cable tightly around the adapter.
Battery Safety
The rechargeable battery must not be:
- Opened or disassembled
- Crushed or punctured
- Short-circuited
- Exposed to water or other liquids
- Placed near fire
- Repaired without authorization
The built-in rechargeable battery must only be replaced by a Lenovo-authorized repair facility or technician.
Ventilation and Heat Safety
The laptop must not be operated on surfaces that block airflow, including beds, sofas, and carpets.
Air entering the computer must not exceed 35°C (95°F).
Electrical Safety
Do not connect or disconnect cables during an electrical storm.
Use properly wired and grounded electrical outlets.
Do not use the computer when there is evidence of fire, water damage, or structural damage.
Display Safety
The LCD contains glass and can break if the laptop is dropped or handled roughly.
If LCD fluid contacts the skin or eyes, wash the affected area with water for at least 15 minutes and seek medical attention if symptoms remain.
Headphone Safety
Listening through headphones at excessive volume can damage hearing.
Use compatible headphones and maintain a suitable listening level.
Before First Use
The laptop should be prepared in a suitable environment before it is connected to power and started.
Initial Preparation
- Place the computer on a stable surface.
- Make sure ventilation openings are clear.
- Prepare the supplied AC power adapter and power cord.
- Connect the computer to AC power.
- Press the Power button.
- Complete the Windows setup instructions displayed on the screen.
Connecting the AC Power Adapter
The IdeaPad 4G and 5G laptops use a 45-watt AC adapter.
AC Adapter Specifications
| Specification | Value |
| Input Voltage | 100–240V AC |
| Input Frequency | 50–60 Hz |
| Output Voltage | 20V DC |
| Output Current | 2.25A |
| Rated Power | 45 W |
Power Connection Instructions
- Connect the power cord to the AC adapter.
- Connect the USB-C charging connector to the laptop.
- Plug the adapter into an electrical outlet.
The computer can operate using AC power while charging its battery.
Windows Setup and Basic Controls
The computer includes Windows functions for network connections, system settings, display adjustments, and software updates.
Opening Windows Settings
Windows settings can be found using the Windows search box.
- Select the Windows search box.
- Enter the name of the required setting.
- Select the matching result.
- Follow the on-screen instructions.
Common Windows Settings
| Setting | Purpose |
| Control Panel | Changes hardware and software settings. |
| WiFi | Connects to wireless networks. |
| Airplane Mode | Enables or disables wireless communications. |
| Night Light | Changes display colors to warmer tones. |
| Windows Update | Downloads applicable Windows updates. |
| Sign-In Options | Configures supported authentication methods. |
Windows Updates
Windows can automatically download applicable feature and security updates when connected to the internet.
When an update requires a restart, Windows displays a notification.
Use Windows Update for downloading and installing operating system updates.
How to Connect to WiFi
The computer includes a wireless LAN module for connecting to compatible WiFi networks.
WiFi Setup Instructions
- Locate the network icon in the Windows notification area.
- Select the icon to view available wireless networks.
- Choose the required WiFi network.
- Follow the on-screen instructions to complete the connection.
The wireless LAN module may support different standards depending on the computer configuration.
In certain countries or regions, operation using the 802.11ax standard may be restricted by local regulations.
Using Airplane Mode
Airplane Mode provides a quick way to turn wireless communications on or off.
Turning Airplane Mode On or Off
- Open the Windows search box.
- Search for Airplane mode.
- Open the matching setting.
- Turn Airplane Mode on or off as required.
Airplane Mode may need to be enabled when boarding an aircraft.
How to Install or Replace a Nano SIM Card
The laptop includes a nano SIM card slot on the right side.
A compatible nano SIM card can be used to establish a wireless WAN connection.
SIM Card Installation Instructions
- Locate the nano SIM card tray on the right side.
- Insert a SIM-ejection tool into the tray’s release opening.
- Eject the tray and slide it out of the computer.
- If a SIM card is already installed, gently remove it.
- Place the replacement nano SIM card in the tray using the correct orientation.
- Insert the tray back into the nano SIM slot.
Important: The nano SIM card must be correctly positioned in the tray before insertion.
Windows Hello Facial Authentication
The integrated camera and infrared LED support Windows Hello facial authentication.
Setting Up Face Recognition
- Open the Windows search box.
- Search for Sign-in options.
- Open the corresponding Windows settings.
- Follow the instructions to enroll the user’s face.
Once configured, Windows Hello can use facial information for authentication.
Keyboard Hotkeys and Function Keys
The keyboard includes hotkeys for frequently used Windows functions.
Hotkey Functions
| Hotkey Function | Description |
| Mute/Unmute | Turns sound on or off. |
| Volume Down/Up | Adjusts speaker volume. |
| Edge Browser | Opens Microsoft Edge. |
| Airplane Mode | Turns Airplane Mode on or off. |
| Windows Settings | Opens the Settings application. |
| Calculator | Opens Windows Calculator. |
| Snipping Tool | Opens the Windows Snipping Tool. |
| Task View | Displays thumbnails of open applications. |
| Lock Screen | Locks the Windows screen. |
| Display Switching | Switches between display devices. |
| Brightness Down/Up | Changes display brightness. |
| Keyboard Backlight | Turns on, turns off, or changes keyboard illumination. |
Keyboard Backlight Control
Use the keyboard backlight hotkey together with the Fn key to change keyboard illumination.
Hotkey Mode
Hotkey Mode determines whether a hotkey or standard function-key action is activated directly.
| Hotkey Mode | Using Hotkeys | Using Function Keys |
| Enabled | Press the hotkey directly. | Hold Fn and press the function key. |
| Disabled | Hold Fn and press the hotkey. | Press the function key directly. |
FnLock
FnLock reverses the default and secondary functions of certain keyboard keys.
Press Fn + Esc to enable or disable FnLock.
When FnLock is enabled, its indicator light turns on.
How to Change Hotkey Mode in BIOS
- Open the UEFI/BIOS Setup Utility.
- Select Configuration > Hotkey Mode.
- Press Enter.
- Choose Enabled or Disabled.
- Select Exit > Exit Saving Changes.
Novo Button Menu
The Novo button allows access to system startup functions.
Opening the Novo Button Menu
- Turn off the computer.
- Open the display.
- Press the Novo button.
Alternatively, turn off the computer and press Fn + Power.
Novo Button Menu Options
| Option | Function |
| UEFI/BIOS Setup | Opens firmware configuration. |
| Boot Menu | Allows selection of a startup device. |
| Windows Startup Options | Opens Windows recovery and advanced startup tools. |
Windows Startup Options
The Windows startup menu provides access to functions such as:
- Starting from a recovery drive
- Resetting the computer
- Opening advanced startup options
Battery Charging and Power Management
The IdeaPad 4G and 5G laptops include a rechargeable four-cell battery with a typical capacity of 51 Wh.
Checking Battery Status
The Windows notification area includes a battery icon.
Select the icon to view:
- Remaining battery percentage
- Current power mode
- Available battery settings
Windows displays a warning when the battery becomes low.
Charging the Battery
- Connect the laptop to AC power.
- Allow the battery to charge.
- Check the battery status through Windows.
A full charge normally takes approximately two to four hours.
Charging time depends on battery capacity, the operating environment, and whether the computer is in use.
Charging Temperature
The battery temperature must be at least 15°C (59°F) before charging.
Battery Recharge Behavior
To help preserve battery life, the computer does not begin another charging cycle immediately after reaching full charge.
The battery must discharge to 94% or lower before charging starts again.
Changing Power Button Behavior
By default, pressing the Power button while the computer is running puts it into Sleep mode.
Changing the Power Button Action
- Search for Control Panel in Windows.
- Open Control Panel.
- Change the view to Large Icons or Small Icons.
- Select Power Options.
- Select Choose what the power button does.
- Configure the preferred action.
Creating or Changing a Power Plan
A power plan controls how Windows manages power consumption.
Power Plan Instructions
- Search Windows for power plan.
- Open the matching settings.
- Select an available plan or create a new plan.
- Adjust the settings as required.
ENERGY STAR Power Settings
For ENERGY STAR-certified configurations using the Balanced plan while connected to AC power, the documented inactivity settings are:
| Function | Time |
| Turn Off Display | After 10 Minutes |
| Enter Sleep Mode | After 10 Minutes |
USB-C Connections and Data Transfer
The laptop includes two USB-C ports.
These ports support external data devices, power connections, and DisplayPort output.
USB-C Specifications
| Feature | Specification |
| USB Standard | USB 3.2 Gen 1 |
| Maximum Listed Data Rate | 5 Gbps |
| Power Output | Up to 5V, 3A |
| Display Output | DisplayPort |
The actual transfer speed depends on the connected device, system configuration, file characteristics, and operating conditions.
USB Transfer Rate Comparison
| USB Standard | Listed Data Rate |
| USB 3.2 Gen 1 | 5 Gbps |
| USB 3.2 Gen 2 | 10 Gbps |
| USB 3.2 Gen 2 × 2 | 20 Gbps |
The computer’s USB-C specification identifies support for USB 3.2 Gen 1.
The higher rates shown in the comparison table are general USB standard reference values.
Using the Always-On USB Port
The USB 3.2 Gen 1 Type-A port supports the Always-On function.
This feature allows selected external devices to be charged while the computer is powered off, sleeping, or hibernating.
The function can be enabled or disabled through UEFI/BIOS settings.
UEFI/BIOS Setup Utility
The UEFI/BIOS firmware starts before the operating system.
It initializes the computer’s hardware and loads the operating system.
How to Enter BIOS
- Turn on or restart the laptop.
- When the Lenovo logo appears, press F2 repeatedly.
If Hotkey Mode is enabled, press Fn + F2.
Changing the Startup Sequence
- Open the UEFI/BIOS Setup Utility.
- Navigate to the Boot menu.
- Locate Boot Priority Order.
- Follow the on-screen instructions to arrange the startup devices.
Temporarily Selecting a Boot Device
When the Lenovo logo appears during startup, press F12 or Fn + F12 repeatedly.
The startup device selection menu opens.
BIOS Password and Security Settings
The UEFI/BIOS Setup Utility supports several password controls.
Setting an Administrator Password
An administrator password helps prevent unauthorized access to the BIOS settings.
- Open UEFI/BIOS Setup.
- Select Security > Set Administrator Password.
- Press Enter.
- Enter a password containing letters and numbers.
- Confirm the password.
- Select Exit > Exit Saving Changes.
Important: If the administrator password is forgotten, Lenovo-authorized service personnel cannot reset it. System board replacement is required, and parts and service charges apply.
Changing or Removing an Administrator Password
- Open UEFI/BIOS Setup using the administrator password.
- Select Security > Set Administrator Password.
- Enter the current password.
- Enter and confirm the new password.
- Save the changes.
To remove the password, leave the new password and confirmation fields empty and press Enter.
Setting a User Password
An administrator password must be configured before a user password can be created.
- Open BIOS Setup using the administrator password.
- Select Security > Set User Password.
- Enter a password containing letters and numbers.
- Confirm the password.
- Save the changes.
The user password must differ from the administrator password.
Enabling the Power-On Password
- Open UEFI/BIOS Setup.
- Select Security > Power on Password.
- Change the setting to Enabled.
- Save the changes.
When enabled, the computer requests an administrator or user password each time it starts.
Windows Recovery and System Reset
Windows recovery tools can be accessed through the Windows startup options menu.
Opening Windows Startup Options
- Turn off the computer.
- Open the Novo Button Menu.
- Select the Windows startup options screen.
Available Recovery Functions
| Function | Purpose |
| Recovery Drive | Starts the computer using recovery media. |
| Reset | Provides Windows reset options. |
| Advanced Options | Opens additional startup and recovery tools. |
Lenovo Recovery Resources
Recovery instructions are available at:
https://support.lenovo.com/HowToCreateLenovoRecovery
Windows recovery support can also be accessed through:
Select the computer model and follow the applicable operating system recovery instructions.
Troubleshooting Guide
The following troubleshooting instructions cover system responsiveness, liquid spills, Windows problems, and recovery assistance.
Computer Stops Responding
If the computer becomes unresponsive:
- Press and hold the Power button until the computer turns off.
- Restart the computer.
Liquid Spilled on the Computer
If liquid spills onto the laptop:
- Disconnect the AC power adapter carefully.
- Turn off the computer immediately.
- Wait until the liquid has completely dried before turning the computer on again.
Important: Do not turn the laptop upside down to drain the liquid. If the computer has keyboard drainage holes, liquid drains through those openings.
Windows Problems
If Windows settings or applications are not functioning as expected, the following help resources are available:
| Resource | How to Access |
| Windows Get Help | Search Windows for Get Help. |
| Windows Tips | Search Windows for Tips. |
| Microsoft Support | https://support.microsoft.com |
| Lenovo Diagnostics | https://pcsupport.lenovo.com |
| Lenovo Community | https://forums.lenovo.com |
| Lenovo Troubleshooting | https://www.lenovo.com/tips |
Cleaning and Maintenance
The computer should be inspected periodically for dust, blocked ventilation openings, and damaged components.
Cooling and Ventilation Maintenance
- Inspect the computer’s exterior for dust accumulation.
- Remove dust from ventilation openings.
- Keep airflow around the computer unobstructed.
- Avoid operating the laptop on surfaces that block cooling.
- Do not use the computer inside enclosed furniture where heat may accumulate.
General Handling
Avoid dropping, striking, twisting, or placing heavy objects on the computer.
Protect the display and connected devices from physical damage.
Storage and Travel Instructions
The laptop should be protected from physical damage and extreme environmental conditions when transported or stored.
Transporting the Computer
- Use a padded carrying case.
- Avoid tightly packed bags or suitcases.
- Turn off the laptop or place it in a suitable power-saving state before packing.
- Keep cables positioned where they cannot be pinched or damaged.
Long-Term Battery Storage
For extended storage:
- Keep the battery charged to approximately 30–50%.
- Store the computer at room temperature.
- Recharge the battery approximately once each year.
Ergonomic Recommendations
| Area | Recommendation |
| Viewing Distance | Approximately 510–760 mm (20–30 inches) |
| Head Position | Keep head and neck upright and relaxed. |
| Arms and Wrists | Keep arms supported and wrists in a neutral position. |
| Legs | Keep thighs parallel to the floor. |
| Feet | Rest feet on the floor or a footrest. |
| Work Habits | Take regular short breaks. |
Customer Replaceable Units
Lenovo identifies two self-service Customer Replaceable Units for this product family.
| Component | CRU Type |
| Power Cord | Self-Service CRU |
| AC Power Adapter | Self-Service CRU |
Replacement Parts and Warranty
Lenovo may provide replacement CRUs under the applicable warranty conditions.
If a replaced part must be returned, Lenovo supplies return instructions and applicable shipping materials.
When a return is required, the defective part must be returned within 30 days of receiving the replacement, or charges may apply.
Warranty Information
Warranty coverage is governed by the Lenovo Limited Warranty applicable to the computer.
Warranty Services
Depending on the applicable terms, Lenovo may provide:
- Hardware problem diagnosis
- Qualifying hardware repairs
- Applicable engineering changes
Warranty Terms
The Lenovo Limited Warranty is available at:
https://www.lenovo.com/warranty/llw_02
Additional warranty services and upgrades are available through:
https://pcsupport.lenovo.com/warrantyupgrade
Service availability varies by country or region.
Recycling and Environmental Information
Used computers, batteries, and electronic components must be disposed of according to applicable regulations.
Recycling Resources
| Resource | Website |
| Lenovo Recycling | https://www.lenovo.com/recycling |
| Environmental Declarations | https://www.lenovo.com/ecodeclaration |
| Environmental Information | https://www.lenovo.com/environment |
Batteries and electrical equipment bearing the crossed-out wheeled-bin symbol must be handled through appropriate collection and recycling systems rather than unsorted household waste.
Customer Support Information
Lenovo provides assistance for hardware problems, product identification, warranty services, and software support.
Before Contacting Support
Prepare the following:
| Information | Details |
| Product Name | IdeaPad 4G / IdeaPad 5G |
| Model and Machine Type | Corresponding model identification |
| Serial Number | Found on the bottom label or cover |
| Problem Description | Continuous or intermittent symptoms |
| Error Messages | Any displayed error message or code |
| Operating System | Installed Windows version |
| Application Details | Applications running when the problem occurred |
Lenovo Support Resources
| Resource | Website |
| Official Lenovo Support | https://support.lenovo.com |
| Lenovo PC Support | https://pcsupport.lenovo.com |
| Regional Support Phone Numbers | https://pcsupport.lenovo.com/supportphonelist |
| Windows Support | https://support.microsoft.com |
| Lenovo Accessibility | https://www.lenovo.com/accessibility |
Frequently Asked Questions
1. How do I enter BIOS on the Lenovo IdeaPad 4G or 5G laptop?
Turn on or restart the computer and press F2 repeatedly when the Lenovo logo appears. If Hotkey Mode is enabled, press Fn + F2. The UEFI/BIOS Setup Utility allows configuration of startup devices, passwords, and supported system settings.
2. How do I install a nano SIM card?
Insert a SIM-ejection tool into the nano SIM tray opening on the right side. Remove the tray, position the nano SIM card correctly, and insert the tray back into the laptop.
3. How long does the IdeaPad 4G or 5G battery take to charge?
The battery normally takes approximately two to four hours to charge fully. The actual time depends on battery capacity, operating conditions, and whether the computer is in use.
4. What do the amber and white charging lights mean?
A solid white charging light indicates the laptop is connected to AC power and the battery has 91–100% charge. A solid amber light indicates 1–90% charge. The light turns off when AC power is disconnected.
5. Does the Lenovo IdeaPad 4G or 5G support USB-C charging?
Yes. The laptop includes two USB-C connectors that support the supplied 45-watt power adapter. The USB-C ports also support USB 3.2 Gen 1 data transfer and DisplayPort video output.
6. How do I enable or disable FnLock?
Press Fn + Esc to turn FnLock on or off. The FnLock indicator shows whether the feature is enabled.
7. What should I do if the laptop stops responding?
Press and hold the Power button until the computer shuts down. Then restart the computer. If the problem continues, use the appropriate Lenovo or Windows support resources.