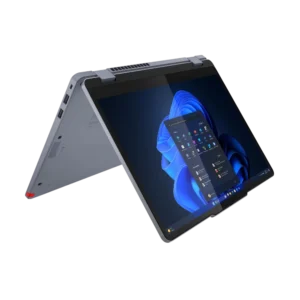
| Field | Details |
| Document Title | Lenovo 13w 2-in-1 Gen 3 Setup Guide |
| Document Type | Setup Guide |
| Brand Name | Lenovo |
| Product Name | 13w 2-in-1 Gen 3 |
| Model Number(s) | Specific machine-type/model number not identified in the document |
| PDF File Size | 1.04 MB |
| Number of Pages | 12 |
| Languages Covered | English, Italian, Dutch, German, French, Greek, Arabic |
Lenovo 13w 2-in-1 Gen 3
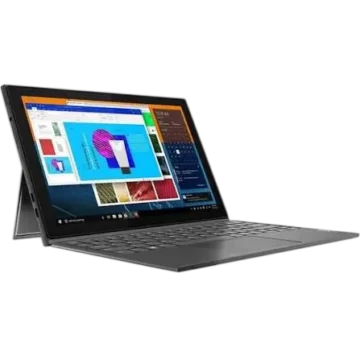
The Lenovo 13w 2-in-1 Gen 3 is a convertible laptop computer designed for everyday computing, productivity, communication, and portable use. It features a touchscreen, integrated camera and microphones, keyboard, touchpad, USB connectivity, HDMI output, and wireless networking.
The computer supports USB-C Power Delivery charging, with a maximum supported adapter output of 65 watts for the fastest charging speed specified in this setup guide. It also provides access to Lenovo Commercial Vantage on supported configurations, allowing device settings to be adjusted and system updates to be checked.
Selected configurations include a fingerprint-enabled power button for signing in, an additional camera, and a pen accessory. The availability of these components depends on the purchased model.
The laptop supports wireless LAN and Bluetooth connectivity. Its wireless networking capabilities include the frequency bands identified in the European Union and United Kingdom regulatory specifications.
Technical Specifications
| Specification | Details |
| Brand | Lenovo |
| Product Name | 13w 2-in-1 Gen 3 |
| Product Type | Convertible Laptop Computer |
| Computer Design | 2-in-1 |
| Input Devices | Keyboard, Touchpad, Touchscreen |
| Camera | Integrated |
| Additional Camera | Available on Selected Models |
| Microphones | Integrated |
| Fingerprint Login | Available on Selected Models |
| USB-A Ports | 2 |
| USB-C Connection | Yes |
| External Display Connection | HDMI |
| Audio Connection | Headset/Audio Jack |
| Security Lock Slot | Yes |
| Pen Accessory | Available on Selected Models |
| Wireless LAN | 802.11b/g/n/ax and 802.11a/n/ac/ax Bands |
| Bluetooth | BR/EDR/LE |
| Charging Technology | USB Power Delivery (USB PD) |
| Minimum Specified Adapter Power | 15 W (5V, 3A) |
| Maximum Specified Adapter Power | 65 W (20V, 3.25A) |
| Device Management | Lenovo Commercial Vantage, on Supported Models |
| Coin-Cell Battery Type | CR2016 |
| Coin-Cell Nominal Voltage | 3.0V DC |
| Maximum Reported Body-Worn SAR | 0.982 W/kg |
| Maximum Reported Limb SAR | 0.915 W/kg |
The USB transfer rates and additional hardware specifications for individual configurations can be checked in the Lenovo User Guide.
Package Contents and Setup Components
The initial setup illustration identifies the computer and the equipment used to prepare it for operation.
Components Shown in the Setup Guide
| Component | Description |
| Lenovo 13w 2-in-1 Gen 3 | Main laptop computer |
| Power Adapter | Provides power to the computer |
| Power Cable | Connects the adapter to an electrical outlet |
| Documentation | Printed setup information |
| Selected-Model Accessories | Additional accessories may depend on configuration |
The available accessories can vary by model.
Parts and Components
The laptop includes built-in controls and connectors for normal operation and external device connections.
Front and Interior Components
The front-view diagram identifies the display, keyboard, touchpad, microphones, camera components, and power control.
| Component | Function |
| Touchscreen | Provides direct touch input. |
| Integrated Microphones | Capture sound for recording and communication. |
| Integrated Camera | Supports camera functions. |
| Camera Privacy Control | Camera-related privacy control shown near the display camera. |
| Additional Camera | Camera fitted near the keyboard on selected models. |
| Keyboard | Provides typing and computer input. |
| Touchpad | Controls the on-screen pointer. |
| Power Button | Turns on the computer. |
| Fingerprint-Enabled Power Button | Supports sign-in on selected models. |
Integrated Cameras
The laptop illustration identifies a camera near the upper edge of the display.
An additional camera is shown near the keyboard area on selected models.
The camera-related controls and privacy features should be used according to the installed hardware configuration.
Fingerprint Login
Selected models include a fingerprint function associated with the Power button.
When fingerprint sign-in is configured, the designated button can be pressed to log in to the computer.
Fingerprint availability depends on the purchased model.
Side Ports and Connections
The laptop’s side-view diagram identifies USB, display, audio, and security connections.
USB-A Ports
The computer includes two USB-A connectors.
These ports provide connections for compatible USB devices and accessories.
USB-C Port
The USB-C connection supports USB Power Delivery charging.
It is used to connect the compatible charging adapter during initial setup.
HDMI Port
The HDMI connector provides a connection for compatible external display equipment.
Audio Jack
The laptop includes a headset/audio connection identified by the headset symbol.
Security Lock Slot
The security-lock slot provides a connection point for a compatible physical security lock.
Pen Accessory
Selected models support the pen accessory indicated in the hardware illustration.
The applicable accessory and its availability depend on the specific computer configuration.
Before First Use
The laptop must be connected to a suitable power source before initial setup.
The setup diagram shows the connection sequence for the power adapter, laptop, electrical outlet, and Power button.
Initial Preparation
- Remove the laptop and applicable accessories from their packaging.
- Place the computer on a stable surface.
- Identify the USB-C charging connection.
- Prepare the supplied power adapter and cable.
- Follow the power connection procedure.
How to Set Up the Lenovo 13w 2-in-1 Gen 3
Step 1: Prepare the Power Adapter
Connect the applicable power cable to the power adapter.
Step 2: Connect the Laptop
Insert the USB-C power connector into the laptop’s charging port.
Step 3: Connect Electrical Power
Connect the power adapter to an electrical outlet.
Step 4: Turn On the Computer
Press the Power button.
The computer begins its startup process.
Complete the operating system’s on-screen setup instructions as required.
How to Turn On and Sign In
The laptop includes a Power button for starting the computer.
Turning On the Laptop
- Connect the computer to a compatible power source when necessary.
- Locate the Power button.
- Press the Power button.
- Allow the computer to start.
Signing In with Fingerprint
On models equipped with fingerprint authentication, the designated power/fingerprint button can be used for sign-in after the feature has been configured.
The fingerprint function is not available on every configuration.
USB-C Charging and Power Adapter Requirements
The Lenovo 13w 2-in-1 Gen 3 supports USB Power Delivery fast charging.
Supported Power Requirements
| Power Specification | Rating |
| Minimum Specified Power | 15 Watts |
| Minimum Voltage and Current | 5V, 3A |
| Maximum Specified Power | 65 Watts |
| Maximum Voltage and Current | 20V, 3.25A |
| Charging Protocol | USB Power Delivery |
The adapter must provide power within the stated range.
The minimum 15-watt output is identified as the power required by the radio equipment.
A compatible 65-watt USB PD adapter supports the maximum charging speed specified for the product.
Charging Instructions
- Connect the power adapter cable to the laptop’s USB-C charging connector.
- Connect the adapter to the electrical outlet.
- Leave the adapter connected while the laptop requires charging.
The charging system supports USB PD fast charging using the specified power range.
Connecting to WiFi
The Lenovo 13w 2-in-1 Gen 3 supports wireless network connections through its integrated WiFi hardware.
Connecting to a wireless network increases the computer’s energy consumption.
How to Connect to a WiFi Network
- Open the Quick Settings area on the Windows taskbar.
- Locate the WiFi quick setting.
- Select Manage Wi-Fi connections.
- Choose the desired wireless network.
- Select Connect.
- Enter the required information if prompted.
The computer connects to the selected network when the appropriate credentials and connection requirements are satisfied.
How to Disconnect from WiFi
- Open Quick Settings on the taskbar.
- Select the WiFi connection controls.
- Click the WiFi icon again to disconnect the wireless connection.
The disconnected status icon appears when the computer is no longer connected to a WiFi network.
Wireless Networking Specifications
The computer supports the wireless communication technologies and radio-frequency bands identified below.
Wireless Frequency Bands
| Technology | Frequency Band | Maximum Transmit Power |
| WLAN 802.11b/g/n/ax and Bluetooth BR/EDR/LE | 2400–2483.5 MHz | Less than 20 dBm |
| WLAN 802.11a/n/ac/ax | 5150–5350 MHz and 5470–5725 MHz | Less than 23 dBm |
| WLAN 802.11a/n/ac/ax | 5725–5875 MHz | Less than 13.98 dBm |
| WLAN 802.11ax | 5945–6425 MHz | Less than 23 dBm |
Not every wireless mode or frequency band is necessarily enabled on every product configuration.
Indoor Wireless Usage Restrictions
In the European Union and United Kingdom, operation within the following frequency bands is restricted to indoor locations:
- 5150–5350 MHz
- 5945–6425 MHz
The applicable regulatory requirements must be followed when using wireless communications.
Power Management and Sleep Mode
The operating system includes a Sleep setting that reduces power consumption when the computer is not actively being used.
Sleep Mode Recommendation
The Sleep setting should remain enabled.
When Sleep is active, the computer can automatically enter a lower-power standby condition.
Effect of Disabling Sleep
Disabling the operating system’s Sleep setting increases energy consumption.
For normal operation, leave the Sleep setting enabled unless another configuration is specifically required.
Wireless Power Consumption
Connecting the laptop to a wireless network also increases energy consumption.
Wireless connections should be managed according to the user’s operating requirements.
Lenovo Commercial Vantage
Selected Lenovo 13w 2-in-1 Gen 3 configurations provide access to Lenovo Commercial Vantage.
The application offers controls for device management and system updates.
Lenovo Commercial Vantage Functions
| Function | Description |
| Device Settings | Adjust available computer settings. |
| System Updates | Check for available updates. |
How to Open Lenovo Commercial Vantage
- Open the Windows Start menu.
- Search for Vantage.
- Open Lenovo Commercial Vantage if the application is available.
- Select the required device-management function.
Checking for System Updates
Open Lenovo Commercial Vantage and use its system update function to check for available updates.
Follow the instructions displayed by the application.
Radio Frequency Exposure Information
The Lenovo 13w 2-in-1 Gen 3 meets the international guidelines for exposure to radio waves identified in the setup guide.
The document provides specific absorption rate (SAR) limits and maximum reported values.
Specific Absorption Rate (SAR)
SAR measures the rate at which radio-frequency energy is absorbed by body tissue.
The values are expressed in watts per kilogram (W/kg).
SAR Limits and Reported Values
| Measurement | Limit | Maximum Reported Value |
| Body-Worn SAR | 2 W/kg | 0.982 W/kg |
| Limb SAR | 4 W/kg | 0.915 W/kg |
The maximum reported values apply at a separation distance of 0 mm.
Additional SAR information is provided in the Safety and Warranty Guide supplied with the device.
Important Battery Safety Instructions
The Lenovo 13w 2-in-1 Gen 3 contains a non-rechargeable coin-cell battery.
The battery requires careful handling because swallowing or inserting a button or coin-cell battery into the body can cause severe internal chemical burns.
Coin-Cell Battery Specifications
| Specification | Details |
| Battery Type | CR2016 |
| Nominal Voltage | 3.0V DC |
| Battery Category | Non-Rechargeable Coin Cell |
| Maximum Permitted Heating Temperature | 100°C (212°F) |
Coin-Cell Battery Precautions
- Observe the correct positive (+) and negative (−) polarity.
- Keep the battery compartment completely secured.
- Stop using the product if the battery compartment cannot be closed securely.
- Keep new and used batteries out of children’s reach.
- Remove and appropriately recycle used batteries when applicable.
- Follow local battery disposal regulations.
- Do not attempt to recharge a non-rechargeable coin-cell battery.
- Do not disassemble, crush, forcibly discharge, or burn the battery.
- Do not heat the battery above 100°C (212°F).
- Do not mix different battery types, brands, or old and new batteries.
Coin-Cell Battery Ingestion Hazard
Warning: A swallowed coin-cell battery can cause internal chemical burns in as little as two hours. Serious injury or death may occur.
If a coin-cell battery is suspected of being swallowed or inserted into any part of the body, seek immediate medical attention.
Contact a local poison control center for treatment information.
Even used coin-cell batteries can cause severe injury.
Battery Disposal and Recycling
Used coin-cell batteries must not be placed in household trash or incinerated.
Dispose of or recycle batteries immediately according to the applicable local regulations.
Batteries removed from equipment that will not be used for an extended period must also be stored and handled safely, away from children.
How to Access the Full Lenovo User Guide
The Lenovo 13w 2-in-1 Gen 3 provides access to its full User Guide through the methods illustrated on the back cover of the Setup Guide.
Method 1: Access Through the Computer
- Open the Windows Start menu.
- Locate the User Guide access option shown in the setup illustration.
- Select it to open the available documentation.
Method 2: Scan the QR Code
The back cover includes a QR code for accessing the User Guide.
Use a compatible device to scan the QR code and follow the displayed instructions.
The full User Guide provides additional information, including the statement about USB transfer rates.
Frequently Asked Questions
1. How do I turn on the Lenovo 13w 2-in-1 Gen 3?
Connect the power adapter to the laptop’s USB-C charging port, then connect it to an electrical outlet. Press the Power button to start the computer and follow the operating system’s on-screen setup instructions.
2. What charger does the Lenovo 13w 2-in-1 Gen 3 use?
The laptop supports USB Power Delivery charging. The specified adapter power range is 15 watts (5V, 3A) to 65 watts (20V, 3.25A). A compatible 65-watt adapter supports the maximum charging speed identified in the guide.
3. How do I connect the Lenovo 13w 2-in-1 Gen 3 to WiFi?
Open Quick Settings on the Windows taskbar, select Manage Wi-Fi connections, choose the required wireless network, and click Connect. Enter the network password or other requested credentials if necessary.
4. Does the Lenovo 13w 2-in-1 Gen 3 support fingerprint login?
Fingerprint login is available on selected configurations. Models equipped with the fingerprint-enabled power control can use the designated button for sign-in after the feature has been configured.
5. What is Lenovo Commercial Vantage used for?
Lenovo Commercial Vantage allows supported configurations to access device settings and check for system updates. The application can be opened by searching for Vantage from Windows.
6. Does the Lenovo 13w 2-in-1 Gen 3 support USB-C fast charging?
Yes. The laptop supports USB Power Delivery fast charging, with the maximum specified adapter power of 65 watts at 20V and 3.25A.
7. Should Sleep mode remain enabled on the Lenovo 13w Gen 3?
Yes. Lenovo recommends leaving the operating system’s Sleep setting enabled because it automatically places the computer into a lower-power standby condition. Disabling Sleep increases energy consumption.
8. Where can I find the full Lenovo 13w 2-in-1 Gen 3 User Guide?
The full User Guide can be accessed using the documentation method shown on the computer or by scanning the QR code printed on the back cover of the Setup Guide.