
The Heatmiser neoStat-hw V3 is a smart hot water programmer and time clock from the IMI Heatmiser neo Series. It is designed to control a timed hot water output and can connect to the neoHub for app-based control through the Heatmiser neoApp.
The official manual covers installation, neoHub pairing, neoStat-hw pairing, mesh network operation, time clock display icons, keypad locking, clock setup, hot water switching times, timer override, standby mode, holiday mode, optional settings, factory reset, wiring diagrams, and support details.
Key Features
The Heatmiser neoStat-hw V3 includes:
- Smart hot water time clock control
- neoHub and neoApp compatibility
- Flush-mounted wall installation
- Mesh network communication
- Approach sensor with backlit touch keys
- Hot water timer ON/OFF programming
- Weekday/weekend, 7-day, and 24-hour schedules
- Timer override / hot water boost
- Holiday mode
- Standby mode
- Keypad lock with PIN
- Optional feature settings
- S Plan wiring support
- Mid-position valve wiring support
- Factory reset
Important Installation Notes
The neoStat-hw is designed to be flush mounted and needs a wall back box with a minimum depth of 35mm.
Installation Do’s and Don’ts
| Do | Don’t |
| Mount the time clock at eye level | Do not install near a direct heat source |
| Read the instructions fully before setup | Do not press hard on the LCD screen |
| Follow the correct wiring diagram | Do not force the front panel onto the back plate |
The official wiring diagrams state that the product must only be installed by a qualified electrician and must comply with local installation regulations.
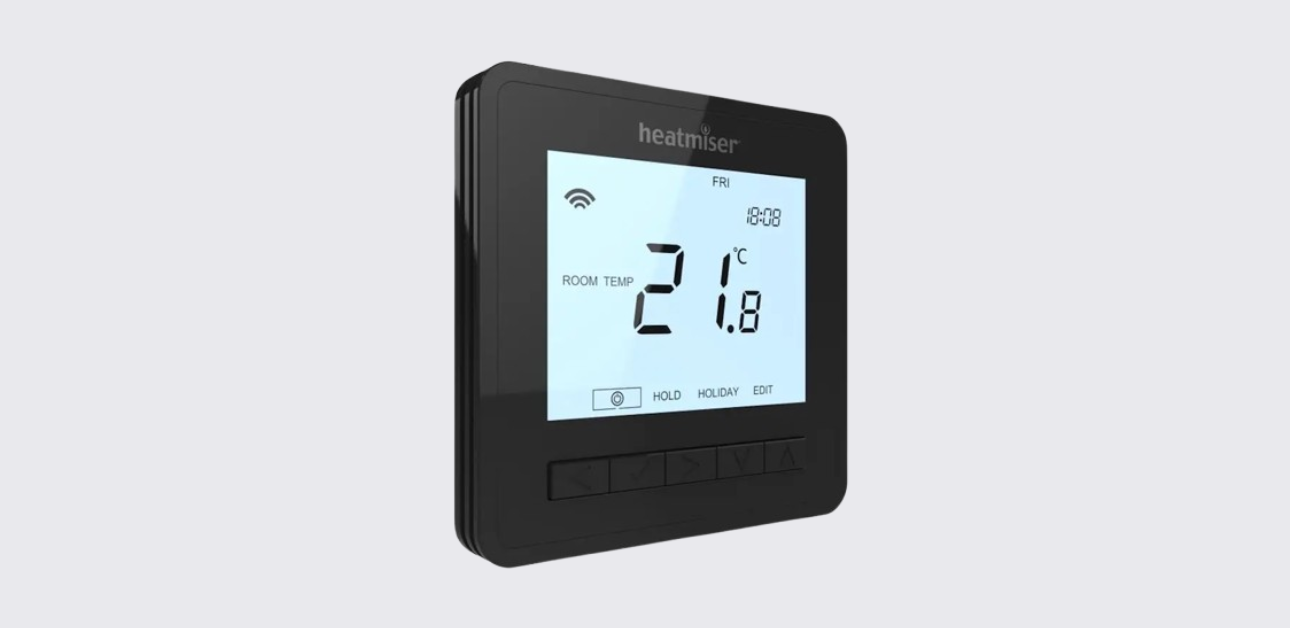
Parts and Controls
The neoStat-hw V3 uses a square LCD display with touch-sensitive navigation keys.
Main Controls
| Control | Function |
| Left arrow | Moves through menu options |
| Tick key | Confirms selections and enters settings |
| Right arrow | Moves through menu options |
| Down key | Reduces time or setting values |
| Up key | Increases time or setting values |
Main Menu Options
The display may show options such as:
- Power
- Setup
- Clock
- Hold
- Holiday
- Edit
- Cancel
- Done
Product Specifications
| Specification | Detail |
| Product model | Heatmiser neoStat-hw V3 |
| Product type | Smart hot water time clock / programmer |
| Series | neo Series |
| Mounting type | Flush mounted |
| Back box depth | 35mm minimum |
| App control | Heatmiser neoApp via neoHub |
| Network type | Heatmiser mesh network |
| Main function | Timed hot water output control |
| Programming modes | Weekday/weekend, 7 day, 24 hour |
| Timer override | Yes |
| Holiday mode | Yes |
| Standby mode | Yes |
| Keypad lock | Four-digit PIN |
| Wiring options | S Plan and mid-position valve |
| RF frequency | 2.4GHz 3.54dBm |
| Compliance | Directive 2014/53/EU |
How to Install the Heatmiser neoStat-hw V3
Installation Steps
- Remove the retaining screw
Remove the screw from the bottom face of the time clock. - Separate the front from the back plate
Carefully remove the front half from the back plate. - Place the front section safely aside
Keep the display panel protected during wiring and mounting. - Connect the wiring
Terminate the time clock according to the wiring diagrams on pages 18–19 of the official manual. - Secure the back plate
Screw the back plate securely into the wall back box. - Refit the front panel
Clip the front of the time clock onto the back plate. - Tighten the retaining screw
Secure the front panel in place.
Pairing the neoHub
The neoHub connects the neoStat-hw to the Heatmiser neoApp for smart control.
neoHub Pairing Steps
- Connect the neoHub to the router using the Ethernet cable.
- Connect the power supply to the neoHub.
- Wait for the router to assign an IP address.
- The Link LED lights red when the neoHub is connected to the network.
- The Link LED turns green when connected to the Heatmiser cloud server.
- Connect the smartphone or tablet to the same Wi-Fi network as the router.
- Download the free Heatmiser neoApp from the Apple App Store or Google Play.
- Register an account or sign in.
- Select Add Location.
- Press the connect button on the neoHub.
- Enter a location title, such as Home.
Pairing the neoStat-hw with the neoHub
The manual recommends pairing the neoStat located nearest to the neoHub first.
Pairing Steps
- In the neoApp, select Add neoStat.
- Enter a preset or custom title.
- Press Next.
- On the neoStat-hw, use Left/Right to select the power icon.
- Press and hold Tick.
- When SETUP appears, press Tick once.
- Feature 01 appears.
- Press Tick again to pair the neoStat-hw to the neoHub.
- The mesh symbol flashes on the display.
- When connection succeeds, the mesh symbol stays permanently displayed.
- Select Add Another for more zones or Finish to complete setup.
What Is a Mesh Network?
Heatmiser neoStats use a mesh network. This allows compatible neoStats to send and receive signals through other thermostats on the same network until the signal reaches the neoHub.
This helps improve:
- Communication range
- Network stability
- Smart control reliability
If the mesh symbol disappears, the time clock has lost connection to the neoHub.
Approach Sensor
The neoStat-hw uses proximity detection. When someone approaches the unit, the touch keys and backlight turn on automatically.
This makes the time clock easier to adjust in low-light areas.
Time Clock Mode Overview
The neoStat-hw V3 works as a hot water time clock. It controls timed output based on programmed switching times, override settings, standby mode, and holiday mode.
LCD Display Icons and Indicators

| Display Item | Meaning |
| Mesh symbol | Connected to neoHub |
| Day indicator | Shows day of the week |
| Holiday icon | Time clock is in holiday mode |
| Set | Settings are being changed |
| Program indicator | Shows which switching period is being edited |
| Main menu | Shows selected option |
| Keypad lock indicator | Keypad is locked |
| Timer status | Shows current timed output state |
| Hold Left | Timer hold or override is active |
| Time/Day/Month/Year | Used when setting clock, calendar, or holiday period |
Locking and Unlocking the neoStat-hw
The neoStat-hw includes a keypad lock with a four-digit PIN.
Lock the Time Clock
- Use Left/Right to scroll to HOLD.
- Press and hold Tick for 10 seconds.
- The display shows 0000.
- Use Up/Down to enter the first two digits.
- Press Tick to confirm.
- Use Up/Down to enter the second two digits.
- Press Tick to confirm.
- The keypad lock indicator appears.
Unlock the Time Clock
- Press Tick once.
- The display shows 00:00.
- Enter the four-digit PIN using Up/Down and Tick.
- The display unlocks and returns to the main screen.
Setting the Clock
- Use Left/Right to scroll to the power icon.
- Press and hold Tick to turn off the display.
- Use the Right arrow to select CLOCK.
- Press Tick to confirm.
- Use Up/Down to set the year.
- Press Tick.
- Repeat the same process for month, date, and time.
- Press Tick to confirm the new clock settings.
- Use the Down arrow to scroll back to the power icon.
- Press Tick to turn the display back on.
Setting Hot Water Switching Times
Hot water switching times control when the hot water output turns ON and OFF.
How to Program Hot Water Times
- Use Left/Right to scroll to EDIT.
- Press Tick.
- Use Left/Right to select the day or period of the week.
- Press Tick to confirm.
- Switching period 1 flashes and the current ON time appears.
- Press Down to view the OFF time.
- Select a switching time and press Tick.
- Use Up/Down to set the ON time hours.
- Press Tick.
- Use Up/Down to set the ON time minutes.
- Press Tick.
- Use Up/Down to set the OFF time hours.
- Press Tick.
- Use Up/Down to set the OFF time minutes.
- Press Tick.
- Press the Right arrow to move to switching period 2.
- Repeat for all switching periods.
- For unused periods, enter –:–.
- Scroll to DONE and press Tick to confirm all changes.
Hot Water Boost / Timer Override
The timer override function works like a hot water boost. It turns the timed output on for a selected duration without changing the saved schedule.
How to Use Timer Override
- Use Up/Down to set the override duration, such as 02:00.
- Press Tick to confirm and return to the main display.
- Hold Left and the remaining override time appear on screen.
When the countdown ends, the time clock returns to the normal programmed schedule.
Standby Mode
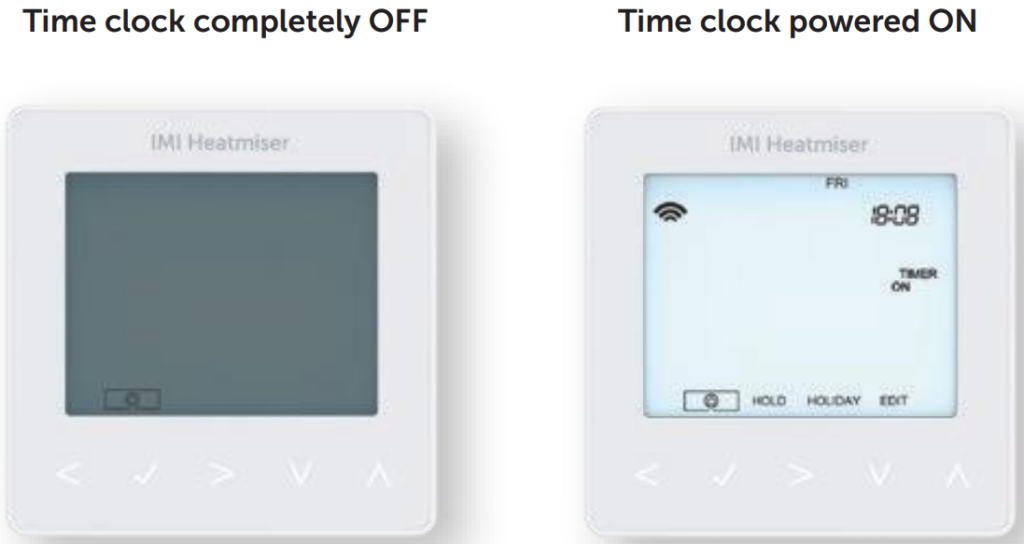
Standby turns the time clock off completely and keeps the timed output off.
Turn Standby On
- Scroll to the Power icon.
- Press and hold Tick for about 3 seconds until the display goes blank.
- The timed output turns off during Standby mode.
Turn the Time Clock Back On
Press Tick once.
Holiday Mode
Holiday mode keeps the timed output OFF during the holiday period. The time clock returns to the normal program at the selected return date and time.
Set Holiday Mode
- Use Left/Right to scroll to HOLIDAY.
- Press Tick.
- Use Up/Down to set the year.
- Press Tick.
- Use Up/Down to set the month.
- Press Tick.
- Repeat for date and time.
- Press Tick to confirm.
Holiday mode starts immediately and returns to normal operation at the configured time and date.
Cancel Holiday Mode
- Use Left/Right to scroll to HOLIDAY.
- Press Tick.
- When CANCEL appears, press Tick.
Optional Settings
The neoStat-hw V3 includes two optional feature settings.
| Feature | Description | Settings |
| 01 | Pairing to neoHub | Connects the time clock to neoHub |
| 02 | Program mode | Weekday/weekend, 7 day, or 24 hour |
Program Mode Options
| Program Mode | Description |
| Weekday/Weekend | Four ON/OFF switching times for weekdays and four different ON/OFF times for weekends |
| 7 Day | Each day has four ON/OFF switching times that can be programmed independently |
| 24 Hour | All days use the same ON/OFF switching times |
Adjusting Optional Settings
- Use Left/Right to scroll to the power icon.
- Press and hold Tick for 3 seconds.
- When SETUP appears, press Tick once.
- Use Up/Down to scroll through features.
- Use Left/Right to change the setting within each feature.
- Press Tick to confirm and exit setup.
Factory Reset
A factory reset clears all setup and pairing settings. After reset, setup and pairing must be repeated.
Factory Reset Steps
- Use Left/Right to scroll to the power icon.
- Press and hold Tick to turn the display off.
- SETUP appears.
- Press and hold Tick for 10 seconds.
- All icons appear for 2 seconds.
- The number 1 or 2 flashes.
- Use Left/Right to select the mode.
- Press Tick to confirm.
The manual states:
- Mode 1 = Thermostat
- Mode 2 = Time Clock
For the neoStat-hw, the unit is used as a time clock for hot water programming.
Wiring Diagram
The manual includes two main wiring diagrams for hot water control.
S Plan Wiring
The S Plan diagram shows the neoStat-hw connected with:
- Fused supply to neoStat-hw
- Hot water stat
- Hot water valve
- End switch boiler enable
- Timer terminals
- Supply to neoStat
Terminals shown include L, N, COM, NO, NC, L, N.
Mid-Position Valve Wiring
The mid-position valve diagram shows the neoStat-hw wired with:
- Fused supply to neoStat-hw
- Hot water stat
- Mid-position valve
- Boiler enable
- Supply to neoStat heating
- A2 neoStat connection
The diagram includes valve wire labels such as BL, GR, OR, WH, plus L, N, COM, NO, NC, L, N terminals.
Troubleshooting Guide
| Problem | Possible Cause | Recommended Action |
| Mesh symbol disappears | Connection to neoHub has been lost | Check neoHub power, router connection, and pairing |
| Hot water does not turn on | Timer schedule may be off or output is in standby | Check switching times and standby mode |
| Timer output stays off | Holiday mode may be active | Cancel holiday mode or wait for return time |
| Boost does not work | Override duration may be set incorrectly | Set a boost duration and press Tick |
| Touch keys do not respond | Keypad lock is active | Unlock with the four-digit PIN |
| Time or date is wrong | Clock not set correctly | Reset the clock and calendar |
| Schedule does not match routine | Wrong program mode selected | Check weekday/weekend, 7 day, or 24 hour mode |
| Unit lost app control | neoHub or mesh connection issue | Re-pair the neoStat-hw with the neoHub |
| Wiring-related output issue | Incorrect S Plan or mid-position wiring | Ask a qualified electrician to check the wiring diagram |
Support and Contact
IMI Heatmiser provides technical specifications, PDFs, FAQs, and product support through its official support channels.
IMI Heatmiser Support
Support phone: +44 (0)1254 669090
Website: www.heatmiser.com
Address:
IMI Heatmiser
Units 1-5 Hurstwood Court, Mercer Way
Shadsworth Business Park
Blackburn, Lancashire, BB1 2QU
United Kingdom
The manual states that Heatmiser UK Ltd declares the radio equipment complies with Directive 2014/53/EU. RF frequency is listed as 2.4GHz 3.54dBm.