
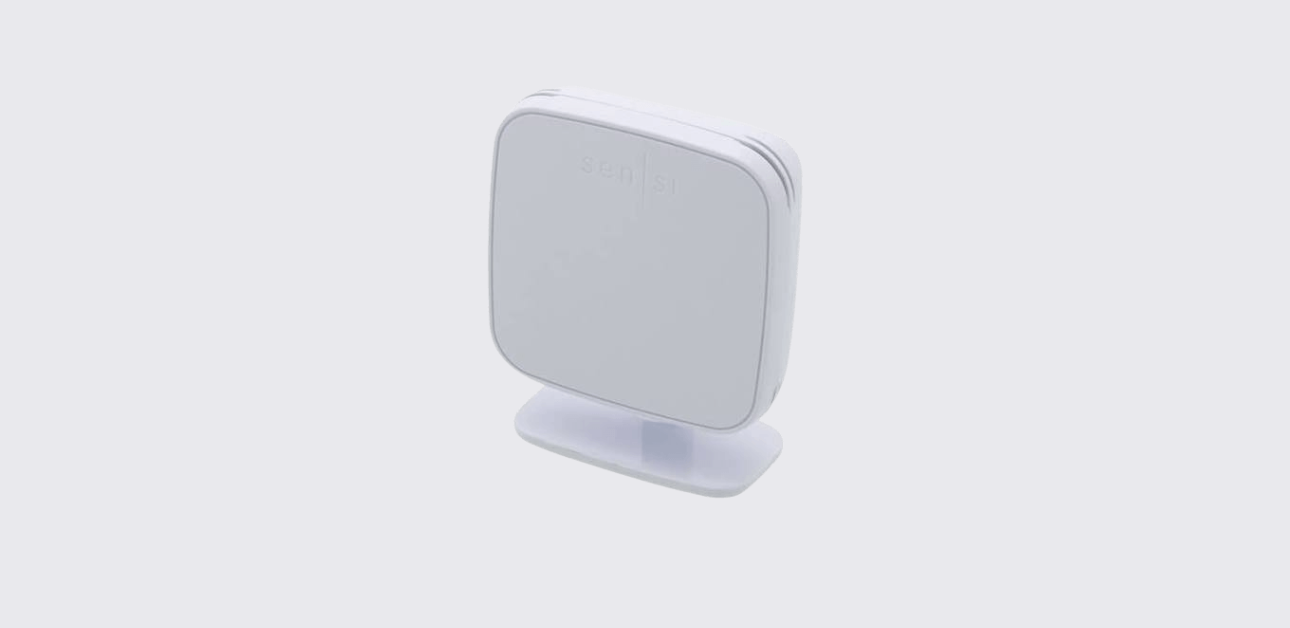
The Sensi Room Sensor is an add-on sensor designed to work with the Sensi Touch 2 Smart Thermostat. It helps measure temperature and humidity in different rooms, giving the thermostat better visibility across the home instead of relying only on the thermostat’s built-in reading.
This official installation guide applies to Sensi Room Sensor models RS01-SG and RS01-SGB3.
The room sensor is useful for homes where certain rooms feel warmer or cooler than the main thermostat location. Once paired, users can view sensor readings in the Sensi app, rename sensors by room, and choose which sensors should influence heating and cooling.
Compatible Thermostat
The Sensi Room Sensor is made to pair with the Sensi Touch 2 Smart Thermostat.
According to the manual, users can pair up to 15 Sensi room sensors with one Sensi Touch 2 thermostat.
| Product | Compatible With |
| Sensi Room Sensor | Sensi Touch 2 Smart Thermostat |
| Supported sensor models | RS01-SG, RS01-SGB3 |
| Maximum sensors supported | Up to 15 sensors |
What the Sensi Room Sensor Does
The Sensi Room Sensor helps the thermostat understand conditions in more than one room. After setup, the Sensi app can show sensor data and use selected devices to calculate the average temperature and humidity across the home.
The sensor can be used to:
| Function | Description |
| Measure room temperature | Helps track comfort in specific rooms |
| Measure humidity | Shows humidity readings in the Sensi app |
| Support room prioritization | Lets users prioritize selected rooms or sensors |
| Improve comfort balance | Helps heating and cooling respond to selected areas |
| Show sensor status | Displays sensor details in the app |
Sensi Room Sensor Parts and Components
The manual references the main sensor components and included mounting options.
| Part or Component | Purpose |
| Sensi Room Sensor | Measures room temperature and humidity |
| Battery compartment | Holds the sensor batteries |
| Reset button | Used to reset or re-pair the sensor |
| AAA batteries | Power the sensor |
| Wall mounting hardware | Used to mount the sensor on a wall |
| Sensor stand/base | Lets the sensor sit on a table or shelf |
| Sensi app | Used to view, rename, and prioritize sensors |
| Sensi Touch 2 thermostat screen | Used to begin pairing and connect sensors |
How to Add a Sensi Room Sensor
Step 1: Open Remote Sensor Setup
Start from the Sensi Touch 2 thermostat.
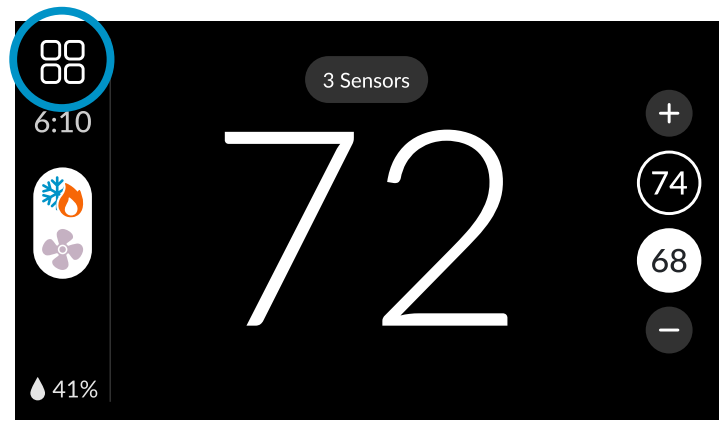
- Tap the menu icon in the top-left corner of the thermostat screen.
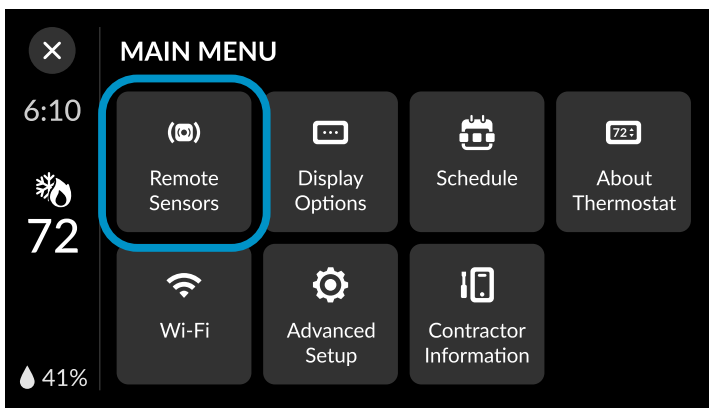
- Tap Remote Sensors.
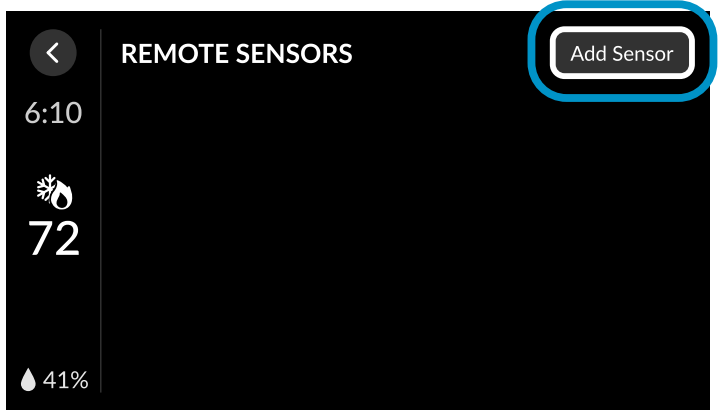
- Tap Add Sensor.
This opens the sensor pairing process on the thermostat.
How to Connect the Sensor
Step 2: Pair the Sensor
To connect a Sensi Room Sensor:
- Insert batteries into the sensor.
- Tap OK on the Sensi Touch 2 screen.
- Wait for compatible sensors to appear on the thermostat screen.
- Tap Connect next to the sensor.
- Wait for the connection process to complete.
If the connection is successful, the thermostat screen will show a green check mark.
If the sensor already had batteries installed or was paired before, press and hold the Reset button inside the battery compartment for 5 seconds before trying again.
The manual recommends pairing one sensor at a time, especially when setting up multiple sensors, so users can easily identify which room sensor is being added.
How to Rename Sensi Room Sensors
Step 3: Name the Sensor in the Sensi App
After the sensor is paired, the thermostat prompts users to open the Sensi app and rename the sensor.
To rename a sensor:
- Open the Sensi app.
- Tap the connected Touch 2 thermostat.
- Look above the room temperature reading to see the connected sensors.
- Tap Sensors to view sensor status.
- Tap the info icon next to the sensor.
- Enter a new name in the Sensor Name field.
- Use a clear location name such as “Living Room,” “Master Bedroom,” or “Kids’ Bedroom.”
- Tap Save.
The screenshots on page 4 show the sensor list, sensor details screen, signal strength, battery status, and the rename field inside the Sensi app.
How to Place or Mount the Sensi Room Sensor
Step 4: Choose the Best Location
After pairing and naming the sensor, place it in the correct room.
The manual gives three installation options:
| Placement Option | Description |
| Wall mount | Mount the sensor using the included hardware |
| Stand mount | Slide the sensor onto the included stand and snap it into place |
| Flat surface | Place the sensor on a table, shelf, or similar flat surface |
For best accuracy, place the sensor:
| Placement Rule | Recommendation |
| Height | About 5 feet off the ground |
| Direction | Facing the room |
| Airflow | In a location with good airflow |
| Surface | Away from surfaces that may skew readings |
Where Not to Place the Sensor
Sensor placement matters because heat, cold, sunlight, and poor airflow can affect readings.
Avoid placing the sensor:
- In direct sunlight
- Near air vents
- Near windows
- Near stoves, radiators, hot water pipes, or other heat sources
- On or near an uninsulated surface or wall
- Inside a closet or enclosed area
- Behind books, wall art, or objects that block airflow
- In locations outside normal operating conditions, such as a refrigerator or greenhouse
The manual also warns not to paint or spray anything on the sensor because it may affect performance.
How Sensor Prioritization Works
Step 5: Prioritize Selected Rooms
After installation, the Sensi app shows a checkmark next to all sensors and the thermostat by default. This means the thermostat uses an average reading across all selected devices to manage heating and cooling.
To prioritize a room:
- Open the Sensi app.
- Go to the thermostat screen.
- Tap Sensors.
- Keep only the thermostat or sensors selected that should influence heating and cooling.
- Uncheck devices that should not be included in the average.
The temperature and humidity shown at the top of the app screen will display the average reading across selected devices.
This is helpful when users want the system to focus comfort on one room, such as a bedroom at night or a living room during the day.
Connection Type and Range
Sensi Room Sensors do not use Wi-Fi to connect directly. The manual states that they use low-frequency radio waves for a secure connection to the Sensi Touch 2 thermostat.
For a stable connection:
| Requirement | Recommendation |
| Sensor distance | Keep sensor within 45 feet of the thermostat |
| Obstacles | Avoid thick walls between sensor and thermostat |
| Interference | Avoid nearby low-frequency devices around 900MHz |
| Possible interference sources | Cordless phones, baby monitors, similar devices |
Troubleshooting the Sensi Room Sensor
Sensor Won’t Connect
If the sensor does not appear on the thermostat screen or shows a failed connection message:
- Hold the Reset button on the sensor for 5 seconds.
- Try the pairing process again.
- If the sensor still does not connect, replace the batteries with 2 new AAA batteries.
- Pair only one sensor at a time.
Sensor Lost Connection
If the sensor loses connection:
- Remove the batteries.
- Wait 5–10 seconds.
- Reinstall the batteries.
- Let the sensor reconnect.
This power cycle can help restore communication between the sensor and thermostat.
Inaccurate Temperature Readings
If sensor readings seem wrong, check the placement first.
For accurate readings, the sensor should be about 5 feet off the ground, face the room, and sit in a location with good airflow.
Move the sensor away from:
| Problem Location | Why It Can Affect Readings |
| Direct sunlight | Can make readings too warm |
| Air vents | Can cause rapid temperature changes |
| Windows | Can expose sensor to drafts or sun |
| Heat sources | Can raise readings artificially |
| Closets/enclosed areas | Poor airflow can distort readings |
| Uninsulated walls | Surface temperature may affect sensor accuracy |
Support and Help
For help connecting Sensi thermostats or room sensors, users can contact Sensi Technical Support.
| Support Option | Details |
| Support website | https://sensi.copeland.com/en-us/support |
| Support help | Assistance for users or contractors troubleshooting thermostat and sensor setup |