
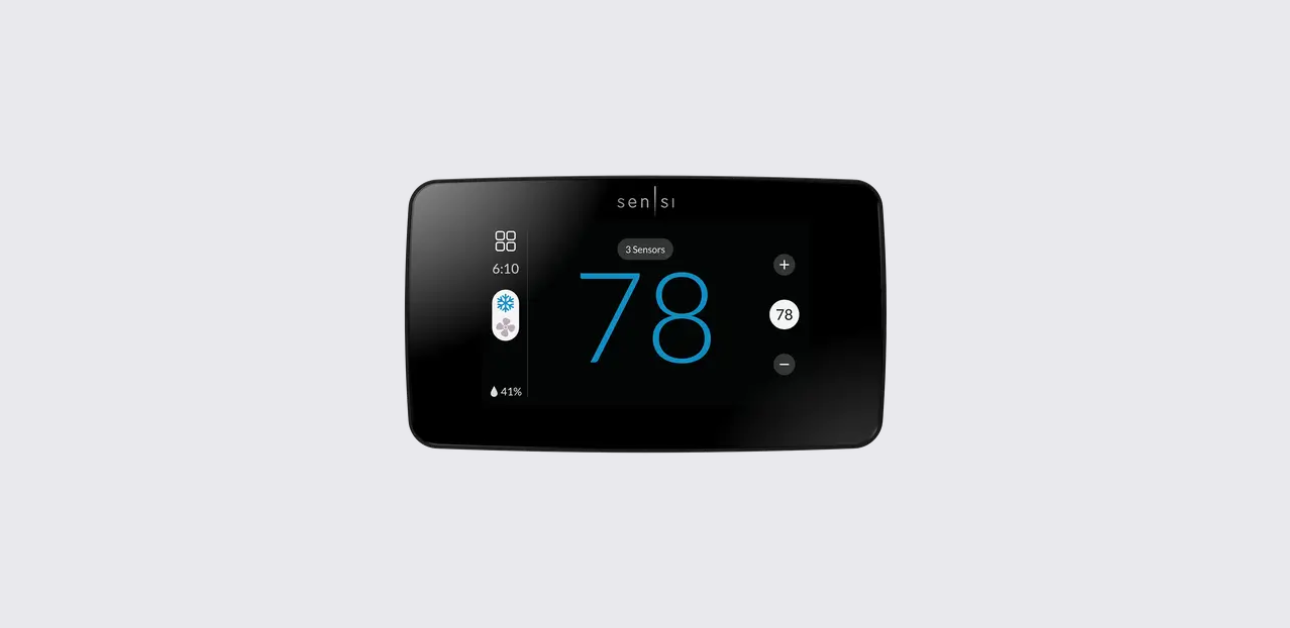
The Sensi Touch 2 Smart Thermostat is a Wi-Fi-enabled touchscreen thermostat designed for app-based control, smart HVAC management, and remote access through the Sensi mobile app. This installation guide applies to the Sensi Touch 2 Smart Thermostat models 1F96U-42WF series and ST76 series.
Unlike basic thermostats, the Sensi Touch 2 requires the Sensi app for installation and configuration. The app walks users through wiring, HVAC system selection, Wi-Fi connection, registration, and thermostat setup.
A key requirement is that the Sensi Touch 2 requires a C-wire. Without a proper C-wire connection, the thermostat may not power on or may show a blank or flashing display.
Compatible Models
| Product | Model Series |
| Sensi Touch 2 Smart Thermostat | 1F96U-42WF series |
| Sensi Touch 2 Smart Thermostat | ST76 series |
The model number can be found on the back of the thermostat cover.
What You Need Before Installation
Before installing the Sensi Touch 2 thermostat, gather the following items:
| Requirement | Purpose |
| 2.4GHz Wi-Fi network name/SSID | Needed for wireless connection |
| Wi-Fi password | Required during app setup |
| Screwdriver | Used to remove the old thermostat and mount the new base |
| Included Sensi Touch 2 hardware | Mounting and installation components |
| Sensi app | Required for installation and configuration |
| C-wire | Required to power the thermostat |
The thermostat connects only to 2.4GHz Wi-Fi networks. If the Wi-Fi network does not appear during setup, it may be hidden or not compatible.
Downloading the Sensi App
The Sensi Touch 2 must be installed using the Sensi app. The app is free and available for smartphones and tablets through the App Store and Google Play.
To begin:
- Download the Sensi app.
- Open the app.
- Create a Sensi account.
- Use a valid email address and password.
- Save the login details for future access.
The thermostat is linked to the email address used during registration, so the account credentials should be kept secure.
Creating a Sensi Account
A Sensi account is required to control the thermostat remotely and access Sensi features. After downloading the app, users are prompted to create an account with a valid email address and password.
If the password is forgotten later, tap Forgot Password on the Sensi app login screen. A temporary password will be sent to the registered email address.
Parts and Key Components
The manual focuses on installation, wiring, and configuration, but several key parts are referenced throughout the setup process.
| Part or Component | Function |
| Touchscreen thermostat cover | Main display and control interface |
| Thermostat base | Mounts to the wall and holds the wiring terminals |
| Wire terminal slots | Connect HVAC system wires |
| QR code / security PIN | Used to connect the thermostat to the app |
| Menu button | Used to access Wi-Fi setup on the thermostat |
| RC/RH internal jumper | Used for power configuration; may need clipping on two-transformer systems |
| ACC+ / ACC- terminals | Used for accessory devices such as humidifiers or dehumidifiers |
| Mounting screws | Secure the thermostat base to the wall |
The wiring diagrams on pages 12 and 13 show the thermostat terminal layout for conventional systems, heat pump systems, and accessory devices.
Important C-Wire Requirement
The Sensi Touch 2 requires a C-wire to power the thermostat. If there is no wire connected to the C terminal, the thermostat may not turn on.
For homes without a C-wire, the manual recommends checking Sensi’s C-wire support resources. In some heat-only systems, an external transformer may be an option, but users should review support guidance or contact a professional before attempting that setup.
How to Install the Sensi Touch 2 Smart Thermostat
Step 1: Add the Thermostat to the Sensi App
After creating a Sensi account, open the app and tap the plus (+) sign to add a thermostat.
Choose Sensi Touch 2 Smart Thermostat for these model numbers:
| Model Option | Supported Series |
| Sensi Touch 2 | 1F96U-42WF series |
| Sensi Touch 2 | ST76 series |
Step 2: Choose the Installation Type
The app asks whether the thermostat is already mounted.
Choose Not Mounted if installing the thermostat yourself. This option gives a full step-by-step guide for identifying wires, labeling wires, connecting terminals, and setting up Wi-Fi.
Choose Is Currently Mounted if the thermostat was professionally installed. This option helps identify already connected wires and configure the system before Wi-Fi setup.
For DIY users, the manual recommends selecting Not Mounted to make sure the wiring and HVAC settings are correct.
Removing the Old Thermostat
Before handling wires, turn off power to the heating and cooling system.
Then follow these steps:
- Gather the required tools and included hardware.
- Turn off power to the HVAC system.
- Remove the old thermostat cover.
- Take a clear photo of the old wiring.
- Remove and discard old jumper wires.
- Select the wire terminals shown on the old thermostat in the Sensi app.
- Confirm whether the wiring setup is valid.
- Select the furnace type.
- Label each wire using the included stickers.
- Disconnect the wires.
- Remove the old thermostat base from the wall.
The wiring photo is important. It can help if troubleshooting is needed later.
Installing the Sensi Touch 2 Base
After removing the old thermostat base, install the new Sensi base.
Use the included mounting screws to secure the thermostat base to the wall. Make sure the base is properly aligned and that each wire can reach its matching terminal.
Wiring the Sensi Touch 2 Thermostat
For a Not Mounted installation:
- Insert the labeled wires into the matching terminal slots.
- Push each wire securely into place.
- Attach the thermostat cover to the base.
- Turn the HVAC system power back on.
The manual notes that the Sensi system has a jumper wire built into it, so old jumper wires from the previous thermostat should not be reused.
Setup for an Already Mounted Thermostat
If the Sensi Touch 2 is already mounted:
- Turn off power to the HVAC system.
- Pull the thermostat cover straight toward you to remove it from the base.
- Identify the wires already connected to the base.
- Confirm that a C-wire is installed.
- Select the correct furnace type.
- Push the thermostat cover back onto the base.
- Turn the HVAC power back on.
This path is mainly for thermostats installed by a professional.
Connecting the Sensi Touch 2 to Wi-Fi
After wiring and mounting the thermostat, connect it to Wi-Fi.
On the thermostat:
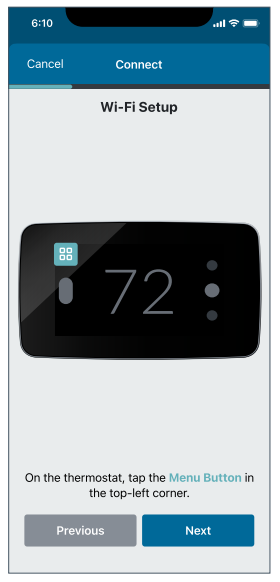
- Tap Menu in the top-left corner.
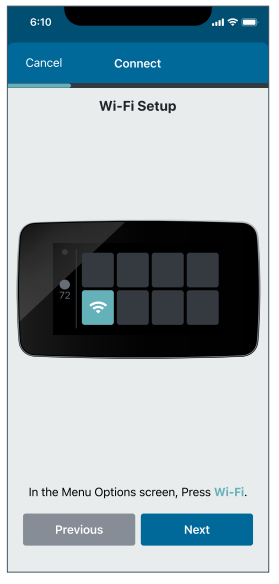
- Select Wi-Fi.
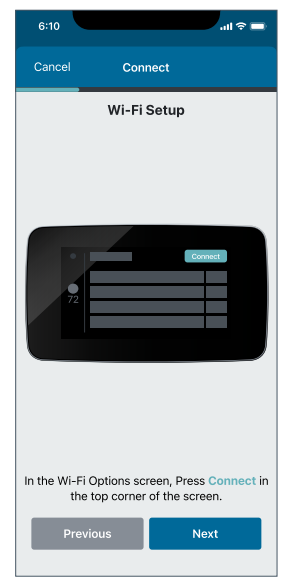
- Tap Connect.
In the app:
- Scan the QR code shown on the Sensi Touch 2 screen.
- Allow Bluetooth permissions on the phone.
- If scanning does not work, tap Use Security PIN and enter the code from the touchscreen.
- Select the home Wi-Fi network.
- Enter the Wi-Fi password.
- Name the thermostat.
- Register the thermostat with location details.
- Add contractor information if available.
- Tap Start Using Sensi.
The thermostat uses Bluetooth during setup, so Bluetooth must be enabled and allowed in app permissions.
Registering the Thermostat
After Wi-Fi connection, the app prompts users to register the thermostat. Registration can be completed by using Locate Me or by manually entering:
| Required Information | Details |
| Street address | Home or installation address |
| City | Local city |
| State | State or region |
| ZIP code | Postal code |
| Country | Country |
| Time zone | Local time zone |
Registration helps the thermostat function properly with location-based settings and account access.
HVAC Configuration Menu
The Sensi Touch 2 includes HVAC configuration settings for different system types.
| Menu Item | Description | Options |
| Outdoor Equipment | Select AC or heat pump equipment and number of stages | AC1, AC2, HP1, HP2, None |
| Indoor Equipment | Select gas, electric, or fan-only equipment | GA1, GA2, EL1, EL2, Fan |
| Reversing Valve Position | Sets reversing valve operation or hydronic zone setting | O, B, 6, None |
| Humidifier Accessory | Enables humidifier if wired to thermostat | Yes, No |
| Dehumidifier Accessory | Enables dehumidifier if wired to thermostat | Yes, No |
For most heat pump systems, the reversing valve is set to O, which energizes the valve in cooling. Some brands, including Rheem or Ruud, may use B, which energizes in heating.
Supported HVAC System Types
Conventional Single-Stage and Multi-Stage Systems
The wiring diagram on page 12 covers conventional systems without a heat pump. These systems may include:
| Terminal / Function | Description |
| RC | Power for cooling, 24V |
| RH | Power for heating, 24V |
| C | Common wire, 24V |
| Y | First-stage cooling |
| Y2 | Second-stage cooling |
| W/E | First-stage heat |
| W2 | Second-stage heat or dehumidifier |
| G | Indoor blower fan |
| O/B | Heat pump changeover, zone panel, or 3-wire hot water zone valve |
For two-transformer systems with separate RC and RH wires, the manual notes that the internal RC/RH jumper located on the back of the thermostat should be clipped.
Heat Pump Systems
The heat pump diagram on page 12 covers single-stage and multi-stage heat pump setups.
| Terminal / Function | Description |
| RC | Power for cooling, 24V |
| RH | Power for heating, 24V |
| C | Common wire, 24V |
| Y | First-stage heat and cool compressor |
| Y2 | Second-stage heat and cool compressor |
| W/E | Auxiliary or emergency heat |
| W2 | Additional auxiliary/emergency heat depending on system setup |
| G | Indoor blower fan |
| O/B | Heat pump reversing valve |
The manual also notes the internal jumper between RC and RH on the back of the thermostat.
Accessory Device Wiring
The page 13 diagram shows accessory wiring options using ACC+ and ACC-.
2-Wire Accessory
A 2-wire accessory has its own power source. In this setup, the switch on the back of the thermostat should be set to Accessory.
1-Wire Accessory
A 1-wire accessory pulls power from the HVAC system. In this setup, the switch on the back of the thermostat should be set to System.
Accessory terminals may be used for devices such as humidifiers or dehumidifiers when supported by the system and configured in the thermostat menu.
Installing Multiple Sensi Thermostats
To install more than one Sensi thermostat:
- Install the first thermostat using the Sensi app.
- Open the main screen of the app.
- Tap the plus (+) sign.
- Add another thermostat to the same account.
Each thermostat should be installed through the same guided app process.
Accessing the Thermostat from Other Devices
Users can control registered thermostats from any device logged into the same Sensi account. There is no listed limit to the number of devices that can access the thermostat.
Account login details should not be shared casually because anyone with the email and password can control thermostats connected to that account.
Troubleshooting the Sensi Touch 2 Thermostat
Heating or Cooling Is Not Turning On
If heating or cooling does not start, check these items:
| Issue | What to Do |
| No HVAC power | Confirm the system has power |
| Control board error | Check the HVAC control board for error codes |
| Breakers | Reset the breakers |
| Furnace or air handler doors | Make sure compartments are closed and secured |
| Loose wires | Push wires fully into the terminal slots |
| Incorrect wiring | Follow the wiring instructions in the Sensi app |
| Possible HVAC issue | Reinstall the original thermostat to test the system |
If heating or cooling does not work even with the original thermostat, the HVAC equipment may need service from a professional technician.
Blank or Flashing Display
A blank or flashing Sensi Touch 2 display usually means the thermostat is not receiving enough power.
The most important checks are:
- Confirm a wire is connected to the C terminal.
- Make sure the C-wire is connected at both the thermostat and the HVAC control board.
- Gently tug the C-wire at the system control board to make sure it is secure.
- Gently tug all thermostat wires to confirm they are seated properly.
- Use a voltmeter to measure voltage between RH or RC and C.
- Confirm the thermostat receives 20–30VAC.
- Reset breakers if needed.
If voltage is below 20VAC, the thermostat will not turn on.
Wi-Fi Connection Troubleshooting
If the thermostat will not connect to Wi-Fi:
| Problem Area | Recommended Fix |
| Sensi app version | Update the app to the latest version |
| Phone issue | Reboot the smartphone |
| Router issue | Unplug the router for a few minutes, then plug it back in |
| Bluetooth | Turn Bluetooth on and allow it in Sensi app permissions |
| Location access | Enable Location access and allow it for the Sensi app |
| Device issue | Try another smartphone or tablet |
| Network type | Confirm the network is 2.4GHz |
Reconnecting to Wi-Fi
If the router was replaced or the Wi-Fi password changed, the thermostat must be reconnected. The process depends on the smart device being used, and the manual directs users to Sensi’s reconnection support article.
Account Settings and Password Help
The Sensi app account area allows users to manage email preferences, change account information, and update the email address connected to the thermostat.
For iOS, tap the person icon in the upper-right corner.
For Android, tap the three dots in the upper-right corner.
For forgotten passwords, tap Forgot Password on the app login screen. A temporary password will be sent to the account email.
Technical Support
For installation help, troubleshooting, Wi-Fi setup issues, or thermostat feature support, users can contact Sensi technical support.
| Support Option | Details |
| Support website | https://sensi.copeland.com/en-us/support |
| Phone support | (888) 605-7131 |
| Compatibility help | sensi.copeland.com/system |
| C-wire help | sensi.copeland.com/en-us/support/c-wire |