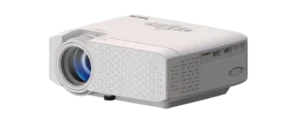
| Document Detail | Information |
| Document Type | User Manual |
| Brand Name | Tzumi |
| Product Name | GOTheater LED Home Cinema Projector |
| PDF File Size | 11.05 MB |
| Number of Pages | 1 |
| Languages Covered | English |
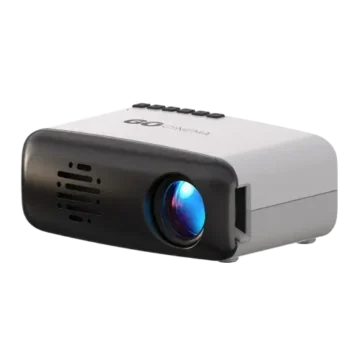
Tzumi GOTheater LED Home Cinema Projector
The Tzumi GOTheater LED Home Cinema Projector is a compact WiFi-enabled projector designed for movies, video games, sports, and other home entertainment. It supports wireless screen mirroring from compatible iPhone, Mac, and Android devices, along with wired mirroring and conventional HDMI, VGA, AV/RCA, and USB connections.
The projector has a native display resolution of 800 × 480 and accepts HDMI video signals up to 1080p. It also includes manual focus and keystone adjustment, USB media playback, WiFi network connectivity, and remote-control operation.
The manual recommends using the GOTheater primarily for video entertainment in a dark environment and specifically notes that it is not recommended for Word or Excel applications in education or business settings.
Main Features
The user manual highlights the following features:
- WiFi-enabled screen mirroring.
- Wireless iPhone and Android screen mirroring.
- Wired iPhone and Android mirroring through USB.
- HDMI input.
- VGA computer input.
- AV/RCA input.
- USB media playback.
- LED light source with a stated lifetime of up to 30,000 hours.
- Manual focus adjustment.
- Keystone image correction.
- Portable home-cinema design.
- Best performance in a dark viewing environment.
The feature panel also advertises a 150-inch dynamic image, while the technical specification panel lists a 30–130-inch projection range. This discrepancy is noted again at the end of this article.
What’s Included in the Box
The package contents listed in the manual are:
- 1 × GOTheater projector
- 1 × Wireless remote
- 1 × Lens cover
- 1 × AC power adapter
- 1 × HDMI cable
- 1 × AV/RCA cable
- 1 × User manual
Remote Control Guide
The supplied wireless remote uses two AAA batteries.
| Remote Control | Function |
| Power | Turns the projector on or off |
| Menu | Opens projector settings |
| Home | Returns to the home screen |
| Up | Moves upward through menus |
| Down | Moves downward through menus |
| Left | Moves left through menus |
| Right | Moves right through menus |
| OK | Confirms the highlighted selection |
| Play/Stop | Controls supported media playback |
| Return | Goes back to the previous screen |
| Volume Down | Reduces audio volume |
| Volume Up | Raises audio volume |
| Mute | Mutes or restores sound |
The projector also has navigation controls on the unit itself for many menu functions.
Technical Specifications
| Specification | Value |
| Native Display Resolution | 800 × 480 |
| Supported HDMI Video Resolutions | 1080p, 1080i, 720p, 576i, 480p, 480i |
| Power Consumption | 50W operating |
| Standby Power Consumption | 0.8W |
| Display Color | 16.7K |
| Projection Size | 30–130 in. |
| Supported Signal/Input Ports | VGA / USB / HDMI / SD Card |
| Dimensions | 7.5 × 6.5 × 2.6 in. |
| Metric Dimensions | 190 × 165 × 65 mm |
| Weight | 2.12 lb. / 0.96 kg |
| LED Lifetime | Up to 30,000 hours |
The manual distinguishes the projector’s 800 × 480 native resolution from the higher video resolutions accepted through HDMI.
Before First Use
Before using the projector:
- Remove the lens cover.
- Install two AAA batteries in the remote.
- Place the projector on a stable surface.
- Use it in a sufficiently dark environment for better picture visibility.
- Connect the supplied AC power adapter.
- Make sure the projector’s ventilation openings remain uncovered.
The manual instructs users to read the operating instructions before setup and keep them available for future reference.
How to Turn On the GOTheater Projector
1. Connect Power
Plug the AC power cable into an available electrical outlet.
After power is applied, the projector’s Power indicator turns blue.
2. Start the Projector
Press and hold the Power button for approximately 3 seconds, either on the projector or on the remote.
During startup:
- The projector lamp turns on.
- The Power indicator initially flashes.
- The indicator becomes steady blue once the projector is running.
- The internal fan starts.
- A boot/static image appears while the projector warms up.
The projector does not respond to commands while it is warming up.
Adjusting the Focus
The manual focus control is located just above the projector lens.
To focus the picture:
- Project an image onto the viewing surface.
- Turn the focus knob above the lens.
- Observe the image pixels near the center of the screen.
- Continue adjusting until the center pixels appear clearly defined.
The manual notes that when projecting a large image, the edges may appear less sharp than the center.
Keystone Adjustment
The Keystone Image Adjustment knob is located just behind the focus knob.
A keystone-shaped distortion occurs when the projector’s beam reaches the screen at an angle. The keystone adjustment can be used to bring the distorted image back toward a rectangular or square shape.
GOTheater Boot Screen and Source Menu
When startup is complete, the projector displays its main screen.
The arrow controls on either the remote or projector can be used to select a source or function.
| Home Screen Option | Purpose |
| HDMI | Connect laptops, DVD players, and other HDMI devices |
| VGA | Connect a PC |
| AV | Connect an AV/RCA source |
| Setting | Open projector settings |
| iOS/Mac Mirror | Mirror an iPhone/Mac through WiFi |
| Android Mirror | Use Miracast from an Android phone |
| USB Mirror | Mirror an iPhone or Android phone through USB |
| Media | Play video, music, or pictures from USB media |
Connecting an HDMI Device
The GOTheater supports HDMI video and audio.
The manual gives examples of compatible HDMI sources including:
- Laptop computers
- DTV tuners
- DVD players
- Blu-ray players
- Chromecast
- Fire TV
- Other compatible HDMI equipment
HDMI Setup
- Connect the included HDMI cable to the source device.
- Connect the other end to the projector’s HDMI port.
- The HDMI connection is located on the right-side panel and is marked HD.
- From the GOTheater home screen, select HDMI.
- Begin playback from the source device.
HDMI carries both audio and video through the same cable.
Connecting a Computer Through VGA
The projector includes a VGA input for connecting a laptop or desktop computer.
A VGA cable is not listed among the supplied accessories.
VGA Setup
- Connect a VGA cable to the computer.
- Connect the opposite end to the projector’s VGA input.
- The VGA connector is located on the right side of the GOTheater and is blue.
- Select VGA from the home screen.
Connecting an AV/RCA Device
The GOTheater supports compatible analog AV devices using the included AV/RCA cable.
The AV connector is on the right-side panel and is marked AV.
RCA Color Guide
| RCA Plug | Signal |
| Yellow | Video |
| White | Left audio channel |
| Red | Right audio channel |
AV Setup
- Connect the included AV/RCA adapter cable to the projector’s AV port.
- Match the yellow, white, and red connections to the corresponding outputs on the video source.
- Turn on the connected source.
- Select AV from the projector’s home screen.
Playing Media From a USB Drive
The GOTheater can play supported media directly from a USB storage device.
USB Media Playback
- Insert a USB drive containing media into the projector’s USB port.
- The USB socket is located on the right side and is marked USB.
- Select the Media icon from the home screen.
- Choose the required media category.
- Select the file to begin playback.
Supported USB Media Formats
| Media Type | Formats Listed in the Manual |
| Video | MPEG 1, MPEG-2, MPEG 4, DivX 3/4/5/6, H.264, RM/RMVB, Sorenson Spark, FLV, MOV, MKV, MPG, MP4, WMV |
| Music | MP1, MP2, MP3, WMA; the manual also states “etc. Audio formats” without naming the additional formats |
| Photo | JPEG, BMP, PNG |
Connecting the GOTheater to WiFi
WiFi connectivity is required for supported wireless screen-mirroring functions.
WiFi Setup
- From the main menu, open Setting.
- Open Wireless.
- Start a WiFi search.
- Select the desired home WiFi network.
- Enter the network password with the on-screen keyboard.
- Select Enter on the keyboard to save the password.
- If the password is correct, the GOTheater connects to the network.
- A WiFi network icon appears in the upper-right area of the main screen after connection.
Setting Up iPhone or Mac Wireless Screen Mirroring
The GOTheater supports iOS/Mac wireless screen mirroring over WiFi.
iPhone/iOS Mirroring
- Select the iOS/Mac Mirror icon on the GOTheater home screen.
- Open Control Center on the iPhone.
- Select Screen Mirroring.
- Choose the GOTheater projector from the available device list.
- The connection should establish automatically.
- The iPhone display will appear on the projection screen.
For newer iPhones, Control Center is opened by swiping down from the upper-right corner. On older supported iPhones or iPod touch devices, the manual describes swiping upward from the bottom of the screen.
Setting Up Android Wireless Screen Mirroring
Android wireless mirroring uses Miracast.
Android Miracast Setup
- Select the Android Mirror icon on the GOTheater.
- Open the phone’s Wireless Display Mirroring or Miracast feature.
- Choose the GOTheater projector from the available device list.
- The phone connects to the projector.
- The Android screen appears on the projection surface.
Different Android manufacturers may use different names for Miracast. The manual gives examples including Smart View and Multi-screen.
Using USB Screen Mirroring
The GOTheater also provides a USB Mirror mode for supported iOS and Android smartphones.
Select the USB Mirror icon from the projector home screen before following the instructions for the connected device.
USB Mirroring for iPhone
iOS Wired Mirroring
- Connect the iPhone to the GOTheater using a USB data cable.
- A trust request appears on the iPhone.
- Tap Trust.
- Wait for the connection to complete.
- The iPhone screen is mirrored through the GOTheater.
The manual states that the first connection may take approximately 20 seconds.
USB Mirroring for Android
Android wired mirroring requires USB debugging.
Android USB Mirroring
- Connect the Android phone to the GOTheater using a USB cable.
- Open the phone’s Developer Options.
- Enable USB Debugging.
- The smartphone screen should then be mirrored through the projector.
If Developer Options are not visible, the manual instructs users to open Settings > About and select the Build Number several times to enable Developer Options. The exact name or location may vary between phones.
Android USB Mirroring Compatibility Note
The manual warns that USB mirroring may not be compatible with many Android phones.
On some devices, the image may mirror but sound may not work. In that case, the manual recommends connecting the phone to external speakers.
DRM-Protected Streaming Content
The GOTheater manual contains an important restriction for screen mirroring.
The projector’s mirroring function does not work with DRM-enabled programs such as:
- Netflix
- Amazon Prime Video
- Other secured video-content services
The appearance of phone and projector menus may also differ from the screenshots in the manual because of operating-system changes and software updates.
Adjusting Projector Settings
Projector settings can be opened with the Menu control on the projector or remote.
The manual identifies adjustable sections including:
- Picture
- Sound
- Preference
- Setup
- Network Setup
Changing a Setting
- Press Menu.
- Open the required settings section.
- Move through the available options with the navigation controls.
- Adjust the setting with the left or right controls.
- Press OK to confirm the selected setting.
Network Settings
The network menu provides several status and update options.
| Setting | Purpose |
| Net Interface | Displays Wireless because the projector does not provide a hardwired internet connection |
| Wireless | Shows the WiFi network currently connected to the GOTheater |
| Net State | Displays the projector’s IP address and other network information |
| OTA | Searches online for projector firmware upgrades and applies them when available |
Important Safety Instructions
The manual provides the following safeguards:
- Use the GOTheater only for its intended purpose and as described in the manual.
- Do not look into the projector lens while the projector is operating.
- Do not cover the ventilation holes with cloth or other materials.
- The projector is not waterproof. Keep it away from water, cups, bowls, vases, and other liquid sources.
- Use and store the projector in a dry, clean location.
- If it will not be used for a long period, turn it off and unplug the power cord.
- Use the original factory foam and other shock-resistant packing materials when transporting it.
- If the GOTheater is defective or damaged, do not attempt to repair it. Contact Tzumi support.
- To reduce the risk of electric shock, do not disassemble or attempt to repair the projector.
Storage and Transport
When the projector is not in use for an extended period:
- Turn it off.
- Disconnect the power cord.
- Store it in a dry, clean location.
For transportation, the manual recommends using the original factory foam and other protective, shock-resistant packaging.
Customer Support
The manual provides the following Tzumi technical support contacts:
| Support Method | Contact Information |
| support@tzumi.com | |
| Phone | 1-855-GO-TZUMI |
The document identifies the product as the GO Theater Cinema Projector, distributed by Tzumi Inc., New York, NY 10016. It carries a © 2020 Tzumi Inc. copyright notice and states that the product was made in China.
Frequently Asked Questions
What is the native resolution of the Tzumi GOTheater projector?
The projector has a native display resolution of 800 × 480. Its HDMI input can accept video signals up to 1080p.
How large is the GOTheater projection image?
The technical specification table lists a projection range of 30 to 130 inches. A separate feature statement advertises a 150-inch dynamic image, creating an inconsistency in the source manual.
How is an iPhone mirrored wirelessly to the GOTheater?
Connect the GOTheater to WiFi, select iOS/Mac Mirror, open Control Center on the iPhone, select Screen Mirroring, and choose the GOTheater projector from the device list.
How is an Android phone mirrored wirelessly?
Select Android Mirror on the projector and open the phone’s Miracast-compatible wireless-display feature, such as Smart View or Multi-screen. Select the GOTheater from the device list.
Can an iPhone be mirrored using a USB cable?
Yes. Select USB Mirror, connect the iPhone with a USB data cable, and tap Trust on the phone when prompted. The first connection may take about 20 seconds.
Does Netflix work through GOTheater screen mirroring?
The manual states that the mirroring function does not work with DRM-enabled services, specifically giving Netflix and Amazon Prime Video as examples.
What media formats can the GOTheater play from USB?
The manual lists video formats including MPEG-1/2/4, DivX, H.264, RM/RMVB, FLV, MOV, MKV, MPG, MP4, and WMV; music formats including MP1, MP2, MP3, and WMA; and JPEG, BMP, and PNG images.
How is a distorted trapezoid-shaped image corrected?
Use the Keystone Image Adjustment knob, located behind the focus knob, until the projected image returns toward a rectangular or square shape.