
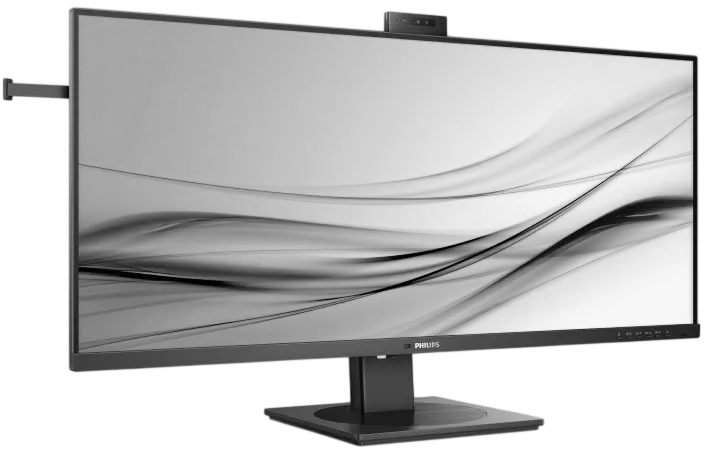
The Philips Business Monitor 5000 Series 40B1U5601H is a 39.5-inch ultrawide display with a 21:9 IPS panel and a native resolution of 3440 x 1440. It doubles as a USB-C docking station: two USB-C upstream ports can each deliver a typical 96 W to a laptop, and the monitor adds Ethernet, four USB-A ports and a DisplayPort output. A pop-up 5.0-megapixel webcam with Windows Hello facial recognition, 5 W x 2 speakers, microphone noise cancelling, a two-PC KVM switch, MultiView (PIP/PBP) and DisplayPort daisy-chaining make it a good fit for hybrid work and multi-device desks.
Product Specifications
| Feature | Details |
| Panel | 39.5″ IPS, W-LED backlight, 21:9 |
| Native resolution | 3440 x 1440 @ 60 Hz |
| Maximum resolution | 3440 x 1440 @ 100 Hz (HDMI); @ 120 Hz (DP/USB-C) |
| Contrast / viewing angle | 1200:1 (typ.) / 178° H, 178° V |
| Video inputs | 1 x HDMI 2.0, 1 x DisplayPort 1.4, 2 x USB-C (DP Alt mode) |
| USB ports | 2 x USB-C upstream (typ. 96 W PD), 1 x USB-C downstream (15 W), 4 x USB-A downstream |
| Other connectors | RJ45, DisplayPort out, audio in/out combo jack |
| Ethernet | 10/100 Mbps (USB 2.0 setting); 1000 Mbps (USB 3.2 setting) |
| Stand | Tilt -5° to +30°, swivel ±180°, height 150 mm, slant ±2° |
| VESA mount | 100 x 100 mm (M4 screws) |
| Size with stand (W x H x D) | 944 x 628 x 280 mm |
| Weight | 14.12 kg with stand, 9.90 kg without |
| Power | Built-in supply, 100–240 V AC, 50/60 Hz; 41.0–42.9 W typical in use, 0.4 W sleep |
| Operating environment | 0–40°C, 20–80% humidity |
The two USB-C ports share a combined maximum of 115 W, adjusted dynamically between them. Actual charging also depends on what your computer supports (PDF p. 35).
What’s in the Box
The box contains the monitor, a quick start guide, a power cable, and a screw with screwdriver (M4 x 4). Signal and USB cables (DisplayPort, HDMI, USB C-C, USB C-A) vary by region (PDF p. 7).
Installation and Setup
Attach the Base
- Place the monitor face down on a smooth surface, taking care not to scratch the screen.
- Hold the stand with both hands and tighten the assembly screws to secure the stand to the monitor.
- Gently attach the base to the stand.
- Tighten the screw at the bottom of the base with your fingers.
The arrow on the base should face the front (PDF p. 7).
Connect to Your Computer
- Connect the power cord to the back of the monitor.
- Turn off your computer and unplug its power cable.
- Connect the signal cable to the video connector on the computer.
- Plug the computer and monitor power cords into a nearby outlet.
- Turn on the computer and monitor. If an image appears, setup is complete.
Remove the rubber plug from the DisplayPort out connector before using it (PDF p. 8). For USB-C docking, run a USB-C or USB-A cable from the computer to USB C1 or USB C2.
Ethernet and USB Notes
- Install the matching LAN driver from the Philips support page and restart. It appears as “Realtek USB Ethernet Network Adapter” (PDF pp. 8–9).
- If Ethernet is slow, set USB-C to High Data Speed in the OSD, which supports 1 Gbps.
- USB ports are disabled in standby and off modes. To keep charging during sleep, set USB Standby Mode to On (default Off). A factory reset returns it to Off.
- Switching off the power switch cuts power to all USB ports.
- 2.4 GHz wireless receivers can suffer interference from USB 3.2 devices, so keep them away from the USB 3.2 ports.
Controls and On-Screen Menu
The front bezel has eight controls: power, Menu/OK, navigation, a customizable User key, input source, back, SmartImage (which opens the HDR menu when an HDR signal is present) and microphone mute (PDF p. 10). To set the User key, open OSD Settings > User Key and choose Volume, MultiView, Brightness, KVM or PowerSensor. Setup > Reset restores factory settings.
For best results, run the monitor at 3440 x 1440. A notice appears at other resolutions, and you can turn it off under Setup.
Adjusting the Stand
Tilt, swivel, height and slant are adjustable. Never tilt the screen downward more than -5°, and grasp only the bezel while adjusting. Excess downward tilt is not covered by warranty (PDF p. 14).
Webcam and Windows Hello
Press the webcam on top of the monitor and turn it to the front. Connect a USB cable from your PC to USB C1 or USB C2, then choose the matching port under KVM in the OSD. Windows Hello works on Windows 10 and 11; the setup steps are written for Windows 11 and require a PIN first. On Windows 8, 8.1 or Mac, the webcam works without facial recognition (PDF pp. 15–16).
The webcam light has levels 0 (off) to 4, default 1 (Webcam > Webcam Light). The Mute button syncs with the operating system in Teams and Skype for Business, and in Zoom if the monitor is Zoom-certified. In other apps it mutes the microphone, but the operating system may still show it as unmuted.
Noise Cancelling filters for human voices during video calls over USB C1/C2. It is on by default and can be turned off under Audio.
Using Two Computers
KVM Switch
One monitor, keyboard and mouse can control two PCs. Connect each PC’s USB upstream cable to USB C1 and USB C2, even when video comes over HDMI or DisplayPort. Then open the OSD, go to KVM and select Auto, USB C1 or USB C2. Input selection is not automatic, so confirm the input in the OSD (PDF pp. 18–19).
MultiView (PIP/PBP)
Under PIP / PBP, choose PIP (small window) or PBP (side by side), then set the sub-source, size (Small, Middle, Large), position and Swap. Any two of the four inputs can be paired. HDR and DP Out Multi-Stream cannot run alongside MultiView. If the sub-window flickers, its source is probably interlaced, so switch to progressive timing (PDF p. 47).
Daisy-Chaining Monitors
Your graphics card must support DisplayPort MST. Over USB-C, the number of chained monitors depends on link rate and USB setting (PDF p. 28):
| Link rate | USB setting | Monitors | Output |
| HBR2 | USB 3.2 | 1 | 3440 x 1440 @ 30 Hz |
| HBR2 | USB 2.0 | 1 | 3440 x 1440 @ 60 Hz |
| HBR3 | USB 3.2 | 1 | 3440 x 1440 @ 30 Hz |
| HBR3 | USB 2.0 | 2 | 3440 x 1440 @ 60 Hz |
Over DisplayPort, up to two external monitors run at 3440 x 1440 @ 60 Hz in Extend mode (Setup > DP Out Multi-Stream > Extend). To check your link rate, open Setup > Information.
Safety Instructions
- Use only the Philips-approved power cord and the specified voltage. Do not pull, bend or place objects on cables.
- Wait 6 seconds after unplugging before reconnecting power.
- Connect the USB-C port only to equipment with a fire enclosure complying with IEC 62368-1 or IEC 60950-1.
- Keep the monitor away from direct sunlight, heat sources and oil, and do not block the ventilation holes.
- Only qualified service personnel should open the casing.
- Lift the monitor by the frame, never by pressing on the panel.
- Use a moving screen saver or periodic screen refresh for static content. Severe burn-in is not repairable or covered by warranty.
- Take a 5–10 minute break after 50–60 minutes of continuous screen use.
Cleaning and Maintenance
Unplug the monitor before cleaning. Wipe the screen with a soft, slightly damp cloth, or a dry cloth when it is off. Avoid oil-based cleaners, ammonia and organic solvents. The maintenance section warns against alcohol, while the FAQ allows isopropyl alcohol for extensive cleaning only, so a damp soft cloth is the safer first choice (PDF pp. 4, 44). If water or a foreign object gets inside, switch off, unplug and contact a service center.
Troubleshooting
- No picture, power LED off: Check the power cord at both ends, then turn the power button off and on.
- No picture, LED white: Confirm the computer is on and the signal cable is firmly connected with no bent pins. A blinking white LED means sleep mode.
- “Check cable connection” message: Reseat the display cable at the computer.
- Blurred, dark or fuzzy image: Adjust brightness and contrast, and set the PC to 3440 x 1440.
- Colored or dark dots: A few are normal for LCD panels; up to five total dot defects fall within tolerance (PDF p. 40).
- Smoke or sparks: Disconnect from mains power immediately and contact Philips customer service.
Frequently Asked Questions
What resolution and refresh rate should I use?
Use 3440 x 1440 at 60 Hz for the best picture. If your PC does not support HBR3 over USB-C, set USB-C to High Resolution to reach 3440 x 1440 @ 120 Hz.
What if the screen says it cannot display the video mode?
Reconnect the PC to the display you used before, set the resolution to 3440 x 1440 and the refresh rate to 60 Hz, restart, then reconnect the Philips monitor.
Why can’t Windows detect the webcam or Face Recognition option?
Press Ctrl + Shift + Esc, open Services, find WbioSrvc (Windows Biometric Service), stop and restart it if it is running, then set up Windows Hello again in Sign-in options.
How do I lock or unlock the OSD controls?
With the monitor off, hold the Menu/OK button, then press the power button to turn it on. Repeat to unlock.
What can I do if daisy-chained monitors show no signal?
On the monitor with the DisplayPort output, open Input, change Auto to Off and select DP. If that fails, connect the second monitor directly to the computer, set its Input to DP the same way, then reconnect the chain.
Can I connect it to a Mac?
Yes. Philips describes its displays as compatible with standard PCs, Macs and workstations, though some Macs may need a cable adapter. The webcam works on Mac without facial recognition.
Can I wall-mount it?
The monitor accepts a 100 x 100 mm VESA interface with M4 screws. Remove the base by loosening the assembly screws and detaching the neck, and contact the manufacturer for wall-mount installation (PDF p. 23).