
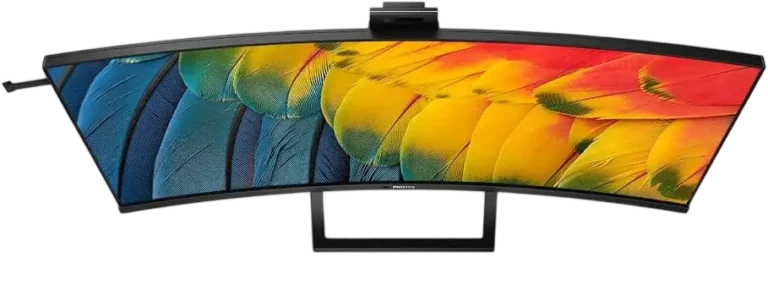
The Philips Curved Business Monitor 40B1U6903CH is a 39.7-inch curved IPS display with a 21:9 aspect ratio and a native resolution of 5120 x 2160. It is built as a docking monitor: a single Thunderbolt 4 cable can carry video, data, network and up to 90 W of power to a laptop. It also adds a USB hub, Ethernet, a pop-up 5.0-megapixel Windows Hello webcam, 5 W x 2 speakers, noise-cancelling speakerphone and a KVM switch for two computers. This is the only model number covered in the document.
Product Specifications
| Feature | Detail |
| Panel | 39.7″ IPS, W-LED backlight, 21:9 |
| Native resolution | 5120 x 2160 at 60 Hz (Thunderbolt 4/DP), 50 Hz (HDMI) |
| Maximum resolution | 5120 x 2160 at 75 Hz (Thunderbolt 4/DP), 50 Hz (HDMI) |
| Contrast / viewing angle | 1000:1 (typical) / 178° horizontal and vertical |
| Colors | 1.07 billion, 10-bit (8 bits + A-FRC) |
| Video inputs | 2 x HDMI 2.0, 1 x DisplayPort 1.4, Thunderbolt 4 input |
| Power delivery | Thunderbolt 4 input up to 90 W; USB-C downstream 45 W; Thunderbolt 4 output 15 W |
| USB | 1 x USB-B upstream, 4 x USB-A downstream, 1 x USB-C downstream, USB 3.2 Gen2 10 Gbps |
| Power use | 70.0 W typical in operation, 0.5 W in sleep |
| Size with stand | 948 x 605 x 236 mm, 13.50 kg |
| Operating conditions | 0°C to 40°C, 20% to 80% humidity |
The monitor’s stand tilts from -5° to +15°, swivels ±45° and adjusts 150 mm in height. It accepts 100 x 100 mm VESA mounts with M4 screws. A Kensington lock slot is built in (PDF p. 36–39).
What’s in the Box
The package includes the monitor, stand and base, a quick start guide, an M4 x 4 screw with screwdriver and a power cable. HDMI, DisplayPort and Thunderbolt 4 cables vary by region (PDF p. 7).
Installation and Setup
Attach the Base
The monitor has a curved design, so put protective material under it and never press down on the screen while attaching or removing the base.
- Lay the monitor face down on a cushion.
- Tighten the assembly screws to secure the stand to the monitor.
- Attach the base to the stand, then tighten the screws on the underside of the base.
- Hold the monitor and its styrofoam with both hands and stand it upright. Pull out the styrofoam without squeezing the panel.
Connect to a Computer
Plug the power cord into the AC input on the back and connect your signal cable to your computer’s video port. With the computer off, plug in both power cords, then turn on the computer and monitor. If an image appears, setup is complete. Rear ports also include RJ45 Ethernet and an audio combo jack (PDF p. 8).
For the full 5120 x 2160 at 75 Hz over Thunderbolt 4 or USB-C, your computer’s graphics card must support Display Stream Compression (PDF p. 41). If it does not support HBR 3, open the OSD, go to USB Setting > USB-C Setting and choose High Resolution (PDF p. 14).
Ethernet and USB Hub
Install the matching Realtek LAN driver from the Philips support page, then restart the computer. If Ethernet feels slow, set the USB-C setting to High Data Speed to allow 1G.
The USB ports switch off in standby and when the power switch is off. To keep them active, set USB Standby Mode to On in the OSD (default is Off). A factory reset returns it to Off. Keep 2.4 GHz wireless receivers away from USB 3.2 ports or use an extension cable (PDF p. 9–10).
Parts and Controls
Eight keys sit on the front bezel: power, Menu/OK, Up/Down, USER (a function you assign under OSD Settings > User Key), Input, Back, SmartImage and a microphone Mute key (PDF p. 11).
To lock the OSD, hold the Menu/OK key while the monitor is off, then press the power key. Repeat to unlock (PDF p. 50).
How to Use the Monitor
Thunderbolt Docking and Daisy Chain
Connect a Thunderbolt 4 cable from your computer to the monitor’s Thunderbolt input, press the Input key and choose Thunderbolt. If the screen appears as an extended display, press Windows key + P twice to bring up your main screen.
To daisy-chain a second monitor, connect the first monitor’s Thunderbolt output to the second monitor’s Thunderbolt input. The number of monitors you can chain depends on your graphics performance.
Webcam and Windows Hello
Rotate the pop-up webcam to face forward. Connect a USB cable from your PC to the Thunderbolt input or USB UP port, then choose the matching option under USB Setting > KVM. For face sign-in, set up a PIN and Windows Hello in Windows sign-in options. Webcam light brightness runs from 0 to 4 (default 3) under Webcam > Webcam light (PDF p. 15–17).
KVM Switch for Two Computers
Connect both PCs by USB upstream, using USB UP for HDMI or DP sources and the Thunderbolt input for Thunderbolt sources. Then pick Auto, Thunderbolt or USB UP in the OSD’s KVM setting to switch which PC your keyboard and mouse control. Video input does not switch automatically, so select the source yourself (PDF p. 18–20).
Noise Cancelling
Over Thunderbolt or USB-B, the monitor filters human voices for calls. It is on by default and can be changed under Audio > Noise Cancelling. In your computer’s sound settings, choose the monitor’s noise-cancelling speakerphone. Use a USB-C to USB-C or USB-C to USB-A cable (PDF p. 21).
MultiView (PIP and PBP)
MultiView shows two sources at once. Under PIP/PBP, choose PIP for a small window or PBP for side-by-side. Any input can serve as main or sub source. PIP offers three window sizes and four corner positions, and Swap exchanges the pictures and their audio. Flickering sub-windows usually mean the sub source uses interlaced timing; switch it to progressive (PDF p. 22–23, 51).
Picture and Power Features
- SmartImage: EasyRead, Office, Photo, Movie, Game, Economy, LowBlue Mode, SmartUniformity or Off. With an HDR signal, the hotkey offers HDR Premium, Movie, Photo, Basic or Off.
- Color Space: NTSC, sRGB or DCI-P3. Turn HDR off first, since the two cannot run together.
- PowerSensor: Detects whether you are seated 30 to 100 cm (12 to 40 inches) away and dims the screen when you leave. Setting 4 reaches 120 cm. It works in landscape only and is disabled while the microphone is muted (PDF p. 32–33).
Safety Instructions
- Never tilt the screen downward by more than -5°. Panel damage from exceeding it is not covered by warranty. Grip only the bezel and never press the screen (PDF p. 3–4).
- Use only the approved Philips power cord and the specified voltage. After unplugging, wait 6 seconds before reconnecting.
- Keep ventilation holes clear, and keep the monitor away from oil, direct sunlight and moisture.
- Connect the USB-C port only to equipment with a fire enclosure meeting IEC 62368-1 or IEC 60950-1.
- Always run a moving screen saver or periodic screen refresh. Prolonged static images can cause permanent burn-in that is not covered by warranty (PDF p. 5).
- If smoke or sparks appear, disconnect power immediately and call Philips customer service.
Cleaning and Maintenance
Unplug the monitor first. Wipe the screen with a dry cloth when powered off, or a slightly damp cloth for dirt. Avoid organic solvents and ammonia-based liquids, and keep oil-based cleaners away from the plastic parts. When lifting, hold the frame rather than the panel. Keep the PowerSensor lens clean (PDF p. 4, 33).
Troubleshooting
| Problem | What to try |
| No picture, power LED off | Check the power cord at both ends, then toggle the power switch off and on. |
| No picture, LED white | Confirm the computer is on, the signal cable is firmly connected and the cable pins are straight. |
| Blurry or fuzzy text | Adjust brightness and contrast, and set the PC to 5120 x 2160. |
| Power LED too bright | Lower it under Setup > Power LED. |
| Windows Hello camera missing | Stop and restart the Windows Biometric Service in Task Manager > Services. |
Scattered colored or dark dots are a normal trait of LCD panels (PDF p. 47–48).
Frequently Asked Questions
How do I get 5120 x 2160 at 75 Hz?
Use Thunderbolt 4 or DisplayPort. HDMI is limited to 50 Hz at this resolution. Your graphics card must also support Display Stream Compression for 10-bit output at 75 Hz.
How do I switch between two computers?
Connect each PC’s video and USB upstream cables, then change the KVM setting and the input source in the OSD. Neither happens automatically.
Why do my USB ports stop working when the monitor sleeps?
To meet energy standards, the hub is disabled in standby and off modes. Set USB Standby Mode to On in the OSD. Turning off the power switch always cuts power to every port.
Why is face recognition greyed out?
Make sure the webcam is turned to the front and your USB cable is on the Thunderbolt input or USB UP port. Restarting the Windows Biometric Service usually brings the option back. The setup text specifies Windows 11, though the compatibility table also lists Windows 10. Older Windows versions and macOS can use the webcam without face recognition.
How should I clean the screen?
Start with a soft, clean cloth. For heavier cleaning, the FAQ allows isopropyl alcohol only and rules out ethyl alcohol, ethanol, acetone and hexane. The safety notes separately caution against alcohol-based solvents, so use it sparingly if at all.
How many bad pixels qualify for warranty service?
Defects must exceed these limits: 2 bright dots, 4 dark dots, or 5 total dot defects, with defects of the same type more than 15 mm apart. No white-pixel (three adjacent lit subpixel) defects are acceptable (PDF p. 44–45).