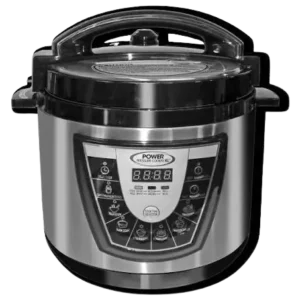
| Product Name | Power Pressure Cooker XL |
| Model Number | PPC770 |
| File Size | 836 KB |
| Number of Pages | 19 |
| Languages Covered | English |
| Capacity | 6 QT |
Power Pressure Cooker XL PPC770 Manual
The Power Pressure Cooker XL PPC770 is a 6-quart electric pressure cooker with digital cooking programs for pressure cooking, slow cooking, steaming, rice, beans, meat, canning and other common cooking tasks. Its sealed cooking chamber builds heat and pressure before starting the programmed countdown, and the appliance automatically switches to Keep Warm when a cooking cycle ends.
This guide explains how to use the Power Pressure Cooker XL, install the lid and pressure valve correctly, select cooking programs, release pressure safely, clean the cooker and follow the pressure-canning instructions included with model PPC770.
Quick Facts
| Feature | Specification |
| Inner pot capacity | 6 QT |
| Supply power | AC 120V, 60Hz |
| Rated power | 1000W |
| Working pressure | 0–80 kPa |
| Safety working pressure | 80–90 kPa |
| Maximum pressure-cooking temperature listed | 248°F / 120°C |
| Control type | Digital |
| Automatic Keep Warm | Yes |
| Pressure canning mode | Yes |
| Maximum stated canning altitude | 2,000 ft above sea level |
The model specifications are listed in the pressure-cooking chart section of the owner’s manual.
Important Safety Instructions
The Power Pressure Cooker XL cooks food under pressure and produces very hot steam. Incorrect operation can cause burns, scalding or other injury.
General safety precautions
- Read the operating instructions before using or cleaning the cooker.
- Do not allow children to operate the appliance.
- Do not touch hot surfaces; use the handles or knobs.
- Do not immerse the cord, plug, housing or cooker base in water.
- Unplug the unit when it is not being used and before cleaning.
- Allow the cooker to cool before removing or installing parts.
- Do not operate it with a damaged cord or plug.
- Do not use accessories or utensils that are not recommended by the manufacturer.
- Do not use the cooker outdoors.
- Keep the electrical cord away from hot surfaces and countertop edges.
- Do not place the cooker on or near a hot burner or inside a heated oven.
- Take extra care when moving the cooker while it contains hot liquids.
- Use the appliance only for its intended purpose.
Do not overfill the inner pot
Never fill the removable inner pot above its MAX line.
For foods that expand during cooking, including rice and dried beans, the manual recommends following the applicable pressure-cooking recipe and, as a general rule, keeping the contents below approximately the halfway point.
Overfilling can obstruct the pressure-release system and allow excessive pressure to develop.
Foods that can foam or clog the steam vent
Extra care is required with foods that may foam, froth or sputter, including:
- Applesauce
- Cranberries
- Pearl barley
- Oatmeal and other cereals
- Split peas
- Noodles
- Macaroni
- Rhubarb
- Spaghetti
Recipes involving these foods should be followed carefully because food particles or foam can interfere with the pressure-release system.
Never force the lid open
The lid must not be forced open while pressure remains inside the cooker.
If the cooker is difficult to open, it may still be pressurized.
To release pressure:
- Press KEEP WARM/CANCEL.
- Use tongs or another kitchen tool to carefully move the Pressure Valve to the OPEN position.
- Allow all steam and pressure to escape.
- Turn the lid handle clockwise only after pressure has been released.
- Open the lid away from the body and face.
Never use a bare hand to move the hot pressure valve after cooking.
Electrical requirements
The cooker is designed for a 3-prong grounded 120V electrical outlet.
The owner’s manual instructs users to:
- Plug it directly into a wall outlet.
- Avoid extension cords.
- Use a properly grounded outlet.
- Prefer a dedicated electrical circuit so other appliances do not overload the circuit.
Built-In Safety Features
The PPC770 includes several mechanical and electronic safety systems.
| Safety Feature | Purpose |
| Lid Safety Device | Prevents pressure buildup if the lid is not properly closed and prevents opening before pressure is released |
| Pressure and Temperature Sensor Controls | Regulate heat and pressure by switching the power supply on and off |
| Backup Safety Release Valve | Releases pressure if the primary pressure/temperature sensor system malfunctions |
| Clog-Resistant Feature | Helps prevent food from blocking the steam-release port |
| Spring-Loaded Safety Pressure Release | Allows pressure to escape if the other safety systems fail |
| Temperature Cut-Off Device | Cuts power if internal temperature rises beyond the safe limit |
The manual explains these six systems as built-in protections against abnormal pressure or temperature conditions.
Parts and Accessories
The parts diagram identifies the following main components:
- Lid
- Pressure seal and vent valve
- Rubber gasket beneath the lid
- Inner pot
- Cooker housing/base
- LED control panel
- AC power cord
- Measuring cup
- Ladle
- Condensation collector
- Steamer tray
The manual instructs the owner to inspect all components before use. A missing or damaged component is a reason not to operate the appliance.
Before First Use
The cooker requires an initial cleaning and test cycle before normal cooking.
Wash the removable parts
Before the first use:
- Remove the inner pot.
- Wash the inner pot with warm, soapy water.
- Wash the lid.
- Wash the rubber gasket.
- Rinse everything with clean water.
- Dry all parts thoroughly.
Run the first-use test cycle
The manual uses the Canning program to confirm that the gasket is installed correctly.
- Fill the inner pot approximately two-thirds full with water.
- Put the lid on the cooker.
- Move the Pressure Valve to the LOCK position.
- Select CANNING.
- Run the cooker for 10 minutes.
- When the cycle ends, use tongs or another suitable kitchen tool to move the Pressure Valve to OPEN.
- Allow all pressure to escape.
- Let the appliance cool to room temperature.
- Pour out the water.
- Rinse and towel-dry the inner pot.
The cooker is then ready for normal use.
How to Install the Rubber Gasket
The rubber gasket sits beneath the lid and must be fitted correctly for the cooker to seal.
For cleaning or installation:
- Use the pull tab beneath the lid to remove the pot lid liner.
- Remove the rubber gasket.
- Clean the gasket and liner.
- Reattach the gasket to the lid liner.
- Snap the liner back into place.
The gasket should remain clean, flexible and undamaged. A torn gasket should not be used.
How to Install the Inner Pot
Before inserting the inner pot:
- Make sure the bottom of the pot is clean and dry.
- Make sure the heater plate is clean.
- Place the pot into the cooker base.
- Turn it slightly clockwise and counterclockwise.
- Confirm that it is seated correctly on the heating plate.
- Never load food above the MAX line.
Improper seating can interfere with cooker operation and may damage the appliance.
How to Put the Lid On
The manual gives a specific lid orientation.
- Place the filled inner pot correctly inside the cooker.
- Position the lid so that its handle and recessed valve point toward approximately the 10 o’clock position.
- Rotate the lid counterclockwise.
- Continue until it clicks into its locked position.
Use only the black composite handle when opening the hot lid. Stainless-steel areas can become hot enough to cause burns.
Condensation Collector
The condensation collector catches moisture that runs down the rear of the cooker.
To install it:
- Align the collector with the channels on the back of the cooker.
- Push it into position.
Empty and clean the condensation collector after each use.
How to Use the Power Pressure Cooker XL
The basic operating sequence is:
- Place the inner pot correctly on the heating plate.
- Add the ingredients and required cooking liquid.
- Keep the contents below the appropriate fill level.
- Install the lid and lock it.
- Check that the Pressure Valve moves freely and is not obstructed.
- Attach the AC cord to the cooker.
- Plug the cord into a dedicated 120V outlet.
- Select the required cooking program.
- Allow the cooker time to build pressure.
- Wait for the programmed cooking countdown to complete.
- Release pressure as required before opening the lid.
The pressure-building period occurs before the programmed cooking countdown begins. Depending on conditions, reaching full pressure can take up to 17 minutes.
Digital Control Panel
When the Power Pressure Cooker XL is first plugged in, the LED display shows 0000.
After a cooking program is selected:
- The default cooking time appears for approximately five seconds.
- A rotating display effect appears while pressure builds.
- Once operating pressure is reached, the rotating display stops.
- The cooking timer begins counting down.
- When cooking is complete, the cooker beeps.
- The appliance automatically enters KEEP WARM mode.
Control panel buttons
The control panel includes:
- Delay Timer
- Canning / Preserving
- Soup / Stew
- Slow Cook
- Rice / Risotto
- Beans / Lentils
- Fish / Vegetables / Steam
- Meat / Chicken
- Cook Time Selector
- Time Adjustment
- Keep Warm / Cancel
The control-panel diagram shows these functions around the central LED display.
Cook Time Selector
When a program is chosen, the default setting begins in Quick mode.
The Cook Time Selector can change the program among Quick, Medium and Well settings where supported.
For the Rice/Risotto program, the selector is also used for different rice varieties, including:
- White rice
- Brown rice
- Wild rice
The Time Adjustment button can override the programmed cooking time within the supported range.
Any active function can be stopped by pressing CANCEL.
Power Pressure Cooker XL Program Settings
| Program | Default | Quick / Medium / Well | Adjustable Range | Temperature | Pressure |
| Delay Timer | N/A | N/A | 0–24 hr | — | — |
| Canning / Preserving | 10 min | 10 / 45 / 120 min | 10–120 min | 116°C / 241°F | 82.7 kPa / 12 PSI |
| Soup / Stew | 10 min | 10 / 30 / 60 min | 10–60 min | 109°C / 228°F | 50 kPa / 7.2 PSI |
| Slow Cook | 2 hr | 2 / 6 / 12 hr | 2–12 hr | 79–93°C / 174–199°F | <30 kPa / <4.3 PSI |
| Rice / Risotto | 6 min | 6 / 18 / 25 min | 6–25 min | 109°C / 228°F | 50 kPa / 7.2 PSI |
| Beans / Lentils | 5 min | 5 / 15 / 30 min | 5–30 min | 109°C / 228°F | 50 kPa / 7.2 PSI |
| Fish / Vegetables / Steam | 2 min | 2 / 4 / 10 min | 2–10 min | 109°C / 228°F | 50 kPa / 7.2 PSI |
| Meat / Chicken | 15 min | 15 / 40 / 60 min | 15–60 min | 109°C / 228°F | 50 kPa / 7.2 PSI |
| Time Adjustment | 10 min | N/A | 10–120 min | — | — |
These program values come from the PPC770 program-settings chart.
Keep Warm Mode
After a pressure-cooking cycle finishes, the cooker automatically switches to KEEP WARM.
The mode is designed to hold cooked food at serving temperature for an extended period.
The manufacturer notes that food kept in Keep Warm for more than four hours may begin losing desirable flavor and texture.
Steam Mode
The Steam program quickly heats liquid inside the inner pot to boiling.
It can be used for steaming and cooking foods suited to the steaming process.
How to Release Pressure
The Pressure Valve is used to release internal pressure quickly.
To vent the cooker:
- Finish or cancel the cooking program.
- Keep hands and skin away from the steam outlet.
- Use tongs or another suitable kitchen tool.
- Carefully rotate the Pressure Valve to the OPEN / Vent position.
- Wait until steam has completely stopped.
- Make sure all internal pressure has been released.
- Open the lid away from the body.
Never move the hot pressure valve with bare hands.
What to Do if Steam Comes Out Around the Lid
Steam escaping from the sides of the lid while the Pressure Valve is in the Lock position generally indicates that the lid has not seated correctly.
The manual recommends checking the following:
- Make sure the rubber gasket is installed.
- Gently press down on the lid to help it seal.
- Check the Float Valve.
- Make sure the Float Valve can move freely up and down.
- Confirm that its silicone gasket is correctly fitted.
An incorrectly assembled Float Valve can allow steam to escape or prevent the cooker from building pressure.
Condensation collecting in the condensation collector is considered normal.
Pressure Cooking Times
All pressure-cooking modes require liquid, such as water or stock.
Never fill the inner pot above the MAX line.
Meat and poultry cooking guide
| Food | Liquid | Approximate Time |
| Beef/veal roast or brisket | 3–4 cups | 35–40 min |
| Beef meatloaf, 2 lb | 1 cup | 10–15 min |
| Corned beef | 4 cups | 50–60 min |
| Pork roast | 1 cup | 40–45 min |
| Pork ribs, 2 lb | 3 cups | 20 min |
| Leg of lamb | 2–4 cups | 35–40 min |
| Whole chicken, 2–3 lb | 3–4 cups | 20 min |
| Chicken pieces, 2–3 lb | 3–4 cups | 15–20 min |
| Two Cornish hens | 1 cup | 15 min |
| Meat/poultry soup or stock | 4–6 cups | 15–20 min |
Vegetable cooking guide
| Vegetable | Liquid | Approximate Time |
| Thin whole asparagus | 1 cup | 1–2 min |
| Fava beans | 1 cup | 4 min |
| Green beans | 1 cup | 2–3 min |
| Lima beans | 1 cup | 2 min |
| Medium beets | 1 cup | 10 min |
| Broccoli pieces | 1 cup | 2 min |
| Whole Brussels sprouts | 1 cup | 4 min |
| 1-inch carrot pieces | 1 cup | 4 min |
| Corn on the cob | 1 cup | 3 min |
| Whole pearl onions | 1 cup | 2 min |
| 1½-inch potato chunks | 1 cup | 6 min |
| Whole medium potatoes | 1 cup | 10–11 min |
| Halved acorn squash | 1 cup | 7 min |
| Summer squash / zucchini | 1 cup | 4 min |
Seafood and fish cooking guide
| Food | Liquid | Approximate Time |
| Clams | 1 cup | 2–3 min |
| Lobster, 1½–2 lb | 1 cup | 2–3 min |
| Shrimp | 1 cup | 1–2 min |
| Fish soup or stock | 1–4 cups | 5–6 min |
Cooking Frozen Food
Frozen food can be placed into the cooker without thawing first.
For frozen meat, the manual recommends adding approximately 10 extra minutes to the cooking time.
Care and Cleaning
The Power Pressure Cooker XL should be cleaned thoroughly after each use.
Before cleaning:
- Unplug the cooker.
- Allow it to cool to room temperature.
- Remove the inner pot and lid.
- Never pour cold water into a hot cooker.
Cleaning the inner pot and lid
The removable cooking pot and lid can be immersed for cleaning.
Use:
- Hot or warm running water
- Mild liquid detergent
- A soft cloth
- A sponge
- A nylon scrubber
Do not use:
- Abrasive powders
- Baking soda / bicarbonate of soda
- Bleach
- Scouring pads
- Harsh chemical detergents
Cleaning the cooker base
Wipe the base after every use with a soft, damp cloth or sponge.
Remove all visible food residue.
Do not immerse the cooker base in water.
Cleaning the rubber gasket
Remove the rubber gasket from the lid and wash it separately with warm, soapy water and a soft cloth or sponge.
Periodically inspect it for:
- Dirt
- Loss of flexibility
- Tears or damage
Do not operate the cooker with a damaged gasket.
Cleaning the Pressure Valve
The Pressure Valve and its opening should be cleaned after each use.
To clean the valve:
- Pull the Pressure Valve upward to remove it from the spring-lock mechanism.
- Wash it under warm running water with mild detergent.
- Press the internal spring-loaded component and make sure it moves freely.
- Clean the valve opening and remove any food blockage.
- Reinstall the valve by pushing it back onto the spring mechanism.
Small food particles can interfere with the cooker’s safety systems, so the valve and other safety components should remain free of debris.
Pressure Canning Guide
The PPC770 manual includes a dedicated pressure-canning section.
The manufacturer warns that canning is not an area for experimentation. Processing times, temperatures, ingredients and approved methods should be followed exactly because improper canning can create serious food-safety risks.
Canning altitude limit
For pressure canning, the Power Pressure Cooker XL is specified for operation only up to 2,000 feet above sea level.
Do not use the cooker for pressure canning above that altitude.
Canning pressure
The Canning program uses an 80 kPa setting. The guide equates 80 kPa to approximately 11.6 PSI.
Raw packing vs. hot packing
Raw packing means placing fresh, unheated food directly into canning jars.
Hot packing means pre-cooking the food before placing it into the jars.
The manual notes that hot packing helps reduce the amount of air remaining in the food.
For either method, liquids added to foods should be heated to the boiling point before filling.
Preparing Jars for Pressure Canning
The PPC770 accommodates up to four 16-ounce (1-pint) wide-mouth jars per canning session.
Clean the jars
Wash empty jars:
- By hand in hot water with detergent, or
- In a dishwasher.
Rinse them thoroughly.
Hard-water deposits can be removed by soaking the jars for several hours in a mixture containing 1 cup of 5% acidity vinegar per gallon of water.
Prepare the lids
Inspect the self-sealing metal lids carefully.
Do not use lids that are:
- Old
- Dented
- Deformed
- Missing sealing material
- Otherwise damaged
Prepare the lids according to the lid manufacturer’s instructions.
Pressure Canning Process
The canning guide instructs users to begin with a pre-tested and approved pressure-canning recipe.
Step 1: Prepare the food
Choose fresh ingredients and prepare them exactly as required by the tested recipe.
Step 2: Fill the jars
Fill clean 16-ounce jars while leaving approximately 1 inch of headspace at the top.
Step 3: Remove trapped air
Run a flexible, nonporous spatula between the food and jar to release trapped air bubbles.
Step 4: Install the lids and bands
Place the clean lid on the jar and install the screw band.
Hand-tighten the band.
Do not retighten the band after the jars have been processed.
Step 5: Load the cooker
- Put the inner pot into the cooker base.
- Place the wire rack at the bottom of the inner pot.
- Put the filled jars on the rack.
- Load no more than four 16-ounce jars.
Step 6: Add hot water
Pour hot water around the jars until the water reaches approximately one-quarter of the way up their sides.
For four 16-ounce jars, the manual gives approximately 6 cups of water as the reference amount.
Fewer jars may require additional water.
Step 7: Lock the lid
Install and lock the cooker lid, then plug the appliance into the outlet.
Step 8: Select Canning / Preserving
Press CANNING/PRESERVING.
The program automatically sets pressure to 80 kPa.
Adjust the cooking time according to the tested canning recipe.
Step 9: Complete the cycle and release pressure
When processing is finished:
- Press Cancel.
- Unplug the cooker.
- Move the Pressure Valve to Open using the safe pressure-release method.
- Allow all steam to escape.
- Carefully remove the lid.
Step 10: Remove the jars
Use canning tongs to lift the hot jars.
Place them on a heat-resistant surface and allow them to cool to room temperature.
Step 11: Check the seals
Once the jars are completely cool:
- Remove the screw bands.
- Press the center of each lid.
- A correctly sealed lid should not flex or spring.
If a jar has not sealed correctly, the guide says it should not be stored as a shelf-stable product.
Step 12: Store properly processed jars
Store properly processed jars in a cool, clean and dry location.
Inspect jars, lids and bands for damage before reuse.
Pressure Canning Processing Times
The manual’s canning table uses an 80 kPa pressure setting for the listed foods.
| Food | Packing Method | Jar Size | Processing Time |
| Asparagus | Hot & Raw | Pints | 30 min |
| Green beans | Hot & Raw | Pints | 20 min |
| Lima, pinto, butter or soy beans | Hot & Raw | Pints | 40 min |
| Beets | Hot | Pints | 30 min |
| Carrots | Hot & Raw | Pints | 25 min |
| Whole-kernel corn | Hot & Raw | Pints | 55 min |
| Greens | Hot | Pints | 70 min |
| Okra | Hot | Pints | 25 min |
| Green or English peas | Hot & Raw | Pints | 40 min |
| Potatoes, white | Hot | Pints | 35 min |
| Meat strips, cubes or chunks | Hot or Raw | Pints | 75 min |
| Ground or chopped meat | Hot or Raw | Pints | 75 min |
| Poultry without bones | Hot or Raw | Pints | 75 min |
| Poultry with bones | Hot or Raw | Pints | 65 min |
The manual also directs readers to the National Center for Home Food Preservation or a local county extension agent for additional low-acid foods and processing methods.
Safe Canning Tips
The canning guide gives several important precautions:
- Do not use over-ripe fruit.
- Do not increase the amount of low-acid ingredients beyond the tested recipe.
- Do not over-season with spices.
- Do not add butter or fat.
- Do not use flour, starch, pasta, rice or barley as thickeners.
- Use only the thickener specified in an approved recipe.
- Add lemon juice, vinegar or citric acid when the recipe requires it.
Technical Specifications
| Specification | PPC770 |
| Model | PPC770 |
| Supply | AC 120V, 60Hz |
| Rated power | 1000W |
| Inner pot capacity | 6 QT |
| Working pressure | 0–80 kPa |
| Safety working pressure | 80–90 kPa |
| Maximum listed pressure-cooking temperature | 248°F / 120°C |
| Canning pressure setting | 80 kPa |
| Maximum canning altitude | 2,000 ft above sea level |
Troubleshooting Common Problems
Steam is leaking from around the lid
Possible causes addressed by the manual include an incorrectly seated lid, improperly installed gasket or incorrectly assembled Float Valve.
Check that:
- The gasket is correctly installed.
- The lid is properly seated.
- The Float Valve moves freely.
- The Float Valve silicone gasket is installed correctly.
Gently pressing down on a newly seated lid may help establish the seal.
Cooker will not build pressure
Check the lid, rubber gasket and Float Valve first.
The Float Valve must move freely, and the pressure valve and release passages must remain clear of food debris.
The inner pot must also be properly seated on the heating plate.
Lid will not open
Do not force it.
Resistance can indicate that pressure remains inside the cooker.
Press Keep Warm/Cancel, safely move the Pressure Valve to Open with tongs or another kitchen tool, wait until all steam has escaped, and only then attempt to open the lid.
Display shows a rotating pattern
This is normal during the pressure-building stage.
After pressure has been reached, the rotating display stops and the cooking countdown begins.
Cooker takes several minutes before the timer starts
The cooking timer does not begin until the cooker has reached the required pressure or temperature.
Full pressurization can take up to 17 minutes.
Manufacturer’s Limited Warranty
The owner’s manual states that all parts and components of the Power Pressure Cooker XL are covered for 60 days from the original purchase date, subject to the warranty conditions.
Warranty conditions
Coverage applies to consumer use and the original purchaser.
The warranty may be void if the appliance has been subjected to:
- Commercial or institutional use
- Accident
- Misuse or abuse
- Improper maintenance
- Improper repair
- Unauthorized modification
Proof of purchase is required.
Warranty service address
The manual gives the following address for warranty repair or replacement requests:
Power Pressure Cooker XL
P.O. Box 3007
Wallingford, CT 06492
The manual also states that the original purchaser must provide proof of purchase and follow the warranty-return procedure described in the document.
Customer Support Information
The owner’s manual lists the following customer-service telephone number:
Customer Service: 1-973-287-5169
The product was distributed by:
Tristar Products, Inc.
Fairfield, NJ 07004
Frequently Asked Questions
How do you use the Power Pressure Cooker XL?
Place the inner pot correctly inside the cooker, add the food and required liquid, lock the lid, make sure the Pressure Valve is unobstructed, plug the cooker into a dedicated 120V outlet and select the required program. The cooker first builds pressure and then begins the programmed countdown. When cooking finishes, it beeps and automatically changes to Keep Warm.
How long does the Power Pressure Cooker XL take to build pressure?
The PPC770 can take up to 17 minutes to reach full pressure before the cooking countdown begins. The pressurization time is separate from the cooking time shown in recipes.
How do you release pressure from the Power Pressure Cooker XL?
Press Keep Warm/Cancel when appropriate, then use tongs or another kitchen tool to carefully move the Pressure Valve to Open. Keep skin away from escaping steam and wait until all pressure has been released before opening the lid.
Why is steam coming out around the lid?
Steam around the sides can indicate that the lid has not sealed correctly. Check the rubber gasket and Float Valve and make sure the Float Valve can move freely. The manual notes that gently pressing down on the lid can help establish a seal when the cooker is new.
What does 0000 mean on the Power Pressure Cooker XL?
0000 appears on the LED display when the cooker is first plugged in. Once a cooking program is selected, the default cooking time appears, followed by a rotating display while the cooker builds pressure.
Can frozen food be cooked in the Power Pressure Cooker XL?
Yes. The owner’s manual states that frozen food can be cooked without defrosting first. For frozen meat, approximately 10 extra minutes should be added.
What is the capacity of the Power Pressure Cooker XL PPC770?
Model PPC770 has a 6-quart inner pot and a rated power of 1000 watts.
Can the Power Pressure Cooker XL be used for canning?
The PPC770 owner’s manual includes a pressure-canning program and guide. Its Canning program uses an 80 kPa setting, and the manual limits pressure-canning use to locations no more than 2,000 feet above sea level. The canning instructions call for tested pressure-canning recipes and exact processing procedures.