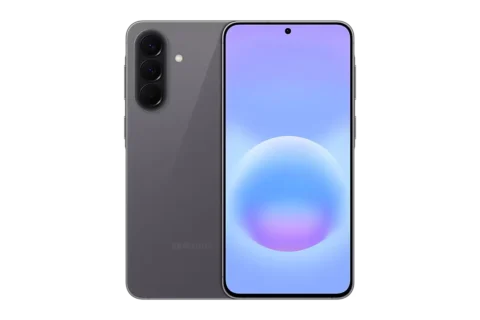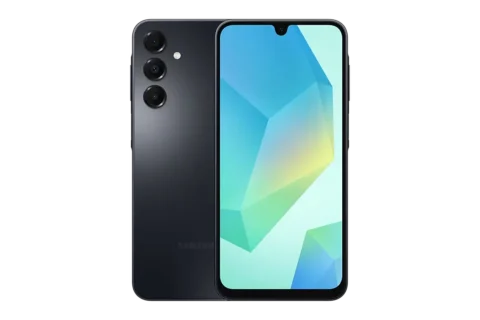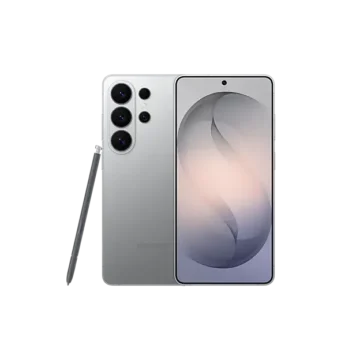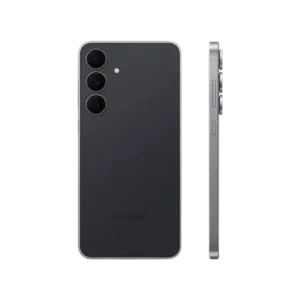
| Field | Details |
| Document Title | Samsung Galaxy S25 FE User Guide |
| Document Type | User Manual |
| Brand Name | Samsung |
| Product Name | Galaxy S25 FE |
| Model Number(s) | SM-S731B, SM-S731B/DS |
| PDF File Size | 1237 KB |
| Number of Pages | 149 |
| Languages | English |
Samsung Galaxy S25 FE SM-S731B
The Samsung Galaxy S25 FE is a 5G smartphone with front and rear cameras, Galaxy AI features, wireless charging, fingerprint recognition, and Samsung DeX support. It provides tools for communication, photography, entertainment, productivity, and managing connected devices.
The Galaxy S25 FE supports nano-SIM and eSIM configurations, USB Type-C charging, fast wireless charging, Wireless power sharing, and video recording at resolutions up to 8K. Galaxy AI provides supported functions for live translation, writing, transcription, image editing, and other everyday tasks.
These operating instructions apply to models SM-S731B and SM-S731B/DS. They cover initial setup, battery charging, mobile network connections, camera operation, Galaxy AI, display settings, security, maintenance, water resistance, and troubleshooting.
Some applications and functions may vary depending on the region, mobile carrier, software version, or available services.
Product Features and Technical Specifications
The Galaxy S25 FE includes the following hardware and software functions.
| Specification | Details |
| Brand | Samsung |
| Product Name | Galaxy S25 FE |
| Model Numbers | SM-S731B, SM-S731B/DS |
| Product Type | Smartphone |
| Mobile Network | 5G and supported mobile networks |
| SIM Card Type | Nano-SIM |
| eSIM | Supported, depending on carrier, region, and model |
| Dual-SIM Operation | Supported configurations |
| Charging Port | USB Type-C |
| Wired Charging | Supported |
| Wireless Charging | Supported |
| Fast Wireless Charging | Supported with compatible equipment |
| Wireless Power Sharing | Supported |
| Recommended Charger | Samsung 45W charger with compatible cable |
| Supplied USB Cable | Supports up to 3A charging |
| Wi-Fi | Supported |
| Bluetooth | Supported |
| NFC | Supported |
| Fingerprint Recognition | On-screen fingerprint sensor |
| Face Recognition | Supported |
| Camera System | Front and rear cameras |
| Maximum Video Resolution | 8K in supported recording modes |
| Galaxy AI | Supported |
| Samsung DeX | Supported |
| Smart View | Supported |
| Water and Dust Resistance | IP68 |
| Recommended Operating Temperature | 0°C–35°C |
The 45W charger is Samsung’s recommended separately sold charging accessory. Actual charging performance depends on the charger, cable, battery condition, and operating conditions.
Package Contents and Accessories
Package contents may vary according to the region or mobile carrier. The Galaxy S25 FE is supplied with a USB Type-C cable that supports charging current up to 3A.
A power adapter is generally not included. Certain regional packages may include a charger.
Charging and Compatible Accessories
| Item | Description |
| Galaxy S25 FE | Main smartphone |
| USB Type-C Cable | Supplied cable supporting up to 3A |
| USB Power Adapter | Generally sold separately |
| Samsung 45W Charger | Recommended compatible charging accessory |
| Wireless Charger | Compatible accessory sold separately |
| USB Type-C Headphones | Digital-output USB Type-C headphones are supported |
| Protective Accessories | Compatible covers and other accessories available separately |
Only compatible accessories should be connected to the phone. Accessories that are not approved or compatible may cause charging problems, reduced performance, or device malfunctions.
Parts and Components
The Galaxy S25 FE includes a touchscreen, physical buttons, cameras, microphones, speakers, antennas, SIM card tray, USB Type-C connector, and wireless charging coil.
Main Components and Functions
| Component | Function |
| Screen | Displays information and responds to touch input |
| Side Button | Turns on the device, locks the screen, and controls assigned shortcuts |
| Volume Button | Adjusts call, notification, and media volume |
| Front Camera | Captures selfies and supports face recognition |
| Rear Cameras | Capture pictures and record videos |
| Flash | Provides additional lighting for supported camera functions |
| Proximity/Light Sensor | Detects nearby objects and ambient lighting |
| Fingerprint Recognition Sensor | Recognizes registered fingerprints |
| Nano-SIM Card Tray | Holds supported physical SIM cards |
| USB Type-C Port | Connects charging cables and compatible accessories |
| Speakers | Play calls, notifications, and media audio |
| Microphones | Record speech and other sounds |
| Air Vent Hole | Device opening that must remain unobstructed |
| GPS Antenna | Supports location services |
| NFC Antenna | Supports NFC communication |
| Wireless Charging Coil | Supports wireless charging and Wireless power sharing |
| Main Antenna | Supports cellular network communication |
Important Component Precautions
- Do not cover the proximity/light sensor with stickers or unsuitable accessories.
- Keep metallic stickers and protective covers away from antenna areas.
- Do not cover the air vent hole.
- Avoid inserting sharp objects into the microphones or speakers.
- Do not expose the camera lenses to strong light sources, including direct sunlight or lasers.
- Do not use the phone if its screen, glass, or body is damaged.
Obstructing the microphones, speakers, sensors, or antennas may affect sound quality, connectivity, or device operation.
Buttons, Navigation, and Status Indicators
Physical Button Functions
| Button or Combination | Function |
| Hold Side button while device is off | Turns on the phone |
| Press Side button | Wakes or locks the screen |
| Double-press Side button | Opens an assigned application or function |
| Press and hold Side button | Opens the assigned long-press function |
| Side button + Volume Down | Captures a screenshot |
| Hold Side button + Volume Down | Opens the power menu |
| Hold both buttons for more than 7 seconds when frozen | Forces a restart |
How to Customize the Side Button
- Open Settings.
- Tap Advanced features → Side button.
- Select the double-press or long-press function.
- Choose the required application or action.
Navigation Bar Controls
| Control | Function |
| Recents | Opens recently used applications |
| Home | Returns to the Home screen |
| Back | Returns to the previous screen |
| Home button long press | Opens Circle to Search |
To use gesture navigation, open Settings → Display → Navigation bar → Swipe gestures.
Common Status Indicators
| Indicator | Meaning |
| Signal Bars | Mobile network signal strength |
| No Signal | Cellular network unavailable |
| Roaming | Connected outside the normal service area |
| LTE | LTE network connection |
| 5G | 5G network connection |
| Wi-Fi | Wi-Fi connected |
| Bluetooth | Bluetooth turned on |
| Location | Location service in use |
| Call | Call in progress |
| Missed Call | Missed call notification |
| Alarm | Alarm enabled |
| Mute/Vibration | Sound mode changed |
| Flight Mode | Flight mode enabled |
| Battery | Battery level or charging status |
| Error/Caution | Device warning or error condition |
Indicator appearance may vary depending on the mobile carrier and software.
Safety Instructions and Precautions
General Device Safety
- Do not use the device if the screen, glass, or body is broken.
- Do not place the speaker close to the ears during loud media playback or speakerphone use.
- Avoid exposing the camera lenses to intense light, including lasers and direct sunlight.
- Do not apply excessive pressure to the touchscreen.
- Keep sharp objects away from device openings.
- Do not block the air vent, sensor, or antenna areas.
- Follow restrictions on wireless device use in hospitals, aircraft, and other regulated locations.
- Do not install unauthorized operating system modifications.
- Do not use damaged charging cables, adapters, or batteries.
Strong light entering a camera lens can permanently damage its image sensor.
Medical Device Precautions
The Galaxy S25 FE contains magnets that may interfere with implanted medical devices, magnetic cards, and other sensitive equipment.
Keep the smartphone more than 15 cm away from implanted medical devices.
If interference is suspected, stop using the device and consult a physician or the medical device manufacturer.
Charging Safety
- Use compatible charging equipment. Samsung recommends approved batteries, chargers, and cables.
- Do not connect the charger when the USB Type-C port is wet.
- Do not place metal objects, magnets, or magnetic cards between the phone and a wireless charger.
- Disconnect the charger from the outlet when it is not being used.
- Avoid charging the device with damaged cables.
- Allow the phone to cool if its temperature becomes excessive.
Operating Temperature
The recommended operating temperature is 0°C to 35°C.
Avoid prolonged exposure to very hot or cold environments. Extreme temperatures may affect performance, damage internal components, or shorten battery life.
Before First Use
Before setting up the Galaxy S25 FE:
- Check the device and accessories for visible damage.
- Prepare a compatible USB Type-C power adapter.
- Charge the battery before first use.
- Prepare a nano-SIM card or carrier-provided eSIM.
- Make sure the SIM card tray is clean and dry.
- Turn on the phone using the Side button.
- Follow the displayed setup instructions.
- Connect to a Wi-Fi network when prompted.
Some setup functions require an internet connection.
Samsung Galaxy S25 FE Setup Instructions
How to Turn On the Galaxy S25 FE
- Press and hold the Side button for several seconds.
- Release the button when the device starts.
- Follow the initial setup instructions.
- Configure the language, network, account, and available security settings.
How to Turn Off the Phone
- Press and hold the Side button and Volume Down button simultaneously.
- Tap Power off.
- Tap Power off again to confirm.
The power menu can also be opened from the quick settings panel.
To restart the phone, select Restart → Restart.
How to Insert a Nano-SIM Card
- Locate the nano-SIM card tray.
- Insert the ejection pin straight into the tray hole.
- Gently pull out the tray.
- Place the nano-SIM card in the tray with its gold-colored contacts facing upward.
- Press the card gently into position.
- Reinsert the tray completely.
For supported dual-SIM configurations, place the second card in its designated tray position.
Important: Use only nano-SIM cards. Do not insert a wet tray into the phone. Close the tray completely to reduce the risk of liquid entering the device.
How to Activate an eSIM
- Open Settings → Connections.
- Tap SIM manager.
- Select Add eSIM.
- Follow the activation instructions.
If the carrier provides a QR code, select Add eSIM → Scan QR code and scan the supplied code.
eSIM availability depends on the region, carrier, and model.
Managing Dual-SIM Settings
Open Settings → Connections → SIM manager.
| Setting | Function |
| SIM Cards | Activates physical SIM cards and changes their settings |
| eSIMs | Downloads or activates eSIM profiles |
| Preferred SIMs | Selects preferred SIM cards for supported services |
| Data Switching | Changes the SIM used for mobile data if the preferred SIM cannot connect |
| More SIM Settings | Opens additional SIM options |
Additional carrier charges may apply when using certain data-switching functions.
How to Sign In to a Samsung Account
- Open Settings.
- Tap Sign in to your Galaxy.
- Enter Samsung account credentials.
- Create an account if necessary.
- Follow the verification instructions.
Samsung account services are available at https://account.samsung.com.
Transferring Data with Smart Switch
Smart Switch transfers compatible data from a previous device through USB cable, wireless connection, external storage, or computer.
- Open Settings → Accounts and backup.
- Tap Transfer data for device setup.
- Select the preferred transfer method.
- Follow the displayed instructions.
- Check the transfer result when complete.
Some transfer methods may not be supported on certain devices or computers.
For additional information, visit https://www.samsung.com/smartswitch.
Galaxy S25 FE Charging Instructions
The Galaxy S25 FE supports USB Type-C wired charging, wireless charging, fast wireless charging, and Wireless power sharing.
How to Charge with a USB Type-C Cable
- Connect a compatible USB Type-C cable to the power adapter.
- Insert the cable into the phone’s USB Type-C port.
- Connect the adapter to an electrical outlet.
- Check the charging indicator.
- Disconnect the charger after charging is complete.
If the battery is completely discharged, allow it to charge for several minutes before attempting to turn on the phone.
How to Use Wireless Charging
- Connect a compatible wireless charger to its power source.
- Place the back of the Galaxy S25 FE at the center of the charger.
- Check that charging has started.
- Leave the phone in position while charging.
- Remove the phone when charging is complete.
The estimated charging time appears in the notification panel.
Remove protective covers or accessories if they interfere with wireless charging.
Fast Charging Settings
- Open Settings → Battery.
- Tap Charging settings.
- Check the available fast charging options.
- Turn on the required function.
- Use compatible charging equipment.
Fast charging may be quicker when the device or screen is turned off.
How to Use Wireless Power Sharing
Wireless Power Sharing allows the Galaxy S25 FE to charge another compatible wireless charging device using its own battery.
- Open Settings → Battery → Wireless power sharing.
- Turn on Wireless power sharing.
- Place the compatible device against the back of the phone, with both devices’ backs facing each other.
- Adjust their positions until charging begins.
- Disconnect the devices when charging is complete.
Do not use headphones while sharing power. Some phone functions may be unavailable during the charging process.
Set the Battery Limit for Wireless Power Sharing
- Open Settings → Battery → Wireless power sharing.
- Tap Battery limit.
- Set the remaining battery level at which power sharing should stop.
Wireless Charging Precautions
- Do not place metal objects between the phone and wireless charger.
- Keep magnetic stripe cards and RFID cards away from the charging area.
- Avoid moving either device during charging.
- Remove cases or accessories that interfere with charging.
- Use compatible wireless charging equipment.
Wireless charging speed and efficiency may vary depending on device positioning, charger compatibility, and operating conditions.
Battery Settings and Power Saving
Open Settings → Battery to manage charging, power usage, and battery protection.
| Setting | Function |
| Power Saving | Reduces battery consumption |
| Background Usage Limits | Restricts background battery use by selected applications |
| Battery Protection | Stops charging at a configured limit or when fully charged |
| Today | Displays recent battery usage |
| Charging Settings | Controls available charging functions |
| Wireless Power Sharing | Charges compatible devices |
| Auto Dim Screen | Reduces display brightness when battery power becomes low |
| Show Battery Percentage | Displays the battery percentage in the status bar |
| Battery Information | Shows available battery details |
How to Reduce Battery Consumption
- Turn on Power saving mode.
- Reduce screen brightness.
- Shorten screen timeout.
- Close unnecessary applications.
- Turn off Bluetooth when it is not needed.
- Limit unnecessary background synchronization.
- Use Device care to manage system performance.
Checking Battery Information
Open Settings → Battery → Battery information or Settings → About phone → Battery information.
Depending on the region and carrier, available details may include battery manufacturing date, first-use date, full charge/discharge cycles, and measured battery state of health.
Home Screen and Touchscreen Instructions
Touchscreen Gestures
| Gesture | Function |
| Tap | Selects an item |
| Touch and Hold | Opens additional options |
| Double Tap | Performs supported double-tap functions |
| Swipe | Scrolls or changes screens |
| Drag | Moves an item |
| Pinch or Spread | Adjusts zoom in supported applications |
Avoid prolonged display of fixed graphics because this may cause afterimages or screen burn-in.
Home Screen and Apps Screen
The Home screen displays widgets, application shortcuts, and frequently used functions.
Swipe upward from the Home screen to open the Apps screen.
To return, swipe upward or downward on the Apps screen or use the Home navigation control.
Adding Widgets
- Touch and hold an empty area on the Home screen.
- Tap Widgets.
- Select a widget.
- Tap Add.
Creating App Folders
- Touch and hold an application icon.
- Drag it over another application.
- Release it to create a folder.
- Enter a folder name if required.
Using the Edge Panel
Drag the Edge panel handle toward the center of the screen.
If the handle is not visible, open Settings → Display → Edge panels and turn on the feature.
Notification Panel
Swipe downward from the top of the display, except the upper-right quick settings area, to open the notification panel.
Notifications can be checked, cleared, or managed through notification settings.
Quick Settings Panel
Swipe downward from the upper-right corner of the display.
The quick settings panel provides access to supported controls such as Wi-Fi, Bluetooth, media output, and nearby devices.
Touch and hold a control to open its detailed settings.
Screen Capture and Screen Recording
How to Take a Screenshot
Press the Side button and Volume Down button simultaneously.
The screenshot is saved in Gallery.
Palm Swipe Screenshot
- Open Settings → Advanced features → Motions and gestures.
- Turn on Palm swipe to capture.
- Swipe the edge of the hand across the screen.
Screenshots cannot be captured in some applications.
How to Record the Screen
- Open the quick settings panel.
- Expand the available controls.
- Tap Screen recorder.
- Choose the sound recording option.
- Tap Start recording.
- Tap Stop when finished.
Screen recordings are saved in Gallery.
Additional screen recording controls allow drawing on the screen or including a selfie-video overlay.
Galaxy AI Features and Instructions
Galaxy AI provides supported tools for communication, translation, writing, transcription, image editing, and other activities.
Feature availability may vary by region, carrier, language, or software version. Some functions require online processing.
Galaxy AI Features Overview
| Feature | Function |
| Live Translate | Translates supported phone calls |
| Writing Assist | Provides writing suggestions, grammar checks, and translation |
| Interpreter | Translates conversations and speech |
| Note Assist | Formats, summarizes, and translates notes |
| Transcript Assist | Converts supported recordings into text |
| Browsing Assist | Summarizes or translates webpages |
| Circle to Search | Searches selected screen content |
| Generative Edit | Moves or removes objects in images |
| Sketch to Image | Generates image elements from drawings |
| Portrait Studio | Creates stylized portraits |
| Drawing Assist | Generates artwork from drawings, text, or images |
| AI Select | Performs actions on selected screen content |
| Audio Eraser | Adjusts or reduces selected sounds in videos |
| Now Brief | Displays personalized briefings |
How to Use Live Translate
- Open the Phone app.
- Tap the three-dot menu.
- Select Settings → Live translate.
- Turn on the function.
- Select the languages.
- During a call, tap Call assist → Live translate.
Tap the stop translation control to end translation.
How to Use Writing Assist
- Open a supported messaging or text-entry application.
- Start composing a message.
- Tap the Assist control on Samsung Keyboard.
- Select the required writing function.
Writing Assist includes spelling and grammar suggestions, writing style changes, message translation, and automatic text composition.
How to Use Interpreter
- Open the Edge panel.
- Tap Interpreter.
- Select the two languages.
- Download a language pack if necessary.
- Tap the microphone control.
- Begin speaking.
Interpreter also includes a Listening mode for translating supported lectures, meetings, and other spoken content.
How to Use Note Assist
- Open Samsung Notes.
- Create or select a note.
- Tap the Assist control.
- Choose a function.
Note Assist can format notes, summarize text, correct spelling, translate content, and generate supported artwork from drawings.
How to Transcribe Voice Recordings
- Open Voice Recorder.
- Select a recording.
- Tap Transcribe.
- Select a language.
- Start transcription.
- Use the available summary, translation, or editing options.
How to Transcribe Recorded Phone Calls
- Open Phone → Settings → Record calls → Transcript assist.
- Turn on Auto transcribe recorded calls.
- Select the transcription language.
- Record a supported phone call.
- Open the recorded call in Recents.
- Select the transcript.
The transcript can also be summarized using the available control.
How to Use Browsing Assist
- Open Samsung Internet.
- Open a webpage.
- Tap the Assist control.
- Select summarization, translation, or supported read-aloud options.
Circle to Search
- Touch and hold the Home navigation control.
- Tap or draw a circle around the required image or text.
- Review the search results.
Generative Photo Editing
- Open Gallery.
- Select a picture.
- Tap Assist → Generative edit.
- Select the object to move or remove.
- Adjust its position if required.
- Tap Generate.
- Select Save copy.
How to Use Sketch to Image
- Open Gallery and select an image.
- Tap Assist → Sketch to image.
- Draw the required object.
- Tap Generate.
- Save the edited picture.
How to Use Portrait Studio
- Open Gallery and select a portrait.
- Tap Assist → Portrait studio.
- Choose a style.
- Tap Generate.
- Select Save copy.
How to Use Drawing Assist
- Open the Edge panel.
- Select Drawing assist.
- Choose a drawing, image, or text description.
- Select an image style.
- Tap Generate.
- Save the result.
How to Use Audio Eraser
- Open Gallery.
- Select a video.
- Tap Edit → Audio → Audio eraser.
- Select a sound category.
- Adjust its volume or mute it.
- Tap Apply edits → Save copy.
Galaxy AI Privacy Settings
Open Settings → Galaxy AI.
The Process data only on device option limits supported AI processing to the phone. Some Galaxy AI functions require online processing and may be unavailable when this restriction is active.
Phone Calls and Contacts
How to Make a Call
- Open the Phone app.
- Tap Keypad.
- Enter a phone number.
- Tap the voice call button.
Supported video calls can also be started using the available video call controls.
How to Answer or Reject Calls
When receiving a call, drag the answer icon outside the circle to accept it.
Drag the decline icon outside the circle to reject it.
A quick decline message may also be sent using the message option.
How to Block Phone Numbers
- Open Phone.
- Tap the three-dot menu.
- Select Settings → Block numbers.
- Add a phone number or contact.
How to Use Text Call
- Open Phone → Settings → Text call.
- Turn on the feature.
- During a supported call, select Call assist → Text call.
- Enter text or choose a prepared response.
The other caller hears the text as speech, while their spoken response appears on the screen.
Creating Contacts
- Open Contacts.
- Tap the Create control.
- Select a storage location.
- Enter the contact details.
- Tap Save.
Importing and Synchronizing Contacts
To import contacts, open Contacts → Settings → Import contacts.
To synchronize contacts, open Settings → Accounts and backup → Manage accounts, select the account, and turn on Contacts synchronization.
Galaxy S25 FE Camera Instructions
The Galaxy S25 FE provides several camera modes for photography, video recording, portraits, and manual shooting.
How to Take a Picture
- Open Camera.
- Select PHOTO.
- Point the camera toward the subject.
- Tap the screen to select the focus point.
- Adjust brightness if necessary.
- Tap the shutter button.
The Camera app can also be opened using a configured Side button shortcut.
Camera Controls
| Control | Function |
| Shutter | Captures a picture |
| Record | Starts video recording |
| Camera Switch | Changes between front and rear cameras |
| Zoom | Adjusts image magnification |
| Preview Thumbnail | Opens recently captured content |
| Shooting Modes | Changes camera operation |
| Flash | Turns flash on or off |
| Resolution | Changes the selected image or video resolution |
| Filters | Applies camera effects |
| Quick Controls | Opens additional camera settings |
Galaxy S25 FE Camera Modes
| Mode | Function |
| Photo | Takes pictures with automatic camera adjustments |
| Video | Records standard video |
| Portrait | Takes pictures with background effects |
| Portrait Video | Records video with background effects |
| Pro | Provides manual photography controls |
| Pro Video | Provides manual video controls |
| Night | Captures low-light pictures |
| Food | Adjusts photography settings for food |
| Panorama | Combines multiple pictures into a wide scene |
| Slow Motion | Records video for slow-motion playback |
| Hyperlapse | Records fast-motion video |
| Dual Rec | Records from two cameras simultaneously |
| Single Take | Creates multiple results from one recording session |
How to Record Video
- Open Camera → VIDEO.
- Tap the Record button.
- Record the scene.
- Tap Stop when finished.
A still image can also be captured during recording using the available capture control.
How to Record 8K Video
- Open Camera → VIDEO.
- Tap the video resolution control.
- Select an available high-resolution option, up to 8K.
- Start recording.
Available resolutions and frame rates depend on the selected recording mode.
How to Use Super Steady
- Open Camera → VIDEO.
- Tap the Super steady control.
- Turn on the feature.
- Record the video.
Super steady provides additional stabilization for recordings affected by camera movement.
How to Use Auto Framing
- Open Camera → VIDEO.
- Open Quick controls.
- Turn on Auto framing.
- Begin recording.
The camera automatically adjusts the shooting angle and zoom by recognizing and tracking people.
How to Use Dual Rec
Dual Rec records video using two cameras simultaneously.
- Open Camera → MORE → DUAL REC.
- Select two camera lenses.
- Choose the recording layout or saving option.
- Start recording.
- Stop when finished.
Supported recordings can be saved as separate files or displayed in split-view and picture-in-picture arrangements.
How to Use Single Take
- Open Camera → MORE → SINGLE TAKE.
- Tap the recording button.
- Capture the required scene.
- Open the resulting file in Gallery.
- Review the available photographs and videos.
Single Take automatically creates multiple results from the captured scene.
Portrait and Portrait Video Modes
- Open Camera → PORTRAIT or MORE → PORTRAIT VIDEO.
- Select an available background effect.
- Adjust its intensity.
- Wait until Ready appears.
- Capture the picture or video.
Portrait effects may be less accurate when the subject moves, is transparent, or has colors similar to the background.
Pro and Pro Video Modes
- Open Camera → MORE.
- Select PRO or PRO VIDEO.
- Adjust the available controls.
- Capture a picture or record video.
| Setting | Function |
| ISO | Adjusts light sensitivity |
| Speed | Changes shutter speed |
| EV | Adjusts exposure |
| Focus | Adjusts manual focus |
| White Balance | Changes color temperature |
Night Mode
- Open Camera → MORE → NIGHT.
- Select the available capture duration if needed.
- Hold the phone steady.
- Tap the shutter button.
- Wait until capture finishes.
A tripod may help produce steadier low-light photographs.
Panorama Mode
- Open Camera → MORE → PANORAMA.
- Tap the shutter button.
- Move the phone slowly in one direction.
- Keep the scene inside the guide frame.
- Tap the finish control.
Slow Motion Mode
- Open Camera → MORE → SLOW MOTION.
- Start recording.
- Stop the recording.
- Open the video.
- Adjust the slow-motion section using the editing controls.
Hyperlapse Mode
- Open Camera → MORE → HYPERLAPSE.
- Select the recording speed.
- Start recording.
- Stop when finished.
Hyperlapse includes automatic recording speed adjustments and supported night recording options.
Scanning Documents and Text
- Open Camera → PHOTO.
- Point the camera toward the document.
- Tap the scan control when it appears.
- Select the required area.
- Save the scan.
Camera File Formats and Settings
| Setting | Function |
| JPEG | Saves compressed pictures |
| RAW / DNG | Saves detailed image data in supported Pro settings |
| HEIF | Saves high-efficiency images |
| HEVC | Saves compressed high-efficiency video |
| HDR10+ Video | Records supported high-dynamic-range video |
| Auto FPS | Adjusts video frame rate in low-light conditions |
| Video Stabilization | Reduces camera shake |
| Tracking Auto Focus | Tracks a selected subject |
| Location Tags | Adds location information to pictures |
| Shot Suggestions | Suggests picture composition |
Some settings are unavailable in certain camera modes.
Gallery and Photo Management
The Gallery app provides tools for viewing, editing, organizing, and sharing pictures and videos.
Viewing Pictures and Videos
- Open Gallery.
- Select a picture or video.
- Swipe between files.
- Use the editing, sharing, or playback controls.
How to Remaster an Image
- Open a picture in Gallery.
- Swipe upward.
- Tap Remaster.
- Review the result.
- Save the picture.
Extracting Objects from Pictures
- Open an image in Gallery.
- Touch and hold the required object.
- Choose an available extraction option.
The extracted object can be copied, saved as an image, or used as a sticker.
For videos, this function is available when playback is paused.
Creating Albums
Open Gallery → Albums and tap the Create control.
Available album types include regular albums, automatically updating albums, grouped albums, and supported shared albums.
Synchronizing Gallery with OneDrive
- Open Gallery.
- Select the OneDrive synchronization control.
- Follow the account connection instructions.
- Complete synchronization.
Restoring Deleted Images
- Open Gallery.
- Select Menu → Recycle bin.
- Choose the deleted pictures or videos.
- Tap Restore.
Deleted files remain in the recycle bin temporarily before permanent removal.
Bixby and Bixby Vision
How to Use Bixby
Bixby accepts voice commands to open supported applications, perform actions, and provide information.
- Open Settings → Advanced features → Side button.
- Select Long press → Bixby.
- Press and hold the Side button.
- Speak the command.
A configured voice wake-up phrase can also activate Bixby.
Bixby Vision Functions
| Function | Purpose |
| Translate | Translates recognized text |
| Text | Extracts text from images |
| Discover | Searches for similar images and related information |
| Scene Describer | Describes recognized scenes using speech |
| Object Identifier | Identifies objects using speech |
| Text Reader | Reads recognized text aloud |
| Color Detector | Detects and announces colors |
To open Bixby Vision, use the available control in Camera or Gallery.
Samsung DeX Instructions
Samsung DeX allows the Galaxy S25 FE to use a desktop-style interface on a compatible external display.
Wireless DeX Connection
- Open Settings → Connected devices → Samsung DeX.
- Select Connect wirelessly.
- Choose a compatible display.
- Follow the connection instructions.
Some televisions and monitors must have screen mirroring enabled before they can be detected.
Wired DeX Connection
Connect the phone to a compatible external display using an officially supported USB Type-C to HDMI adapter.
Using the Phone as a Touchpad
- Start Samsung DeX.
- Tap the Touchpad control on the phone.
- Use the phone’s display to control the external screen.
If gesture navigation is enabled, open the notification panel and select Use your phone as a touchpad.
A compatible external keyboard and mouse can also be used.
Wi-Fi, Bluetooth, and Mobile Connections
How to Connect to Wi-Fi
- Open Settings → Connections → Wi-Fi.
- Turn on Wi-Fi.
- Select the desired network.
- Enter the password if required.
If the connection fails, restart the phone’s Wi-Fi function or the wireless router.
Bluetooth Pairing Instructions
- Open Settings → Connections → Bluetooth.
- Turn on Bluetooth.
- Put the other device into pairing mode.
- Select it from the device list.
- Confirm the connection request.
Bluetooth connections should be made with trusted devices. Obstacles can reduce operating distance.
NFC and Contactless Payments
- Open Settings → Connections.
- Turn on NFC and contactless payments.
- Configure a supported payment service if required.
- Hold the phone’s NFC antenna area near a compatible reader.
Mobile Hotspot Setup
- Open Settings → Connections → Mobile Hotspot and Tethering.
- Select Mobile Hotspot.
- Turn on the feature.
- Configure the network name and password.
- Connect another device through Wi-Fi.
If the hotspot cannot be found, select the 2.4 GHz band and turn off Hidden network in the advanced hotspot settings.
Data Saver
Open Settings → Connections → Data usage → Data saver.
Turn on Data saver to restrict background mobile data use by selected applications.
Quick Share, Smart View, and Connected Devices
Quick Share Instructions
- Open Gallery and select an image.
- Tap Share → Quick Share.
- Choose a nearby compatible device.
- Accept the transfer on the receiving device.
Quick Share supports compatible QR-code, link, and private sharing options.
Smart View Screen Mirroring
- Open the quick settings panel.
- Tap Smart View.
- Select a compatible television or monitor.
- Follow the connection instructions.
Music Share
Music Share allows a connected Bluetooth speaker or supported Galaxy Buds to share audio with another compatible device.
Open Settings → Connected devices → Music Share and turn on the feature.
Camera Share and Storage Share
Camera Share allows supported Samsung devices to use the Galaxy S25 FE camera as a webcam.
Storage Share allows compatible Samsung devices to access shared files.
These functions require supported devices, account connections, and wireless settings.
SmartThings
Open SmartThings to connect and manage supported smart appliances and other connected products.
Available functions include device controls, routines, location management, and connected-device services.
Display Settings
Open Settings → Display to configure screen appearance and behavior.
| Setting | Function |
| Light / Dark | Changes the display theme |
| Brightness | Adjusts screen brightness |
| Adaptive Brightness | Adjusts brightness according to lighting and previous adjustments |
| Motion Smoothness | Changes refresh behavior |
| Eye Comfort Shield | Limits blue light |
| Screen Mode | Changes display colors and contrast |
| Font Size and Style | Adjusts text appearance |
| Screen Zoom | Changes displayed element sizes |
| Screen Timeout | Controls when the display turns off |
| Easy Mode | Provides larger icons and a simpler layout |
| Navigation Bar | Changes navigation controls |
| Touch Sensitivity | Increases sensitivity for compatible screen protectors |
Motion Smoothness
Open Settings → Display → Motion smoothness.
| Mode | Description |
| Adaptive | Automatically adjusts the refresh rate for smoother scrolling and animation |
| Standard | Uses a standard refresh rate to reduce battery consumption |
Screen Color Settings
- Open Settings → Display → Screen mode.
- Select Vivid or Natural.
Vivid mode provides additional white balance and color adjustments.
Natural mode displays colors using a more natural tone.
Always On Display
Open Settings → Lock screen and AOD → Always On Display.
The function displays supported information, including the clock and notification icons, while the screen is otherwise off.
Select When to show to configure its behavior.
Sound, Vibration, and Notifications
Open Settings → Sounds and vibration to manage ringtones, notification sounds, system sounds, vibration, and volume.
Sound Quality Settings
| Feature | Function |
| Dolby Atmos | Provides supported surround sound effects |
| Equalizer | Changes the audio profile |
| Loudness Normalization | Reduces differences in audio volume |
| Adapt Sound | Adjusts audio to suit the listener |
| UHQ Upscaler | Improves supported audio playback |
| Separate App Sound | Sends selected application audio to a different output device |
Some audio functions require compatible headphones or speakers.
Notification Settings
Open Settings → Notifications to configure application notifications, notification pop-ups, lock screen notifications, Do Not Disturb, and status indicators.
Security and Privacy Settings
Setting a Screen Lock
Open Settings → Lock screen and AOD → Screen lock and biometrics.
Select a supported lock method.
Registering Fingerprints
- Open Settings → Security and privacy → Screen lock and biometrics.
- Tap Fingerprints.
- Follow the registration instructions.
- Turn on Fingerprint unlock.
Keep the screen and fingers clean and dry.
Thick or unsuitable screen protectors may affect fingerprint recognition.
Setting Up Face Recognition
- Open Settings → Security and privacy → Screen lock and biometrics → Face recognition.
- Set a screen lock method.
- Tap Continue.
- Position the face inside the displayed frame.
- Complete registration.
Face recognition is less secure than a PIN, password, or pattern.
Secure Folder
Secure Folder provides a separate protected area for supported applications and personal content.
- Open Settings → Security and privacy → More security settings → Secure Folder.
- Follow the setup instructions.
- Configure the protection method.
- Add the required files or applications.
Secure Wi-Fi
Open Settings → Security and privacy → More security settings → Secure Wi-Fi.
Follow the setup instructions to activate the supported wireless network protection service.
Samsung Pass
Samsung Pass supports identity verification, saved sign-in information, and compatible passkeys.
Open Settings → Security and privacy → More security settings → Passwords, passkeys, and autofill → Samsung Pass.
Follow the setup instructions.
Emergency Settings
Open Settings → Safety and emergency.
Available options include medical information, emergency contacts, Emergency SOS, emergency sharing, location services, and wireless emergency alerts.
Device Maintenance and Software Updates
How to Check for Software Updates
- Open Settings → Software update.
- Tap Download and install.
- Install an available update.
- Follow the displayed instructions.
Emergency security updates may install automatically.
Device Care
Open Settings → Device care.
| Function | Description |
| Optimize Now | Checks performance and unnecessary background activity |
| Battery | Displays battery information |
| Storage | Manages storage use |
| Memory | Checks and frees available memory |
| App Protection | Scans for suspicious activity |
| Performance Profile | Adjusts supported performance behavior |
| Auto Optimization | Performs automatic maintenance |
| Software Update | Checks for updates |
| Diagnostics | Opens Samsung Members diagnostic tests |
| Maintenance Mode | Protects personal data during service |
Samsung Cloud Backup
- Open Settings → Accounts and backup.
- Select Back up data under Samsung Cloud.
- Choose the required data categories.
- Tap Back up now.
- Tap Done when finished.
Restoring Backup Data
- Open Settings → Accounts and backup.
- Tap Restore data.
- Select the backup.
- Choose the required content.
- Tap Restore.
Maintenance Mode
Maintenance mode helps protect personal information when another person needs to handle the device during service.
Open Settings → Device care → Maintenance mode and follow the instructions.
Back up important files before sending the phone for repair.
Cleaning and Water Resistance
How to Clean the Galaxy S25 FE
If the device is exposed to water or contaminants:
- Wipe the phone with a clean, soft cloth.
- If exposed to unclean water, soap, oil, perfume, sunscreen, cosmetics, or similar substances, clean it with fresh water that is not flowing.
- Wipe it again.
- Dry the device thoroughly.
- Do not connect charging accessories until the phone is completely dry.
A wet speaker or microphone may cause unclear audio during calls.
IP68 Water and Dust Resistance
The Galaxy S25 FE has an IP68 rating under controlled testing conditions.
| Test Condition | Details |
| Standard | IEC 60529 |
| Protection Rating | IP68 |
| Water Type | Fresh water |
| Tested Depth | 1.5 meters |
| Duration | 30 minutes |
| Temperature | 15°C–35°C |
| Pressure | 86–106 kPa |
| Device Position | Stationary |
Maintaining Water Resistance
- Avoid swimming pool water and seawater.
- Do not expose the phone to high-pressure or forcefully moving water.
- Avoid saunas and steam rooms.
- Keep the USB Type-C charging port dry.
- Do not connect accessories while the phone is wet.
- Avoid physical impacts that may damage protective seals.
Water and dust resistance can decrease over time through normal wear or damage.
Storage and Overheating Precautions
Safe Storage
- Do not store the phone in excessively hot or cold environments.
- Avoid prolonged exposure to direct sunlight.
- Do not leave the device inside a hot parked vehicle.
- Keep it away from heaters and hot cooking equipment.
- Avoid damaged chargers and cables.
- Keep the device away from magnetic cards and sensitive medical equipment.
What to Do if the Galaxy S25 FE Overheats
- Stop demanding activities.
- Close unnecessary applications.
- Disconnect the charger if charging.
- Reduce display brightness.
- Turn off unused Wi-Fi, GPS, and Bluetooth functions.
- Allow the phone to cool.
- Restart it if necessary.
When the device becomes excessively hot, it may automatically reduce performance, screen brightness, refresh rate, or charging speed.
A temperature warning may appear. If the temperature increases further, the phone may shut down.
Do not continue using the phone until its temperature returns to the recommended operating range.
Galaxy S25 FE Troubleshooting Guide
| Problem | Possible Cause or Condition | Recommended Solution |
| Phone does not turn on | Battery completely discharged | Charge the battery |
| Phone freezes | Temporary software problem | Restart or force restart |
| Touchscreen responds slowly | Moisture, gloves, protector, or software issue | Check screen conditions and restart |
| Network errors | Weak signal or unavailable service | Move to another area or contact the carrier |
| Calls cannot connect | Network selection or call barring | Check mobile network and call settings |
| Other person cannot hear calls | Microphone covered or headset problem | Check microphone and headset |
| Echo during calls | Volume or reception conditions | Adjust volume or change location |
| Network disconnects frequently | Poor reception or carrier issues | Move to an area with better reception |
| Battery not charging | Charger connection or battery issue | Check charging equipment and request service if necessary |
| Wireless charging fails | Charger positioning or compatibility issue | Check charger, positioning, and accessories |
| Battery drains quickly | Temperature, demanding apps, or battery aging | Review usage and enable power saving |
| Camera displays errors | Insufficient battery or storage | Charge, free storage, and restart |
| Pictures appear blurry | Lighting or camera conditions | Check lens and shooting conditions |
| Media files do not play | Unsupported format or DRM protection | Check file compatibility and permissions |
| Bluetooth fails | Pairing or connection problem | Check pairing and reset network settings if needed |
| Computer cannot detect phone | USB cable or computer driver issue | Check cable and driver |
| GPS cannot find location | Obstructed GPS signal | Use Wi-Fi or mobile-network location services |
| Storage is full | Unnecessary files or applications | Remove unneeded content |
| Home button is missing | Navigation bar hidden | Swipe upward from the bottom of the display |
| Rattling sound when shaken | Camera OIS or autofocus components | Can be normal on applicable devices |
How to Force Restart a Frozen Galaxy S25 FE
- Press and hold the Side button and Volume Down button simultaneously.
- Keep both buttons pressed for more than 7 seconds.
- Allow the device to restart.
How to Factory Reset the Galaxy S25 FE
- Open Settings.
- Tap General management → Reset.
- Select Factory data reset.
- Tap Reset.
- Confirm with Delete all.
Warning: A factory reset removes stored data. Back up important files before continuing.
Galaxy S25 FE Not Charging
If the battery does not charge correctly:
- Check that the charger is connected properly.
- Inspect the charging cable and adapter.
- Make sure the USB Type-C port is dry.
- Allow a fully discharged battery to charge for several minutes.
- If wireless charging fails, check charger compatibility and position.
- Contact an authorized Samsung service center if the problem continues.
Bring the charger and USB cable when requesting charging service. If wireless charging fails, bring the wireless charger as well.
Galaxy S25 FE Bluetooth Not Working
- Check that the other Bluetooth device is ready for pairing.
- Keep the devices within the supported range of 10 meters.
- Open Settings → Connections → Bluetooth.
- Turn Bluetooth off and on again.
- If necessary, open Settings → General management → Reset → Reset Wi-Fi and Bluetooth settings → Reset settings.
Resetting connection settings may remove saved pairing information.
Galaxy S25 FE Camera Not Working
- Charge the battery.
- Free available storage.
- Restart the phone.
- Open Camera again.
Contact Samsung service if the camera continues to display errors.
Touchscreen Not Responding
Touch recognition may be affected by moisture, gloves, screen protectors, damaged glass, or temporary software problems.
Restart the phone and check for software updates.
If the screen is physically damaged, contact an authorized service center.
Error Codes and Status Warnings
SIM and Security Codes
| Code | Meaning | Required Action |
| Password | Device password required | Enter the configured password |
| PIN | SIM card PIN required | Enter the carrier-provided PIN |
| PUK | SIM card blocked after incorrect PIN attempts | Enter the PUK supplied by the carrier |
| PIN2 | Additional SIM security code required | Enter the carrier-provided PIN2 |
Charging and Temperature Warnings
| Indicator or Warning | Meaning | Recommended Action |
| Battery Charging | Battery is charging | Check charging status |
| Blinking Battery Indicator | Charging stopped because the device became too hot | Allow the device to cool |
| Temperature Warning | Device temperature is excessive | Stop demanding activities and allow cooling |
| Additional Overheating Warning | Temperature has increased further | Allow the device to shut down and cool |
| Error/Caution Indicator | Device warning requires attention | Check the displayed notification |
Replacement Parts, Accessories, and Battery Service
Samsung recommends compatible accessories designed for the Galaxy S25 FE.
Supported accessory categories include USB Type-C charging cables, power adapters, wireless chargers, digital-output USB Type-C headphones, and compatible protective accessories.
Battery Replacement
Battery removal and replacement should be performed by an authorized Samsung service center.
Warning: Do not attempt to remove the built-in battery. Improper removal may damage the battery or device and cause injury.
Battery removal information is available at https://www.samsung.com/global/ecodesign_energy.
Warranty and Service Information
Samsung warranty coverage is subject to applicable regional terms.
Damage caused by misuse or improper charger connections is not covered. Problems caused by unsuitable accessories may also fall outside warranty coverage.
Modifying the operating system or installing software from unauthorized sources can void warranty coverage.
For repairs, battery replacement, and other hardware problems, contact a Samsung Service Centre or authorized service center.
Samsung Customer Support
| Support Resource | Website or Access |
| Samsung Official Website | https://www.samsung.com |
| Samsung Account | https://account.samsung.com |
| Smart Switch | https://www.samsung.com/smartswitch |
| Samsung DeX | https://www.samsung.com/samsung-dex |
| Bixby | https://www.samsung.com/bixby |
| Samsung Wallet | https://www.samsung.com/samsung-wallet |
| Samsung Health | https://www.samsung.com/samsung-health |
| Security Updates | https://security.samsungmobile.com |
| Battery Removal Information | https://www.samsung.com/global/ecodesign_energy |
| Samsung Members | Diagnostics, questions, and error reports |
| Authorized Service Center | Repairs and battery replacement |
How to Run Device Diagnostics
- Open Settings → Device care.
- Tap Diagnostics.
- Follow the Samsung Members instructions.
- Review the results.
If a hardware problem continues, contact a Samsung Service Centre or authorized service center.
Frequently Asked Questions
How do I set up the Samsung Galaxy S25 FE for the first time?
Charge the battery, insert a nano-SIM card or activate a supported eSIM, and press and hold the Side button. Follow the displayed instructions to configure the language, Wi-Fi, accounts, and security settings.
Does the Galaxy S25 FE support wireless charging?
Yes. The Galaxy S25 FE supports wireless charging and fast wireless charging with compatible equipment. It also supports Wireless power sharing for charging compatible devices.
How do I restart a frozen Galaxy S25 FE?
Press and hold the Side button and Volume Down button simultaneously for more than 7 seconds. The phone should restart.
Is the Samsung Galaxy S25 FE waterproof?
The Galaxy S25 FE has an IP68 water and dust resistance rating. It was tested in freshwater at a depth of 1.5 meters for 30 minutes under controlled conditions. Avoid seawater, pool water, high-pressure water, and charging while wet.
How do I activate an eSIM on the Galaxy S25 FE?
Open Settings → Connections → SIM manager → Add eSIM. Follow the activation instructions or scan a QR code provided by the mobile carrier. Availability depends on the region and carrier.
How do I fix a Galaxy S25 FE that is not charging?
Check the charger and USB cable, make sure the charging port is dry, and allow a completely discharged battery to charge for several minutes. If wireless charging fails, check the compatible charger and device position. Contact Samsung service if the problem continues.
How do I factory reset the Samsung Galaxy S25 FE?
Open Settings → General management → Reset → Factory data reset → Reset → Delete all. Back up important data before resetting because the process deletes stored information.