| Field | Details |
| Document Title | Digital Battery Tester for 12 Volt Batteries |
| Document Type | Owner’s Manual |
| Brand Name | Schumacher Electric |
| Product Name | Digital Battery Tester |
| Model Number(s) | BT175 |
| PDF File Size | 157 KB |
| Number of Pages | 18 |
| Languages | English, French |
Schumacher Digital Battery Tester BT175
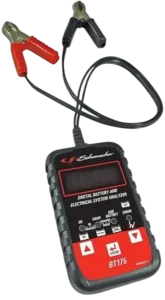
The Schumacher BT175 is a digital battery tester designed to evaluate the condition of 12V vehicle batteries and check the performance of vehicle starting and charging systems.
The BT175 uses a digital display, three control buttons, and colored LED indicators to guide battery testing and show diagnostic results. It supports multiple battery types, including standard SLI batteries, AGM spiral batteries, AGM flat-plate batteries, and gel-cell batteries.
The tester can measure battery voltage, perform battery condition tests using different cranking-amp rating standards, check starter system performance, and evaluate vehicle charging system voltage.
Battery testing results help identify whether a battery is in good condition, requires recharging, should be retested, or needs replacement.
Product Features
The Schumacher BT175 includes the following functions:
- Digital testing for 12V batteries.
- Battery voltage display.
- Cold Cranking Amps (CCA) testing.
- Support for multiple battery rating standards.
- AGM spiral battery testing.
- Standard SLI battery testing.
- Gel-cell battery testing.
- AGM flat-plate battery testing.
- Starter system testing.
- Vehicle charging system testing.
- Battery testing with different electrical loads.
- Digital test results and diagnostic messages.
- Green, yellow, and red LED result indicators.
- ENTER and arrow-button controls.
- Battery condition and replacement recommendations.
- Display messages for voltage and connection problems.
Technical Specifications
| Specification | Details |
| Brand | Schumacher Electric |
| Model Number | BT175 |
| Product Type | Digital Battery Tester |
| Supported Battery Voltage | 12V |
| Recommended Operating Temperature | 32–122°F (0–50°C) |
| Supported Battery Types | Standard SLI, AGM Spiral, AGM Flat Plate, Gel Cell |
| Battery Test Standards | CCA/SAE, CA/MCA, EN, IEC, DIN |
| Battery Voltage Measurement | Yes |
| Starter System Test | Yes |
| Charging System Test | Yes |
| Digital Display | Yes |
| Battery Condition Indicators | Green, Yellow, Red |
| Battery Connection | Positive and Negative Clamps |
| Warranty | 1-Year Limited Warranty |
Battery Testing Ranges
The BT175 supports the following battery rating ranges.
| Battery Rating Standard | Test Range |
| SAE / CCA | 100–1200 CCA |
| DIN | 55–670 |
| IEC | 65–790 |
| EN | 90–1125 |
| CA / MCA | 120–1440 |
The correct battery rating standard and value must be selected according to the battery being tested.
Parts and Components
The Schumacher BT175 includes a digital tester body, electrical test leads, and battery clamps.
Main Components
| Component | Function |
| Digital Display | Shows battery voltage, menu selections, test values, and diagnostic messages |
| ENTER Button | Confirms selections and starts test functions |
| Up Arrow (▲) | Scrolls through settings and increases selected values |
| Down Arrow (▼) | Scrolls through settings and decreases selected values |
| Positive Clamp (Red) | Connects to the positive battery terminal |
| Negative Clamp (Black) | Connects to the negative battery terminal |
| Battery Test Leads | Connect the tester to the battery |
| LED Result Indicators | Display battery and vehicle system test results |
Control Panel and Display Guide
The BT175 uses three buttons to select test functions and confirm battery information.
ENTER Button
The ENTER button confirms menu selections and starts the selected test.
It is also used to move between test stages and return to the beginning of a test.
Up Arrow (▲)
The Up Arrow button scrolls through available battery types, rating standards, and numerical values.
Down Arrow (▼)
The Down Arrow button scrolls through the same selections in the opposite direction.
Digital Display
The display shows the connected battery’s voltage when the battery clamps are properly attached.
During testing, it also displays menu selections, entered battery ratings, measured results, and diagnostic messages.
Display Messages
| Display Message | Meaning |
| bAtt | Battery Test Mode |
| SySt | Vehicle System Test |
| CrAn | Starter System Test |
| CHAr | Charging System Test |
| CHA- | Battery Charge Confirmation Question |
| HI | Battery Voltage Exceeds 15.0V |
| Lo | Battery Voltage Is Below 7V |
| ERR | Clamp Connection Problem or Battery Rating Beyond Test Capacity |
| —- | Unstable Battery Voltage |
Battery Type Selection Codes
| Display Code | Battery Type |
| SPL | AGM Spiral Battery |
| SLI | Standard SLI Battery |
| 6eL | Gel-Cell Battery |
| FLat | AGM Flat-Plate Battery |
Battery Rating Selection Codes
| Display Code | Rating Standard |
| CCA | Cold Cranking Amps |
| CA / MCA | Cranking Amps / Marine Cranking Amps |
| EN | European Standard |
| IEC | International Electrotechnical Commission Standard |
| diN | Deutsches Institut für Normung Standard |
Important Safety Instructions
WARNING: Working near lead-acid batteries is dangerous. Batteries generate explosive gases during normal operation. Sparks, flames, or incorrect handling may cause an explosion.
The Schumacher BT175 must be operated according to its safety instructions and the battery manufacturer’s precautions.
General Safety Precautions
- Read all instructions before using the tester.
- Use the tester in a well-ventilated area.
- Keep the tester away from children.
- Do not expose the tester to rain or snow.
- Do not use the tester if it has been dropped, struck, or otherwise damaged.
- Do not test a battery with a cracked or broken case or cover.
- Do not disassemble the tester.
- Repairs must be performed by a qualified service person.
- Follow all battery and vehicle manufacturer safety instructions.
- Review the caution labels on the battery, vehicle, and nearby equipment.
Battery Explosion Precautions
To reduce the risk of an explosion:
- Never smoke near the battery or engine.
- Keep sparks and open flames away from the battery.
- Avoid dropping metal tools onto the battery.
- Do not allow metal objects to create a short circuit.
- Make sure the test area is well ventilated.
Personal Protection
When working near lead-acid batteries:
- Wear complete eye protection.
- Wear protective clothing.
- Keep another person nearby who can provide assistance.
- Remove rings, bracelets, watches, necklaces, and other metal jewelry.
- Keep fresh water, soap, and baking soda available.
- Avoid direct contact with battery acid.
A lead-acid battery can produce enough short-circuit current to heat or weld metal jewelry, causing serious burns.
Battery Acid Safety
Battery acid may cause serious injuries.
If battery acid contacts the skin or clothing, wash the affected area immediately with soap and water and seek medical attention.
If battery acid enters the eyes, flush them immediately with water for at least 10 minutes and obtain medical attention.
Battery acid spills must be neutralized thoroughly with baking soda before cleanup.
California Proposition 65 Warning
This product contains one or more chemicals identified by the State of California as causing cancer, birth defects, or other reproductive harm.
Before First Use
Before using the Schumacher BT175, prepare the battery and confirm that the tester is in good condition.
Initial Preparation
- Inspect the tester and its battery clamps for visible damage.
- Check the battery case and cover for cracks or other damage.
- Make sure the testing area is well ventilated.
- Clean the battery terminals.
- Confirm that the battery is a 12V battery.
- Make sure all vehicle accessories are switched off before beginning a battery test.
Preparing the Battery for Testing
The battery should be inspected and prepared before attaching the tester.
Cleaning the Battery Terminals
Clean the battery terminals before connecting the tester.
Prevent corrosion particles from contacting the eyes.
Checking Battery Electrolyte Levels
For batteries that are not sealed or maintenance-free, add distilled water to each cell until the electrolyte reaches the level specified by the battery manufacturer.
Do not overfill the cells.
Removing a Battery From a Vehicle
If the battery must be removed from the vehicle for testing:
- Turn off all vehicle accessories.
- Disconnect the grounded battery terminal first.
- Remove the battery according to the vehicle manufacturer’s instructions.
Turning off electrical accessories helps reduce the risk of electrical arcing.
Operating Temperature Requirements
The BT175 is intended for use within the following ambient temperature range:
| Temperature Unit | Operating Range |
| Fahrenheit | 32–122°F |
| Celsius | 0–50°C |
The tester must only be used with 12V batteries.
How to Connect the Schumacher BT175 to a Battery
The tester connects directly to the positive and negative battery terminals.
Battery Connection Instructions
- Turn off the vehicle ignition.
- Switch off all electrical accessories and connected loads.
- Close all vehicle doors and the trunk lid.
- Clean the battery terminals.
- Connect the red clamp to the positive battery terminal marked POS, P, or +.
- Connect the black clamp to the negative battery terminal marked NEG, N, or –.
- Check the digital display.
When properly connected, the digital display illuminates and shows the battery voltage.
If the display shows HI, Lo, remains blank, or flickers, follow the troubleshooting instructions.
How to Test a 12V Battery With the Schumacher BT175
The battery test measures battery condition using the selected battery type, rating standard, and battery capacity.
Step 1: Prepare the Vehicle
- Turn the ignition OFF.
- Turn off all vehicle accessories and electrical loads.
- Close all vehicle doors and the trunk lid.
- Clean the battery terminals.
Step 2: Connect the Battery Clamps
- Connect the red clamp to the positive battery terminal.
- Connect the black clamp to the negative battery terminal.
- Check that the tester display illuminates and shows battery voltage.
Step 3: Select Battery Test Mode
- Press ENTER.
- Press ▲ or ▼ until bAtt appears on the display.
- Press ENTER to enter Battery Test Mode.
Step 4: Select the Battery Type
Press ▲ or ▼ to select the correct battery type.
| Battery Type | Display Code |
| AGM Spiral | SPL |
| Standard SLI | SLI |
| Gel Cell | 6eL |
| AGM Flat Plate | FLat |
Press ENTER when the correct battery type is displayed.
Step 5: Select the Battery Rating Standard
Press ▲ or ▼ to select the battery’s rating standard.
Available selections include:
- CCA — Cold Cranking Amps.
- CA/MCA — Cranking Amps or Marine Cranking Amps.
- EN — European Standard.
- IEC — International Electrotechnical Commission.
- DIN — Deutsches Institut für Normung.
Press ENTER when the correct standard appears on the display.
Step 6: Enter the Battery Rating
- Press ▲ or ▼ to enter the battery’s rated cranking-amp value.
- Select the value according to the rating printed on the battery.
- Confirm that the selected value falls within the tester’s supported range.
- Press ENTER when the correct rating is displayed.
The tester begins the battery test within approximately one second.
Step 7: Answer the Battery Charge Question
If the display shows CHA-, the tester is asking whether the battery being tested is charged.
- Press ENTER.
- Press ▲ or ▼ to select YES or No.
- Press ENTER to confirm.
Step 8: Read the Battery Test Results
When testing is complete, the tester displays the measured CCA value and illuminates the appropriate LED indicators.
The battery result may indicate that the battery is good, needs recharging, requires another test, or should be replaced.
Step 9: End or Repeat the Test
When the test is complete:
- Press ENTER to return to the beginning of the test.
Alternatively, remove the battery clamps from the battery terminals to end testing.
Schumacher BT175 Battery Test Results Explained
The BT175 uses colored LED indicators to identify the condition of the tested battery.
Battery Test Result Chart
| LED Indicator | Display Result | Meaning | Recommended Action |
| Green | OK | Battery is good and can hold a charge | Battery passes the test |
| Green + Yellow | OK & RECHARGE | Battery is good but needs recharging | Recharge the battery |
| Yellow + Red | RECHARGE & RETEST | Battery is discharged and its condition cannot yet be determined | Fully recharge and retest |
| Red | BAD BATTERY | Battery cannot hold a charge or has at least one short-circuited cell | Replace the battery immediately |
| ERR + Second Red LED | ERR | Clamp connection is incorrect or battery exceeds maximum test capacity | Check connections and battery rating |
Green LED — OK
A green LED indicates that the battery is in good condition and can hold a charge.
Green and Yellow LEDs — OK & RECHARGE
Green and yellow LEDs indicate that the battery is in good condition but needs recharging.
Recharge the battery before further use.
Yellow and Red LEDs — RECHARGE & RETEST
Yellow and red LEDs indicate that the battery is discharged.
Its condition cannot be determined accurately until it has been fully charged.
Recharge the battery and repeat the test.
If the result remains the same after recharging, replace the battery immediately.
Red LED — BAD BATTERY
A red BAD BATTERY result indicates that the battery cannot hold a charge or has at least one short-circuited cell.
The battery should be replaced immediately.
ERR Display and Second Red LED
If ERR appears and the second red LED illuminates, the tester has detected one of the following conditions:
- The battery clamps are not connected properly.
- The battery’s rated cranking capacity exceeds the tester’s maximum testing range.
Check the battery clamp connections and confirm that the selected battery rating is within the supported range.
How to Test the Starter System With the Schumacher BT175
The BT175 can check the performance of a vehicle’s 12V starting system by monitoring battery voltage during engine cranking.
Starter System Test Instructions
- Turn off the vehicle ignition.
- Turn off all electrical accessories and connected loads.
- Close all vehicle doors and the trunk lid.
- Connect the red tester clamp to the positive battery terminal.
- Connect the black tester clamp to the negative battery terminal.
- Confirm that the display shows battery voltage.
- Press ENTER to enter the test menu.
- Press ▲ or ▼ until SySt appears.
- Press ENTER to select the system test.
- The display shows CrAn.
- Press ENTER to read the battery’s minimum voltage.
- Start the vehicle engine.
- Read the voltage after cranking the starter.
- Observe the LED result.
Starter System Test Results
| LED or Display Result | Meaning | Recommended Action |
| Green LED | Starting system is good | Starting system passes the test |
| Yellow LED | Starting system is weak | Check connections, wiring, and starter |
| Red LED | Starting system problem | Check connections, wiring, and starter immediately |
| Blank Display | Starting system problem | Check connections, wiring, and starter immediately |
| Battery Voltage Displayed as Fault Result | Starting system problem | Check connections, wiring, and starter immediately |
Green LED — Starting System Good
A green LED indicates that the vehicle’s starting system is operating properly.
Yellow LED — Weak Starting System
A yellow LED indicates that the starting system is weak.
Check the battery connections, wiring, and starter.
Red LED — Starting System Problem
A red LED, a blank display, or a display showing battery voltage as the fault result indicates a starting system problem.
Check the connections, wiring, and starter immediately.
How to Test the Vehicle Charging System With the BT175
The Schumacher BT175 can evaluate the vehicle’s charging system by measuring battery voltage while the engine is running.
This test helps identify charging voltage that is normal, too low, or too high.
Step 1: Enter Charging System Test Mode
After completing the starter system test:
- Press ENTER.
- The display shows CHAr.
- Press ENTER to read live voltage.
Step 2: Increase Engine Speed
- Increase the engine speed to 1200–1500 RPM.
- Read the voltage while the engine is running.
- Observe the LED indicator.
Charging System Test Results
| LED Indicator | Meaning | Recommended Action |
| Green | Charging system is good | Charging system passes the test |
| Yellow | Charging voltage is low | Check connections, wiring, and alternator |
| Red | Charging voltage is high | Check the voltage regulator |
Green LED — Charging System Good
A green LED indicates that the charging system is operating properly.
Yellow LED — Charging Voltage Low
A yellow LED indicates that the charging voltage is low.
Check the battery connections, vehicle wiring, and alternator.
Red LED — Charging Voltage High
A red LED indicates that the charging voltage is high.
Check the voltage regulator.
How to Test the Charging System Under Electrical Load
After performing the charging system test with the engine running, continue the test with vehicle electrical accessories switched on.
Electrical Load Test Instructions
- Keep the engine running.
- Turn the heater blower to its highest speed.
- Switch on the high-beam headlights.
- Turn on the rear window defogger.
- Observe the battery voltage and LED results.
Do not use cycling electrical loads such as:
- Air conditioning.
- Windshield wipers.
Charging System Load Test Results
| LED Indicator | Meaning | Recommended Action |
| Green | Charging system is good | System passes the test |
| Yellow | Charging voltage is low | Check connections, wiring, and alternator |
| Red | Charging voltage is high | Check the regulator |
Ending the Charging System Test
- Turn off the vehicle engine.
- Remove the battery clamps from the battery terminals.
Schumacher BT175 Error Codes and Display Messages
The BT175 displays several diagnostic messages when the connected battery voltage or test conditions prevent normal operation.
Error Code Reference
| Display Message | Possible Cause | Recommended Action |
| HI | Battery voltage exceeds 15.0V | Confirm that the battery is a 12V battery |
| Lo | Battery voltage is below 7V | Recharge and retest; replace if the result remains unchanged |
| Blank Display | Battery voltage is too low or clamps are not properly connected | Check clamps, recharge, and retest |
| —- | Battery voltage is unstable | Allow voltage to stabilize and repeat the test |
| ERR | Clamp connection problem or battery exceeds tester’s maximum rating | Check clamps and battery rating |
HI Error Code
The HI message indicates that the tested battery voltage is above 15.0V.
The BT175 cannot operate in this condition.
Confirm that the connected battery is a 12V battery.
Lo Error Code
The Lo message indicates that the tested battery voltage is below 7V.
The tester cannot operate in this condition.
Recharge the battery and repeat the test.
If the reading remains unchanged, replace the battery.
Blank Digital Display
A blank display may indicate that:
- The connected battery voltage is too low for the tester to read.
- The battery clamps are not connected properly.
Check the battery clamps.
Recharge and retest the battery.
If the low-voltage condition remains unchanged, replace the battery.
Flickering Display or Four Dashes
A flickering display or —- indicates that the tested battery voltage is unstable.
If the battery was recently charged, wait 15–30 minutes before repeating the test.
If any vehicle accessories remain switched on, turn them off.
Recharge and retest the battery.
If the result remains unchanged, replace the battery.
Troubleshooting Guide
The following troubleshooting instructions address the BT175’s display messages and battery testing problems.
Schumacher BT175 Troubleshooting Table
| Problem | Possible Cause | Recommended Solution |
| Display Shows HI | Battery voltage exceeds 15V | Make sure the battery is a 12V battery |
| Display Shows Lo | Battery voltage is below 7V | Recharge and retest; replace the battery if the result remains unchanged |
| Display Is Blank | Battery voltage is too low | Recharge and retest |
| Display Is Blank | Battery clamps are not connected correctly | Check the clamp connections |
| Display Flickers | Battery voltage is unstable | Wait 15–30 minutes after charging and retest |
| Display Shows —- | Battery voltage is unstable | Turn off accessories, recharge, and retest |
| Display Shows ERR | Battery clamps are connected incorrectly | Check the battery clamp connections |
| Display Shows ERR | Battery rating exceeds the testing capacity | Confirm the selected battery rating is within the supported test range |
| Battery Shows RECHARGE & RETEST | Battery is discharged | Fully recharge and repeat the test |
| Battery Shows BAD BATTERY | Battery cannot hold a charge or has a short-circuited cell | Replace the battery |
| Starter Test Shows Yellow | Starting system is weak | Check connections, wiring, and starter |
| Charging System Test Shows Yellow | Charging voltage is low | Check connections, wiring, and alternator |
| Charging System Test Shows Red | Charging voltage is high | Check the regulator |
Schumacher BT175 Display Not Turning On
If the display remains blank after connecting the tester, check the battery voltage and clamp connections.
Battery Voltage Too Low
If the battery voltage is too low for the tester to read, recharge the battery.
Repeat the test after charging.
If the result remains unchanged, replace the battery.
Poor Battery Clamp Connection
Check that the red clamp is connected to the positive terminal and the black clamp to the negative terminal.
Make sure the battery terminal contact points are clean.
Schumacher BT175 Shows HI on the Display
The HI message means the connected battery voltage exceeds 15V.
The tester cannot operate at this voltage.
Check that the battery is a 12V battery.
Schumacher BT175 Shows Lo on the Display
The Lo message indicates that battery voltage is below 7V.
Recharge the battery and repeat the test.
If the reading remains unchanged, replace the battery.
Schumacher BT175 Display Keeps Flickering
A flickering display indicates unstable battery voltage.
Corrective Action
- If the battery was recently charged, wait 15–30 minutes.
- Make sure all vehicle accessories are switched off.
- Recharge the battery if necessary.
- Repeat the battery test.
If the result remains unchanged, replace the battery.
Schumacher BT175 Shows ERR
If ERR appears with the second red LED illuminated, the tester has detected incorrect clamp connections or a battery rating beyond its maximum testing capacity.
Corrective Action
- Check the positive and negative battery clamp connections.
- Confirm that the battery terminals are clean.
- Check the battery’s rating.
- Confirm that the selected testing standard and rating fall within the supported test range.
Schumacher BT175 Battery Shows RECHARGE & RETEST
The RECHARGE & RETEST result indicates that the battery is discharged.
The tester cannot determine its condition until it has been fully charged.
Corrective Action
- Fully recharge the battery.
- Repeat the battery test.
- Check the result.
If the result remains unchanged, replace the battery immediately.
Schumacher BT175 Shows BAD BATTERY
A BAD BATTERY result means the battery cannot hold a charge or has at least one short-circuited cell.
The battery should be replaced immediately.
Schumacher BT175 Starter System Test Shows Yellow or Red
A yellow starter test LED indicates a weak starting system.
A red LED, blank display, or fault display indicates a starting system problem.
Check the battery connections, wiring, and starter.
For a red result, inspect the starting system immediately.
Schumacher BT175 Charging System Test Shows Yellow or Red
Yellow LED — Low Charging Voltage
A yellow LED indicates low charging voltage.
Check the battery connections, wiring, and alternator.
Red LED — High Charging Voltage
A red LED indicates excessive charging voltage.
Check the regulator.
Care and Servicing Instructions
Proper inspection and battery preparation are important when using the BT175.
Before Testing
Check that:
- The tester has not been dropped or damaged.
- The battery clamps are in good condition.
- The battery case and cover are not cracked or broken.
- The battery terminals are clean.
- The test area is well ventilated.
Damaged Tester
Do not operate the BT175 if it has received a sharp blow, has been dropped, or is otherwise damaged.
Have the unit inspected by a qualified service person.
Service and Repair
Do not disassemble the tester.
Incorrect reassembly may create a risk of fire or electric shock.
All servicing and repairs must be performed by qualified personnel.
Limited Warranty
Schumacher Electric Corporation provides a one-year limited warranty for the BT175 Digital Battery Tester.
Warranty Information
| Warranty Detail | Information |
| Manufacturer | Schumacher Electric Corporation |
| Product | BT175 Digital Battery Tester |
| Warranty Type | Limited Warranty |
| Warranty Duration | 1 Year |
| Warranty Start Date | Original Retail Purchase Date |
| Eligible Purchaser | Original Purchaser |
| Covered Defects | Defective Materials or Workmanship Under Normal Use and Care |
| Warranty Remedy | Repair or Replacement at Manufacturer’s Discretion |
Warranty Repair or Replacement
If the tester develops a covered defect during the warranty period, Schumacher Electric Corporation may repair the product or replace it with a new or reconditioned unit.
The manufacturer determines whether repair or replacement is appropriate.
The purchaser is responsible for sending the unit to the manufacturer or an authorized representative with:
- Proof of purchase.
- Prepaid shipping charges.
Warranty Limitations
Schumacher Electric Corporation excludes warranties other than the stated limited warranty and limits liability for incidental, special, or consequential damages.
The warranty gives the purchaser specific legal rights. Additional rights may vary according to applicable law.
Warranty Registration
The BT175 can be registered online at:
Customer Support Information
Schumacher Electric Corporation provides customer assistance for operating problems, warranty claims, and product service.
| Service | Contact Information |
| Manufacturer | Schumacher Electric Corporation |
| Customer Support Phone | 1-800-621-5485 |
| Customer Support Email | services@schumacherelectric.com |
| Customer Support Website | www.batterychargers.com |
| Support Days | Monday–Friday |
| Support Hours | 7:00 AM–5:00 PM CST |
| Manufacturer Address | 801 Business Center Drive, Mount Prospect, IL 60056-2179, USA |
Frequently Asked Questions
1. What does the Schumacher BT175 battery tester do?
The Schumacher BT175 tests 12V battery condition, measures battery voltage, checks cranking-amp performance, and evaluates vehicle starting and charging systems. It displays battery ratings, test results, and error messages using a digital display and colored LED indicators.
2. How do I test a 12V battery with the Schumacher BT175?
Turn off the vehicle ignition and electrical accessories. Connect the red clamp to the positive battery terminal and the black clamp to the negative terminal. Press ENTER, select bAtt, choose the battery type and rating standard, enter the battery’s rated cranking amps, and press ENTER. The tester displays the test result and appropriate LED indicators.
3. What does RECHARGE & RETEST mean on the Schumacher BT175?
RECHARGE & RETEST means the battery is discharged and its condition cannot be determined until it has been fully charged. Recharge the battery and repeat the test. If the result remains unchanged, the battery should be replaced immediately.
4. What does HI or Lo mean on the Schumacher BT175 display?
HI means the connected battery voltage exceeds 15V, which is outside the tester’s operating condition. Lo means the battery voltage is below 7V. For a Lo reading, recharge and retest the battery, replacing it if the reading remains unchanged.
5. Can the Schumacher BT175 test AGM and gel batteries?
Yes. The BT175 supports AGM spiral (SPL), AGM flat-plate (FLat), gel-cell (6eL), and standard SLI (SLI) batteries. The correct battery type must be selected before entering the rating standard and battery capacity.
6. How do I test my alternator with the Schumacher BT175?
After the starter system test, press ENTER until CHAr appears, then press ENTER to read live voltage. Increase engine speed to 1200–1500 RPM and observe the result. Green indicates a good charging system, yellow indicates low charging voltage, and red indicates high charging voltage. The test can also be repeated with the heater blower, high beams, and rear defogger operating.
7. Why is the Schumacher BT175 display blank or flickering?
A blank display may indicate battery voltage too low for the tester to read or incorrectly connected clamps. A flickering display indicates unstable battery voltage. If the battery was recently charged, wait 15–30 minutes before retesting. Check the connections, turn off vehicle accessories, and recharge the battery if necessary.
8. What battery testing range does the Schumacher BT175 support?
The Schumacher BT175 supports 100–1200 CCA (SAE), 55–670 DIN, 65–790 IEC, 90–1125 EN, and 120–1440 CA/MCA ratings. The battery’s rating standard and corresponding value must be selected correctly before testing.