| Document Detail | Information |
| Document Type | Use & Care Manual |
| Brand Name | PowerXL |
| Product Name | Blender/Food Processor with SensiMax Technology |
| Model Number(s) | BL7019-2MPLA, BL7019-2MPTV, BL7019-3MPTV |
| Primary Model Covered Here | BL7019-3MPTV |
| PDF File Size | 13.96 MB |
| Total Number of Pages | 68 |
| Languages Covered | English, Spanish, French |
PowerXL Blender with SensiMax Technology
The PowerXL BL7019-3MPTV Blender/Food Processor with SensiMax Technology combines countertop blending and food-processing functions in one powered base. The system supports standard blending, a personal blending jar, automatic Smart Sensing programs, manual speed control, pulsing, dicing, slicing, shredding, and julienne processing.
The BL7019-3MPTV version is the most accessory-equipped model listed in this manual. It includes the food-processing attachments, personal blender jar, two-sided julienne disc, multiple shredding/slicing discs, dicing components, cleaning tool, and storage case.
Technical Specifications
| Specification | BL7019-3MPTV |
| Model | BL7019-3MPTV |
| Rated Voltage | 120 Vac |
| Frequency | 60 Hz |
| Rated Current | 6.5 A |
| Application | Blender/Food Processor |
| Intended Use | Household use only |
The manual lists BL7019-3MPTV at 120 Vac, 60 Hz, 6.5 A. The BL7019-2MPLA has a separate 1500W rating, so that wattage should not be assigned to BL7019-3MPTV.
What’s Included with the BL7019-3MPTV
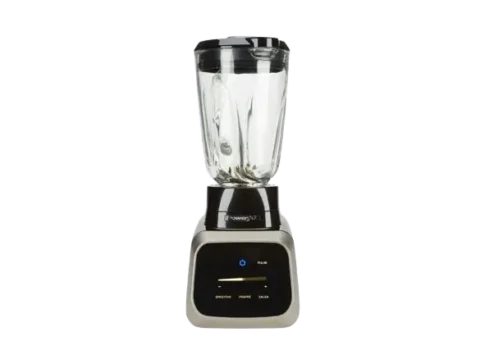
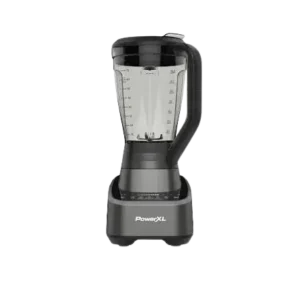
The parts diagrams on pages 5-7 show the blender components and the model-specific accessory package.
Main Blender Components
| Part | Purpose |
| Blender Lid | Covers the large blending jar during operation |
| Pour Spout | Provides a controlled pouring point |
| Ingredient Slot | Allows ingredients to be added during permitted blending operations |
| Large Blending Jar | Main container for blending and food-processing tasks |
| Blade Assembly | Performs standard blending and chopping |
| Appliance Base | Houses the motor and electronics |
| Touch Screen | Controls blending and food-processing functions |
BL7019-3MPTV Accessories
| Accessory | Included |
| Food Processor Pusher | 1 |
| Food Processor Lid | 1 |
| Dicing Blade | 1 |
| Dicing Disc | 1 |
| Dicing Shaft | 1 |
| Food Processor Base | 1 |
| Julienne Disc | 1 |
| Large Shredding/Thick Slicing Disc | 1 |
| Fine Shredding/Thin Slicing Disc | 1 |
| Blade Shaft | 1 |
| Personal Blender Jar with Lid | 1 |
| Dicing Cleaning Tool | 1 |
| Storage Case | 1 |
The model comparison table confirms that BL7019-3MPTV receives all listed accessories, including the julienne disc, fine shredding/thin slicing disc, and storage case.
Touch Screen Controls
The touch screen provides separate blender, Smart Sensing, food processor, and manual controls.
| Control | Function |
| Power On/Off | Wakes the interface or places the unit in standby |
| Food Processor Functions | Accesses DICE and DISC processing modes |
| Sensing Light Bar | Displays SensiMax sensing activity |
| Pulse | Runs the motor in short manual bursts |
| Smart Sensing Functions | Accesses CRUSH, SMOOTHIE, and CHOP |
| Stop | Stops operation |
| Start | Begins the selected function |
| – / + Speed Slider | Changes manual blending speed |
| LCD Display | Displays program, time, speed, and status information |
Power and Standby
When the unit is plugged in, the Power symbol illuminates. Pressing it displays the available functions.
If the appliance is left without interaction, it returns to standby mode and only the Power button remains partially illuminated.
The system detects whether the blender base or food processor base is installed and displays only the functions that apply to the attached configuration.
SensiMax Smart Sensing Technology
The SensiMax system is used by three automatic functions:
- CRUSH
- SMOOTHIE
- CHOP
After a Smart Sensing function is selected and Start is pressed, the appliance first senses the ingredients. A countdown then appears, but the displayed time is only a guide because the appliance can change its operating time according to ingredient conditions and mixture thickness.
If the mixture requires more liquid, the display shows AL, meaning Add Liquid.
Function Guide
| Function | Recommended Use |
| CRUSH — Smart Sensing | Crushes ice and frozen food; handles up to 2 cups of frozen food or ice. Liquid should be added for larger-volume ice crushing. |
| SMOOTHIE — Smart Sensing | Prepares fruit smoothies and protein drinks |
| CHOP — Smart Sensing | Chops fruits, vegetables, cooked meats, and nuts from coarse to fine |
| PULSE — Manual | Provides short bursts for thick smoothies, milkshakes, ice, and ingredient redistribution |
| +/– Speed Control — Manual | Provides manual blending at lower, medium, or higher speeds |
| DICE | Cuts suitable foods such as cheese or ham into cubes |
| DISC | Runs slicing, shredding, and compatible disc-processing attachments |
The manual suggests lower manual speeds for removing lumps from gravies, medium speeds for crumbs, and higher speeds for pureeing fruits and vegetables.
Manual Blending Mode
To control blending speed manually:
- Press the + or – control until the preferred speed appears on the LCD or sensing bar.
- Press Start.
- Speed can be changed while the blender is operating.
- Press Stop to end blending.
Pulse can also be used during manual operation. Each pulse should last no more than 5 seconds, with a short rest between pulses. Total Pulse operation should not exceed 2 minutes.
Before First Use
Before using the PowerXL BL7019-3MPTV for the first time:
- Remove all packaging, product stickers, and the plastic band around the plug.
- Keep the supplied product literature.
- Wash all removable components according to the Care and Cleaning instructions.
- Register the product warranty using the PowerXL registration address printed in the manual.
Blender Assembly
The large blending jar must be assembled correctly before operation.
- Turn the jar upside down on a flat work surface.
- Insert the blade assembly into the bottom opening with the blades facing downward.
- Turn the blade assembly clockwise until securely tightened.
- Return the assembled jar to an upright position.
- Place the blender lid and cap on the jar and align the indicated arrows.
- Unwrap the power cord from its storage area beneath the appliance base.
- Position the assembled jar on the powered base.
- Turn the jar clockwise until it locks and the alignment arrows match.
- Plug the appliance into a suitable outlet.
The blade assembly is sharp and must be handled carefully. The illustrated assembly sequence appears on page 10 of the manual.
How to Use the Large Blender Jar
The lid must remain fitted whenever the blender is running.
The manual specifies a minimum of 474 mL of ingredients or water when using the large blending jar.
Recommended Ingredient Order
For the large jar, ingredients should be loaded in this order:
- Liquids
- Powders
- Soft foods
- Hard foods
- Ice
After adding the ingredients:
- Secure the lid and lid cap.
- Select the appropriate function or manual speed.
- Start blending.
- Ingredients may be added through the ingredient slot while the blender is operating.
- Do not remove the main lid while the motor is running.
- Wait until the blades completely stop before removing the jar.
- Turn the jar counterclockwise, hold the handle, and lift it from the base.
- Remove the lid to serve.
- Unplug the appliance when it is not in use.
When processing hard foods such as ice or cheese, the manual instructs the operator to keep one hand on the lid to help hold the blender in place.
Using the Personal Blender Jar
The BL7019-3MPTV includes a personal blender jar and drinking lid.
Hot liquids must not be blended in the personal jar. The manual also specifies a minimum quantity of 236 mL or 1 cup, because a smaller amount may be detected as an empty jar. Ingredients must not exceed the MAX mark.
Recommended Personal Jar Ingredient Order
The manual gives a different loading order for the personal jar:
- Liquids
- Ice
- Hard foods
- Soft foods
- Powders
Personal Jar Operating Instructions
- Place the personal jar upright on a level surface.
- Add ingredients without exceeding the MAX line.
- Insert the blade assembly with the blades facing down.
- Turn the blade assembly clockwise until tight to reduce leakage.
- Turn the jar upside down.
- Place it onto the blender base.
- Select the desired manual speed or Pulse.
- Hold the personal jar with one hand while blending.
- When finished, wait for the blades to stop.
- Lift the jar from the base and turn it upright.
- Turn the blade base counterclockwise and carefully remove the blade assembly.
- Install the drinking lid for portable use.
If the jar becomes stuck on the base or starts loosening from the blade base, unplug the unit first and turn the jar clockwise to tighten it.
Blending Tips
For better blending results, the manual recommends:
- Cutting food into pieces no larger than 3/4 inch.
- Adding liquids before other ingredients in multi-ingredient recipes.
- Starting at a low speed and increasing speed if needed.
- Using Pulse for drinks containing ice or frozen ingredients.
- Keeping the jar dry when making breadcrumbs.
- Stopping the appliance before scraping ingredients from the jar walls.
- Using a rubber spatula only while the blender is stopped.
- Avoiding overfilling.
- Not storing prepared food inside the blending jar.
- Limiting continuous blender operation to 2 minutes before pausing as needed.
- Never using a chipped or cracked jar.
Foods and Tasks Not Recommended for the Blender
The manual does not recommend using the blender to:
- Beat egg whites
- Mix bread dough
- Mash potatoes
- Grind meat
It also instructs users not to place the following items in the blender:
- Large pieces of frozen food
- Very tough foods such as raw turnips, sweet potatoes, or potatoes
- Bones
- Hard cured meats such as hard salami or pepperoni
- Boiling liquids
The manual says boiling liquids should be allowed to cool for at least 5 minutes before being placed in the blending jar. Its safety section separately warns against blending hot liquids.
Food Processor Setup
The BL7019-3MPTV uses the same main jar with a dedicated food processor base, shafts, lid, discs, and food pusher.
Before food processing, the correct base, shaft, disc, and lid must all be properly assembled. Food must always be guided through the feed chute with the supplied food pusher, never by hand.
Dicing Disc Assembly
To assemble the dicing system:
- Turn the main jar upside down on a flat surface.
- Fit the food processor base into the bottom opening with its shaft adapter extending inside the jar.
- Turn the processor base clockwise until tight.
- Return the jar upright.
- Fit the dicing shaft onto the shaft adapter and press until it snaps into place.
- Lift the dicing disc using its finger holes.
- Position the disc in the food processor lid with the chosen dicing grid facing the jar handle.
- Align the arrows on the disc and lid.
- Hold the dicing blade only by its safe finger grips.
- Insert the curved plastic portion under the outer edge of the dicing disc first.
- Press the blade center onto the dicing shaft until it locks.
The illustrated sequence on page 13 emphasizes that the blade edge should never be handled directly.
Complete assembly by locking the processor lid onto the jar, placing the jar on the powered base, turning it clockwise until aligned, and plugging in the appliance.
Using the Dicing Function
- Place food in the feed chute.
- Use the food pusher to guide it toward the dicing disc.
- Select DICE on the touch screen.
- Apply firm but gentle pressure with the pusher.
- Let the processor perform the cutting rather than forcing food downward.
- When finished, switch the appliance off.
- Wait until the disc stops completely.
- Unplug the appliance before removing the lid.
Heavy force on the pusher does not make processing faster.
Dicing Tips
For more consistent dicing:
- Trim the ends of foods before processing.
- When dicing multiple ingredients, process softer foods before harder foods.
- Chill or freeze soft cheese for about 10 minutes before dicing.
- Firm, seedless cucumbers work best.
- The manual does not recommend dicing corned beef, raw meat, or chicken.
Removing and Cleaning the Dicing Disc
After dicing:
- Turn the appliance off and unplug it.
- Remove the processor lid.
- Move the dicing blade lock to the open position using the metal tab.
- Lift the blade from the shaft.
- Pull its curved edge away from the dicing disc.
- Remove the dicing blade before using the dicing cleaning tool.
- Keep the disc installed in the processor lid while using the cleaning tool.
- Align the cleaning tool’s posts with the grid.
- Press the tool through the grid to push out trapped food.
- Lift the dicing disc using its finger holes.
- Remove the dicing shaft.
- Unlock and remove the jar.
Hard foods such as carrots can require more pressure with the cleaning tool, and some food may remain until the grid is washed.
Shredding and Slicing Disc Assembly
The BL7019-3MPTV includes both large/thick and fine/thin shredding and slicing discs.
To assemble:
- Attach the food processor base to the bottom of the jar.
- Place the blade shaft onto the internal shaft adapter.
- Select the required disc.
- For shredding, position the hole side upward.
- For slicing, position the blade side upward.
- Fit the disc onto the shaft.
- When slicing, position the active blade just to the right of the feed chute so it can make a complete rotation before meeting food.
- Lock the processor lid onto the jar.
- Lock the jar onto the powered base.
- Plug in the appliance.
Using the Shredding and Slicing Discs
- Place food in the feed chute.
- Guide it toward the disc with the food pusher.
- Select DISC on the touch screen.
- Press firmly but do not force the pusher.
- When finished, switch off the appliance.
- Wait for the disc to stop completely.
- Unplug the unit.
- Remove the lid, disc, shaft, and jar.
Excessive pressure can cause inconsistent slice thickness.
Shredding and Slicing Tips
For better results:
- Cut a thin slice from the bottom of round fruits and vegetables so they stand securely.
- Remove seeds, cores, and pits.
- Choose firm produce that is not overripe.
- Remove the core from hard vegetables such as cabbage.
- Pack thin vegetables vertically into the feed chute.
- Cut any large pieces left above the disc by hand if desired.
- Chill soft and semi-hard cheeses before shredding.
- For mozzarella and similar soft cheeses, freeze for approximately 10-15 minutes before processing.
Julienne Disc Assembly
The two-sided julienne disc is included with the BL7019-3MPTV.
It provides:
- 6 mm large julienne cuts
- 3 mm small julienne cuts
To assemble the julienne system:
- Install the food processor base.
- Fit the blade shaft onto the shaft adapter.
- Hold the julienne disc through its two large finger holes.
- Position the required 6 mm or 3 mm side upward.
- Fit the disc onto the shaft.
- Position the intended cutting blade just to the right of the feed chute.
- Lock the food processor lid.
- Lock the jar onto the powered base.
- Plug the appliance into the outlet.
Using the Julienne Disc
- Place food in the feed chute.
- Guide food toward the julienne disc with the pusher.
- Select DISC on the touch screen.
- Apply steady pressure without forcing food.
- Turn the appliance off when finished.
- Wait until the disc completely stops.
- Unplug the appliance before opening it.
- Lift out the disc using its finger holes.
- Remove the shaft and jar.
General Food Processing Tips
The manual recommends processing dry ingredients before wet ingredients to reduce repeated cleaning.
For long, narrow foods such as carrots or celery, cut them into several pieces and pack the feed chute so they remain upright.
Use lighter pressure for softer foods such as cucumber, zucchini, and tomatoes, and slightly more pressure for firmer foods such as onions, carrots, and potatoes.
Do not process food that is frozen or hard enough that the tip of a knife cannot penetrate it. If a hard item becomes stuck on a blade, stop the appliance, unplug it, remove the blade, and then carefully remove the food.
Important Safety Instructions
The PowerXL BL7019-3MPTV contains sharp moving blades and should only be operated when correctly assembled.
Important precautions from the manual include:
- Read the instructions before use.
- Do not immerse the appliance, power cord, or plug in water or other liquid.
- Unplug before adding or removing parts and before cleaning.
- Avoid touching moving components.
- Do not defeat the appliance’s safety interlocks.
- Do not use a damaged appliance, cord, or plug.
- Do not use attachments not recommended by the manufacturer.
- Do not use outdoors.
- Keep the cord away from hot surfaces and countertop edges.
- Keep hands and utensils out of the jar while blending.
- Use a scraper only when the blender is stopped.
- Handle all blades carefully because they are sharp.
- Always blend with the cover installed.
- Do not blend hot liquids.
- Never install cutting blades or discs on the powered base without first correctly fitting the jar.
- Never feed food into the processor by hand; use the food pusher.
- Do not exceed the jar’s top edge, MAX line, or marked maximum capacity.
Polarized Plug and Electrical Safety
The 120V models use a polarized plug, with one blade wider than the other. The plug fits a polarized outlet in only one orientation and should not be modified.
The appliance also uses a tamper-resistant screw that prevents removal of the outer housing. There are no user-serviceable components inside the powered base.
If an extension cord is used, its electrical rating must be at least equal to the appliance rating. When applicable to a grounded appliance, a three-wire grounding-type extension cord is required, and the cable should be arranged so children cannot pull it and users cannot trip over it.
Error Messages and Troubleshooting
The BL7019-3MPTV displays specific status codes when it detects conditions that need attention.
| Display | Meaning | Action |
| AL | Add Liquid — mixture is too thick and an air pocket has formed above the blades | Add liquid and/or stir the mixture, then restart a Smart Function or select a manual speed |
| H | Motor is approaching an overheated condition | Power the appliance off, allow it to cool for 1 minute, then restart |
| Er | Touch interface has been held or activated for more than 30 seconds | Wipe the touch surface dry, remove liquid residue, then power the appliance off and restart |
| C | Calibration mode | Appears when Crush and Chop are held together to start Smart Sensing calibration |
Smart Sensing Functions Not Working
If the automatic Smart Sensing functions are not operating correctly, the manual provides a calibration procedure.
- Place 1 cup of water in the large jar with the blade assembly installed.
- Mount the jar on the powered base.
- Install the blender lid.
- Press CRUSH and CHOP simultaneously for 3-5 seconds.
- Wait for C to appear on the display.
- Press Start.
- Calibration runs automatically for approximately 7-10 seconds.
- After calibration, the appliance returns to the On mode.
The manual says recalibration may be needed after repeated use or when input-voltage conditions vary.
Cleaning and Care
The appliance should be switched off and unplugged before cleaning.
Cleaning Removable Parts
- Lift the jar from the powered base using its handle.
- Turn the attached base counterclockwise until loose.
- Remove the blender blade assembly when fitted.
- Remove the lid.
- Wash removable components by hand or in the dishwasher.
The jar may be placed on the bottom dishwasher rack. Other removable components should be placed on the top rack only.
Quick Blender Jar Cleaning
For a quick rinse:
- Add 1 cup of hot water to the blending jar.
- Add one drop of liquid dish soap.
- Cover the jar.
- Blend on low speed for approximately 30 seconds.
- Discard the liquid.
- Rinse thoroughly.
Cleaning the Powered Base
The powered base must never be immersed in liquid.
Wipe it with a damp cloth and dry thoroughly. Stubborn marks can be cleaned with a damp cloth and nonabrasive cleaner.
Do not use rough scouring pads or abrasive cleaning products on the components or appliance finish. Jar components should not be placed in boiling liquids.
Maintenance and Service
The powered base has no user-serviceable parts. Repair or internal servicing should be handled by qualified service personnel.
Warranty Registration and Product Support
The manual directs owners to register the product through:
The distributor listed on the manual is Empower Brands, LLC, Middleton, WI 53562. The back cover also lists www.powerxlproducts.com and www.powerxllatam.com as PowerXL websites.
Recycling and Disposal
The manual asks owners not to dispose of the appliance with ordinary household waste when a suitable recycling program is available. It recommends taking the product to an official local collection point that accepts this type of appliance.
Recipes Included in the Manual
Classic Smoothie
The English recipe section provides a basic smoothie using apple juice, bananas, and frozen strawberries. The ingredients are placed into the blending jar in the listed order, the jar is covered, and the mixture is blended for about 30 seconds or until smooth. Orange juice can be substituted for apple juice.
Quick and Easy Salsa
The included salsa uses diced tomatoes with green chilies, onion, jalapeño, garlic, cilantro, lime juice, sugar, cumin, and salt.
The ingredients are added in the order listed in the manual, then processed with Pulse for approximately 30 seconds or until the preferred consistency is reached. The recipe can be halved for a smaller batch.
Frequently Asked Questions
What is SensiMax Technology on the PowerXL BL7019-3MPTV?
SensiMax controls the CRUSH, SMOOTHIE, and CHOP Smart Sensing functions. The appliance senses the ingredients and mixture thickness and can adjust operating time rather than relying on a fixed countdown.
What does AL mean on the PowerXL blender?
AL means Add Liquid. It appears when the mixture is too thick and an air pocket forms above the blades. Liquid should be added and/or the mixture stirred before restarting.
What does H mean on the BL7019-3MPTV display?
H is a warning shown before an overheating condition. The appliance should be powered off and allowed to cool for approximately one minute before restarting.
What does Er mean on the PowerXL touch screen?
Er appears when the touch interface has been continuously activated for more than 30 seconds. The touch surface should be wiped dry, with all liquid residue removed, before the appliance is restarted.
How much liquid or food must be placed in the large blender jar?
The manual states that the large blending jar should not be operated with less than 474 mL of ingredients or water.
What is the minimum amount for the personal blender jar?
The personal jar should contain at least 236 mL or 1 cup of ingredients. A smaller quantity can be interpreted by the SensiMax system as an empty jar.
Can hot liquids be blended in the PowerXL BL7019-3MPTV?
The safety instructions state that hot liquids should not be blended, and hot liquids must never be used in the personal blender jar. The blending tips also say boiling liquids should cool for at least five minutes before being placed in the large jar.
Are the BL7019-3MPTV removable parts dishwasher safe?
Yes. Removable parts can be washed by hand or in a dishwasher. The main jar belongs on the bottom rack, while the other removable components should be placed on the top rack. The powered appliance base must never be submerged.