| Document Detail | Information |
| Document Type | Use & Care Manual |
| Brand Name | PowerXL |
| Product Name | Smart Pro Blender with Smart Sensing Technology |
| Model Number(s) | BL6018-1BP |
| PDF File Size | 211.3 KB |
| Total Number of Pages | 16 |
| Languages Covered | English |
PowerXL Smart Pro Blender BL6018-1BP
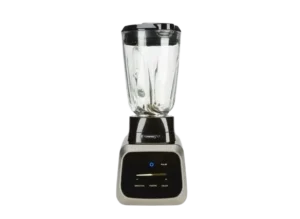
The PowerXL Smart Pro Blender BL6018-1BP is a countertop blender with a 68 oz. glass blending jar, touchscreen controls, adjustable manual speeds, Pulse operation, and automatic Smart Sensing programs for smoothies, frappés, and salsa.
Its Smart Functions combine blending, pulsing, and pauses while automatically detecting the food load. The blender then completes the selected program and turns itself off. Manual operation is also available through the touchscreen speed slider.
Technical Specifications
| Specification | Value |
| Model Number | BL6018-1BP |
| Rated Voltage | 120V |
| Frequency | 60Hz |
| Rated Current | 8.5A |
| Maximum Capacity | 68 oz. glass jar |
| Intended Use | Household use only |
The appliance specifications printed in the manual list the BL6018-1BP at 120V, 60Hz, 8.5A with a 68 oz. glass blending jar.
Parts and Components
The product diagram on page 6 identifies the blender’s main components and touchscreen controls.
| No. | Part or Control | Function |
| 1 | Lid Cap | Covers the opening in the blender lid |
| 2 | Lid | Covers the blending jar during operation |
| 3 | 68 oz. Glass Blending Jar | Holds ingredients for blending |
| 4 | Blade Assembly | Blends, crushes, and processes ingredients |
| 5 | Jar Base | Secures the blade assembly to the jar |
| 6 | Base | Houses the motor and electronics |
| 7 | Touch Screen | Provides operating controls |
| 8 | Start | Starts manual or programmed blending |
| 9 | Stop | Stops the blender |
| 10 | Power On/Off | Wakes or powers down the controls |
| 11 | Pulse | Provides short bursts of blending power |
| 12 | Speed Slider with – and + | Adjusts manual blending speed |
| 13 | Smoothie | Smart program for smoothies and protein drinks |
| 14 | Frappé | Smart program for milkshakes and frozen drinks |
| 15 | Salsa | Smart program for salsa and similar sauces |
Before First Use
Before operating the PowerXL Smart Pro Blender for the first time:
- Remove all packaging material.
- Remove any product stickers.
- Remove the plastic band around the power plug.
- Keep the supplied product literature.
- Wash all removable components according to the Care and Cleaning section.
The manual states that the appliance is intended for household use only.
Blender Jar Assembly
The jar and blade assembly must be installed correctly before blending.
How to Assemble the Blender
- Turn the blending jar upside down and place it on a flat countertop or work surface.
- Insert the blade assembly into the bottom opening of the jar with the blades facing downward.
- Handle the blade assembly carefully because the blades are sharp.
- Position the jar base on the jar.
- Turn the jar base clockwise until it is securely tightened.
- Turn the assembled jar upright.
- Place the lid on the blending jar with the lid cap installed.
- Unwrap the power cord from the cord-storage area beneath the appliance base.
- Place the assembled jar onto the base.
The blender is then ready for normal setup and operation.
Touchscreen Controls
When the blender is first plugged in, only the blue Power symbol appears.
Touching Power illuminates the remaining available touchscreen graphics. If no controls are touched for approximately 30 seconds, the display dims.
To wake the display, touch any white word or symbol. If Power is pressed while the display is dimmed, the other illuminated controls switch off.
Manual Speed Control
The PowerXL Smart Pro provides a touchscreen speed slider for manual blending.
How to Set a Manual Speed
- Wake the touchscreen.
- Move a finger along the speed slider to choose the desired speed.
- The – button moves the setting to the lowest speed.
- The + button moves it to the highest speed.
- The Start control flashes after a manual speed is selected.
- Press Start to begin blending.
- Press Stop to end operation.
Pulse Function
Pulse provides short bursts of blending power and is useful for ice, frozen ingredients, and thick mixtures.
For safety, Pulse requires two touchscreen actions:
- Touch another control to illuminate the Pulse button.
- Press Pulse to activate it.
Each Pulse should last no more than 5 seconds. The blender should rest briefly between pulses, and total Pulse operation should not exceed 2 minutes.
Smart Sensing Functions
The Smart Pro’s automatic functions use combinations of blending, pulsing, and pauses.
To use a Smart Function:
- Press the required program.
- Press Start.
- The blender detects the food load.
- The automatic program runs based on the selected function and detected load.
- The speed slider acts as a countdown indicator while the program runs.
- The blender automatically switches off when the program is finished.
To stop an automatic program before completion, press Stop.
Speed and Function Guide
| Speed or Program | Function | Recommended Use |
| Low Speed | Blend / Easy Clean | Removes lumps from gravies; can also mix hot water and dish soap for quick jar cleaning |
| Medium Speed | Crumb | Makes cookie, cereal, and bread crumbs |
| High Speed | Puree | Purees fruits and vegetables |
| Pulse | Ice Crush | Crushes ice and frozen food |
| Smoothie | Smoothie | Prepares fruit smoothies and protein drinks |
| Frappé | Shake | Prepares ice cream milkshakes, daiquiris, and margaritas |
| Salsa | Salsa | Prepares salsa and similar sauces such as guacamole |
How to Use the PowerXL Smart Pro Blender
The lid must remain securely installed during blending.
Basic Blending Instructions
- Make sure the appliance is switched off.
- Add the ingredients to the blending jar.
- Load ingredients in the recommended order:
- Liquids
- Powders
- Soft foods
- Hard foods
- Ice
- Fit the lid securely.
- Make sure the lid cap is installed.
- Plug the power cord into an outlet.
- Select the manual speed or Smart Function suited to the recipe.
- Start blending.
- Additional ingredients may be added through the lid-cap opening while the blender is running.
- Do not remove the main lid while the blades are moving.
- Wait until the blades have completely stopped before removing the jar.
- Lift the jar from the base using the handle.
- Remove the lid and serve.
- Unplug the blender when it is not being used.
Using Hard Ingredients
When processing hard foods such as ice or cheese, the manual instructs the operator to keep one hand on the lid to help hold the blender securely in place. The blender should not be left unattended during operation.
Smoothie Mode
The Smoothie Smart Function is designed for:
- Fruit smoothies
- Protein drinks
After Smoothie is selected and Start is pressed, the blender automatically detects the food load and performs the programmed combination of blending, pulsing, and pauses.
Frappé Mode
The Frappé program is intended for frozen and blended drinks such as:
- Ice cream milkshakes
- Daiquiris
- Margaritas
The program operates automatically after Frappé and Start are selected.
Salsa Mode
The Salsa Smart Function is designed for:
- Salsa
- Guacamole
- Similar sauces
The manual also includes a Quick and Easy Salsa recipe that can be prepared using the Salsa function or Pulse.
Easy Clean Function
The speed and function chart identifies an Easy Clean use at low speed.
For quick cleaning:
- Add 1 cup of hot water to the blending jar.
- Add one drop of liquid dish soap.
- Cover the jar.
- Blend at low speed for approximately 30 seconds.
- Discard the soapy water.
- Rinse thoroughly.
Blending Tips and Best Practices
The manual provides several recommendations for better blending results.
Prepare Ingredients Correctly
Food should be cut into pieces no larger than approximately 3/4 inch before blending.
For recipes with multiple types of ingredients, liquids should normally be added first.
Scrape Down Thick Mixtures Safely
If ingredients collect on the jar walls or the mixture becomes very thick:
- Press Stop.
- Wait for the blades to stop.
- Remove the lid.
- Use a rubber spatula to scrape ingredients from the sides and redistribute them toward the blades.
- Replace the lid.
- Continue blending.
Never place a spatula or other utensil into the jar while the motor is operating.
Use a Dry Jar for Breadcrumbs
When making breadcrumbs, the blending jar should be completely dry.
Use Pulse for Ice and Frozen Ingredients
Pulse is recommended when preparing beverages containing ice cubes or frozen ingredients because the short bursts can help produce a smoother mixture.
The blades should be allowed to stop between Pulse operations, and Pulse should not be used for more than two minutes in total.
Start at a Lower Speed
The manual recommends starting blending at the lowest speed and increasing the speed when necessary.
Do Not Overfill the Jar
The blender works more efficiently when the jar is not overloaded. Food should not be stored in the blending jar after use.
Limit Continuous Operation
The blender should not run continuously for more than 1½ minutes.
If additional processing is needed, stop the blender, scrape the jar sides if necessary, and then resume blending.
Uses Not Recommended
The manual does not recommend using this blender to:
- Beat egg whites
- Mix dough
- Mash potatoes
- Grind meat
Foods That Should Not Be Placed in the Blender
The manual lists the following items as unsuitable:
- Large pieces of frozen food
- Tough raw foods such as turnips
- Raw sweet potatoes
- Raw potatoes
- Bones
- Hard cured meats such as salami
- Hard pepperoni
- Boiling liquids
Boiling liquids should be allowed to cool for approximately 5 minutes before being placed in the jar.
Error Indicators and Troubleshooting
The Smart Pro Blender uses touchscreen flashing patterns rather than alphanumeric error codes.
| Problem | Indicator | Meaning | Solution |
| Error 1 | Touchscreen continuously flashes on and off | A large air pocket has formed in a mixture that is too dry | Touch the screen to dismiss the warning, then add liquid and/or stir the mixture |
| Error 2 | Two quick flashes followed repeatedly by one longer flash | Motor has overheated | Unplug the blender and allow it to cool for approximately 20 minutes before restarting |
Troubleshooting Thick or Dry Mixtures
If the touchscreen continuously flashes:
- Stop operation.
- Touch the screen to dismiss the warning.
- Add more liquid and/or stir the mixture.
- Reassemble the blender securely.
- Restart the desired function.
The error indicates that an air pocket has developed because the mixture is too dry.
What to Do if the Blender Overheats
If the screen produces the Error 2 flashing pattern:
- Unplug the blender.
- Allow it to cool for approximately 20 minutes.
- Reconnect the appliance after it has cooled.
- Resume operation.
The manual identifies this flashing sequence as a motor-overheat warning.
Important Safety Instructions
The PowerXL Smart Pro Blender contains sharp blades and moving components, so it should only be used according to the safeguards in the manual.
Important precautions include:
- Read all instructions before use.
- Do not immerse the appliance, cord, or plug in water or other liquids.
- Provide close supervision when the appliance is used by or near children.
- Unplug the blender when not in use.
- Unplug before installing or removing components.
- Unplug before cleaning.
- Avoid unintended contact with the touchscreen when the appliance is ready to operate.
- Keep away from moving parts.
- Do not operate the blender with a damaged cord or plug.
- Do not use the appliance after a malfunction, drop, or other damage.
- Do not use attachments that are not recommended by the manufacturer.
- Do not use the appliance outdoors.
- Do not allow the power cord to hang over the edge of a table or counter.
- Keep the cord away from hot surfaces.
- Do not place the appliance near a hot gas burner, electric burner, or heated oven.
- Keep hands and utensils out of the jar during blending.
- A scraper may be used only while the blender is stopped.
- Handle the blades carefully because they are sharp.
- Never install the blade assembly on the powered base without the jar correctly attached.
- Always operate the blender with its lid fitted.
The manual specifies that this product is for household use only.
Polarized Plug
The 120V model uses a polarized plug, meaning one blade is wider than the other.
It is designed to fit into a polarized outlet in only one direction. If it does not fit:
- Reverse the plug.
- Try the outlet again.
- If it still does not fit, contact a qualified electrician.
The plug should not be modified.
Tamper-Resistant Housing
The blender uses a tamper-resistant screw to prevent removal of its outer cover.
The manual warns owners not to remove the housing because there are no user-serviceable parts inside. Internal repairs should be handled only by authorized service personnel.
Extension Cord Guidance
A short power cord is supplied to reduce entanglement and tripping risk.
If an extension cord is used:
- Its rated electrical capacity should be at least equal to that of the appliance.
- A grounded appliance requires a grounding-type three-wire extension cord.
- The cord should be arranged so it does not hang over a table or countertop where a child could pull it or someone could trip over it.
Cleaning and Care
The blender must be switched off and unplugged before cleaning.
Disassembling for Cleaning
- Lift the blending jar from the powered base using its handle.
- Turn the jar base counterclockwise until loose.
- Remove the blade assembly carefully.
- Remove the lid.
The blades are sharp and should be handled with care.
Dishwasher Cleaning
The removable components may be washed by hand or in a dishwasher.
- Place the glass jar on the bottom rack.
- Place the other removable components on the top rack only.
Cleaning the Appliance Base
The powered base should never be immersed in liquid.
Instead:
- Wipe it with a damp cloth.
- Dry it thoroughly.
- Remove stubborn marks with a damp cloth and nonabrasive cleaner.
Do not use rough scouring pads or abrasive cleaners on the appliance or its components.
Maintenance and Service
The PowerXL Smart Pro contains no parts that can be serviced by the owner.
If the appliance needs internal repair or service, the manual instructs owners to contact qualified service personnel.
Included Recipe: Classic Smoothie
The manual includes a Classic Smoothie recipe using apple juice, bananas, and frozen strawberries.
The ingredients are added to the jar in the order specified, then blended for approximately 30 seconds or until smooth. Orange juice may be substituted for the apple juice.
Included Recipe: Quick and Easy Salsa
The manual’s salsa recipe combines diced tomatoes with green chilies, onion, jalapeño, garlic, cilantro, lime juice, sugar, cumin, and salt.
The ingredients are added to the jar in the listed order and processed using the Salsa function or Pulse for approximately 30 seconds, or until the desired consistency is reached.
Two-Year Limited Warranty
The PowerXL Smart Pro BL6018-1BP includes a two-year limited warranty that applies in the United States and Canada.
The warranty covers defects in materials or workmanship, with Empower Brands, LLC’s liability limited to the original purchase price. Coverage lasts two years from the original purchase date, and proof of purchase is required.
Warranty Remedy
For a covered claim, the company states that it will provide a reasonably similar replacement product that is either:
- New, or
- Factory refurbished.
How to Obtain Warranty Service
Owners should:
- Keep the purchase receipt as proof of the original sale date.
- Use the online PowerXL service portal at www.prodprotect.com/powerxl, or
- Call 800-577-1557 for general warranty service.
For replacement parts or accessories, the manual lists:
1-800-738-0245.
Warranty Exclusions
The warranty does not cover:
- Damage resulting from commercial use
- Misuse
- Abuse
- Neglect
- Products modified in any way
- Products used or serviced outside the country of purchase
- Glass components and other accessories packaged with the appliance
- Shipping and handling costs associated with replacement
- Certain consequential or incidental damages, subject to applicable law
Customer Support
For service, repair, or questions, the manual instructs owners not to return the blender to the retailer, not to mail the product directly back to the manufacturer, and not to take it to a service center without first following the provided service process.
| Support Need | Contact |
| General Warranty Service | 800-577-1557 |
| Parts and Accessories | 1-800-738-0245 |
| Online Warranty/Service Portal | www.prodprotect.com/powerxl |
The manual identifies Empower Brands, LLC, Middleton, WI 53562 as the rights holder and lists the product as made in China.
Frequently Asked Questions
What is the capacity of the PowerXL Smart Pro BL6018-1BP?
The blender uses a 68 oz. glass blending jar.
What automatic programs does the PowerXL Smart Pro have?
The touchscreen provides automatic Smoothie, Frappé, and Salsa Smart Functions. These programs detect the food load and automatically run the programmed blending, pulsing, and pausing sequence.
How long can the PowerXL Smart Pro run continuously?
The manual states that the blender should not operate continuously for more than 1½ minutes. If additional blending is required, stop the unit and continue after checking or redistributing the ingredients.
Why is the PowerXL blender touchscreen flashing continuously?
Continuous flashing indicates Error 1, meaning the mixture is too dry and a large air pocket has formed. Add liquid and/or stir the mixture before continuing.
What does two quick flashes followed by a long flash mean?
That repeating pattern is Error 2 and indicates that the motor has overheated. Unplug the blender and allow it to cool for approximately 20 minutes.
Can boiling liquids be placed in the PowerXL Smart Pro?
The manual instructs users not to place boiling liquids directly into the blender. Boiling liquid should cool for approximately 5 minutes before being added to the jar.
Are the PowerXL Smart Pro blender parts dishwasher safe?
Yes. Removable parts may be washed in a dishwasher. The glass jar should be placed on the bottom rack, while the other removable parts should be placed on the top rack.
How long is the PowerXL Smart Pro warranty?
The manual provides a two-year limited warranty for the United States and Canada, beginning from the original purchase date with proof of purchase.