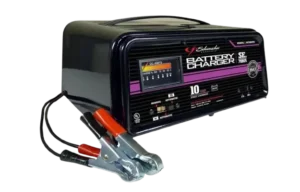
| Brand Name | Schumacher |
| Product Name | Manual Battery Charger |
| Model Number(s) | 105-4, 105-5, 105-8 |
| File Size | 729 KB |
| Number of Pages | 36 |
| Languages Covered | English, Spanish, French |
Schumacher Battery Charger Manual
The Schumacher 105-4, 105-5, and 105-8 are manual battery chargers designed for rechargeable lead-acid batteries, including standard, AGM, and GEL types. The charger provides a selectable Charge mode, Boost mode, and Engine Start setting, along with a timer and analog ammeter for monitoring the charging process.
Unlike an automatic charger that determines the entire charging cycle itself, these units require the operator to select the appropriate charging setting, set the timer, monitor the battery, and stop charging when the battery is fully charged. The timer helps prevent overcharging by stopping the charging process after the selected period.
Quick Facts
| Feature | Manual Information |
| Battery types | Lead-acid STD, AGM and GEL |
| AC supply | Nominal 120V grounded circuit |
| Main operating modes | Charge, Boost, Engine Start |
| Charge control | Charge Rate Selector Switch |
| Charge duration control | Mechanical timer |
| Charging status | Analog ammeter |
| Engine Start | Yes |
| Boost | Yes |
| Marine battery charging | Battery must be removed and charged ashore |
| Warranty | 2-year limited warranty |
The charger is intended only for rechargeable lead-acid batteries and should not be used to charge dry-cell batteries commonly found in household devices. A frozen battery must never be charged.
Important Safety Instructions
Lead-acid batteries can release explosive gases during normal operation. Schumacher instructs users to follow the battery charger instructions every time the unit is used.
General safety precautions
- Keep the charger out of reach of children.
- Do not expose it to rain or snow.
- Use only attachments recommended or sold by the charger manufacturer.
- Disconnect the charger by pulling on the plug rather than the cord.
- Do not operate the unit with a damaged cord or plug.
- Do not use a charger that has been dropped, struck, or otherwise damaged.
- Do not disassemble the charger.
- Have repair or servicing performed by a qualified technician.
- Unplug the charger from the AC outlet before cleaning or maintenance.
- Turning the controls off does not remove the electrical-shock risk while the charger remains plugged in.
Battery explosion precautions
Working close to a lead-acid battery can be dangerous because the battery generates explosive gases.
Never:
- Smoke near the battery or engine.
- Allow sparks or flames near the battery.
- Drop metal tools onto the battery.
- Allow charger clamps to touch each other while energized.
Personal protection
When working near a lead-acid battery:
- Wear full eye protection.
- Wear protective clothing.
- Keep fresh water and soap nearby.
- Remove rings, watches, necklaces, bracelets, and other metal jewelry.
- Have another person close enough to provide help if necessary.
If battery acid contacts skin or clothing, wash immediately with soap and water.
If acid enters the eyes, flush them with running cold water for at least 10 minutes and get medical attention immediately.
Supported Battery Types
The charger is intended for rechargeable lead-acid batteries, including:
- Standard / flooded lead-acid
- AGM
- GEL
It is intended for battery charging and starter-motor applications.
Do not use it to charge:
- Household dry-cell batteries
- Frozen batteries
Dry-cell batteries can burst when charged using an incompatible charger.
Preparing a Battery for Charging
Before connecting the Schumacher battery charger:
- Turn off vehicle accessories.
- If the battery must be removed from the vehicle, disconnect the grounded battery terminal first.
- Work in a well-ventilated area.
- Clean corrosion from the battery terminals.
- Keep corrosion away from the eyes.
- For serviceable batteries, add distilled water only to the level specified by the battery manufacturer.
- Follow the battery manufacturer’s charging instructions.
- Confirm the battery voltage using the vehicle owner’s manual.
- If an adjustable charge rate is available, begin charging at the lowest suitable rate.
Where to Place the Battery Charger
Position the charger as far from the battery as the DC cables allow.
Do not:
- Place the charger directly above the battery.
- Place the battery on top of the charger.
- Operate the charger in a closed or poorly ventilated space.
- Allow battery acid to drip onto the charger.
Battery gases can corrode or damage the charger.
AC Power and Grounding
These Schumacher chargers are intended for use on a nominal 120V circuit and use a grounded plug.
The charger should be connected to a properly installed and grounded outlet that complies with applicable electrical codes.
The supplied plug or AC cord should not be altered. If it does not fit the available outlet, a qualified electrician should install an appropriate grounded outlet.
Using an Extension Cord
Schumacher does not recommend using an extension cord unless it is absolutely necessary.
If one must be used:
- Its plug must have the same number, size, and shape of pins as the charger plug.
- It must be properly wired.
- It must be in good electrical condition.
- Its wire gauge must be suitable for the charger’s AC current and cord length.
Recommended Extension Cord Wire Size
| Charger AC Input | 25 ft | 50 ft | 100 ft | 150 ft |
| 0–<2 A | 18 AWG | 18 AWG | 18 AWG | 16 AWG |
| 2–<3 A | 18 | 18 | 16 | 14 |
| 3–<4 A | 18 | 18 | 16 | 14 |
| 4–<5 A | 18 | 18 | 14 | 12 |
| 5–<6 A | 18 | 16 | 14 | 12 |
| 6–<8 A | 18 | 16 | 12 | 10 |
| 8–<10 A | 18 | 14 | 12 | 10 |
| 10–<12 A | 16 | 14 | 10 | 8 |
| 12–<14 A | 16 | 12 | 10 | 8 |
| 14–<16 A | 16 | 12 | 10 | 8 |
| 16–<18 A | 14 | 12 | 8 | 8 |
| 18–<20 A | 14 | 12 | 8 | 6 |
These are the minimum AWG sizes listed in the manual.
Assembly Instructions
The charger should be completely assembled before use.
Remove the cord wraps and fully uncoil the charger cables before operating it.
Assembly Parts
The manual’s wheel-and-foot assembly diagram on page 8 identifies:
| Part | Quantity |
| ¼-20 thread-cutting screws | 4 |
| Wheels | 2 |
| Axle | 1 |
| Nylon spacers | 2 |
| Axle end caps | 2 |
| Right foot | 1 |
| Left foot | 1 |
Required tools:
- 3/8-inch nut driver or socket with extension
- Hammer
Installing the Wheels and Axle
- Place the charger upside down on a flat surface.
- Tap one axle end cap into place using a hammer.
- Slide one wheel onto the axle.
- Add one nylon spacer.
- Pass the axle through the right and left feet.
- Add the second nylon spacer.
- Install the second wheel.
- Fit the remaining axle end cap.
Installing the Feet
Secure each foot to the bottom of the charger using two of the supplied ¼-20 thread-cutting screws.
Extending the Handle
Pull the handle upward until it locks into place.
If needed, press the small silver buttons inward while extending it.
Schumacher Battery Charger Controls
The charger uses three main controls or indicators:
- Charge Rate Selector Switch
- Timer
- Ammeter
Charge Rate Selector Switch
The selector switch chooses between the main operating functions.
Charge
Use Charge for normal charging of small or large batteries.
Boost
Use Boost to quickly add energy to a severely discharged or high-capacity battery before using Engine Start.
The battery should be monitored while Boost is active.
Engine Start
Engine Start supplies additional current to assist with cranking an engine when the installed battery is weak or discharged.
This function must always be used with a battery connected.
How the Timer Works
The timer controls how long the charger supplies charging current.
When the selected time expires, the charger stops charging.
Its main purpose is to reduce the risk of overcharging while giving the battery enough time to reach the desired state of charge.
To set the timer correctly, the operator should know:
- Battery amp-hour capacity, or
- Battery reserve capacity
- Current state of charge
- Appropriate charge rate
The charger and battery should be monitored during charging.
How to Read a Schumacher Battery Charger Ammeter
The analog ammeter shows the amount of current, in amperes, being drawn by the battery.
A battery generally draws more current when charging begins. As the battery accepts charge, the amount of current it draws decreases.
The ammeter needle therefore normally moves toward a lower reading as charging progresses.
When the current stops decreasing, the battery is considered charged under the manual’s operating description.
What a high ammeter reading means
A high reading means the battery is drawing a relatively large amount of current from the charger.
The START area of the meter represents the high current used during Engine Start.
When the engine is being cranked, the needle can move to the far-right side of the START area.
What happens at a 2-amp rate
The manual notes that the ammeter may show some activity at a 2-amp charge rate, but the gauge does not have enough resolution to accurately display such a low current.
How to Connect the Charger to a Battery in a Vehicle
A spark near a battery can cause an explosion, so the connection order is important.
Negative-grounded vehicle
Most vehicles use a negative-grounded electrical system.
- Check which battery terminal is grounded to the chassis.
- Connect the red POSITIVE clamp to the battery’s positive (+) terminal.
- Connect the black NEGATIVE clamp to a heavy metal section of the vehicle frame or engine block away from the battery.
- Do not connect the negative clamp to the carburetor, fuel line, or thin sheet-metal body panels.
Positive-grounded vehicle
For a positive-grounded vehicle:
- Connect the black NEGATIVE clamp to the battery’s negative terminal.
- Connect the red POSITIVE clamp to a heavy metal section of the chassis or engine block away from the battery.
Disconnecting after charging
When charging is finished:
- Set charger controls to OFF.
- Unplug the AC power cord.
- Remove the clamp connected to the vehicle chassis.
- Remove the clamp connected to the battery terminal.
How to Connect a Battery Outside the Vehicle
When charging a removed battery:
- Check the positive and negative battery terminals.
- Attach an insulated battery cable at least 24 inches long and 6 AWG to the negative battery terminal.
- Connect the charger’s red POSITIVE clamp to the positive battery terminal.
- Move as far away from the battery as practical.
- Connect the black NEGATIVE charger clamp to the free end of the 24-inch cable.
- Do not face the battery while making the final connection.
When finished, disconnect the charger in the reverse order, breaking the first connection while positioned as far from the battery as practical.
A marine battery must be removed from the boat and charged on shore unless specially designed marine charging equipment is used.
How to Use a Schumacher Battery Charger
Charging a Battery in the Vehicle
- Turn off all vehicle accessories.
- Keep the hood open.
- Clean the battery terminals.
- Set the timer to OFF.
- Position the AC and DC cables away from fan blades, belts, pulleys, and other moving parts.
- Connect the charger using the correct battery and chassis connection procedure.
- Plug the charger into the electrical outlet.
- Select the required charge rate.
- Set the timer for the calculated charging period.
- Monitor both the charger and battery.
When charging is finished:
- Return the timer to OFF.
- Disconnect AC power.
- Remove the chassis clamp.
- Remove the battery-terminal clamp.
Charging a Battery Outside the Vehicle
- Put the battery in a well-ventilated area.
- Set the timer to OFF.
- Clean the terminals.
- Make the battery connections using the outside-vehicle procedure.
- Plug the charger into the AC outlet.
- Select the desired charge rate.
- Set the timer.
- Monitor the battery and charger.
- When finished, turn the timer OFF and disconnect AC power.
- Remove the negative connection followed by the positive connection.
Charge Mode
Charge mode is intended for:
- Automotive batteries
- Marine batteries
- Deep-cycle batteries
The charging process must be monitored and stopped when the battery becomes fully charged.
Continuing to charge a full battery can damage it and may result in property damage or personal injury.
Boost Mode
Boost is intended to quickly add energy to:
- Severely discharged batteries
- Large-capacity batteries
It is mainly used to prepare a weak battery before using Engine Start.
The Boost process should be monitored.
How to Use Engine Start
Engine Start can assist a vehicle with a weak or discharged battery.
Engine Start procedure
- Set the timer to OFF.
- Keep the charger unplugged from AC power while making the battery connections.
- Connect the charger using the in-vehicle battery procedure.
- Plug the charger into the AC outlet.
- Set the Charge Rate Selector to Engine Start.
- Crank the engine for no more than 5 seconds.
- If it does not start, wait 3 minutes before trying again.
- If necessary, use Boost or Engine Start for another 5 minutes before another attempt.
- Once the vehicle starts, move the timer to OFF.
- Unplug the AC cord before removing the battery clamps.
Very cold weather or extremely low battery voltage
If the battery voltage is below 2 volts, or the vehicle is being started in extremely cold weather, the manual recommends using Boost or Engine Start for 5 minutes before cranking.
Engine Start safety
Do not use Engine Start without a battery installed in the vehicle.
Doing so can damage the vehicle’s electrical system.
If the battery has already been charged but the vehicle still will not start, Schumacher advises having the battery checked rather than continuing to use Engine Start.
Fan Operation
It is normal for the charger’s fan to operate while the timer is running.
Keep the ventilation area around the charger clear so the fan can move air efficiently.
How Long Does a Schumacher Battery Charger Take to Charge?
Charge time depends on:
- Battery amp-hour capacity
- Battery’s existing state of charge
- Selected charge rate
- Whether the battery is a deep-cycle type
The manual provides a formula for estimating the required charging time.
Charge Time Formula
Battery Ah × percentage of charge required × 1.25 ÷ charger amp setting = approximate charging hours
For deep-cycle batteries, add approximately one additional hour.
Example
For a 100 Ah battery that needs 50% charge at a 20A charger setting:
100 × 0.50 × 1.25 ÷ 20 = 3.125 hours
The manual therefore estimates slightly more than 3 hours for that example.
Schumacher Battery Charger Charge Time Chart
The following charging times assume the battery is at approximately 50% charge before recharging.
| Battery Size / Rating | 10A | 20A | 50A |
| Small battery, 6–12 Ah | NR | NR | NR |
| Small battery, 12–32 Ah | NR | NR | NR |
| Car/Truck, 200–315 CCA / 40–60 RC | 2¼–3 hr | 1–1½ hr | 25–35 min |
| Car/Truck, 315–550 CCA / 60–85 RC | 3–3¾ hr | 1½–2 hr | ½–¾ hr |
| Car/Truck, 550–1000 CCA / 85–190 RC | 3¾–7 hr | 2–3½ hr | ¾–1½ hr |
| Marine/Deep-Cycle, 80 RC | 3½ hr | 1¾ hr | NR |
| Marine/Deep-Cycle, 140 RC | 5½ hr | 2¾ hr | NR |
| Marine/Deep-Cycle, 160 RC | 6 hr | 3 hr | NR |
| Marine/Deep-Cycle, 180 RC | 6½ hr | 3¼ hr | NR |
NR = Not Recommended
The manual’s page 11 chart uses CCA for Cold Cranking Amps, Ah for Amp Hours, and RC for Reserve Capacity.
Maintenance and Care
Only a small amount of routine care is required.
Clean the clamps
After every charging session:
- Inspect the battery clamps.
- Wipe away battery fluid.
- Remove residue that could cause corrosion.
Clean the charger case
Periodically wipe the case with a soft cloth to help maintain the finish and prevent corrosion.
Protect the cables
Coil the input and output cables neatly during storage to reduce the risk of accidental damage.
Storage Instructions
Store the charger:
- Unplugged from the AC outlet.
- Upright.
- Indoors.
- In a cool, dry place.
Store the clamps in the storage areas provided on the handle.
Do not store the clamps:
- Clipped together.
- Attached to metal.
- Clipped around the charger cables.
Schumacher Battery Charger Troubleshooting
Charger Will Not Turn On
| Possible Cause | What to Do |
| AC outlet has no power | Check the fuse or circuit breaker supplying the outlet |
| Poor electrical connection | Check the charger cord and any extension cord for a loose plug |
Battery Is Connected but Not Charging
Possible cause: Battery clamps are not making a good connection.
Check the battery and chassis connections.
Make sure the contact surfaces are clean, then rock the clamps slightly back and forth to improve the connection.
Charger Makes a Clicking Sound
The manual lists several possible causes:
- Circuit breaker cycling
- Defective battery
- Shorted battery cable or clips
- Severely discharged battery
- Reversed battery connections
What to check
- Verify the charger settings.
- Have a questionable battery tested.
- Check for shorted cables or clamps.
- Replace damaged cables or clamps.
- Correct reversed connections.
A severely discharged but otherwise usable battery may initially struggle to accept a charge. Allow it time to recover.
If this condition continues for more than 20 minutes, stop charging and have the battery checked.
Charger Makes a Loud Buzz or Hum
A buzzing sound can come from normal transformer-lamination vibration.
If the sound comes from a shorted diode or output rectifier assembly, the charger should be inspected by a qualified technician.
Short or No Engine Start Cycle
Possible causes include:
- Engine cranking requires more than the charger can provide.
- Three minutes of rest was not allowed between attempts.
- Clamps have a poor connection.
- AC cord or extension cord is loose.
- Outlet has no power.
- Charger has overheated.
- Battery is severely discharged.
Corrective steps
- Wait the full 3-minute rest period between starting attempts.
- Check battery and chassis connections.
- Check AC connections.
- Check the fuse or circuit breaker supplying the outlet.
- Make sure charger vents are not blocked.
- Allow an overheated charger’s thermal protection time to reset.
For a severely discharged battery, the troubleshooting chart recommends using the 25A Boost setting for 10–15 minutes to assist with engine cranking.
Before Sending the Charger for Repair
Schumacher directs users to contact customer service before returning the unit.
For repair or return, an RMA number must be obtained before shipping the charger.
Two-Year Limited Warranty
Schumacher Electric Corporation provides a 2-year limited warranty to the original retail purchaser.
The warranty covers defects in materials or workmanship that occur during normal use and care for two years from the retail purchase date.
At the manufacturer’s option, an eligible defective charger may be repaired or replaced with a new or reconditioned unit.
Warranty conditions
The warranty is:
- Provided to the original retail purchaser.
- Non-transferable.
- Subject to proof of purchase.
The purchaser is responsible for forwarding the product and proof of purchase according to the manufacturer’s service procedure.
Conditions that can void warranty coverage
The warranty can be voided if the charger is:
- Misused.
- Handled carelessly.
- Repaired by an unauthorized person.
- Modified by someone other than Schumacher.
- Resold through an unauthorized retailer.
Customer Support
For troubleshooting and product assistance:
Schumacher Electric Customer Service
Phone: 1-800-621-5485
Email: services@schumacherelectric.com
Website: www.batterychargers.com
For repairs or returns, contact customer service and obtain a Return Merchandise Authorization before sending the charger.
Schumacher Electric Corporation
801 Business Center Drive
Mount Prospect, IL 60056-2179
Frequently Asked Questions
How do you use a Schumacher battery charger?
With the charger unplugged and its timer set to OFF, connect the battery clamps using the correct procedure for a battery inside or outside the vehicle. Plug the charger into a grounded AC outlet, select the required charge rate, set the timer for the calculated charging period, and monitor the battery and charger. When finished, turn the timer OFF and disconnect AC power before removing the clamps.
How do you read a Schumacher battery charger gauge?
The ammeter shows how much current the battery is drawing. A discharged battery generally draws more current, so the needle starts higher. As charging progresses, the battery draws less current and the needle moves toward a lower reading. When current stops decreasing, the manual describes the battery as charged.
What is Boost mode on a Schumacher battery charger?
Boost mode quickly adds energy to a severely discharged or large-capacity battery before using Engine Start. The boosting process should be monitored rather than left unattended.
How do you use Engine Start on a Schumacher charger?
Connect the charger to the installed vehicle battery with the charger unplugged, then connect AC power and select Engine Start. Crank for no more than 5 seconds. If the engine does not start, wait 3 minutes before another attempt.
How long does a Schumacher battery charger take to charge a battery?
Charging time depends on battery capacity, current state of charge, and selected amperage. Schumacher provides the formula Ah × percentage of charge required × 1.25 ÷ charging amps. A 100 Ah battery needing 50% charge takes a little more than 3 hours at a 20A setting in the manual’s example.
Why is my Schumacher charger connected but not charging?
The troubleshooting chart identifies poor clamp contact as a common cause. Check the battery and chassis connections, clean the contact surfaces, and move the clamps slightly to improve contact.
Why does my Schumacher battery charger make a clicking sound?
Possible causes include a cycling circuit breaker, defective battery, shorted cables or clamps, an extremely discharged battery, or reversed battery connections. The charger settings and clamp polarity should be checked first.
What types of batteries can the Schumacher 105-4, 105-5 and 105-8 charge?
These chargers are intended for rechargeable lead-acid STD, AGM, and GEL batteries. They should not be used with ordinary household dry-cell batteries, and frozen batteries must never be charged.