
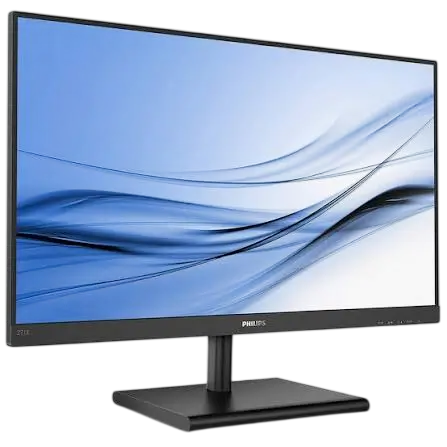
The Philips E Line series covers eight 27-inch monitors: 271E1S, 271E1SD, 272E1SA, 275E1, 275E1S, 275E1E, 278E1 and 278E1A. All use a 27″ (68.6 cm) 16:9 IPS panel with W-LED backlighting, a typical 1000:1 contrast ratio, 178° viewing angles and flicker-free operation. The main difference is resolution: 1920×1080 on the 271E1S, 271E1SD and 272E1SA, 2560×1440 on the 275E1 models, and 3840×2160 on the 278E1 and 278E1A. Every model includes SmartImage presets and a LowBlue mode, and the 272E1SA and 278E1A add built-in 3 W × 2 speakers.
Product Specifications
| Model | Native resolution | Video inputs | Weight with stand |
| 271E1S | 1920×1080 at 60 Hz | HDMI, VGA | 3.89 kg |
| 271E1SD | 1920×1080 at 60 Hz | HDMI, DVI, VGA | 3.95 kg |
| 272E1SA | 1920×1080 at 60 Hz | DisplayPort, HDMI, VGA | 3.96 kg |
| 275E1 | 2560×1440 at 60 Hz | DisplayPort, HDMI, VGA | 3.90 kg |
| 275E1S | 2560×1440 at 60 Hz | DisplayPort, HDMI, VGA | 3.99 kg |
| 275E1E | 2560×1440 at 60 Hz | DisplayPort, HDMI, VGA | 5.53 kg |
| 278E1 | 3840×2160 at 60 Hz | DisplayPort, 2 × HDMI 2.0 | 4.78 kg |
| 278E1A | 3840×2160 at 60 Hz | DisplayPort, 2 × HDMI 2.0 | 4.78 kg |
Other figures that apply across the range (PDF pp. 24–29):
- Refresh rate: 50–76 Hz on analog input and 48–76 Hz on digital input; the 278E1 and 278E1A accept 23–75 Hz.
- Audio: the 272E1SA has audio in and out, and the 278E1A has audio in and a headphone jack. Other models have an audio output.
- Stand: tilt from -5° to +20°. Only the 275E1E adds 100 mm of height adjustment.
- Mounting: VESA 100 × 100 mm, M4 screws.
- Power: 100–240 VAC, 50–60 Hz. Typical use is about 23–30 W depending on the model, 0.3–0.5 W in standby and 0.3 W when switched off.
- Operating conditions: 0–40°C and 20–80% relative humidity. Storage range is -20°C to 60°C.
What’s in the Box
Each monitor ships with an AC/DC adapter and a Quick Start guide. Depending on region, you may also get VGA, HDMI, DisplayPort, DVI (271E1SD) or audio (272E1SA, 278E1A) cables. Use only the adapter listed for your model (PDF pp. 7–8):
- 271E1S and 271E1SD: Philips ADPC1938EX
- 272E1SA: Philips ADPC1945EX
- 275E1, 275E1S, 275E1E, 278E1 and 278E1A: Philips ADPC2065
Installation and Setup
Attaching the Stand
- Lay the monitor face down on a soft, smooth surface so the screen isn’t scratched or damaged.
- Hold the stand with both hands and push the base firmly into the stand column.
- Tighten the screw at the bottom of the stand by hand. On the 27xE1S models, finish with a screwdriver on the screw that joins the stand to the bracket (PDF pp. 8–9).
Connecting to a PC
- Plug the power cable firmly into the back of the monitor.
- Turn off the computer and unplug its power cord.
- Connect the monitor’s signal cable to the video connector on the back of the computer.
- Plug the computer and monitor power cords into a nearby outlet.
- Turn on the computer and the monitor. If a picture appears, setup is finished.
Every model has a Kensington anti-theft lock slot on the back (PDF p. 11).
Controls and On-Screen Menu
Seven keys along the front edge handle power, opening and confirming the on-screen menu (OSD), moving through settings, brightness, input source, going back a level, and SmartImage. On the 272E1SA and 278E1A, one of these keys adjusts speaker volume (PDF pp. 12–13).
The main OSD menu has these groups:
- LowBlue Mode and Input: switch the blue-light filter on or off and pick VGA, DVI, HDMI or DisplayPort.
- Picture: brightness, contrast and sharpness (each 0–100), SmartResponse, SmartContrast, SmartFrame, Gamma (1.8–2.6), Pixel Orbiting and Over Scan. The 271E1S, 271E1SD and 272E1SA also offer MPRT.
- Audio: volume 0–100 and mute, plus source selection on the 272E1SA and 278E1A.
- Color: Native, sRGB, preset temperatures from 5000K to 11500K, or User Define with separate red, green and blue levels.
- Language, OSD Settings and Setup: 21 menu languages, OSD position, transparency and time-out (5–60 seconds), and Reset.
If your model has DPS, it defaults to On and makes the screen look slightly dim. Set DPS to Off in the OSD for full brightness (PDF p. 14). For best results, use each model’s native resolution listed above; the Setup menu can switch off the warning shown when a different resolution is received.
Picture Modes and Adaptive Sync
SmartImage adjusts brightness, contrast, color and sharpness for the content on screen. The modes are FPS, Racing, RTS, Gamer 1, Gamer 2, LowBlue Mode and Off. Gamer 1 and Gamer 2 store your own settings. The 275E1E adds EasyRead for text, and the 278E1 and 278E1A add SmartUniformity, which raises screen uniformity above 95% compared with a typical 75–80%. The SmartImage menu closes after 5 seconds unless you confirm your choice (PDF pp. 19–22).
Adaptive Sync is available on the 271E1S, 271E1SD, 272E1SA, 275E1, 275E1S and 275E1E. It lets a compatible AMD graphics processor refresh the monitor when a new frame is ready, which avoids tearing without the stutter of v-sync. It needs Windows 10, 8.1, 8 or 7 and a supported card, such as the AMD Radeon R9 290/300 series or R7 260 series (PDF p. 23).
Safety Instructions
- Use only the Philips power cable and the power source specified for your model. Wrong voltage can cause a fault, fire or electric shock.
- Don’t open the monitor or take apart the AC adapter. Only qualified service staff should open the housing.
- Keep the vents clear, and keep the monitor away from direct sunlight, strong light, heat, dust, rain, water and oil.
- Never tilt the screen down more than -5°. The screen can separate from the frame, and that damage isn’t covered by the warranty (PDF p. 15).
- Hold the monitor by the bezel when moving it, and never press on the LCD panel.
- Don’t pinch, bend or place heavy items on the power or signal cables.
- If you unplug the monitor, wait 6 seconds before reconnecting it.
- If you see smoke or sparks, unplug the monitor right away and contact Philips customer service. If liquid or a foreign object gets inside, switch it off, unplug it and send it to a service center.
For eye comfort, take short breaks, such as 5–10 minutes after 50–60 minutes of use (PDF p. 4).
Cleaning and Maintenance
Unplug the monitor before cleaning. Wipe the screen with a dry cloth, or a slightly damp one if needed. Don’t use alcohol-based or ammonia-based liquids or oil-based cleaners, which can damage plastic parts and void the warranty.
Static images left on screen for long periods can cause image retention, also called ghosting or burn-in. Start a screen saver whenever you step away, and use a screen-refresh application if the display shows unchanging content. Severe cases may not go away and aren’t covered by the warranty (PDF p. 5).
Troubleshooting
| Problem | What to try |
| No picture, power LED off | Check the power cable at the outlet and monitor, then press the power button. |
| No picture, power LED white | Make sure the computer is on and the signal cable is firmly connected. Look for bent pins on the cable. Power saving may also be active. |
| Picture off-center or shaking | Run Auto (VGA only) or adjust Phase and Clock. Check that the signal cable is secure. |
| Blurry, dark or distorted image | Adjust brightness and contrast, and set the computer to the native resolution. |
| Ghost image after switching off | Use a screen saver and avoid static content. It usually fades gradually. |
| Colored or black dots | A normal trait of LCD technology. See the pixel limits below. |
| Power light too bright | Adjust the power LED setting in the OSD, if your model has it. |
Auto works only on analog VGA input. For other inputs, adjust manually in the OSD (PDF pp. 37–38).
Pixel Limits and Warranty
Warranty repair or replacement requires defects above these levels (PDF p. 35):
| Defect | Acceptable level |
| 1 bright subpixel | 3 |
| 2 adjacent bright subpixels | 1 |
| 3 adjacent bright subpixels (one white pixel) | 0 |
| 1 dark subpixel | 5 or fewer |
| 2 adjacent dark subpixels | 2 or fewer |
| 3 adjacent dark subpixels | 0 |
| All bright and dark dots combined | 5 or fewer |
Two defects of the same type must also be more than 15 mm apart. The warranty period is listed in the separate Important Information booklet. Extended plans add 1, 2 or 3 years and must be bought within 30 calendar days of purchase (PDF p. 36).
Frequently Asked Questions
What if the screen says it can’t display this video mode?
The computer is sending a resolution or refresh rate the monitor can’t show. Reconnect your previous monitor, open the Windows display settings, and set your model’s native resolution at 60 Hz. Restart, confirm the setting, then reconnect the Philips monitor.
What refresh rate should I use?
60 Hz is recommended. If you see interference, try 75 Hz to see whether it clears.
How do I lock or unlock the controls?
On the 271E1S, 275E1S and 275E1E, hold the menu/OK key for 10 seconds to lock or unlock the dedicated key. To lock the OSD itself, hold menu/OK while the monitor is off, then press power to turn it on. Repeat the same steps to unlock it (PDF p. 41).
How do I restore factory settings?
Press OK, open the Setup menu, choose Reset and confirm with Yes.
Does it work with a Mac?
Yes. These monitors work with standard PCs, Macs and workstations, and are Plug and Play with Windows 10, 8.1, 8 and 7 and with Mac OSX. Some Macs may need a cable adapter.
How should I clean the screen?
Use a clean, soft cloth for normal cleaning. For deeper cleaning, isopropyl alcohol is the only alcohol allowed; ethyl alcohol, ethanol, acetone and hexane are ruled out. Because the safety section warns against alcohol-based cleaners, the cautious route is a lightly damp cloth with the monitor unplugged.
Can I wall-mount the monitor?
Yes, it accepts a VESA 100 × 100 mm mount with M4 screws. Buy a suitable wall-mount kit, because the gap between the rear cable connector and the wall is otherwise too short. Contact the manufacturer before wall installation (PDF pp. 16–17).