
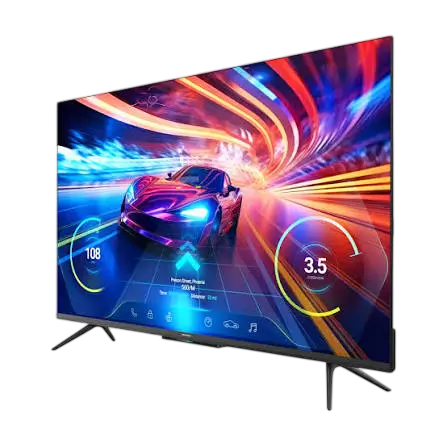
Philips TV 55PUG7675/F7
This Philips 55-inch TV (models 55PUG7675/F7 and 55PUG7675/F6) ships with two stands that attach with four screws, and it can also be mounted on a wall with a VESA 200×200 mm bracket sold separately. Its rear panel includes an Antenna IN jack, three HDMI inputs (HDMI 1 supports eARC/ARC), a LAN port, an optical digital audio output, USB 2.0 and USB 3.0 ports, and a headphone/mini AV input. This page covers unpacking, stand installation, safe lifting, power and antenna or cable connections, external device connections, wall mount specifications, packing for transport and support contact details.
Before You Start
The setup information applies to regular installation with the included stands. It is not intended for wall mount installation, which is covered separately below.
Preparation and Handling Cautions
- Read all of the setup instructions once before following them step by step.
- Work in a wide open space.
- Use a Phillips-head screwdriver to fasten the stands to the TV.
- Take care not to injure your fingers during assembly, and keep children away.
- Two or more people are recommended to remove the TV from the box.
- Keep the packing materials for future transportation.
- Do not return the TV to the store. Contact customer support first with any questions (see Support at the end of this page).
What’s in the Box
The box contents are:
- The TV
- Two stands
- Four screws, size T4 x 0.787″ (20 mm)
- A remote control (shown in the box illustration)
- Quick start guide
- Safety instruction sheet
- Limited warranty sheet
- Caution sheet
- AC cord
A front cardboard piece is included on select models only. Save it for moving or shipping the TV.
Unpacking the TV
The unpacking illustrations show three stages: opening the top of the carton, lifting the TV out of the carton, and laying the TV on a table with the screen facing down. Follow these points when you do it:
- Have two or more people remove the TV from the box.
- Cover a table top with a cloth or blanket to avoid damaging the TV screen.
- Hold both sides of the TV to place it on the table.
- Carefully lay the TV with the screen side down on the front cardboard, as shown in the figure.
Thin TVs can bend easily. To avoid damaging the TV and its screen, the TV must not be carried in a horizontal position when it is being moved.
Installing the Stands
The stands are attached while the TV lies screen-side down on the front cardboard, on a table covered with a cloth or blanket. A Phillips-head screwdriver is required.
Attach the Stands to the TV
- Place one stand at each side of the TV, as shown in the illustration.
- Fasten each stand to the TV with the included screws. Four screws are used in total, two for each stand.
- Hold the stand while you tighten the screws so it cannot fall.
- Check that both stands are securely fastened.
Lifting the TV
The lifting illustration shows two people, one at each side, holding the TV upright by its edges. Keep the TV upright when you lift or move it. Never carry it flat, because thin TVs bend easily and the screen can be damaged.
Connecting Power and Antenna, Cable or Satellite
The connection diagram uses two numbered steps: signal connection first (1), then power (2).
Antenna or Cable From the Wall
Connect the antenna or cable line (labeled OUT on the wall outlet in the diagram) to the Antenna IN jack on the TV, marked 75 Ω. For detailed instructions on installing channels with an RF cable, see the online owner’s manual at https://www.usa.philips.com/c-m/consumer-support.
Satellite or Cable Box
Connect the satellite dish or cable line to the IN connector of the cable/satellite box. Then connect an HDMI cable from the OUT connector of the box to an HDMI input jack on the TV.
Power
Connect the supplied AC cord to the TV and plug it into a wall outlet, as shown in step 2 of the diagram.
Connecting Other Devices
Rear Panel Ports
The connection overview labels these ports:
| Port label | Notes |
| LAN | Ethernet cable connection |
| DIGITAL OUT (OPTICAL) | Optical cable connection, for example to a soundbar |
| HDMI 3 | HDMI input |
| HDMI 2 | HDMI input |
| HDMI 1 (eARC/ARC) | HDMI input; used for the soundbar HDMI cable (eARC) connection |
| USB 2.0 | 5V, 500mA (DC) |
| USB 3.0 | 5V, 900mA (DC) |
| ANTENNA IN | Antenna or cable input |
| HEADPHONE / MINI AV IN | Headphone and mini AV connection |
Typical Connections
- Blu-ray Disc player: connect it to the TV with an HDMI cable.
- Soundbar: use an HDMI cable (eARC) to HDMI 1 (eARC/ARC), or use an optical cable to DIGITAL OUT (OPTICAL).
- Network: connect an Ethernet cable from your network device to the LAN port.
Wall Mounting the TV
A compatible wall bracket kit is not included. Compatible kits are available from third-party vendors, and a recommended wall mount bracket kit is sold separately. For detailed installation information, use the instruction book supplied with the wall mount.
Wall Mount Bracket Specifications
| TV size | VESA | Screw diameter | Screw depth in hole | Screw quantity |
| 55″ | 7.9″ x 7.9″ (200 x 200 mm) | M6 | Top: 0.5″~0.8″ (13~20 mm); Down: 0.4″~0.5″ (10~13 mm) | 4 |
Wall Mount Safety Requirements
- The wall mount bracket must be installed by experts.
- Install the bracket on a sturdy vertical wall. If it is installed on a ceiling or a slanted wall, the TV and bracket may fall and cause severe injury.
- Do not use screws that are longer or shorter than the specified length. Screws that are too long may cause mechanical or electrical damage inside the TV. Screws that are too short may cause the TV to fall.
- Do not fasten the screws with excessive force. This may damage the product or cause it to fall and lead to injury.
- Use 2 people to mount the TV onto a wall mounting bracket.
- Do not mount the TV onto the bracket while it is plugged in or turned on. This may cause an electric shock injury.
- Skyworth USA Corporation is not responsible for damage to the product or injury if you install the wall mount bracket or mount the TV onto it yourself, and it is not liable for the accidents or injuries described above.
Required Clearance
When installing the TV on a wall, leave this much space:
| Side | Clearance |
| Top | 11.8″ (30 cm) |
| Left and right sides | 5.9″ (15 cm) |
| Bottom | 3.9″ (10 cm) |
Packing the TV for Moving or Shipping
Pack the unit by following the diagram on the carton, and keep the packing materials for future transportation.
- Save the front cardboard (included on select models only) to use when moving or shipping the TV.
- Do not pack the stands on the same side as the screen. This avoids damaging the TV screen.
FCC and Canadian Notices
This equipment complies with the limits for a Class B digital device under part 15 of the FCC Rules. Operation is subject to two conditions: it may not cause harmful interference, and it must accept any interference received, including interference that may cause undesired operation. If it does cause interference to radio or television reception, you can try one or more of these measures:
- Reorient or relocate the receiving antenna.
- Increase the separation between the equipment and the receiver.
- Connect the equipment to an outlet on a circuit different from the receiver’s.
- Consult the dealer or an experienced radio or television technician.
Modifications must be approved by Skyworth USA Corporation, or the user could lose the authority to operate the apparatus. Connections must be made with shielded cables with metallic RFI/EMI connector hoods to stay compliant with FCC rules.
The Canadian notice (CAN ICES (B) / NMB (B); Canada BETS-7/NTMR-7) applies only to model 55PUG7675/F6. The declaration of conformity lists the trade name PHILIPS, models 55PUG7675/F7 and 55PUG7675/F6, and the responsible party Skyworth USA Corporation, 10833 Valley View Street, Suite 415, Cypress, CA 90630, United States.
Support
Contact customer support first with any questions, and do not return the TV to the store. Call 1-833-978-3323 or use the chat link at https://tinyurl.com/y2e29xsq. Warranty terms are in the separate Limited warranty sheet packed in the box.
Frequently Asked Questions
What comes in the box with the Philips 55PUG7675/F7?
The box contains the TV, two stands, four T4 x 0.787″ (20 mm) screws, a remote control, a quick start guide, a safety instruction sheet, a limited warranty sheet, a caution sheet and an AC cord. Select models also include a front cardboard piece. Keep that cardboard, because it is meant to be used again when you move or ship the TV.
What do I need to attach the stands, and how many screws are used?
You need a Phillips-head screwdriver and the four screws that come with the TV. Each of the two stands is fastened with two screws. Lay the TV screen-side down on the front cardboard on a table covered with a cloth or blanket, and hold each stand while you tighten its screws so it cannot fall. When both stands are on, check that each one is firmly fastened.
Can I carry the TV lying flat?
No. Thin TVs bend easily, so the TV must not be carried in a horizontal position, and bending can damage the screen. Keep it upright and have two or more people hold it by both sides, as the lifting illustration shows. Also keep children away while you handle and assemble the TV.
Should I keep the box and packing materials?
Yes. Keep all packing materials for future transportation, and save the front cardboard if your model includes it. When you repack the TV, follow the diagram printed on the carton and do not place the stands on the same side as the screen, since that can damage the screen.
How do I connect an antenna or cable line to the TV?
Plug the antenna or cable line into the Antenna IN jack on the rear panel, which is marked 75 Ω, then connect the AC cord to a wall outlet. Detailed channel installation steps for an antenna or cable connection using an RF cable are in the online owner’s manual at https://www.usa.philips.com/c-m/consumer-support.
How do I connect a cable or satellite box?
Run the satellite or cable line into the IN connector of the box, then connect an HDMI cable from the OUT connector of the box to an HDMI input jack on the TV. The rear panel has three HDMI inputs, labeled HDMI 1, HDMI 2 and HDMI 3. Then plug in the TV’s AC cord.
Which port should I use to connect a soundbar?
There are two options. Connect an HDMI cable (eARC) from the soundbar to the port labeled HDMI 1 (eARC/ARC), or connect an optical cable to the port labeled DIGITAL OUT (OPTICAL). The connection diagram shows these as alternatives, so you only need one of them.
Which ports does the TV have, and what do the USB ports supply?
The rear panel is labeled LAN, DIGITAL OUT (OPTICAL), HDMI 3, HDMI 2, HDMI 1 (eARC/ARC), USB 2.0, USB 3.0, ANTENNA IN and HEADPHONE / MINI AV IN. The USB 2.0 port is marked 5V, 500mA and the USB 3.0 port is marked 5V, 900mA. A wired network connection goes into the LAN port with an Ethernet cable.
What wall mount does the TV need?
The TV uses a VESA 200×200 mm (7.9″ x 7.9″) hole pattern with M6 screws, and four screws are used. Screw depth in the hole is 0.5″~0.8″ (13~20 mm) for the top holes and 0.4″~0.5″ (10~13 mm) for the bottom holes. The bracket kit is sold separately, and compatible kits are available from third-party vendors. Experts must install the bracket, and the instruction book that comes with the mount has the detailed steps.
How much space should I leave around the TV on a wall?
Leave 11.8″ (30 cm) above the TV, 5.9″ (15 cm) on each of the left and right sides, and 3.9″ (10 cm) below it.
What should I avoid when mounting the TV on a wall?
Do not mount the TV on a bracket while it is plugged in or turned on, because that can cause an electric shock injury. Use a sturdy vertical wall rather than a ceiling or slanted wall, where the TV and bracket may fall and cause severe injury. Use only screws of the specified length, since screws that are too long can cause mechanical or electrical damage inside the TV and screws that are too short can let the TV fall. Do not overtighten the screws, and use 2 people to lift the TV onto the bracket.
Can I return the TV to the store if I have a problem?
The TV is not meant to be returned to the store. Contact support first at 1-833-978-3323, or use the chat link at https://tinyurl.com/y2e29xsq, and explain your question or problem. Warranty terms are in the separate Limited warranty sheet that comes in the box.