
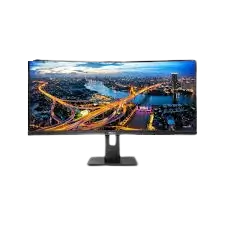
This Philips B Line monitor has a curved screen and a height-adjustable stand. It accepts video over HDMI, DisplayPort or USB-C. The rear panel also has USB ports, a network (RJ-45) port and an audio output. A built-in MultiView feature can show two sources on screen at once. The Quick Start sheet walks through unpacking, attaching the stand, connecting cables, managing cables, using the control buttons and adjusting the viewing position.
What’s in the Box
The monitor ships with the following:
- Monitor
- Stand and base
- Power cable
- Printed Quick Start guide
Several cables vary by region, so your box may not contain all of them. The sheet marks these as region-dependent:
- DisplayPort (DP) cable
- HDMI cable
- USB C-to-C/A cable
- USB C-to-C cable
- USB C-to-A cable
- USB A-to-B cable
- I/O cover
The sheet notes that the monitor’s design may differ from the illustrations.
Attaching the Stand
Do this while the monitor is still in its packaging (panel 1).
- Position the stand against the mounting area on the back of the monitor.
- Secure the stand with the fastener shown in the close-up illustration.
- Lift the assembled monitor out of the box, as the second illustration shows.
Prohibition, warning and fragile-glass symbols appear next to the lifting step. Handle the panel carefully and avoid pressing on the screen.
Connecting Cables and Devices
The rear connection area has these ports (panel 2):
| Port | Use shown on the sheet |
| HDMI | Video input |
| DisplayPort | Video input |
| USB C | Video input from a laptop |
| RJ-45 | Wired network connection to a wall jack |
| Audio Out | Powered speakers |
| USB (two ports) | Accessories such as a keyboard or mouse |
| USB (fast-charge port) | Charging a phone or similar device, marked “Fast Charger” |
| USB UP | Upstream link to a computer |
Plug the power cable into a wall outlet.
Connecting a Computer and Sharing Keyboard and Mouse
- Connect video with one of these options:
- A USB-C cable, either USB C-to-C or USB A-to-C
- An HDMI cable
- A DisplayPort cable
- If you use HDMI or DisplayPort, run a USB A-to-B cable from the computer to the monitor’s USB UP port. The monitor’s USB ports then work with that computer.
- Plug a keyboard or mouse into the monitor’s USB ports.
- Open the on-screen menu, go to USB Setting, and choose the USB source.
The USB Setting menu lists three choices. Choose USB C if the computer is connected by USB-C. Choose USB up if it is connected through the USB UP port. Auto is also listed.
Managing Cables
After connecting the cables, route them behind the stand (panel 3). Then snap the cable cover onto the stand so the cables stay bundled.
Using Two Sources with MultiView
MultiView shows two inputs at once, for example a desktop PC and a laptop. Open the PIP/PBP entry in the on-screen menu to set it up. There are two layouts:
- PIP (picture-in-picture): the main source fills the screen and the second source appears in a small inset.
- PBP (picture-by-picture): the two sources sit side by side.
Both layouts have a Swap option that exchanges the main and secondary sources. Any input (HDMI, DisplayPort or USB-C) can be the main source, and any of the three can be the sub source.
Control Buttons and On-Screen Menu
Five controls sit along the bottom edge of the screen (panel 4). The power button is at the right end, next to its indicator light.
| Control | What it does |
| Power | Turns the monitor on and off. The indicator changes state when the monitor is on. |
| SmartImage / ◄ | Opens the SmartImage picture-mode list. Also goes back in the menu. |
| Input / ▼ | Opens the input list (HDMI 2.0, DisplayPort, USB C). Also moves down in the menu. |
| USER / ▲ | Opens the KVM shortcut. Also moves up in the menu. |
| Menu / OK | Opens the on-screen menu. Also confirms a selection. |
Navigating the Menu
- Press the menu button to open the menu. The first screen lists PowerSensor, LightSensor, LowBlue Mode, Input, Picture and PIP/PBP, with more entries below.
- Press ▼ or ▲ to move through the list.
- Press OK to enter an item or confirm a setting.
- Press ◄ to go back.
SmartImage Modes
The SmartImage list contains EasyRead, Office, Photo, Movie, Game, Economy, LowBlue Mode, SmartUniformity and Off.
KVM Shortcut
Pressing USER opens the KVM list with Auto, USB C and USB up. This is the same USB-source choice as in the USB Setting menu.
Adjusting the Screen Position
The stand allows these adjustments (panel 5):
| Adjustment | Range |
| Tilt | −5° to 30° |
| Swivel | −180° to +180° |
| Height | 180 mm |
Support and Software
Register the monitor at www.philips.com/welcome. Support is at www.philips.com/support, where the sheet points to the FAQ, the SmartControl software and the full user manual. Philips lists Top Victory Investments Ltd. as the warrantor. The sheet is dated 2022, version M10346B1Q2T.
Frequently Asked Questions
Which cables come with the 346B1C?
The power cable always ships with the monitor. The video and USB cables depend on your region, so check your box against the list above. If a cable you need is missing, buy one that matches the port you plan to use.
What video inputs does the monitor support?
It has HDMI, DisplayPort and USB-C inputs. The input list shows them as HDMI 2.0, DisplayPort and USB C. Press the Input / ▼ button to switch between them.
How do I make the keyboard and mouse follow the active computer?
Plug the keyboard and mouse into the monitor’s USB ports. Then set the USB source in the USB Setting menu, or press the USER button to open the KVM shortcut. Pick USB C if the computer is on USB-C. Pick USB up if it is linked through the USB UP port. With HDMI or DisplayPort video, a USB A-to-B cable to USB UP provides the USB link.
Can I show two computers on the screen at once?
Yes. Use PIP or PBP in the on-screen menu to show two sources at the same time. Any combination of HDMI, DisplayPort and USB-C works, and Swap exchanges the main and secondary sources.
Does the monitor have a fast-charging USB port?
The sheet shows one USB port labeled “Fast Charger,” meant for charging a phone or similar device. The sheet gives no charging wattage, so check the full user manual for it.
Can I connect the monitor to a wired network?
An RJ-45 port is on the rear panel, and the sheet shows it connected to a wall network jack.
How far can I adjust the stand?
The screen tilts from −5° to 30° and swivels −180° to +180°. Height adjusts by 180 mm.
Where can I find the full user manual and software?
Go to www.philips.com/support and search for your model. The sheet points to the FAQ, the SmartControl software and the User Manual there.