
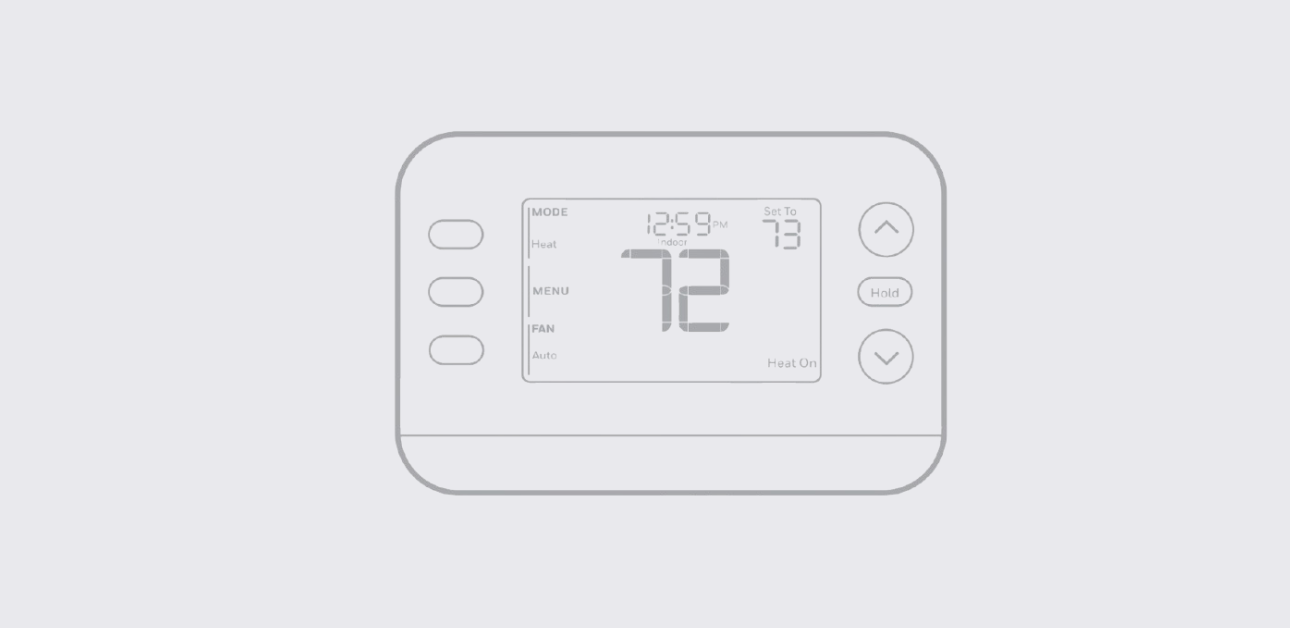
This Honeywell FocusPRO S200 Series thermostats installation manual provides detailed instructions for safe mounting, wiring configuration, system setup, and commissioning.
The thermostat is engineered for residential HVAC systems using standard 24-volt control circuits, supporting both conventional and heat pump equipment configurations.
Following correct installation procedures ensures accurate temperature sensing, reliable HVAC performance, and long-term system efficiency.
Pre-Installation Safety Instructions
Before installing the thermostat, follow essential electrical and equipment safety precautions.
Important Safety Guidelines
- Turn off power at the HVAC system breaker panel
- Confirm system voltage compatibility before wiring
- Prevent wires from touching each other to avoid short circuits
- Use proper insulation and grounding practices
- Follow all local electrical codes and installation standards
Adhering to these precautions helps protect both the installer and HVAC equipment.
Package Contents and Required Tools
Included Components
- FocusPRO S200 thermostat unit
- Universal wallplate mounting base
- Mounting screws and anchors
- Installation documentation
Recommended Tools
- Phillips screwdriver
- Drill with appropriate wall bits
- Level tool for accurate mounting
- Wire stripper
Proper preparation improves installation accuracy and reduces setup time.
Removing the Existing Thermostat
Before installing the new thermostat, safely remove the old control unit.
Removal Procedure
- Turn off HVAC system power.
- Remove the old thermostat cover carefully.
- Label each wire according to terminal designation.
- Disconnect wires and remove mounting plate.
- Inspect wall surface and prepare mounting area.
Correct wire labeling simplifies the new wiring process.
Wallplate Mounting Instructions
The thermostat uses a UWP (Universal Wall Plate) system, enabling flexible installation across multiple wall types.
Mounting Steps
- Position the wallplate on the wall at recommended height.
- Use a level to ensure accurate alignment.
- Mark drilling points for mounting screws.
- Drill pilot holes and insert wall anchors.
- Secure wallplate using mounting screws.
- Route wires through the designated opening.
Proper leveling ensures precise temperature sensing and professional installation appearance.
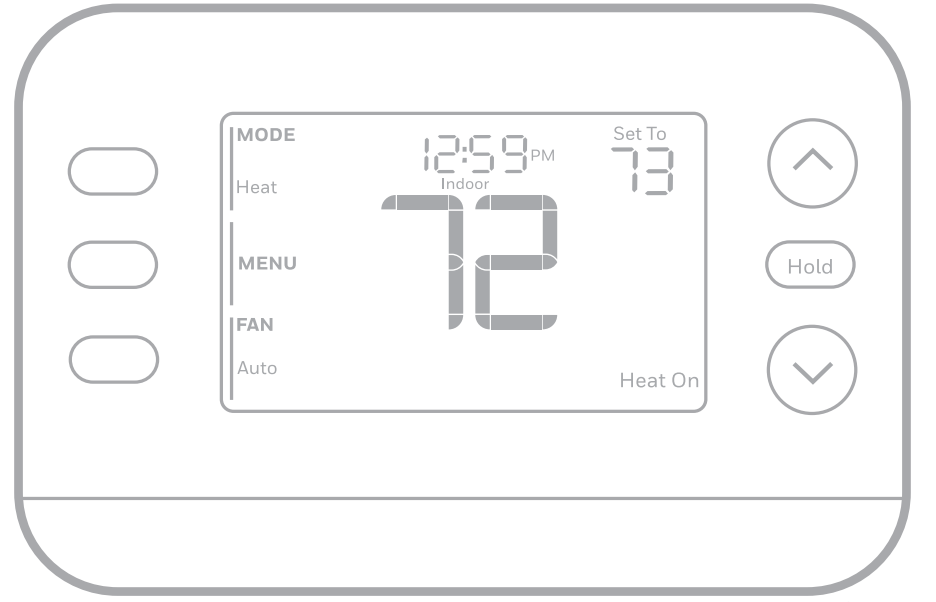
Honeywell FocusPRO S200 Thermostat User Guide
Thermostat Wiring Configuration
The FocusPRO S200 supports both conventional furnace systems and heat pump systems.
Terminal Designations
| Terminal | Function |
| R / Rc | Power supply input |
| C | Common wire (continuous power) |
| Y | Cooling system control |
| W | Heating system control |
| G | Fan relay |
| O/B | Heat pump reversing valve |
| Aux / E | Auxiliary or emergency heat |
Ensure secure wire insertion and terminal tightening for reliable electrical connection.
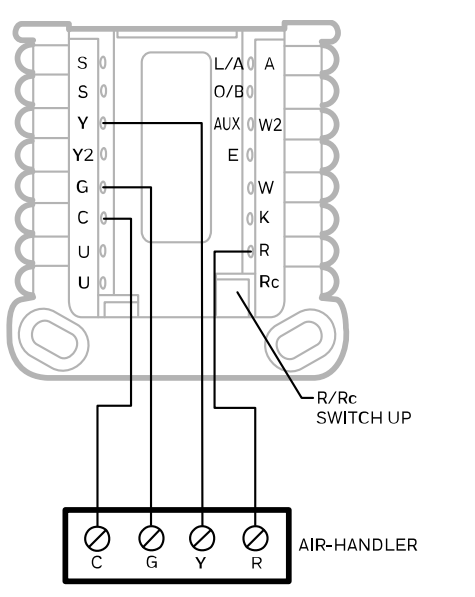
Wiring Setup for Different HVAC Systems
Conventional Heating and Cooling Systems
- Connect R to system power
- Connect Y for air conditioning control
- Connect W for furnace heating control
- Connect G for fan operation
Heat Pump Systems
- Connect O/B terminal for reversing valve
- Use Aux/E for supplemental heating
- Configure staging settings in installer setup menu
These configurations allow compatibility with single-stage and multi-stage HVAC equipment.
Installing Thermostat onto Wallplate
After wiring completion:
- Align thermostat body with mounted wallplate.
- Press gently until secure locking click is felt.
- Restore HVAC system power at breaker panel.
- Confirm display activation and startup screen.
Proper attachment ensures stable electrical contact and device functionality.
Honeywell T10 Pro Smart Thermostat Getting Started Guide
Installer Setup Menu Configuration
Once powered on, configure equipment parameters through installer settings.
Common Configuration Options
- System type selection (heat pump or conventional)
- Fan control logic
- Heating and cooling cycle rate
- Temperature differential settings
- Staging configuration
These settings allow performance optimization based on HVAC system design.
System Testing and Commissioning
The thermostat includes built-in test modes for verifying equipment operation.
Equipment Test Procedure
- Access installer test mode via settings menu.
- Activate heating system test.
- Activate cooling system test.
- Verify fan operation.
- Confirm auxiliary heat response if applicable.
Successful testing ensures correct wiring and operational readiness before handing system to the homeowner.
Wiring Diagrams and Reference Charts
The installation manual provides visual diagrams for:
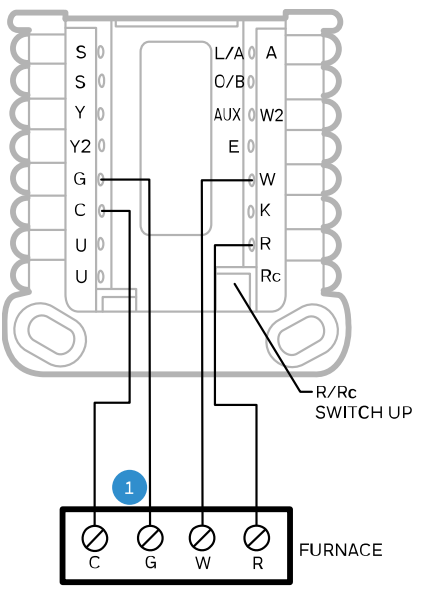
- Conventional HVAC wiring layouts
- Heat pump wiring configurations
- Multi-stage system connections
Installers should refer to diagrams matching their system type to prevent configuration errors.
Honeywell T10 Pro Smart Thermostat Installation Guide
Regulatory Compliance and Technical Support
For professional assistance or installation inquiries:
Honeywell Home Support Website:
https://www.honeywellhome.com
Customer Support Phone:
1-800-633-3991
Manufacturer Address:
Resideo Technologies Inc.
1985 Douglas Drive North
Golden Valley, Minnesota, USA
These support channels offer guidance on installation, configuration, and product warranty services.
Installation Best Practices
- Use a common wire connection for stable smart thermostat power
- Avoid mounting near vents, windows, or direct sunlight
- Verify system staging compatibility before configuration
- Test all HVAC modes before completing installation
- Provide homeowners with basic operating instructions
Following these practices ensures accurate climate control performance and long-term device reliability.