
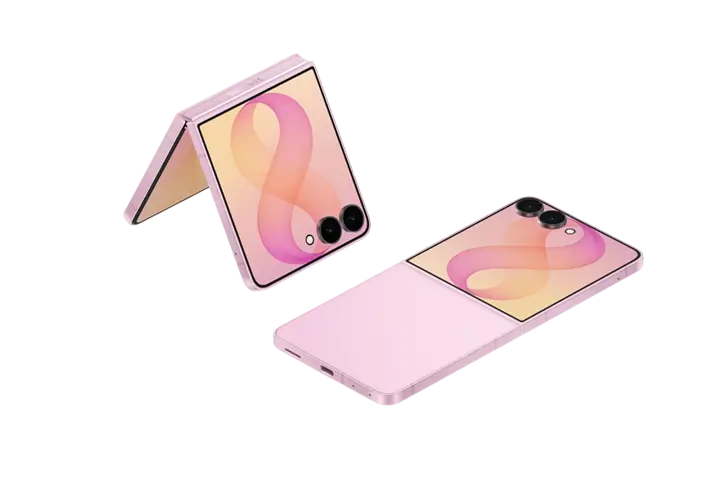
This page summarizes the Samsung user manual for the Galaxy Z Flip and the Galaxy Z Flip 5G. The manual cover lists three model codes: SM-F700F, SM-F700F/DS and SM-F707B. The manual does not state which code belongs to which product name, so this page does not pair them. Where the manual describes one product or one setup differently, the difference is labeled.
Menu paths and button names below use the manual’s labels. The manual says some content may differ depending on region, service provider, model or software version (p. 21, p. 107, p. 150).
Product Overview
The Galaxy Z Flip is a foldable phone with a Main screen that opens flat and a smaller Cover screen on the outside when the device is folded. It has a Side key with a built-in fingerprint sensor, a Volume key, a SIM card tray and a USB Type-C multipurpose jack that is also the earphone jack (pp. 6–9). The manual describes wired and wireless charging, nano-SIM and eSIM use, a Flex mode for using the device folded, and a standard set of Samsung and Google apps and settings.
| Item | What the manual states | Page |
|---|---|---|
| Covered model codes | SM-F700F, SM-F700F/DS, SM-F707B (cover) | 1 |
| Product names in diagrams | Galaxy Z Flip 5G and Galaxy Z Flip | 6–9 |
| Edition | English, 02/2023, Rev. 2.0 | 1 |
| Dust and water | “This device is not dust or waterproof.” An IP rating is not stated in the supplied PDF. | 11 |
| Screen crease | A crease at the center of the Main screen is a normal characteristic. | 11 |
| Battery compatibility | The batteries of LTE and 5G models are not compatible. | 151 |
| Battery removal | Not user-serviceable; contact an authorized service center. | 177 |
Device Layout and Hard Keys
Parts
Both product diagrams use the same part labels. Check the illustrations on pp. 6–9 for the exact positions on your device.
| View | Labeled parts |
|---|---|
| Unfolded | Microphone, Speaker, Front camera, Proximity/Light sensor, Volume key, SIM card tray, Side key (Fingerprint recognition sensor), Main screen, Earphone jack / Multipurpose jack (USB Type-C) |
| Folded | Flash, GPS antenna, Rear camera, Cover screen, NFC antenna / MST antenna / Wireless charging coil, Main antenna, Speaker, Microphone |
Source: manufacturer manual, p. 6–9.
Hard keys
| Key | Function |
|---|---|
| Side key | Device off: press and hold to turn it on. Unfolded: press to turn the screen on or lock it. Folded: press to turn the Cover screen on or off. Press and hold to start a conversation with Bixby. Press twice or press and hold to launch the app or feature you set. |
| Side key + Volume Down key | Press at the same time to capture a screenshot. Press and hold at the same time to turn off the device. |
To choose what the Side key launches, open Settings, tap Advanced features → Side key, and select an option. The soft buttons (Recents, Home, Back) appear at the bottom of the screen when it is on (p. 12).
Source: manufacturer manual, p. 12.
Handling and Care Precautions
Caution: Fold the device before putting it in a bag or storing it. Do not store it unfolded. Do not fold the device toward the back side. Do not unfold it by pushing the screen apart with a finger. Make sure no cards, coins or keys are between the screens when folding.
Source: manufacturer manual, p. 10–11.
- Do not press the screen or front camera lens with a hard or sharp object such as a pen or fingernail.
- The manual recommends not removing the screen protector film and not installing other films or stickers. Use a Samsung-approved screen protector; unapproved protectors may cause sensors to malfunction. Do not cover the proximity/light sensor area.
- The device is not dust or waterproof. Liquid or small particles such as water, coffee or sand may damage it.
- Do not expose the camera lens to a strong light source such as direct sunlight; a damaged image sensor is irreparable and causes dots or spots in pictures.
- Do not hold the device close to your ears when using the speakers.
- If the glass or acrylic body is broken, use the device only after repair at a Samsung Service Centre.
- Metallic stickers or covers on the antenna area, or covering the antenna area with your hands, can cause connectivity problems and battery drain. Covering the folded device with your hands may interfere with Bluetooth, Wi-Fi and other networks.
- Do not remove dust from the microphone, speaker or receiver with a sharp object.
Source: manufacturer manual, p. 10–11.
Warning: The device contains magnets. They may affect pacemakers, implantable cardioverter defibrillators and other medical devices. Keep a safe distance and consult your physician. The manual states to keep the device more than 15 cm (about 6 in) from medical devices and to stop using the device if you suspect interference. Cards such as credit cards, passbooks, access cards, boarding passes and parking passes may be damaged or disabled by the magnets.
Source: manufacturer manual, p. 10, 151.
Charging the Battery
Charge before first use or after long periods of non-use. Use only a Samsung-approved battery, charger and cable made for this device. Use only a USB Type-C cable; a Micro USB cable may damage the device.
Source: manufacturer manual, p. 13.
Wired charging
Connect the USB cable to the USB power adaptor, then plug the cable into the multipurpose jack. When charging is complete, disconnect the charger from the device. The charger has no power switch, so unplug it from the socket when not in use. Keep it close to the socket and easily accessible while charging (p. 13).
Wireless charging
The device has a built-in wireless charging coil. Use a wireless charger sold separately.
- Fold the device.
- Place the center of the back of the device on the center of the wireless charger.
- When charging is complete, disconnect the device from the charger.
- The estimated charging time appears on the notification panel. Actual time varies with charging conditions.
- For stable charging, separate any cover or accessory from the device.
- Do not place a credit card or RFID card (such as a transportation or key card) between the back of the device and its cover. Do not place metal objects or magnets between the device and the charger. The device may not charge properly or may overheat, and the device and cards may be damaged.
- Use Samsung-approved wireless chargers. The manual recommends a wireless charge pad rather than a charge stand.
- Using the charger in weak-signal areas may cause loss of network reception.
Source: manufacturer manual, p. 14–15.
Quick charging
Open Settings → Battery and device care → Battery → More battery settings and activate the feature you want.
- Fast charging: requires a charger that supports Adaptive fast charging.
- Fast wireless charging: requires a charger and components that support it. A charger fan may make noise; you can add a routine in Routines to turn the feature off at a set time to reduce fan noise and the indicator light.
- Charging is faster while the device or its screen is off.
Source: manufacturer manual, p. 15.
Wireless power sharing
Your device can charge another device, such as a smartphone, Galaxy Watch or Galaxy Buds, even while it is charging itself.
- Open the notification panel, swipe down, and tap Wireless power sharing. If it is not on the quick panel, tap and drag the button over to add it.
- Fold the device.
- Place the other device on the center of your device, backs facing.
- When finished, disconnect the other device.
- Do not use earphones while sharing power; it may affect nearby devices.
- Only devices that support wireless charging can be charged this way; some may not charge. See the Samsung website for supported devices.
- Do not move or use either device while charging. The power received may be less than the power shared.
- The device includes magnets and may slide if the devices are not positioned as shown in the manual’s image. Remove accessories and covers before sharing.
- To stop sharing at a set level, open Settings → Battery and device care → Battery → Wireless power sharing → Battery limit.
Source: manufacturer manual, p. 15–16.
Charging tips and battery saving
- A fully discharged battery cannot turn the device on right away. Charge for a few minutes first.
- Charging from a computer or other non-charger source may be slower because of lower current.
- If power is unstable while charging, the touchscreen may not work; unplug the charger.
- The device and charger may heat up while charging. This is normal. If the battery gets hotter than usual, the charger may stop charging.
- Do not charge while the multipurpose jack is wet; dry it thoroughly first.
- If the device does not charge properly, take the device and charger to a Samsung Service Centre.
Source: manufacturer manual, p. 17.
To reduce battery use, the manual suggests: optimize with device care, turn off the screen with the Side key, activate power saving mode, close unused apps, turn off Bluetooth when not in use, turn off auto-sync, shorten the backlight time and lower the brightness (p. 17).
SIM Card and eSIM
Use only a nano-SIM card. eSIM may not be available depending on region, service provider, model or software version. Using both a nano-SIM and an eSIM may slow data transfer in some areas (p. 18).
Install a SIM or USIM card
- Insert the ejection pin into the hole on the tray to loosen it.
- Pull the tray out gently.
- Place the card on the tray with the gold contacts facing down and press it gently into the tray.
- Insert the tray back into the slot.
Caution: Keep the ejection pin perpendicular to the hole or the device may be damaged. Make sure the tray is dry before inserting it, and insert it fully to keep liquid out.
Source: manufacturer manual, p. 18.
Activate an eSIM
Open Settings → Connections → SIM manager → Add eSIM and follow the on-screen instructions when a mobile plan is found. With a QR code from your provider, tap Add eSIM → Scan QR code from service provider and scan it (p. 19).
On dual SIM models, SIM manager offers: SIM cards, eSIMs, Preferred SIMs, Data switching and More SIM settings (p. 19).
Turning the Device On, Off and Restarting
| Action | How |
|---|---|
| Turn on | Press and hold the Side key for a few seconds. |
| Turn off | Press and hold the Side key and Volume Down key at the same time, or open the notification panel, swipe down, tap the power icon, then tap Power off. Tap Restart to restart. |
| Force restart | If the device is frozen and unresponsive, press and hold the Side key and Volume Down key at the same time for more than 7 seconds. |
Source: manufacturer manual, p. 19–20, 173.
To make pressing and holding the Side key open the power menu, open Settings → Advanced features → Side key and tap Power off menu under Press and hold (p. 20).
Initial setup: when you turn the device on for the first time or after a data reset, follow the on-screen instructions. Without a Wi-Fi connection, some features may not be set up during initial setup (p. 20).
Warning: Follow posted warnings and directions in areas where wireless devices are restricted, such as aircraft and hospitals.
Source: manufacturer manual, p. 19.
Cover Screen, Main Screen and Flex Mode
You can use the Main screen unfolded, or folded to a chosen angle. With the device fully folded, the Cover screen shows information such as the clock and notifications (p. 23).
| Task | How the manual describes it | Page |
|---|---|---|
| Wake the Cover screen | Press the Side key or double-tap the screen. | 24 |
| View notifications | Swipe right on the clock and tap the notification icon. Tap a notification and unfold the device to open the app. If the screen is locked, unlock it first. | 24 |
| Music controls | Swipe left on the clock and tap the icons. | 25 |
| Selfie with the rear camera | Press the Side key twice quickly, face the rear camera, then show your palm or press the Volume key. | 25 |
| Answer or reject a call | Tap the Cover screen and drag right to answer, left to reject. A call answered on the Cover screen goes to speakerphone. | 25 |
Caution: Do not use the flash close to your eyes. It may cause temporary loss of vision or damage to the eyes.
Source: manufacturer manual, p. 25.
Flex mode: when the device is folded within a certain range, you can set it upright without a tripod. The layout of some apps changes automatically; in Camera, the shooting options at the top move down for easier control. The device recognizes fully folded or unfolded status from the angle reached when unfolded, and layout changes work only in some apps (p. 36).
Basic Screen Use
Touchscreen
The manual covers tapping, tap and hold (about 2 seconds), dragging, double-tapping, swiping, and spreading and pinching (p. 26).
- Do not let the touchscreen touch other electrical devices; electrostatic discharge can cause malfunction.
- Do not tap it with anything sharp or press with excessive force.
- Avoid fixed graphics on part or all of the screen for long periods; afterimages (burn-in) or ghosting may result.
- The device may not recognize touch near the screen edges.
Source: manufacturer manual, p. 26.
Navigation bar
| Button | Function |
|---|---|
| Recents | Opens the list of recent apps. |
| Home | Returns to the Home screen. Tap and hold to launch the Google Assistant app. |
| Back | Returns to the previous screen. |
To hide the bar, open Settings → Display → Navigation bar and tap Swipe gestures under Navigation type (p. 27). If the Home button is missing in an app, drag up from the bottom of the screen (p. 177).
Home screen, Apps screen and Edge panel
- Swipe up on the Home screen to open the Apps screen; swipe up or down on it, or tap Home or Back, to return (p. 28).
- To add an Apps button, tap and hold an empty area, tap Settings, and activate Show Apps screen button on Home screen (p. 28).
- To edit the Home screen, tap and hold an empty area or pinch. You can add, move or delete panels, set wallpaper, change themes, add widgets and open Home screen settings (p. 29).
- To show all apps on the Home screen, go to Settings → Home screen layout → Home screen only → Apply (p. 29).
- Folders: drag an app over another app, then tap Folder name (p. 30). Deleting a folder deletes only the folder (p. 31).
- Finder: on the Apps screen tap Search and enter a keyword (p. 30).
- Edge panel: drag the handle toward the center. If the handle is not visible, open Settings → Display and activate Edge panels (p. 31).
Lock screen and screen lock
Folding the device or pressing the Side key turns off and locks the screen. To change the method, open Settings → Lock screen → Screen lock type. You can enable Auto factory reset under Secure lock settings to reset the device if the unlock code is entered wrongly several times and the attempt limit is reached (p. 32).
Caution: Auto factory reset erases data when the attempt limit is reached. Back up important data first.
Source: manufacturer manual, p. 32, 138.
Status bar icons and notification panel
Indicator icons on the status bar show items such as signal strength, roaming, network type (GPRS, EDGE, UMTS, HSDPA, HSPA+, LTE, 5G), Wi-Fi, Bluetooth, location use, calls, messages, alarms, mute or vibration mode, flight mode, errors and battery status (pp. 32–33). Drag the status bar down to open the notification panel and swipe up to close it. It holds quick setting buttons, Media output and Device control for nearby and SmartThings devices (pp. 34–35).
Text entry and apps
- Keyboard: change input language under Languages and types → Manage input languages; switch keyboards from the navigation bar (p. 37). To copy, tap and hold text, select it and tap Copy or Cut, then tap and hold the target and tap Paste (p. 38).
- Install apps from Galaxy Store or Play Store. Tap and hold an app to Uninstall or Disable it. To re-enable, open Settings → Apps → Disabled (p. 39).
- App permissions: Settings → Apps → select an app → Permissions. Without permissions, basic app features may not work (p. 40).
Phone, Contacts, Messages and Internet
| Task | Steps from the manual | Page |
|---|---|---|
| Make a call | Phone app → Keypad, enter the number, tap the call icon. | 41 |
| Call from Recents or Contacts | Swipe right on a contact or number. If it does not work, turn on Swipe to call or text under Other call settings. | 41 |
| Speed dial | Phone app → Keypad → menu → Speed dial numbers. Tap and hold the number on the keypad to call; for numbers 10 and up, tap the first digit(s), then tap and hold the last. | 41 |
| International call | Tap and hold 0 until + appears, then enter country code, area code and number. | 42 |
| Reject with a message | Drag the Send message bar up and pick a message. Edit messages under Quick decline messages. | 42 |
| Block numbers | Phone app → menu → Settings → Block numbers. Blocked calls are logged but do not notify. Turn on Block calls from unknown numbers to block hidden caller IDs. | 42 |
| Contacts | Create, import, sync with web accounts, search, delete, share, create groups and merge duplicates in the Contacts app. | 43–44 |
| Messages | Send text or voice messages, attach files, sort by category, delete, and change settings. Roaming may incur extra charges. | 45–46 |
| Internet | Enter an address or keyword and tap Go. Secret mode can lock history, bookmarks and saved pages with a password; screen capture is unavailable in secret mode. | 47 |
Multi Window
Multi window runs two apps in split screen view or several apps in pop-up view. Some apps do not support it (p. 48).
- Split screen: tap Recents, tap an app icon, tap Open in split screen view, then choose a second app (p. 48). Drag the circles between windows to resize; drag to an edge to maximize (p. 49).
- App pairs: in split screen view, tap the circles, tap the add icon and choose a location (p. 49).
- Pop-up view: tap Recents, tap an app icon, tap Open in pop-up view. Tap Home to minimize a pop-up window to an icon. Drag the window toolbar to move it (p. 50).
- Both views can also be launched from the Edge panel (pp. 49–50).
Samsung and Google Apps
| App or feature | What the manual covers | Page |
|---|---|---|
| Samsung account | Sign in, find ID or reset password. Signing out removes account data such as contacts and events from the device. | 22 |
| Bixby | Press and hold the Side key or say “Hi, Bixby”; text input is available. Available only in some languages and regions. | 51–52 |
| Bixby Vision | TRANSLATE, TEXT and DISCOVER from camera, Gallery or Internet app. | 53 |
| Samsung Kids | Turn on from the quick panel; Parental controls need your unlock code; the same code closes Samsung Kids. | 54 |
| Samsung Health, Notes, Members | Wellness tracking; notes by text, handwriting or drawing; support and diagnostics. | 55–57 |
| Galaxy Wearable | Connect and manage wearable devices. | 58 |
| Calendar, Reminder | Create events, sync accounts; Reminder with notifications and location reminders (GPS must be on). | 58–59 |
| My Files, Clock, Calculator | File management and Analyse storage; alarms and timers; calculator with history and unit conversion. | 60 |
| Game Launcher and Game Booster | Performance modes: Performance, Standard, Battery saver. Game performance may be limited to control temperature. | 61–62 |
| SmartThings, Smart View | Connect smart devices; mirror to a TV or monitor. Errors in connected devices are not covered by the Samsung warranty. | 63 |
| Music Share | Share a Bluetooth speaker, or listen together on Galaxy Buds (Galaxy Buds series only). | 64–65 |
| Link to Windows | Needs a Microsoft account; open Settings → Connected devices → Link to Windows. | 66 |
| Google apps | Chrome, Gmail, Maps, YT Music, Google TV, Drive, YouTube, Photos, Google, Meet, Messages. Some may be unavailable by provider or model. | 67 |
Camera
Notice: Do not take pictures or record video of others without permission, where legally prohibited, or where privacy may be violated (p. 68).
Launch Camera from its app, by pressing the Side key twice quickly, or by dragging left on the locked screen. Tap the preview to focus, then tap the camera button (pp. 68–69). Tap and hold the button to record video; swipe it to the screen edge and hold for burst shots (p. 70).
- If pictures are blurry, clean the lens. For close subjects at high resolution or zoom, shoot from a greater distance (p. 69).
- Sudden temperature changes can fog the camera. Let it dry naturally at room temperature before shooting (p. 69).
- Zoom: 0.5x is the Ultra wide camera, 1x is the wide-angle camera. Zoom works only with the rear camera (p. 70).
- Tap and hold to lock focus (AF) and exposure (AE) (p. 70).
Folded camera use
Fold the device and stand it up without a tripod; the camera layout changes. Tap the Cover screen icon on the preview to use the Cover screen as the viewfinder, in some shooting modes only. Selfies with the rear camera: select a picture mode, face the rear camera, show your palm or press the Volume key (pp. 72–73). Fold the device on a flat surface for steadier Night mode shots (p. 79).
Shooting modes
| Mode | How to start | Page |
|---|---|---|
| PHOTO / VIDEO | Shooting modes list; Shot suggestions, Super steady and auto framing are available | 73–75 |
| SINGLE TAKE | MORE → SINGLE TAKE | 76 |
| PORTRAIT / PORTRAIT VIDEO | PORTRAIT or MORE → PORTRAIT VIDEO; use in sufficient light | 77 |
| PRO / PRO VIDEO | MORE → PRO or PRO VIDEO; ISO, SPEED, EV, FOCUS, WB, MIC, ZOOM | 78 |
| NIGHT | MORE → NIGHT; hold steady until finished | 79 |
| FOOD | MORE → FOOD; blur outside the circular frame | 79 |
| PANORAMA | MORE → PANORAMA; move slowly in one direction | 80 |
| SUPER SLOW-MO | MORE → SUPER SLOW-MO; optional motion detection; use in sufficient light | 80–81 |
| SLOW MOTION | MORE → SLOW MOTION; up to two slow-motion sections | 81 |
| HYPERLAPSE | MORE → HYPERLAPSE; choose a frame rate | 82 |
Camera settings (tap the settings icon on the preview) include Scene optimiser, Shot suggestions, Scan QR codes, Watermark, High efficiency pictures, RAW copies, Video stabilisation, HEVC (Reduce file size), HDR10+ videos, Tracking auto-focus, Grid lines, Location tags and Reset settings (pp. 82–84).
- HEVC videos cannot be played on other devices or shared online. Some modes cannot record HEVC (p. 83).
- Tracking auto-focus and Video stabilisation cannot be used together (pp. 83–84).
- Pictures with location tags may reveal your location when uploaded. Turn off Location tags to avoid this (p. 84).
Source: manufacturer manual, p. 83–84.
Gallery, AR Zone and Voice Recorder
- Gallery: view, crop, group similar images, create albums and stories, sync with OneDrive, and delete. The recycle bin keeps deleted items for a set period if turned on in Gallery settings (pp. 85–88).
- AR Zone: AR Emoji Studio, AR Emoji Camera (SCENE, MASK, MIRROR, PLAY), AR Emoji Stickers and AR Doodle (pp. 89–94). Launch from the AR Zone app or Camera → MORE → AR ZONE (p. 89).
- Voice Recorder: Standard, Interview and Speech-to-text modes. Speech-to-text needs the voice memo language to match your spoken language (p. 95). In Interview recordings you can mute sound sources by direction on playback (p. 96).
Payments, Sharing, Screenshots and Data Transfer
| Feature | Key points from the manual | Page |
|---|---|---|
| Samsung Wallet | Payments, identity verification, tickets and a vehicle digital key (if the vehicle supports it; the key is saved only to the phone and must be re-registered on a replacement phone). | 97–98 |
| Samsung Pay | Sign in, register a fingerprint and PIN, register cards. To pay, scan your fingerprint or enter the PIN and touch the lower back of the device to the card reader. May be unavailable by provider or model. | 99–100 |
| Quick Share | Share to nearby devices; choose No one, Contacts only or Anyone nearby. Share large files by Web link. Videos cannot be shared to TVs or SmartThings devices this way; use Smart View. | 101–102 |
| Screenshot | Press Side key + Volume Down key at the same time, or swipe the edge of your hand across the screen if Palm swipe to capture is on. | 103 |
| Screen recorder | Quick panel → Screen recorder → pick sound setting → Start recording. | 104 |
| Smart Switch | Settings → Accounts and backup → Bring data from old device. Transfer by USB Type-C connector, wirelessly via Wi-Fi Direct, or from a computer backup. | 105–106 |
Caution: Do not disconnect the USB cable or USB connector while transferring files with Smart Switch. Data loss or device damage may result. Transferring uses more battery; charge first.
Source: manufacturer manual, p. 105.
Settings Reference
The manual describes these Settings sections. Names are as shown in the manual.
| Section | Covered topics | Page |
|---|---|---|
| Connections | Wi-Fi (network quality info, password sharing, Wi-Fi Direct), Bluetooth (pairing, sending files), NFC and contactless payments, Flight mode, Data usage and Data saver, Mobile data only apps, SIM manager, Mobile Hotspot and Tethering, Printing, VPN, Private DNS, Ethernet | 108–115 |
| Connected devices | Quick Share, Auto switch Buds, Call & text on other devices, Continue apps on other devices, Link to Windows, Smart View, SmartThings, Android Auto | 116 |
| Modes and Routines | Run modes automatically or manually; build routines with conditions | 117–118 |
| Sounds and vibration | Sound, vibrate or mute; ringtone; volume; vibration intensity; Dolby Atmos; Equaliser; UHQ upscaler; Adapt sound; Separate app sound | 118–119 |
| Notifications and Display | App notifications, Do not disturb; Dark mode, Brightness, Eye comfort shield, Screen mode (Vivid or Natural), Screen timeout, Easy mode, Touch sensitivity, Screen saver | 120–122 |
| Lock screen | Screen lock type, Smart Lock (after four hours unused or on power-on, the pattern, PIN or password is required), Always On Display | 123–124 |
| Security and privacy | Face recognition, Fingerprints, Samsung Pass, Secure Folder, Secure Wi-Fi, Find My Mobile, App security, Install unknown apps | 125–135 |
| Location, Safety and emergency | App permissions; Emergency SOS (press the Side key five times); Emergency sharing; wireless emergency alerts | 136–137 |
| Accounts and backup | Manage accounts; Samsung Cloud backup and restore; Google Drive; Smart Switch | 137–138 |
| Advanced features | Side key, Motions and gestures, One-handed mode, Screenshots and screen recorder, Video call effects, Dual Messenger | 139–142 |
| Digital Wellbeing and parental controls | Screen time goal, App timers, Driving monitor, Volume monitor, Parental controls | 143 |
| Battery and device care | Optimise now, Battery, Storage, Memory, Device protection, Auto optimisation, Software update, Diagnostics, Maintenance mode | 143–145 |
| General management, Software update, About phone | Language, Date and time, Keyboard, Reset; update options; status, legal, software and battery information | 146–148 |
Biometrics and Secure Folder
- Face recognition is less secure than Pattern, PIN or Password, and the device could be unlocked by someone or something that looks like you (p. 126).
- After turning the device on, face or fingerprint cannot unlock it the first time; use the pattern, PIN or password you set. Do not forget it (pp. 126, 128).
- If you change the screen lock to Swipe or None, all biometric data is deleted (pp. 126, 128).
- The fingerprint sensor is built into the Side key. Protect it from scratches by metal objects, and avoid films or stickers over it (p. 128).
- If you forget the pattern, PIN or password, you cannot use the device without resetting it. Samsung is not responsible for data loss from forgotten unlock codes (p. 128).
- To register a fingerprint: Settings → Security and privacy → Biometrics → Fingerprints, set a screen lock, then place your finger on the Side key and repeat until done (p. 129).
Source: manufacturer manual, p. 126–129.
Caution: Secure Folder is locked automatically and becomes inaccessible if you customize the operating system or modify software. Back up data before saving it in Secure Folder. Data in Secure Folder cannot be transferred by unapproved methods such as USB or Wi-Fi Direct. Notes saved in Samsung Notes are not backed up when Secure Folder is uninstalled.
Source: manufacturer manual, p. 132, 135.
Accessibility
Open Settings → Accessibility. The manual describes the following features (pp. 157–171).
| Group | Features |
|---|---|
| Spoken assistance | TalkBack (voice feedback, reading menu, image labels), keyboard entry, Bixby Vision for accessibility |
| Visibility enhancements | High contrast theme, font and keyboard; button shapes; Colour adjustment and Colour filter; Remove animations; Reduce transparency and blur; Magnification and Magnifier; font and screen zoom |
| Hearing enhancements | Live Transcribe, Live Caption, Sound detectors (baby crying, doorbell), Hearing aid support, Amplify ambient sound, Adapt sound, Mute all sounds, Mono audio, sound balance |
| Interaction and dexterity | Universal switch, Assistant menu, Interaction control, Touch and hold delay, Tap duration, Auto action after pointer stops |
| Advanced settings | Accessibility button, shortcuts using the Side and Volume keys |
To turn off TalkBack, tap its switch and tap the screen twice quickly (p. 157). To end Universal switch or Interaction control, press the Side key and Volume Up key at the same time (pp. 167, 169).
Source: manufacturer manual, p. 157, 167, 169.
Safety and Usage Notices
Device overheating
The device and charger may become hot while charging, especially during wireless or fast charging. The manual states this does not affect lifespan or performance. If the battery gets too hot, charging may slow or stop.
Source: manufacturer manual, p. 153.
If the device heats up while charging:
- Disconnect the charger, close running apps, let the device cool, then charge again.
- If the lower part overheats, a damaged USB cable may be the cause. Replace it with a new Samsung-approved cable.
- Do not place metal objects, magnets or magnetic stripe cards between the device and a wireless charger.
If the device heats up during use, close apps and stop using it for a while. The manual lists situations that can cause heat, including initial setup or data restore, large downloads, long gaming or video recording, Multi window, mobile hotspot, weak signal areas, roaming, a damaged USB cable and a damaged or contaminated multipurpose jack (pp. 153–154). Keep software updated, restart the device, turn off Wi-Fi, GPS and Bluetooth when unused, close background apps, lower brightness and contact a Samsung Service Centre if overheating continues (p. 154).
Warning: At a certain temperature a warning message appears; brightness and performance are limited, charging stops, running apps close and features are limited except emergency calls. If a second message appears, the device turns off. Do not use it until it cools. If the second message appears during an emergency call, the call is not disconnected by the forced shutdown.
Source: manufacturer manual, p. 155.
Warning: Do not store or use the device in very hot or cold places, in direct sunlight for long periods, in a hot car, on an electric heating mat, or near heaters, microwaves, hot cooking equipment or high-pressure containers. Do not use a cable with damaged covering, or a damaged or malfunctioning charger or battery.
Source: manufacturer manual, p. 155.
Other notices
- Modifying the operating system or installing software from unofficial sources may cause malfunction and data loss, violates your Samsung license agreement and voids your warranty (p. 150).
- A factory-attached screen protector is not covered by the warranty if damaged (p. 150).
- Use only Samsung-approved accessories. Unapproved accessories may cause problems not covered by the warranty (p. 152).
- USB Type-C earphones that support digital output can be used; other earphones may be incompatible (p. 152).
- Use of the Bluetooth feature for illegal purposes is prohibited; Samsung is not responsible for data lost, intercepted or misused over Bluetooth (p. 111).
- Instructional icons in the manual: Warning (injury), Caution (damage to the device or equipment), Notice (notes and tips) (p. 152).
Troubleshooting
The manual says to try these steps before contacting a Samsung Service Centre. Some may not apply to your device (p. 172).
| Problem | What the manual suggests | Page |
|---|---|---|
| Device asks for a code | Password (device lock), PIN (SIM), PUK (blocked SIM; supplied by your provider), PIN2 (supplied with SIM; ask your provider). | 172 |
| Network or service errors | Move to another area. Some options need a subscription; ask your provider. | 172 |
| Does not turn on | A fully discharged battery will not turn on. Fully charge it first. | 172 |
| Touchscreen slow or wrong | Screen protectors or accessories, gloves, dirty hands, sharp objects, humidity or water can cause it. Restart, update software, or visit a service center if scratched or damaged. | 173 |
| Freezes or fatal error | Close apps or restart. Force restart: hold Side key + Volume Down more than 7 seconds. If unresolved, back up and use Settings → General management → Reset → Factory data reset → Reset → Delete all. | 173 |
| Calls not connected | Check the cellular network and call barring for the dialed and incoming numbers. | 173 |
| Others cannot hear you | Do not cover the microphone; keep it near your mouth; check earphone connection. | 174 |
| Echo during calls | Adjust volume with the Volume key or move. | 174 |
| Network or Internet drops, poor audio | Do not block the internal antenna; weak signal areas and moving can cause loss. | 174 |
| Battery does not charge | Check the charger is connected properly. Visit a Samsung Service Centre to replace the battery. | 174 |
| Battery drains faster | Extreme temperatures reduce charge; GPS, games and Internet increase use; the battery is consumable. | 174 |
| Camera error on launch | Charge the battery, free storage, restart. | 175 |
| Pictures worse than preview | Quality varies with surroundings; dark, night or indoor shots may be noisy or out of focus. | 175 |
| Media files will not open | Free storage; check DRM and supported formats (such as DivX or AC3, which need a supporting app). | 175 |
| Bluetooth problems | Keep within 10 m, toggle Bluetooth, or Settings → General management → Reset → Reset network settings → Reset settings → Reset (registered information may be lost). | 176 |
| Brightness bar missing | Open the notification panel, drag it down, tap the menu icon → Quick panel layout → Brightness control → Show always. | 176 |
| Computer will not connect | Use a compatible USB cable and an updated driver. | 176 |
| Cannot find location | GPS may be blocked indoors; use Wi-Fi or mobile network. | 176 |
| Gap around the case | A necessary manufacturing feature; minor rocking or vibration is possible, and the gap may widen slightly over time. | 177 |
| Not enough storage | Delete cache with device care or remove unused apps and files. | 177 |
Caution: Factory data reset deletes all data. Back up important data first. Samsung is not responsible for loss of data stored in the device.
Source: manufacturer manual, p. 173, 177.
Removing the Battery
Warning: Do not attempt to remove the battery yourself. Contact an authorized service center. Improper removal may damage the battery and device, cause personal injury or make the device unsafe. The manual points to www.samsung.com/global/ecodesign_energy for battery removal instructions.
Source: manufacturer manual, p. 177.
Frequently Asked Questions
How do I force restart the Galaxy Z Flip?
If the device is frozen and unresponsive, press and hold the Side key and the Volume Down key at the same time for more than 7 seconds. Source: manufacturer manual, p. 20 and p. 173.
Can the Galaxy Z Flip charge wirelessly?
Yes. It has a built-in wireless charging coil. Fold the device and place the center of its back on the center of a wireless charger (sold separately). Use a Samsung-approved charger, and keep cards, metal objects and magnets out from between the device and charger. Source: manufacturer manual, pp. 14–15.
Is the Galaxy Z Flip waterproof?
The manual states the device is not dust or waterproof. An IP rating is not stated in the supplied PDF. Source: manufacturer manual, p. 11.
Is the crease in the Main screen normal?
Yes. The manual says a crease at the center of the Main screen is a normal characteristic of the device. Source: manufacturer manual, p. 11.
How do I take a screenshot?
Press the Side key and the Volume Down key at the same time. You can also swipe the edge of your hand left or right across the screen if Palm swipe to capture is on under Advanced features → Motions and gestures. Source: manufacturer manual, pp. 12 and 103.
How do I take a selfie with the rear camera while the device is folded?
Press the Side key twice quickly to launch Camera, face the rear camera, then show your palm to the camera or press the Volume key. Source: manufacturer manual, p. 25.
Where does the fingerprint sensor sit?
The Side key has the built-in fingerprint recognition sensor. Register fingerprints under Settings → Security and privacy → Biometrics → Fingerprints. Source: manufacturer manual, pp. 6 and 128–129.
Can I remove the battery myself?
No. The manual says not to attempt it and to contact an authorized service center. Source: manufacturer manual, p. 177.