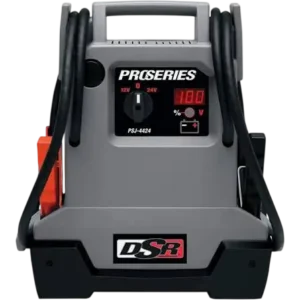
| Field | Details |
| Document Title | 12 Volt Jump Starter with Power Converter |
| Document Type | Owner’s Manual |
| Brand Name | DSR ProSeries (Powered by Schumacher) |
| Product Name | 12 Volt Jump Starter with Power Converter |
| Model Number(s) | DSR116 |
| PDF File Size | 442 KB |
| Number of Pages | 40 |
| Languages | English, Spanish, French |
Schumacher DSR ProSeries 12 Volt Jump Starter
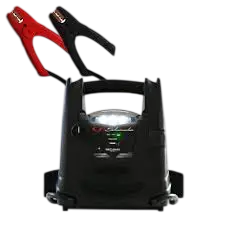
The Schumacher DSR ProSeries DSR116 is a 12V portable jump starter with an integrated power converter, designed to assist with starting compatible vehicle engines and supplying portable power to electrical devices. It uses a sealed, maintenance-free 22Ah AGM lead-acid battery and delivers 2250 peak amps, 525 cranking amps, and 350 cold cranking amps.
The DSR116 also includes a 400-watt continuous power converter with two 110V AC outlets, a 12V DC accessory outlet, a 5V USB port, and a multi-function digital display. Its supplied battery charger supports automatic charging, battery maintenance, and desulfation functions.
These operating instructions cover battery charging, vehicle jump-starting, power converter operation, safety precautions, troubleshooting, maintenance, replacement parts, and warranty service.
Product Features
The Schumacher DSR116 combines a vehicle jump starter with portable AC, DC, and USB power outputs.
Its main features include:
- 2250 peak amp jump-starting capability.
- 525 cranking amps and 350 cold cranking amps.
- Internal 12V, 22Ah AGM lead-acid battery.
- Maintenance-free, sealed battery design.
- Heavy-duty battery clamps and 4 AWG cables.
- Rotary ON/OFF jump starter switch.
- Multi-function digital battery display.
- Battery charge percentage and voltage monitoring.
- Reverse-polarity audible warning.
- 12V DC accessory outlet with 15A maximum continuous output.
- Built-in 400W continuous power converter.
- 800W peak surge capability.
- Two 110V AC outlets.
- Modified sine wave AC output.
- USB charging port with 5V DC, 2.1A output.
- Separate converter and USB selector switch.
- Automatic converter shutdown protection.
- Supplied automatic battery charger.
- Charger LED indicators for power, charging status, and battery problems.
- Automatic Maintain Mode and desulfation capability.
- Optional charging from a vehicle’s 12V accessory outlet.
Technical Specifications
Jump Starter Specifications
| Specification | Details |
| Brand | DSR ProSeries, Powered by Schumacher |
| Model | DSR116 |
| Product Type | 12V Jump Starter with Power Converter |
| Internal Battery Type | Sealed, Maintenance-Free AGM Lead-Acid |
| Battery Voltage | 12V DC |
| Battery Capacity | 22Ah |
| Peak Amps | 2250A |
| Cranking Amps | 525A |
| Cold Cranking Amps | 350A |
| Maximum Continuous DC Output | 15A |
| Battery Cable Gauge | 4 AWG |
| Battery Cable Length | 60 Inches (152.4cm) |
| Dimensions (H × W × D) | 16.3 × 12.9 × 7.9 Inches |
| Metric Dimensions | 41.4 × 32.7 × 20cm |
| Weight | 25.5 lbs. (11.56kg) |
AC Power Converter Specifications
| Specification | Details |
| Converter Type | Modified Sine Wave |
| Maximum Continuous Power | 400W |
| Peak Surge Power | 800W |
| No-Load Current Draw | Less Than 0.3A |
| Input Voltage Range | 10.5–15.5V DC |
| AC Output Voltage | 110V AC |
| AC Outlets | Two NEMA 5-15 USA Outlets |
Battery Charger Specifications
| Specification | Details |
| Charger | DSR2 |
| Input Voltage | 120V AC |
| Input Frequency | 60Hz |
| Input Current | 0.5A |
| Output Voltage | 12V DC |
| Output Current Rating | 2A |
| Automatic Maintain Mode | Yes |
| Desulfation Mode | Yes |
USB and DC Power Specifications
| Specification | Details |
| USB Output | 5V DC |
| USB Maximum Current | 2.1A |
| DC Accessory Output | 12V DC |
| Maximum Continuous DC Load | 15A |
| DC Circuit Protection | Automatic-Reset Circuit Breaker |
Package Contents and Charging Accessories
The DSR116 comes with the jump starter and its matching battery charger. The internal AGM battery is installed in the jump starter.
The included charger must be used when charging the internal battery from an AC electrical outlet.
An optional male-to-male charging cable, part number 94500109, is available separately for charging the jump starter while driving.
Parts and Components
The DSR116 has front-mounted jump-starting controls and rear-mounted AC and USB power connections.
Front and Rear Component Guide
| No. | Component | Function |
| 1 | 12 Volt DC Power Outlet | Supplies power to compatible 12V DC accessories |
| 2 | Jump Starter ON/OFF Switch | Controls the jump-starting output |
| 3 | Multi-Function Digital Display | Displays battery charge percentage or voltage |
| 4 | Display Button | Activates the digital battery status display |
| 5 | Heavy-Duty Battery Clamps | Connect the jump starter to the vehicle battery and chassis |
| 6 | Two AC Outlets | Provide 110V AC power to compatible devices |
| 7 | Converter Status LEDs | Show converter operation and protection status |
| 8 | Converter/USB ON/OFF Switch | Selects USB operation, AC conversion, or OFF |
| 9 | USB Port | Supplies 5V DC power to USB-compatible devices |
Battery Charger Components
The supplied charger includes three LED indicators.
| No. | Component | Function |
| 1 | Charging Status LED | Shows charging activity and certain charging problems |
| 2 | Bad Battery LED | Indicates battery or charging faults |
| 3 | Power LED | Indicates AC power is connected to the charger |
Digital Display and Control Instructions
The multi-function digital display provides information about the jump starter’s internal battery and a connected vehicle battery.
Checking the Internal Battery Charge Percentage
- Make sure the jump starter rotary switch is in the OFF position.
- Press the Display button on the front of the jump starter.
- The digital display shows the percentage of charge remaining in the internal battery.
- A reading of 100% indicates a fully charged battery.
- Recharge the battery when the display indicates less than 100%.
For the most accurate charge percentage reading, the jump starter should be disconnected from all charging sources and connected devices for several hours before checking.
Checking the Internal Battery Voltage
- Make sure the battery clamps are attached to their plastic storage holders.
- Check that the clamps are not touching each other.
- Turn the rotary jump starter switch to the 12V position.
- The digital display shows the voltage of the internal battery.
Checking a Vehicle Battery’s Voltage
- Place the jump starter rotary switch in the OFF position.
- Connect the battery clamps to the vehicle battery following the correct grounding procedure.
- Observe the digital display.
- The display shows the connected vehicle battery’s voltage.
Charger LED Indicators
The supplied DSR2 battery charger uses colored LED indicators to identify charging activity and battery problems.
| Indicator | Color or Behavior | Meaning |
| POWER | Green, Steady | Charger is connected to AC power |
| CHARGING STATUS | Green, Slowly Pulsing | Internal battery is charging or the charger is maintaining a full charge |
| CHARGING STATUS | Yellow/Orange, Rapidly Flashing | Charger has detected a battery problem |
| BAD BATTERY | Red, Illuminated | Charger has detected a battery or charging problem |
Green Power LED
The green POWER indicator illuminates when the charger receives AC electrical power.
Slowly Pulsing Green Charging Status LED
A slowly pulsing green CHARGING STATUS LED indicates that the charger is charging the internal battery or operating in Maintain Mode after charging is complete.
The digital display can be used to determine whether the battery has reached 100%.
Rapidly Flashing Yellow/Orange LED
A rapidly flashing yellow/orange CHARGING STATUS LED indicates that the charger has detected a battery problem.
The condition may occur during an unsuccessful desulfation process or another charging fault.
Red Bad Battery LED
The red BAD BATTERY indicator shows that the charger has detected a charging or battery problem.
Depending on the condition, the battery may be sulfated, unable to accept a charge, overheated, or defective.
The appropriate corrective action depends on the charging condition.
Important Safety Instructions
WARNING: Lead-acid batteries produce explosive gases during normal operation. Working near a battery can cause serious injury if sparks, flames, or incorrect electrical connections are present.
General Electrical Safety
- Read all instructions before using the jump starter.
- Keep the jump starter away from children.
- Do not insert fingers or hands into electrical outlets.
- Do not expose the unit to rain or snow.
- Use only attachments recommended by the manufacturer.
- Disconnect power cords by pulling the plug rather than the cord.
- Disconnect the charger before cleaning or maintenance.
- Do not operate the jump starter with damaged cables or clamps.
- Do not operate the unit if it has been dropped or otherwise damaged.
- Do not disassemble the jump starter.
- Have repairs performed by qualified service personnel.
Battery Explosion Precautions
To reduce the risk of battery explosion:
- Never smoke near the vehicle battery or engine.
- Keep sparks and open flames away from the battery.
- Never allow the battery clamps to touch each other.
- Never connect both clamps to the same metal object.
- Keep the charging and operating area well ventilated.
- Follow the safety instructions from the vehicle and battery manufacturers.
Garage Operating Safety
The jump starter contains components that may produce sparks or electrical arcs.
When used in a garage, position the unit at least 18 inches (46cm) above floor level.
Personal Safety
When working near lead-acid batteries:
- Remove rings, watches, bracelets, necklaces, and other metal jewelry.
- Wear safety goggles, a face shield, and protective clothing.
- Avoid dropping metal tools onto the battery.
- Keep another person nearby when possible.
- Keep soap and fresh water available.
- Avoid touching the eyes, nose, or mouth while working near a battery.
Battery Acid Safety
Battery acid contains corrosive sulfuric acid.
If battery acid contacts skin or clothing, wash the affected area immediately with soap and water.
If battery acid enters an eye, flush the eye immediately with cold running water for at least 10 minutes and obtain medical assistance.
If battery acid is swallowed, do not induce vomiting and seek immediate medical attention.
Frozen Battery Warning
Never charge a frozen battery.
Do not allow the DSR116 internal battery to freeze.
Do not attempt to jump-start a frozen vehicle battery.
Vehicle Battery Preparation
Before connecting the jump starter, clean the vehicle battery terminals if necessary.
When removing corrosion from battery terminals, prevent airborne particles from contacting the eyes, nose, or mouth. Baking soda and water may be used to neutralize battery acid during terminal cleaning.
For vehicle batteries with removable cell caps, follow the vehicle battery manufacturer’s electrolyte-level instructions. Do not overfill. For sealed or valve-regulated batteries, follow the manufacturer’s specific instructions.
Power Converter Safety Restriction
The DSR116 power converter must not be used with life-support devices or systems.
A converter failure could affect the safety or operation of such equipment.
Before First Use
IMPORTANT: Charge the DSR116 internal battery immediately after purchase, after every use, and every 30 days.
Keeping the internal battery fully charged helps prevent permanent damage caused by prolonged discharge.
Initial Preparation
- Check the jump starter for visible damage.
- Inspect the battery cables and clamps.
- Make sure the clamps are secured in their storage holders.
- Place the jump starter on a dry, nonflammable surface.
- Use the included charger to charge the internal battery.
- Allow charging to continue until the digital display shows 100%.
- Disconnect the charger before jump-starting a vehicle.
How to Charge the Schumacher DSR116 Battery
The DSR116 internal battery can be charged using the supplied AC battery charger or an optional vehicle charging cable.
Charging Requirements
Only the charger supplied with the DSR116 should be used for AC charging.
Using a different charger may cause personal injury or property damage.
The supplied charger is intended for use with a nominal 120V AC electrical circuit.
The electrical outlet must be properly installed and grounded.
Do not modify the charger’s plug or power cord. If the plug does not fit the outlet, a qualified electrician must install a suitable outlet.
Extension Cord Requirements
An extension cord should be used only when necessary.
The extension cord must have correctly matched plug connections, proper wiring, and an adequate conductor size.
| Extension Cord Length | Required Wire Size |
| 25 Feet | 18 AWG |
| 50 Feet | 18 AWG |
| 100 Feet | 18 AWG |
| 150 Feet | 16 AWG |
An unsuitable extension cord can increase the risk of electric shock or fire.
Charging With the Included DSR2 Charger
Charging Instructions
- Position the charger and jump starter on a dry, nonflammable surface.
- Connect the charger to the charging port on the front of the jump starter.
- Confirm that the AC outlet voltage matches the charger’s input voltage.
- Connect the charger to the AC wall outlet.
- Check that the green POWER LED illuminates.
- Confirm that the green CHARGING STATUS LED is slowly pulsing.
- Monitor the charging percentage on the jump starter’s digital display.
- Continue charging until the display shows 100%.
- After charging, disconnect the charger from the AC wall outlet first.
- Disconnect the charger from the jump starter.
When the display reaches 100%, the internal battery is fully charged and the jump starter is ready to use.
DSR116 Battery Charging Time
The DSR116 charging procedure describes full charging as taking up to 24 hours, while the general battery charging instructions allow up to 48 hours.
Charging should be monitored using the percentage shown on the digital display. A reading of 100% indicates that the internal battery is fully charged.
Automatic Maintain Mode
When the internal battery reaches full charge, the supplied charger automatically enters Maintain Mode.
In this mode, the charger supplies a small amount of current when needed to maintain the battery’s full charge.
The green CHARGING STATUS LED continues pulsing during maintenance.
DSR116 Battery Charger Modes
The DSR2 charger supports automatic charging and several battery-management functions.
Automatic Charging Mode
The charger automatically changes to Maintain Mode after the internal battery reaches full charge.
Maintain Mode
Maintain Mode keeps the internal battery fully charged by supplying a small current when needed.
If the charger must continuously supply its maximum maintenance current for 12 hours, the charging process enters Aborted Charge mode.
This condition may indicate a defective battery. The jump starter should be checked.
Desulfation Mode
The charger may perform a desulfation process when a sulfated battery condition is detected.
Desulfation may take approximately 8–10 hours.
If the process fails:
- Charging stops.
- The red BAD BATTERY LED illuminates.
- The yellow/orange CHARGING STATUS LED flashes rapidly.
The battery should be checked and replaced if necessary.
Aborted Charge Mode
If charging cannot be completed normally, the charger stops supplying output power.
The red BAD BATTERY LED illuminates.
Do not continue attempting to charge a battery after charging has aborted. Have the battery checked and replace it if necessary.
Charging the DSR116 While Driving
The internal battery can also be charged while driving using an optional male-to-male charging cable.
Vehicle Charging Requirements
| Item | Details |
| Charging Method | Vehicle 12V Accessory Outlet |
| Required Cable | Male-to-Male Charging Cable |
| Cable Part Number | 94500109 |
| Cable Availability | Sold Separately |
| Maximum Charging Time | 30 Minutes |
| Automatic Maintain Mode | Bypassed |
Vehicle Charging Instructions
- Make sure the vehicle engine is running.
- Connect one end of the accessory cable to the jump starter’s 12V DC outlet.
- Connect the other end to the vehicle’s 12V accessory outlet or cigarette lighter socket.
- Monitor the internal battery’s charge percentage using the Display button.
- Disconnect the cable immediately when the battery becomes fully charged.
- Disconnect the cable from the jump starter first.
- Remove the other end from the vehicle’s accessory outlet.
WARNING: Never charge the DSR116 through the vehicle accessory outlet for more than 30 minutes. Do not leave the battery unattended during this charging method.
Vehicle charging bypasses automatic Maintain Mode and may overcharge the internal battery.
Overcharging can cause an explosion, property damage, or personal injury.
Completely disconnect the charging cable whenever the vehicle engine is not running.
Connecting the Jump Starter to a Vehicle Battery
The DSR116 must be connected according to the vehicle’s electrical grounding system.
Identifying Battery Terminals
Vehicle battery terminals are marked with polarity symbols.
| Battery Terminal | Markings |
| Positive | POS, P, + |
| Negative | NEG, N, – |
The positive battery terminal usually has a larger diameter than the negative terminal.
Most vehicles use a negative-ground electrical system.
Connection Safety
Before connecting the jump starter:
- Turn the vehicle ignition OFF.
- Make sure the jump starter rotary switch is OFF.
- Identify the vehicle battery’s polarity.
- Determine whether the vehicle has negative or positive chassis grounding.
- Position the cables away from hot engine components and moving parts.
- Keep the clamps away from fan blades, belts, pulleys, and fuel lines.
If the hood must be closed during jump-starting, make sure it does not touch the metal clamps or damage the cable insulation.
Connecting the DSR116 to a Negative-Grounded Vehicle
For vehicles with negative-ground electrical systems:
- Confirm that the jump starter rotary switch is OFF.
- Connect the positive red clamp to the vehicle battery’s positive terminal.
- Connect the negative black clamp to a heavy-gauge metal section of the chassis or engine block away from the battery.
- Make sure the connections are tight.
Do not connect the chassis clamp to the carburetor, fuel lines, or thin sheet-metal body parts.
Connecting the DSR116 to a Positive-Grounded Vehicle
For vehicles with positive-ground electrical systems:
- Confirm that the jump starter rotary switch is OFF.
- Connect the negative black clamp to the vehicle battery’s negative terminal.
- Connect the positive red clamp to a heavy-gauge metal section of the chassis or engine block away from the battery.
- Make sure the clamps are securely attached.
Do not connect the chassis clamp to fuel lines, the carburetor, or thin body panels.
If the grounding system is uncertain, check the vehicle owner’s manual before connecting the jump starter.
How to Jump-Start a Vehicle Using the Schumacher DSR116
The DSR116 uses its internal 12V battery to provide starting assistance to compatible vehicle engines.
Important Jump-Starting Precautions
Do not use the DSR116 to start a vehicle that does not have a battery installed. Doing so may damage the vehicle’s electrical system.
The jump starter must not be used while its internal battery is charging.
Jump-Starting Instructions
- Turn the vehicle ignition OFF.
- Make sure the jump starter rotary switch is in the OFF position.
- Connect the battery clamps according to the vehicle’s grounding system.
- Check whether the jump starter produces an audible alarm.
- If an alarm sounds because the clamps are reversed, do not turn the switch to 12V.
- Disconnect the clamps and correct the connections. The alarm should stop.
- When no alarm sounds, turn the rotary switch to the 12V position. The clamps are now powered.
- Crank the vehicle engine.
- If the engine does not start within 3–8 seconds, stop cranking.
- Wait at least 1 minute before another starting attempt.
- When the engine starts, return the rotary switch to OFF.
- For a negative-grounded vehicle, disconnect the black clamp first, followed by the red clamp.
- Return the clamps to their storage holders.
- Recharge the jump starter as soon as possible.
The waiting period between starting attempts allows the battery to cool.
Reverse-Polarity Audible Alarm
If the battery clamps are connected in reverse, the jump starter sounds an audible alarm.
Do not move the rotary switch to the 12V position while the reverse-polarity alarm is sounding.
Incorrect operation can cause serious damage to the jump starter or vehicle.
Disconnect and correct the battery clamp connections before continuing.
24V System Warning
If the jump starter is connected to a 24V electrical system while the rotary switch is in the 12V position, the audible alarm sounds continuously.
Turn the jump starter OFF immediately.
Continuing operation may damage the internal battery.
Disconnecting After Jump-Starting
For a negative-grounded vehicle:
- Turn the rotary switch OFF.
- Remove the black clamp from the chassis or engine block.
- Remove the red clamp from the battery terminal.
- Secure both clamps in their storage holders.
- Recharge the internal battery.
For positive-grounded vehicles, remove the chassis connection first, followed by the battery terminal connection.
Using the DSR116 12V DC Power Outlet
The DSR116 provides a 12V DC outlet for compatible accessories equipped with a 12V accessory plug.
The outlet can be used during power outages, camping trips, fishing trips, and other situations where portable 12V power is required.
12V DC Power Instructions
- Make sure the connected 12V device is switched OFF.
- Check that the jump starter clamps are attached to their storage holders.
- Open the protective cover on the front 12V DC outlet.
- Connect the accessory’s 12V plug.
- Turn on the connected device if required.
- Disconnect the device when finished.
- Recharge the jump starter immediately after use.
12V Outlet Overload Protection
The 12V DC outlet supports a maximum continuous load of 15A.
If a connected device draws more than 15A or creates a short circuit, the internal circuit breaker trips and disconnects the output.
Disconnect the device.
The circuit breaker automatically resets shortly after the overload has been removed.
The outlet is connected directly to the internal battery. Extended use can result in excessive battery discharge.
Estimated Runtime for 12V DC Devices
The following operating times assume a fully charged internal battery.
| Device Type | Estimated Power | Estimated Runtime |
| Cell Phone or Fluorescent Light | 4W | 66 Hours |
| Radio, Fan, or Depth Finder | 9W | 23.9 Hours |
| Camcorder | 15W | 17.6 Hours |
| Electrical Tool | 24W | 11 Hours |
| Electric Cooler | 48W | 5.5 Hours |
| Car Vacuum or Air Compressor | 80W | 3.3 Hours |
Actual runtimes may vary depending on the battery condition and power requirements of the connected device.
Using the DSR116 USB Port
The DSR116 includes a USB port that provides up to 2.1A at 5V DC.
USB Power Instructions
- Make sure the jump starter’s battery clamps are secured in their storage holders.
- Move the rear Converter/USB switch to the USB position.
- Connect the USB device to the USB port on the rear panel.
- Turn on the connected device if required.
- When finished, turn off and disconnect the device.
- Return the switch to OFF.
- Recharge the jump starter as soon as possible after USB use.
Using the DSR116 Power Converter
The DSR116 has a built-in power converter that changes energy from its internal 12V battery into 110V AC electricity.
The converter provides:
- 400W maximum continuous power.
- 800W peak surge capability.
- Two 110V AC power outlets.
- Modified sine wave output.
Before Using the Power Converter
The converter must be used in a dry, well-ventilated location.
Follow these precautions:
- Keep several inches of clearance around the top and sides of the jump starter.
- Do not block the cooling vents.
- Keep the jump starter away from flammable fumes and clothing.
- Do not expose the unit to rain or moisture.
- Do not operate the unit when it, the connected device, the user, or a nearby electrical contact surface is wet.
- Do not place the unit near heaters, radiators, or heating vents.
- Do not expose it to direct sunlight.
- Do not operate the converter near an open engine compartment where fumes may accumulate.
- Do not modify the AC receptacles.
The manufacturer’s recommended operating air temperature for converter use is approximately 50–80°F (10–26.7°C).
Power Converter Load Requirements
The converter is designed for devices with a continuous power requirement of 400W or less.
If a device’s wattage is not marked, the manual instructs using only devices that draw less than 4.0A of AC current. The 400W continuous power limit still applies.
Certain devices, including TVs, fans, and electrical motors, require additional power when starting.
The converter provides a temporary surge capability, but a device rated below 400W may still exceed the allowable starting surge and cause an overload shutdown.
Do not operate equipment requiring more power than the converter can provide.
Modified Sine Wave Compatibility
The DSR116 converter produces a modified sine wave output rather than the pure sine wave electricity normally supplied by household outlets.
Before connecting a device, its operating instructions should be checked for modified sine wave compatibility.
Particular caution is required with:
- Switch-mode power supplies.
- Linear power supplies.
- Class 2 transformers.
- Line filter capacitors.
- Shaded-pole motors.
- Fan motors.
- Microwave ovens.
- Fluorescent and high-intensity lamps with ballasts.
- Transformerless battery chargers.
Using the converter with incompatible equipment may cause overheating or abnormal operation.
Operating Multiple AC Devices
When powering more than one device, start the connected devices one at a time.
This reduces the risk of combined starting surges causing an overload.
Each device’s starting demand must remain within the converter’s operating limits.
Using a Battery Charger With the Converter
If a battery charger is operated from the DSR116 converter, monitor the charger’s temperature for approximately 10 minutes.
If the charger becomes abnormally warm, disconnect it immediately.
AC Extension Cord
An AC extension cord may be connected between the converter and an appliance.
For best performance, the cord should not exceed 50 feet (15.24 meters).
How to Power a 110V AC Device
AC Power Operating Instructions
- Make sure the battery clamps are securely attached to their storage holders.
- Turn the connected AC device OFF.
- Connect the device to one of the 110V AC outlets on the rear of the jump starter.
- Move the Converter/USB switch to the 120V position.
- The green converter LED illuminates to indicate that the converter is operating.
- Turn on the connected AC device.
- When finished, turn off the device.
- Return the converter switch to the O (OFF) position.
- Disconnect the device from the AC outlet.
- Recharge the jump starter as soon as possible.
If an AC Device Does Not Start
If the connected device does not operate properly when first connected:
- Move the converter switch ON.
- Move the switch OFF.
- Move the switch ON again in quick succession.
If the device still does not operate, the converter may not have sufficient capacity to power it.
WARNING: The converter output is 110V AC and can cause electric shock or electrocution, just like an ordinary household electrical outlet.
Estimated Runtime for 110V AC Devices
The following estimated runtimes are based on a new, fully charged internal battery operating at room temperature.
| Device Type | Estimated Power | Estimated Runtime |
| Spotlights, Sump Pumps, DVD Players | 100W | 1.5 Hours |
| Fax Machines, TVs, Small Power Tools | 150W | 1.25 Hours |
| Computer Printers, Medium Power Tools, Blenders | 200W | 55 Minutes |
Actual operating time may vary.
The maximum continuous converter load is 400W. Devices exceeding this rating must not be connected.
Power Converter Shutdown Protection
The DSR116 power converter automatically shuts down when certain electrical or temperature limits are exceeded.
Converter Status LEDs
| LED | Meaning |
| Green | Converter is switched ON and operating |
| Red | Converter has entered shutdown protection |
Low Battery Shutdown
The converter shuts down when its battery input falls to approximately 10.5V.
At approximately 10.5V, an audible alarm sounds to indicate low battery voltage.
Action: Recharge the jump starter.
High Voltage Protection
High voltage protection activates when the converter’s battery input exceeds 15V.
The prescribed corrective action is to bring the battery voltage within the 12–14V range.
Overload Shutdown
If a connected device requires more than the converter’s 400W continuous capacity, the converter shuts down.
Action: Use equipment with a lower power requirement.
Overtemperature Shutdown
The converter shuts down if its case temperature exceeds approximately 145°F (62.8°C).
Action:
- Turn off the converter.
- Allow it to cool.
- Check that cooling vents are clear.
- Restore proper airflow around the jump starter.
- Reduce the connected electrical load.
Resetting the Converter After Shutdown
- Turn the converter OFF.
- Identify the cause of the shutdown.
- Correct the problem.
- Turn the converter ON again.
Cleaning and Maintenance Instructions
The DSR116 requires regular inspection and basic cleaning.
Before Cleaning
- Switch off the jump starter.
- Disconnect the charger.
- Disconnect all connected devices.
- Make sure the battery clamps are secured safely.
Cleaning the Battery Clamps
Use a dry cloth to wipe away corrosion, dirt, and oil from the battery clamps.
Cleaning the Cables and Housing
Wipe the cables and jump starter case using a dry cloth.
General Maintenance
Check that all parts and components are present and in good operating condition.
Do not operate the jump starter if the cables, clamps, or housing are damaged.
All servicing must be performed by qualified personnel.
Storage and Transportation Instructions
Proper Storage Conditions
Store the DSR116 indoors in a cool, dry location.
The ideal storage temperature is approximately 70°F (21°C).
Battery Clamp Storage
Do not store the clamps:
- Attached to the carrying handle.
- Clipped together.
- Touching metal objects.
- Attached to the battery cables.
When the rotary switch is ON, the clamps can produce electrical arcs or sparks if they contact each other.
Keep the rotary switch OFF and return the clamps to their storage holders whenever the unit is not being used.
Transportation Precautions
When transporting the jump starter, protect the cables, clamps, and housing from damage.
Do not place the unit on surfaces that could be damaged if the internal battery unexpectedly leaks acid.
Long-Term Battery Maintenance
The internal battery gradually self-discharges during storage, particularly in warm environments.
Leaving the battery in a discharged condition can cause permanent damage.
Recharge the DSR116:
| Situation | Required Action |
| After Purchase | Charge Immediately |
| After Jump-Starting | Recharge as Soon as Possible |
| After AC, DC, or USB Power Use | Recharge as Soon as Possible |
| During Storage | Recharge Every 30 Days |
| Digital Display Below 100% | Recharge Internal Battery |
Troubleshooting Guide
The following troubleshooting procedures address the main operating problems identified for the DSR116 jump starter, power converter, and charger.
Jump Starter Troubleshooting
| Problem | Possible Cause | Solution |
| Vehicle Will Not Start | Poor clamp connection | Check the battery and chassis connections and clean the contact points |
| Vehicle Will Not Start | Internal jump starter battery is discharged | Press the Display button and check the charge percentage |
| Vehicle Will Not Start | Vehicle battery is defective | Have the vehicle battery checked |
| Internal Battery Will Not Hold Charge | Battery cannot accept charging | Replace the internal battery |
| Jump Starter Audible Alarm Sounds | Battery clamp connections are reversed | Disconnect the jump starter and correct the connections |
12V DC Outlet Troubleshooting
| Problem | Possible Cause | Solution |
| 12V Device Does Not Work | Device is switched OFF | Turn on the connected device |
| 12V Device Does Not Work | Internal battery voltage is below 10.5V | Check the battery percentage and recharge |
| 12V Device Does Not Work | Device draws more than 15A or has a short circuit | Disconnect the device and allow the breaker to reset |
The internal 12V circuit breaker normally resets after approximately one or two minutes.
110V AC Converter Troubleshooting
| Problem | Possible Cause | Solution |
| AC Device Does Not Work | Converter is switched OFF | Turn on the converter |
| AC Device Does Not Work | Connected device is OFF | Turn on the device |
| AC Device Does Not Work | Internal battery voltage is below 10.5V | Check the battery charge level and recharge |
| AC Device Does Not Work | Device requires more than 400W or has a short circuit | Disconnect the device and allow the converter to reset |
| Red Converter LED Is On | Converter has entered shutdown protection | Identify and correct the shutdown condition |
For an overloaded AC converter, the converter may reset after approximately one or two seconds once the connected device is disconnected.
If the problem occurs again, use a device with lower power requirements.
Battery Charger Troubleshooting
Green Power LED Does Not Illuminate
Possible causes include:
- The AC outlet is not supplying power.
- The electrical connection is poor.
Corrective actions:
- Check the fuse or circuit breaker supplying the AC outlet.
- Inspect the charger’s power connection.
- Check the extension cord for loose connections.
Red Bad Battery LED Is Illuminated
The red BAD BATTERY indicator can illuminate under several charging conditions.
| Possible Cause | Recommended Action |
| Battery Is Sulfated | The charger may enter desulfation mode; continue the specified process and have the battery checked if unsuccessful |
| Battery Voltage Is Below 14.2V and Charging Is Not Progressing | Allow an overheated battery to cool and have the battery checked or replaced |
| Initial Battery Voltage Is Below 12.2V and Total Input Is Less Than 1.5Ah | Have the battery checked or replaced |
| Battery Voltage Falls Below 12.2V During Maintain Mode | Remove connected electrical loads and have the battery checked if the problem remains |
Red Bad Battery LED and Flashing Yellow/Orange LED
When the red BAD BATTERY LED is illuminated and the yellow/orange CHARGING STATUS LED flashes rapidly, the charger may have detected one of the following conditions:
- The battery voltage remains below 10V after two hours of charging.
- During Maintain Mode, the charger’s output current exceeds 1.5A for 12 hours.
- The desulfation process has failed.
The battery may be defective.
Remove any connected electrical loads and have the battery checked or replaced.
Replacement Parts and Accessories
The DSR116 owner’s manual identifies the following replacement parts and accessories.
| Part or Accessory | Part Number |
| Male-to-Male 12V Accessory Charging Cable | 94500109 |
| DSR2 Battery Charger | 2299003063Z |
| Replacement Battery | 5799000010Z |
The optional 12V accessory charging cable is sold separately.
Only manufacturer-approved components should be used.
Battery replacement and other service work should be performed by qualified service personnel.
Battery Disposal Instructions
The DSR116 contains a sealed, non-spillable lead-acid battery.
The battery must be disposed of properly.
WARNING: The battery presents possible explosion and chemical burn hazards. Battery acid can cause serious burns or blindness.
Keep the battery away from children.
Limited Warranty
Schumacher Electric Corporation provides a limited warranty for the DSR116 jump starter.
Warranty Coverage
| Warranty Detail | Information |
| Manufacturer | Schumacher Electric Corporation |
| Product | DSR116 Jump Starter |
| Warranty Period | 1 Year |
| Warranty Start Date | Original Retail Purchase Date |
| Eligible Purchaser | Original Retail Purchaser |
| Transferability | Nontransferable |
| Covered Defects | Defects in Materials or Workmanship Under Normal Use and Care |
| Warranty Remedy | Repair or Replacement at Manufacturer’s Discretion |
Warranty Repair or Replacement
If the product develops a covered defect, Schumacher Electric Corporation may repair the product or replace it with a new or reconditioned unit.
The original purchaser must provide proof of purchase and pay shipping charges in advance when returning the unit to the manufacturer or its authorized representatives.
Warranty Exclusions
The warranty may be void if the product is:
- Misused or handled carelessly.
- Repaired or modified by anyone other than the manufacturer.
- Resold through an unauthorized retailer.
- Used with unapproved accessories in circumstances excluded by the warranty.
The manufacturer may also void the warranty if a label marked “warranty void if removed” is removed.
The warranty contains limitations on other warranties and liability. Some limitations may not apply in every state, and additional legal rights may vary.
Warranty Registration
The product may be registered online at:
The warranty card should be submitted within 30 days of purchase.
The original purchase receipt must be retained for warranty claims.
Customer Support Information
Schumacher Electric Corporation provides assistance with product troubleshooting, repairs, and returns.
| Service | Contact Information |
| Manufacturer | Schumacher Electric Corporation |
| Customer Support Phone | 1-800-621-5485 |
| Customer Support Email | services@schumacherelectric.com |
| Customer Support Website | www.batterychargers.com |
| Customer Support Days | Monday–Friday |
| Customer Support Hours | 7:00 AM–5:00 PM CST |
| Manufacturer Address | 801 Business Center Drive, Mount Prospect, IL 60056-2179, USA |
Repair and Return Instructions
- Review the troubleshooting instructions.
- Contact Schumacher customer service if the problem continues.
- Request repair or return assistance.
- Obtain a Return Merchandise Authorization (RMA) number.
- Follow the manufacturer’s return instructions.
Do not ship the jump starter until Schumacher Electric Corporation issues an RMA number.
Frequently Asked Questions
1. How many amps does the Schumacher DSR116 jump starter provide?
The Schumacher DSR116 delivers 2250 peak amps, 525 cranking amps, and 350 cold cranking amps. It uses an internal 12V, 22Ah sealed AGM lead-acid battery to provide jump-starting assistance to compatible vehicles.
2. How long does the Schumacher DSR116 take to charge?
The DSR116 charging procedure states that charging may take up to 24 hours, while its general charging guidance allows up to 48 hours. The battery is fully charged when the digital display reaches 100%. The supplied charger automatically enters Maintain Mode after the battery is charged.
3. Why is my Schumacher DSR116 beeping when connected to a battery?
The DSR116 sounds an audible alarm when the battery clamps are connected in reverse. Disconnect the clamps and reconnect them using the correct polarity. If the alarm sounds continuously while the unit is connected to a 24V system with the switch at 12V, turn the jump starter OFF immediately.
4. Can the Schumacher DSR116 power 110V AC appliances?
Yes. The DSR116 includes a modified sine wave power converter with two 110V AC outlets. It supports up to 400W continuous output and 800W peak surge capability. Connected devices must be compatible with modified sine wave power and remain within the converter’s operating limits.
5. What does the red light on the Schumacher DSR116 converter mean?
A red converter LED indicates that the power converter has entered shutdown protection. Possible causes include low battery voltage, excessive input voltage, an electrical load above 400W, or a converter case temperature exceeding 145°F. Turn the converter OFF, correct the problem, and then restart it.
6. Can the Schumacher DSR116 charge USB devices?
Yes. The DSR116 includes a USB port that supplies 5V DC at up to 2.1A. Secure the battery clamps in their holders, move the rear Converter/USB switch to USB, and connect the device. Recharge the jump starter after use.
7. How often should the Schumacher DSR116 battery be charged?
The internal battery should be charged immediately after purchase, after every use, and every 30 days during storage. The battery should be kept fully charged to reduce the risk of permanent damage caused by self-discharge.
8. What replacement battery does the Schumacher DSR116 use?
The DSR116 uses a sealed, maintenance-free 12V, 22Ah AGM lead-acid battery. The replacement battery listed by Schumacher is part number 5799000010Z. Battery replacement should be handled by qualified service personnel.