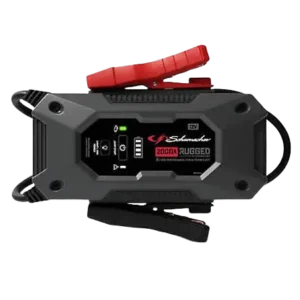
| Field | Details |
| Document Title | Lithium Ion Jump Starter and USB Power Source |
| Document Type | Owner’s Manual |
| Brand Name | Schumacher |
| Product Name | Lithium Ion Jump Starter and USB Power Source |
| Model Number(s) | FR01543 |
| PDF File Size | 140.02 KB |
| Number of Pages | 8 |
| Languages | English, Spanish |
Schumacher Lithium Ion Jump Starter FR01543
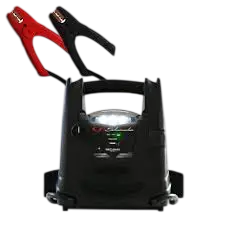
The Schumacher FR01543 Lithium Ion Jump Starter and USB Power Source is a portable battery-powered device designed to assist with starting vehicles equipped with 12V DC lead-acid battery systems. It also provides portable USB power for compatible electronic devices and includes a built-in work light.
The jump starter contains an internal rechargeable lithium-ion battery that can be charged through its Micro-USB input port. With a suitable 2A USB charger, the internal battery can reach full charge in approximately 3–4 hours.
The FR01543 features battery status LED indicators, a Ready/Fail LED, an ON/OFF power switch, and built-in protection against reverse polarity, short circuits, reverse charging, low battery voltage, and high temperatures.
The unit also includes an automatic Energy Saving mode that helps prevent unnecessary battery discharge when the jump starter is left unused.
Product Features
The Schumacher FR01543 includes the following features:
- Rechargeable lithium-ion internal battery.
- Jump-starting support for compatible 12V DC lead-acid battery systems.
- Micro-USB charging input.
- USB power output rated at 5V DC and up to 2.4A.
- Approximately 3–4 hours of internal battery charging time using a suitable 2A USB power source.
- Red, yellow, and green battery status indicators.
- Ready/Fail LED for jump-starting status and protection alerts.
- Audible buzzer for selected fault conditions.
- ON/OFF power switch.
- Battery Status/Light button.
- Built-in work light.
- Automatic Energy Saving mode after 10 minutes of inactivity.
- Reverse-polarity protection.
- Short-circuit protection.
- Battery low-voltage protection.
- Reverse-charging protection.
- High-temperature protection.
- Low-temperature protection.
- Battery clamps with storage holders.
- Micro-USB to USB charging cable.
Technical Specifications
| Specification | Details |
| Brand | Schumacher |
| Model Number | FR01543 (PDF filename identification) |
| Product Type | Lithium Ion Jump Starter and USB Power Source |
| Internal Battery Chemistry | Lithium-Ion |
| Supported Vehicle Electrical System | 12V DC |
| Vehicle Battery Compatibility | Lead-Acid |
| Internal Battery Charging Connection | Micro-USB |
| Recommended USB Charging Current | 2A |
| Approximate Charging Time | 3–4 Hours with Suitable 2A USB Power Source |
| USB Output Voltage | 5V DC |
| Maximum USB Output Current | 2.4A |
| Battery Status Indicators | Red, Yellow, Green |
| Jump-Starting Status Indicator | Ready/Fail LED |
| Audible Fault Indicator | Buzzer |
| Built-in Work Light | Yes |
| Automatic Energy Saving Mode | After 10 Minutes of Inactivity |
| Recommended Wait Before Starting | 30 Seconds After Connecting Clamps |
| Maximum Engine Cranking Duration | 5 Seconds Per Attempt |
| Waiting Time Between Attempts | 30 Seconds |
| Storage Temperature | -4°F to +140°F (-20°C to +60°C) |
| Warranty | 1-Year Limited Warranty |
Parts and Components
The Schumacher FR01543 includes nine components identified in the owner’s manual.
Main Parts and Their Functions
| No. | Component | Function |
| 1 | Battery Clamps | Connect the jump starter to the vehicle battery and chassis |
| 2 | Micro-USB Charging Port | Receives power for charging the internal battery |
| 3 | Ready/Fail LED | Shows whether the jump starter is ready or a protection condition has been activated |
| 4 | Battery Status/Light Button | Checks battery charge and controls the work light |
| 5 | Battery Status Indicators | Display the internal battery charge level |
| 6 | Built-in Work Light | Provides illumination around the work area |
| 7 | ON/OFF Power Switch | Turns the jump starter on or off |
| 8 | USB Port | Supplies power to compatible USB devices |
| 9 | Micro-USB to USB Charging Cable | Connects the jump starter to a suitable USB charging source |
Control Panel and Button Functions
The FR01543 uses an ON/OFF power switch and a multifunction Battery Status/Light button.
ON/OFF Power Switch
The ON/OFF power switch controls the jump starter’s power functions.
The switch must be OFF while the unit is being connected to a vehicle battery.
After the battery clamps have been connected correctly, the switch can be turned ON to activate the jump-starting function.
The power switch must also be ON when using the USB output or built-in work light.
Battery Status/Light Button
The Battery Status/Light button performs two functions:
- Checks the internal battery charge level.
- Turns the built-in work light on or off.
A normal press checks the battery status when the unit is powered on.
Holding the button for approximately 0.75 second controls the work light.
Ready/Fail LED
The Ready/Fail LED indicates whether the jump starter is ready for use or a protective function has been activated.
A solid green LED indicates that the jump starter is ready.
Red or alternating red and green indications communicate different fault conditions.
USB Charging Input and Output
The unit has separate ports for charging the internal battery and powering external USB devices.
| Port | Function |
| Micro-USB Input | Charges the internal lithium-ion battery |
| USB Output | Provides 5V DC power at up to 2.4A to compatible electronic devices |
Battery Status LED Indicator Guide
The Schumacher FR01543 uses red, yellow, and green LEDs to show the internal lithium-ion battery charge level.
Battery Charge Indicator Meanings
| LED Indicator | Battery Charge Level | Meaning |
| Red LED Flashing | 0–5% | Battery requires immediate charging |
| Red LED Solid | 6–49% | Battery has a low charge level |
| Yellow LED Solid | 50–75% | Battery is partially charged |
| Green LED Solid | 76–100% | Battery has a high charge level |
Flashing Red Battery Status LED
A flashing red battery status LED indicates that the internal battery has approximately 0–5% charge remaining.
Recharge the jump starter immediately.
Solid Red Battery Status LED
A solid red LED indicates that the internal battery is approximately 6–49% charged.
Solid Yellow Battery Status LED
A solid yellow LED indicates that the internal battery is approximately 50–75% charged.
Solid Green Battery Status LED
A solid green battery status LED indicates that the internal battery is approximately 76–100% charged.
Important Safety Instructions
WARNING: Risk of explosive gases, electric shock, fire, and serious personal injury.
Lead-acid vehicle batteries generate explosive gases during normal operation. The jump starter must be used according to the safety instructions provided by Schumacher and the vehicle battery manufacturer.
General Safety Precautions
- Read the operating instructions before using the jump starter.
- Keep the jump starter away from children.
- Do not disassemble the unit.
- Have repairs performed by a qualified service professional.
- Do not use the jump starter while its internal battery is charging.
- Do not recharge the unit using a damaged USB cable.
- Allow proper ventilation because the jump starter becomes warm during charging.
- Do not place the jump starter on flammable materials such as carpeting, upholstery, paper, or cardboard.
- Position the jump starter as far from the vehicle battery as the cables permit.
- Do not expose the jump starter to rain or snow.
- Never attempt to jump-start a frozen battery.
- Never place the jump starter directly above the battery being jump-started.
- Never allow the battery clamps to touch each other or the same metal surface.
- Use only attachments recommended or sold by the jump starter manufacturer.
- Never operate a damaged jump starter.
Vehicle Battery Restrictions
The jump starter must only be used with vehicles, boats, and garden tractors equipped with a 12V DC battery system.
The jump-starting function is intended for lead-acid vehicle batteries.
It must not be used to jump-start household dry-cell batteries.
IMPORTANT: The jump starter is not designed to replace a vehicle battery.
A battery must be installed in the vehicle when the jump-starting function is used.
Operating the jump starter without an installed vehicle battery may damage the vehicle’s electrical system.
Personal Safety Precautions
When working near a lead-acid battery:
- Wear complete eye protection.
- Wear protective clothing.
- Have another person nearby who can provide assistance.
- Keep fresh water, soap, and baking soda available.
- Remove rings, bracelets, necklaces, watches, and other metal jewelry.
- Keep sparks and open flames away from the battery.
- Never smoke near the vehicle battery or engine.
A battery can produce enough short-circuit current to heat or weld metal jewelry, causing severe burns.
Battery Acid Safety
Battery acid can cause burns and serious eye injuries.
If battery acid contacts skin or clothing, wash the affected area immediately with soap and water and seek medical attention.
If battery acid enters the eyes, flush immediately with water for at least 10 minutes and obtain medical attention.
Battery acid spills should be thoroughly neutralized with baking soda before cleanup.
Lithium-Ion Battery Fire Safety
The FR01543 contains a lithium-ion battery.
In the event of a battery fire, the manufacturer’s instructions identify the following extinguishing agents:
- Water.
- Foam extinguisher.
- Halon.
- Carbon dioxide (CO2).
- ABC dry chemical.
- Powdered graphite.
- Copper powder.
- Sodium carbonate.
After the fire has been extinguished, the product must be cooled using water, a water-based extinguishing agent, or another nonalcoholic liquid to reduce the risk of reignition.
WARNING: Never attempt to pick up or move a product that is hot, smoking, or burning.
Before First Use
The internal lithium-ion battery must be charged before the jump starter is used.
Initial Preparation Instructions
- Place the jump starter on a stable surface.
- Inspect the housing, battery clamps, and charging cable for damage.
- Make sure the ON/OFF power switch is OFF.
- Secure the battery clamps on their storage holders.
- Connect the Micro-USB charging cable to the unit.
- Connect the USB end to a suitable USB charging source.
- Allow the internal battery to charge completely.
- Disconnect the charging cable.
- Check the battery charge level before using the jump-starting function.
IMPORTANT: Charge the jump starter immediately after purchase, after every use, and every 30 days to keep the internal battery charged and prolong its service life.
How to Check the Internal Battery Charge Level
The Battery Status/Light button activates the LEDs used to check the internal lithium-ion battery.
Battery Status Checking Instructions
- Turn on the jump starter using the ON/OFF power switch.
- Press the Battery Status/Light button on the front of the unit.
- Check the illuminated battery status LED.
- Compare the LED indication with the battery charge level chart.
A flashing red LED indicates that the battery has 0–5% charge remaining and must be charged immediately.
How to Charge the Internal Lithium-Ion Battery
The FR01543 charges through its Micro-USB input port.
The manufacturer’s instructions recommend a 2A USB charger or a 2A USB charging port for faster charging.
Charging Requirements
| Item | Details |
| Charging Input | Micro-USB |
| Charging Cable | Micro-USB to USB |
| Recommended USB Charging Source | 2A USB Charger or Charging Port |
| Approximate Full Charging Time | 3–4 Hours |
| Charger Included | USB Charger Sold Separately |
| Charging Status | Red, Yellow, and Green LEDs |
A USB charger providing less than 2A increases the charging time.
Internal Battery Charging Instructions
- Connect the Micro-USB end of the charging cable to the jump starter’s input port.
- Connect the USB end to a suitable USB charger or charging port.
- Connect the charger to an active power source.
- Allow the internal battery to charge.
- Monitor the battery status LEDs.
- Wait until the green LED becomes solid, indicating full charge.
- Disconnect the USB charger from the power source.
- Remove the charging cable from the charger and jump starter.
- Turn the power switch OFF if the jump starter will not be used immediately.
How Long Does the FR01543 Take to Charge?
The internal lithium-ion battery takes approximately 3–4 hours to reach full charge when using a suitable 2A USB charging source.
Using a charger that provides less than 2A increases the charging time.
LED Indicators During Battery Charging
The FR01543 displays different LED patterns as the internal battery charges.
Charging Status LED Meanings
| LED Behavior | Battery Charge Level |
| Red LED Flashing | 0–49% |
| Red LED Solid and Yellow LED Flashing | 50–75% |
| Red and Yellow LEDs Solid, Green LED Flashing | 76–99% |
| Green LED Solid | 100% |
Flashing Red LED During Charging
A flashing red battery status LED indicates that the internal battery is between 0% and 49% charged.
Red LED Solid and Yellow LED Flashing
This combination indicates that the battery is approximately 50–75% charged.
Red and Yellow LEDs Solid, Green LED Flashing
This pattern indicates that the internal battery is approximately 76–99% charged.
Solid Green LED During Charging
A solid green battery status LED indicates that the internal battery is fully charged.
The green LED becomes solid approximately 10 seconds after the battery reaches full charge.
Charging Protection Warning
If the red Ready/Fail LED illuminates and the buzzer sounds, a protective function has been activated.
Possible protection conditions include:
- Short circuit.
- Low battery voltage.
- Reversed polarity.
- Other detected electrical faults.
The jump starter will not operate while the protective condition is active.
How to Jump Start a Vehicle
The Schumacher FR01543 can assist with starting compatible vehicles equipped with 12V DC lead-acid battery systems.
WARNING: Never use the jump starter while its internal lithium-ion battery is charging.
Before Jump-Starting
- Confirm that the vehicle uses a 12V DC battery system.
- Make sure a battery is installed in the vehicle.
- Turn the vehicle ignition OFF.
- Keep the jump starter power switch OFF.
- Position the DC cables away from fan blades, belts, pulleys, and other moving engine components.
- Identify whether the vehicle has a negative-ground or positive-ground electrical system.
Connecting to a Negative-Ground Vehicle
Most vehicles have a negative-ground electrical system.
- Connect the red positive clamp to the positive (+) battery terminal.
- Connect the black negative clamp to the vehicle chassis or engine block away from the battery.
- Make sure both connections are secure.
Connecting to a Positive-Ground Vehicle
For a vehicle with a positive-ground electrical system:
- Connect the black negative clamp to the negative (–) battery terminal.
- Connect the red positive clamp to the vehicle chassis or engine block away from the battery.
- Make sure both connections are secure.
Starting the Engine
- After connecting the clamps correctly, press the ON/OFF power switch to turn on the jump starter.
- Confirm that the green Ready LED is illuminated.
- Wait approximately 30 seconds after connecting the clamps before attempting to start the vehicle.
- Crank the engine for no more than 5 seconds.
- If the engine does not start, wait 30 seconds before attempting another start.
- After the engine starts, press the ON/OFF switch to turn the jump starter OFF.
- Disconnect the black negative clamp first, followed by the red positive clamp.
- Recharge the internal battery as soon as possible after use.
Jump-Starting Time Limits
| Operation | Required Limit |
| Recommended Waiting Time After Clamp Connection | 30 Seconds |
| Maximum Engine Cranking Duration | 5 Seconds |
| Waiting Time Between Starting Attempts | 30 Seconds |
If the engine does not start after the recommended attempts, disconnect the jump starter and investigate other vehicle problems.
When to Recharge After Jump-Starting
Recharge the jump starter as soon as possible after each use.
The manufacturer also instructs recharging when all battery status LEDs are off.
Ready/Fail LED Indicator Guide
The Ready/Fail LED communicates whether the jump starter is ready for use or a protection function has been activated.
Some faults are also accompanied by an audible buzzer.
Ready/Fail LED and Buzzer Meanings
| Ready/Fail LED Behavior | Buzzer Behavior | Meaning |
| Green LED Solid | — | Ready to jump-start |
| Red LED Solid | Continuous Sound | Short-circuit protection |
| No LED Illuminated | No Sound | Battery low-voltage protection |
| Alternating Green and Red Flashing | — | Reverse-charging protection |
| Red LED Flashing | Two Beeps Per Second | Reverse-polarity protection |
| Red LED Flashing | One Beep Per Second | High-temperature protection |
Solid Green Ready/Fail LED
A solid green Ready/Fail LED indicates that the jump starter is ready for jump-starting.
Solid Red LED With Continuous Buzzer
A solid red Ready/Fail LED accompanied by a continuous buzzer indicates short-circuit protection.
The protective system prevents the jump starter from operating under this condition.
No LED and No Buzzer
No Ready/Fail LED illumination and no buzzer sound indicate the battery low-voltage protection condition identified in the manual.
The internal battery charge level should be checked.
Alternating Green and Red LED
Alternating green and red flashes indicate reverse-charging protection.
Flashing Red LED With Two Beeps Per Second
A flashing red Ready/Fail LED accompanied by two beeps per second indicates reverse-polarity protection.
The battery clamp connections must be checked and corrected.
Flashing Red LED With One Beep Per Second
A flashing red Ready/Fail LED accompanied by one beep per second indicates high-temperature protection.
All Battery Status LEDs Flashing Together
If the red, yellow, and green battery status LEDs flash simultaneously, the unit’s high-temperature protection has been activated.
How to Use the USB Power Port
The Schumacher FR01543 includes a USB output port for powering compatible electronic devices.
USB Output Specifications
| Specification | Details |
| Output Connection | USB Port |
| Output Voltage | 5V DC |
| Maximum Output Current | 2.4A |
| Power Control | ON/OFF Power Switch |
USB Charging Instructions
- Make sure the battery clamps are securely attached to their storage holders.
- Turn the ON/OFF power switch to ON.
- Connect the electronic device to the USB output port.
- Turn on the connected USB device.
- When finished, turn the power switch to OFF.
- Recharge the internal battery as soon as possible after use.
How to Use the Built-in Work Light
The FR01543 includes a work light controlled by the Battery Status/Light button.
Work Light Operating Instructions
- Place the jump starter on a flat, stable surface near the work area.
- Make sure the battery clamps are securely attached to their storage holders.
- Turn the ON/OFF power switch to ON.
- Press the Battery Status/Light button for approximately 0.75 second to turn on the work light.
- Press the same button for approximately 0.75 second to turn off the light.
- Recharge the internal battery as soon as possible after use.
Energy Saving Mode
The Schumacher FR01543 includes an automatic Energy Saving mode to reduce battery discharge when the unit is left unused.
How Energy Saving Mode Works
If the jump starter is not used after being switched ON, it enters Energy Saving mode after approximately 10 minutes.
When Energy Saving mode activates:
- The USB port turns off.
- The Battery Status/Light function turns off.
- The green Ready/Fail LED turns off.
How to Reactivate the Jump Starter
- Turn the unit ON using the power switch.
- The green Ready/Fail LED illuminates.
- If the unit has entered Energy Saving mode, press the Battery Status/Light button once.
- The unit becomes ready for battery status checks, jump-starting, USB output, and work light operation.
Maintenance and Cleaning Instructions
The FR01543 requires regular battery charging and basic cleaning to maintain its operating condition.
Cleaning the Battery Clamps
After each use:
- Turn the jump starter OFF.
- Disconnect the unit from the vehicle battery.
- Clean the battery clamps.
- Return the clamps to their support posts.
Cleaning the Housing
Clean the jump starter housing after use.
Internal Battery Maintenance
The internal lithium-ion battery should be kept charged.
- Charge immediately after purchase.
- Charge after every use.
- Charge at least once every month during periods of infrequent use.
- Never allow the internal battery to become completely discharged.
Storage Instructions
The jump starter should be stored with its internal battery fully charged and its battery clamps properly secured.
Recommended Storage Conditions
| Storage Requirement | Details |
| Minimum Storage Temperature | -4°F (-20°C) |
| Maximum Storage Temperature | +140°F (+60°C) |
| Battery Charge Before Storage | Fully Charged |
| Battery Maintenance During Storage | Recharge at Least Once Per Month |
| Battery Clamp Storage | Designated Support Posts |
Proper Storage Procedure
- Turn the ON/OFF power switch to OFF.
- Disconnect the jump starter from the vehicle and charging source.
- Clean the clamps and housing.
- Charge the internal battery to full capacity.
- Attach the battery clamps to their support posts.
- Store the jump starter within the specified temperature range.
- Recharge the unit at least once every month if it is not frequently used.
Battery Storage Precautions
Never completely discharge the internal battery.
The battery clamps must remain on their support posts to prevent contact with metal surfaces.
Troubleshooting Guide
The Schumacher FR01543 troubleshooting instructions address engine starting failures, low-temperature protection, internal battery problems, and LED fault indications.
Schumacher FR01543 Troubleshooting Table
| Problem | Possible Cause | Recommended Solution |
| Jump starter will not start the vehicle | Battery clamps are not making proper contact | Check battery and chassis connections; clean the connection points |
| Jump starter will not start the vehicle | Battery clamp connections are reversed | Disconnect the jump starter and correct the clamp connections |
| Jump starter will not start the vehicle | Internal battery is not charged | Press the Battery Status/Light button and check the LEDs |
| Jump starter will not start the vehicle | Vehicle battery is defective | Have the vehicle battery checked |
| Jump starter will not start the vehicle | Jump starter is switched OFF | Turn on the jump starter using the ON/OFF switch |
| Jump starter will not operate | Low-temperature protection is active | Use the USB adapter to charge and activate the unit |
| Internal battery will not hold a charge | Internal battery is defective | Have the battery checked |
FR01543 Will Not Jump Start a Vehicle
If the jump starter does not start the engine, several conditions should be checked.
Poor Battery Clamp Connections
Battery clamps that are not making proper contact can prevent the jump starter from operating.
Check the connections at the battery terminals and vehicle chassis.
Make sure the contact points are clean.
Reversed Battery Clamps
If the clamps are connected incorrectly, disconnect the jump starter and correct their positions.
Low Internal Battery Charge
Turn on the jump starter and press the Battery Status/Light button.
Check the LED indicators to determine whether the internal battery needs charging.
Defective Vehicle Battery
If the jump starter is charged and the connections are correct, the vehicle battery may be defective.
Have the vehicle battery checked.
Jump Starter Is Turned OFF
The ON/OFF power switch must be turned ON to activate the jump-starting function.
FR01543 Will Not Turn On or Operate
The jump starter may stop operating when low-temperature protection is active.
Low-Temperature Protection
If the unit does not operate because of low-temperature protection, the manufacturer instructs using a USB adapter to charge and activate the jump starter.
FR01543 Internal Battery Will Not Hold a Charge
If the internal battery does not retain its charge, the battery may be defective or unable to accept charging current.
Have the internal battery checked.
FR01543 Ready/Fail LED Faults
The Ready/Fail LED identifies several protective operating conditions.
Short-Circuit Protection
A solid red Ready/Fail LED and a continuous buzzer indicate that short-circuit protection has been activated.
Low-Voltage Protection
No Ready/Fail LED and no buzzer sound indicate battery low-voltage protection.
Reverse-Charging Protection
Alternating green and red LED flashes indicate reverse-charging protection.
Reverse-Polarity Protection
A flashing red Ready/Fail LED accompanied by two beeps per second indicates reverse-polarity protection.
High-Temperature Protection
A flashing red Ready/Fail LED accompanied by one beep per second indicates high-temperature protection.
If the red, yellow, and green battery status LEDs flash simultaneously, high-temperature protection is active.
FCC Radio Frequency Interference Information
The Schumacher FR01543 is identified as complying with the limits for a Class B digital device under Part 15 of the FCC Rules.
These limits are intended to provide reasonable protection against harmful radio-frequency interference in residential installations.
If the unit causes interference with radio or television reception, the following corrective measures may be used:
- Reorient or relocate the receiving antenna.
- Increase the distance between the jump starter and receiver.
- Connect the equipment to an outlet on a different electrical circuit.
- Consult the dealer or an experienced radio/television technician.
Replacement Parts and Accessories
Schumacher identifies the following replacement charging cable for the jump starter.
Replacement Charging Cable
| Replacement Part | Part Number |
| Micro-USB to USB Charging Cable | 3899003781Z |
Replacement parts information is available at:
Limited Warranty
The Schumacher Lithium Ion Jump Starter and USB Power Source is covered by a one-year limited warranty.
Warranty Information
| Warranty Detail | Information |
| Warranty Type | Limited Warranty |
| Warranty Period | 1 Year |
| Warranty Information Website | batterychargers.com |
| Warranty Assistance Phone | 1-800-621-5485 |
| Online Warranty Registration | batterychargers.com |
The manufacturer’s warranty information can be obtained through its website or by contacting customer support.
Customer Support and Repair Information
Schumacher provides service information, repair requests, returns, and replacement parts through its support resources.
Customer Support Details
| Service | Contact Information |
| Brand | Schumacher |
| Customer Support Phone | 1-800-621-5485 |
| Repairs and Returns | 365rma.com |
| Replacement Parts | batterychargers.com |
| Warranty Information | batterychargers.com |
| Warranty Registration | batterychargers.com |
Repair and Return Procedure
- Review the troubleshooting instructions.
- Identify the operating problem.
- Visit 365rma.com for repair or return requests.
- Follow the service and return instructions provided by the manufacturer.
Replacement parts information is available at batterychargers.com.
Frequently Asked Questions
1. How do I charge the Schumacher FR01543 lithium-ion jump starter?
The Schumacher FR01543 charges through its Micro-USB input port using the supplied Micro-USB to USB charging cable and a suitable USB power source. A 2A USB charger or charging port is recommended. The battery takes approximately 3–4 hours to charge, and the green battery status LED becomes solid when charging is complete.
2. How long does the Schumacher FR01543 take to charge?
The internal lithium-ion battery takes approximately 3–4 hours to reach full charge when using a suitable 2A USB charger or charging port. Charging with a power source providing less than 2A takes longer.
3. What do the battery status lights mean on the Schumacher FR01543?
The battery status LEDs indicate the internal battery charge level. A flashing red LED means 0–5%, solid red means 6–49%, solid yellow means 50–75%, and solid green means 76–100%. A flashing red battery status LED indicates that the unit needs immediate charging.
4. How do I jump start a car with the Schumacher FR01543?
With the power switch OFF, connect the battery clamps according to the vehicle’s grounding system. Turn the unit ON and confirm that the green Ready LED illuminates. Wait approximately 30 seconds before starting the engine. Crank for no more than 5 seconds and wait 30 seconds between attempts. Once the engine starts, turn the jump starter OFF, remove the black clamp followed by the red clamp, and recharge the unit.
5. What does a flashing red Ready/Fail LED mean on the Schumacher FR01543?
A flashing red Ready/Fail LED indicates a protective condition. If the buzzer sounds twice per second, reverse-polarity protection is active. If the buzzer sounds once per second, high-temperature protection is active. The buzzer pattern helps identify the condition.
6. Can the Schumacher FR01543 charge a phone or other USB device?
Yes. The FR01543 includes a USB output rated at 5V DC and up to 2.4A. With the battery clamps secured on their holders, turn the jump starter ON and connect the compatible USB device. Turn the switch OFF and recharge the internal battery after use.
7. Why does the Schumacher FR01543 shut off after 10 minutes?
The FR01543 includes an automatic Energy Saving mode. When the jump starter is left unused for approximately 10 minutes, the USB port, Battery Status/Light function, and green Ready/Fail LED turn off to reduce battery discharge. Press the Battery Status/Light button once to reactivate the unit’s functions.
8. Why will the Schumacher FR01543 not jump start my car?
Possible causes include poor battery clamp connections, reversed clamps, a discharged internal battery, a defective vehicle battery, or the jump starter being switched OFF. Low-temperature protection can also prevent operation. Check the battery connections and charge level, verify the power switch position, and have the vehicle battery checked if necessary.