
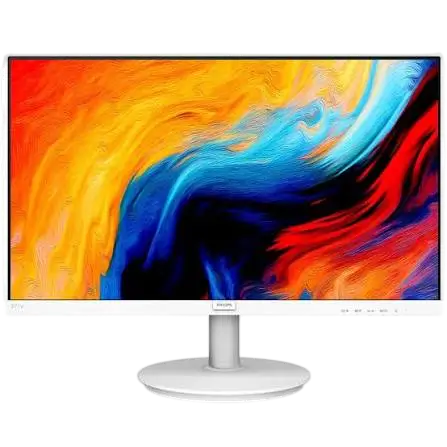
The Philips V Line and i Line 27-inch LCD monitors are Full HD displays built for everyday desktop use. This manual covers six models: 271V8, 271V8L, 271i8, 271V8LA, 272V8A and 272V8LA. All share a 27-inch (68.6 cm) 16:9 panel with W-LED backlighting, a native resolution of 1920 x 1080, 16.7 million colors and a 178°/178° viewing angle. The 271V8, 271i8 and 272V8A use IPS panels, while the 271V8L, 271V8LA and 272V8LA use VA panels with a higher contrast ratio. Other features include SmartImage presets, LowBlue Mode, Flicker Free operation, Adaptive Sync support, a built-in power supply and a 100 x 100 mm VESA mounting pattern.
Model Differences
| Model | Panel | Contrast (typ.) | Video inputs | Audio | Built-in speakers |
| 271V8 | IPS | 1000:1 | VGA, HDMI | HDMI audio out | None listed |
| 271i8 | IPS | 1000:1 | VGA, HDMI | HDMI audio out | None listed |
| 271V8L | VA | 3000:1 | VGA, HDMI | Audio out | None listed |
| 271V8LA | VA | 3000:1 | VGA, HDMI | Audio in, audio out | 2 W x 2 |
| 272V8A | IPS | 1000:1 | VGA, HDMI, DisplayPort | Audio in, earphone out | 2 W x 2 |
| 272V8LA | VA | 3000:1 | VGA, HDMI, DisplayPort | Audio in, audio out | 2 W x 2 |
Product Specifications
| Item | Specification |
| Optimum resolution | 1920 x 1080 at 60 Hz |
| Maximum resolution | 1920 x 1080 at 60 Hz (VGA); 75 Hz (HDMI/DisplayPort) |
| Vertical refresh rate | 48–75 Hz |
| Tilt | -5° to +20° |
| Size with stand (W x H x D) | 613 x 456 x 231 mm |
| Weight with stand | 3.75 kg (271V8, 271i8) to 4.00 kg (272V8LA) |
| Power supply | Built-in, 100–240 V AC, 50–60 Hz |
| Operating conditions | 0°C to 40°C, 20% to 80% humidity |
Typical power use in normal operation is 20.9–21.1 W for the 271V8 and 271i8, 23.2–23.5 W for the 271V8L and 271V8LA, 26.4–26.6 W for the 272V8A and 24.5 W for the 272V8LA. Off mode draws 0.3 W (PDF p. 18–22).
What’s in the Box
The package includes the monitor, a Quick Start guide, the printed user’s manual, a CD with the manual and drivers, and a power cord. HDMI and VGA cables are included, with a DisplayPort cable for the 272V8A and 272V8LA and an audio cable for the 271V8LA, 272V8A and 272V8LA. Cables and the CD vary by region (PDF p. 7).
Installation and Setup
Attaching the Base
- Place the monitor face down on a soft, smooth surface so the screen is not scratched.
- Slide the base column onto the monitor until it clicks into position.
- Hold the base stand with both hands and push it firmly into the base column.
Connecting to a Computer
- Connect the power cord firmly to the back of the monitor.
- Turn off your computer and unplug its power cable.
- Connect the monitor’s signal cable to the video connector on the computer.
- Plug the computer and the monitor into a nearby outlet.
- Turn on the computer and the monitor. If an image appears, installation is complete (PDF p. 9).
Removing the Base for Wall Mounting
- Place the monitor face down on a smooth surface without scratching the screen.
- Press the release button to detach the base stand from the base column.
- Press the release button to detach the base column.
The monitor accepts a 100 x 100 mm VESA interface with M4 screws. Contact the manufacturer for wall-mount installation (PDF p. 13).
Controls and On-Screen Display
Seven buttons sit on the front bezel: power, Menu/OK, up/down arrows, input source, back and SmartImage, plus a fourth button that adjusts brightness on the 271V8, 271V8L and 271i8 and speaker volume on the 271V8LA, 272V8A and 272V8LA. Menu/OK opens the on-screen display (OSD) and confirms a change. The arrows move the cursor.
OSD Menu Overview
The main menus (PDF p. 11) are:
- LowBlue Mode: On or Off, with levels 1 to 4.
- Input: VGA, HDMI 1.4, and DisplayPort on the 272V8A and 272V8LA.
- Picture: Picture Format, Brightness, Contrast, Sharpness, SmartResponse, SmartContrast, Gamma, Pixel Orbiting and Over Scan.
- Audio: Volume and Mute, plus Stand-Alone and Audio Source on the 271V8LA, 272V8A and 272V8LA.
- Color: Color Temperature (Native, 5000K to 11500K), sRGB and User Define red, green and blue.
- Language: 21 languages, including English, Spanish, French and German.
- OSD Setting: Menu position, transparency and OSD Time Out (5 to 60 seconds).
- Setup: Auto, H.Position, V.Position, Phase, Clock, Resolution Notification, Reset and Information.
To lock or unlock the hot keys, hold Menu/OK for 10 seconds (PDF p. 31). If the monitor runs at a resolution other than 1920 x 1080, it shows an alert recommending the native resolution. You can turn this alert off in Setup (PDF p. 12).
SmartImage, SmartContrast and Adaptive Sync
Press the SmartImage button, then keep pressing it to cycle through the presets. The selection stays on screen for 5 seconds, or press OK to confirm (PDF p. 14).
- Standard: Softens brightness and improves text clarity for office work.
- Internet: Boosts saturation, contrast and sharpness for photos and images.
- Game: Turns on overdrive for faster response and stronger contrast.
- EasyRead: Raises text contrast and sharpness for reading documents and e-books.
- LowBlue Mode: Reduces short-wavelength blue light.
SmartContrast analyzes the picture in real time and adjusts the backlight to improve contrast. Adaptive Sync reduces tearing and stutter in games with a compatible AMD graphics card or APU on Windows 10, 8.1, 8 or 7. Supported cards and APUs are listed on PDF p. 16.
Safety Instructions
- Keep the monitor away from direct sunlight, heat sources, oil, dust, rain and excess moisture. Do not block the ventilation holes.
- Do not tilt the monitor downward more than -5°. Exceeding that angle can cause panel peeling, and the damage is not covered by warranty (PDF p. 4, 12).
- Use only the approved Philips power cord and the specified power supply. Do not pull, bend or place heavy objects on the cables.
- Lift the monitor by the frame, never by the panel, and do not press on the screen.
- If water or a foreign object gets inside, unplug the monitor and take it to a service center. If you see smoke or sparks, unplug it immediately and contact Philips.
Static images shown for long periods can cause burn-in or ghosting. Use a moving screen saver when you leave the monitor unattended. Severe burn-in cannot be repaired and is not covered by warranty (PDF p. 4–5).
Cleaning and Maintenance
Unplug the monitor before cleaning. For normal cleaning, use a clean, soft cloth. For heavier cleaning, use isopropyl alcohol only. Avoid ethyl alcohol, ethanol, acetone, hexane, ammonia-based liquids and oil-based cleaners, which can damage plastic parts and void the warranty (PDF p. 4, 29).
Troubleshooting
| Problem | What to try |
| No picture, power LED off | Check the power cord at the outlet and monitor. Set the power button to off, then on. |
| No picture, power LED white | Make sure the computer is on and the signal cable is secure with no bent pins. The monitor may be in energy-saving mode. |
| Image off-center, vibrating or flickering | Check the cable connection. In VGA mode, use Auto or adjust Phase and Clock in Setup. |
| Auto does nothing | Auto works only with VGA analog input. Adjust manually in the OSD. |
| Blurry or fuzzy text | Set the PC to 1920 x 1080. |
| Colored or dark dots | Isolated dots are a normal characteristic of LCD technology. |
If you see smoke or sparks, stop troubleshooting, disconnect power and contact Philips customer service (PDF p. 27–28).
Pixel Defects and Warranty
A panel qualifies for warranty repair or replacement only if pixel defects exceed the acceptable levels: up to 3 bright dots, up to 5 black dots and no more than 5 in total (PDF p. 25). The standard warranty period depends on your region and is listed in the separate Important Information manual, available from the Philips support page. Extended warranty of 1, 2 or 3 years must be purchased within 30 calendar days of the original purchase (PDF p. 26).
Frequently Asked Questions
What resolution and refresh rate should I use?
Use 1920 x 1080. A 60 Hz refresh rate is recommended. If you see screen disturbance, try 75 Hz.
What if the screen says it cannot display this video mode?
Reconnect your previous monitor, set the resolution to 1920 x 1080 and the refresh rate to 60 Hz in Windows display settings, then restart. Shut down, reconnect the Philips monitor, then turn on the monitor first and the PC second (PDF p. 29).
How do I reset the monitor if I get lost in the OSD?
Open the menu, then choose Setup > Reset to restore the factory settings.
Can I change the color settings?
Yes. Open Color in the OSD to choose a color temperature, sRGB or User Define. Settings around 5000K look warmer, and 11500K looks cooler.
Does it work with a Mac?
It is Plug-and-Play compatible with Windows 10, 8.1, 8, 7 and Mac OS X. A Mac may need a cable adapter, which your Philips representative can advise on (PDF p. 30).
Why are my buttons not responding?
The controls may be locked. Hold Menu/OK for 10 seconds to unlock them.