
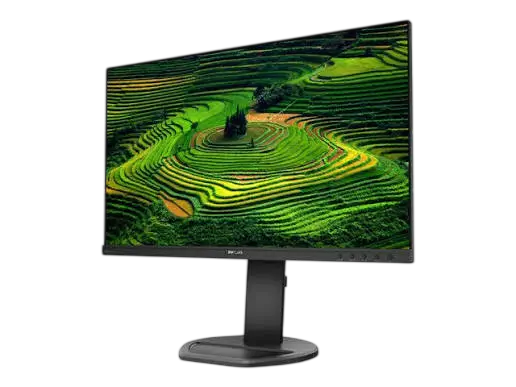
The Philips 241B8 is a 23.8-inch LCD monitor with an IPS panel, LED backlighting, and a native resolution of 1920 × 1080 at 60 Hz. It accepts VGA, DVI, HDMI 1.4, and DisplayPort 1.2 signals and doubles as a USB hub with two USB 3.0 ports (one is a fast charger) and two USB 2.0 ports. Two 2 W speakers are built in. The stand tilts, swivels, pivots, and raises the screen by 150 mm, and the monitor also takes a 100 × 100 mm VESA mount. Picture presets (SmartImage), a LowBlue mode, and Adaptive Sync for compatible AMD graphics round out the feature set.
Product Specifications
| Item | Detail |
| Panel | 23.8″ (60.5 cm) IPS, LED backlight, 16:9 |
| Native resolution | 1920 × 1080 @ 60 Hz |
| Viewing angle | 178° horizontal / 178° vertical (typical) |
| Colors | 16.7 million (6-bit, Hi-FRC) |
| SmartContrast | 50,000,000:1 |
| Refresh rate / horizontal frequency | 48–76 Hz / 30–85 kHz |
| Video inputs | VGA, DVI, HDMI 1.4, DisplayPort 1.2 |
| Tilt / swivel / pivot / height | -5° to +30° / ±175° / ±90° / 150 mm |
| Size with stand (W × H × D) | 540 × 508 × 206 mm |
| Weight | 4.97 kg with stand, 3.37 kg without |
| Power supply | Built-in, 100–240 V AC, 50–60 Hz |
| Operating conditions | 0–40°C, 20–80% humidity |
Typical power draw is about 19 W in normal use (58 W maximum), under 0.5 W in sleep, and under 0.3 W when off. The power LED is white when the monitor is on and blinks white in sleep. Power saving works when your graphics card or software supports VESA DPM (PDF p. 21).
What’s in the Box
The package illustration shows the monitor, a Quick Start guide, and a power cable. USB, DVI, DisplayPort, VGA, HDMI, and audio cables are marked with an asterisk, which means they vary by region (PDF p. 7).
Ports and Controls
Back Panel Connections
Looking at the back of the monitor (PDF p. 8), the numbered connectors are:
- Power switch
- AC power input
- DisplayPort input
- DVI input
- HDMI input
- VGA input
- Audio input
- Headphone jack
- USB upstream
- USB downstream
- USB fast charger / downstream
- Kensington anti-theft lock
Front Controls
The front keys (PDF p. 9) work as follows:
- Power: turns the monitor on and off.
- Menu/OK: opens the on-screen display (OSD) and confirms a choice.
- Up/Down: moves through the OSD.
- Brightness: adjusts the brightness level.
- Input: switches the signal source.
- Back: returns to the previous OSD level.
- SmartImage: cycles through the picture presets.
Installation and Setup
Attach the Stand
- Lay the monitor face down on a soft surface so the screen is not scratched or damaged.
- Hold the base with both hands and attach it gently to the support.
- Tighten the screw at the bottom of the base with your fingers.
- Connect the stand gently to the VESA mounting area until the latch locks.
Connect the Monitor
- Plug the power cable firmly into the back of the monitor.
- Turn off your computer and unplug its power cable.
- Connect the signal cable to the video connector on the computer.
- Plug the computer and monitor power cables into a nearby outlet.
- Turn on the computer and the monitor. If a picture appears, setup is complete.
Wireless 2.4 GHz USB devices such as mice, keyboards, and headsets can suffer interference from USB 3.0 signals, which may reduce radio performance. Keep USB 2.0 receivers away from the USB 3.0 ports, or use a standard USB extension cable or hub to increase the distance (PDF p. 8).
On-Screen Menu and Picture Settings
The OSD Menu
The main menu holds Input, Picture, Audio, Color, Language, OSD Settings, and Setup. Color offers Native, 5000K, 6500K, 7500K, 8200K, 9300K, 11500K, sRGB, and User Define (red, green, blue). Language includes 21 languages (PDF p. 10).
The monitor ships with DPS (power saving) turned on, which dims the screen slightly. For full brightness, switch DPS off in the OSD. This option is listed as available on selected models.
On the Setup menu, Auto, H.Position, V.Position, Phase, and Clock apply to VGA connections only. Setup also holds the Resolution Notification switch and Reset.
SmartImage Modes
- Press the SmartImage key to open the preset menu.
- Keep pressing to cycle through the options.
- Wait 5 seconds, or press OK to confirm.
The options are EasyRead, Office, Photo, Movie, Game, Economy, LowBlue Mode, and Off (PDF p. 13). LowBlue Mode reduces blue light for long sessions; its setting 2 meets the TUV low-blue-light certification (PDF p. 14).
Adaptive Sync
Adaptive Sync lets a compatible AMD graphics card update the screen the moment a frame is ready, which removes tearing without the lag of v-sync. The monitor lists support for Radeon R9 290/300 and R7 260 series cards and certain A-series APUs under Windows 10, 8.1, 8, or 7 (PDF p. 16).
Wall Mounting and Stand Removal
The monitor has a 100 × 100 mm VESA interface and uses M4 screws. Contact the mounting manufacturer for wall installation (PDF p. 12).
- Extend the stand to its maximum height.
- Lay the monitor face down on a soft surface, then lift the stand.
- Hold the release button, tilt the base, and slide it out.
Do not bend the screen downward more than 5 degrees, which could damage the panel. When adjusting the angle, touch only the bezel and do not press on the screen (PDF p. 12).
Safety Instructions
- Keep the monitor away from direct sunlight, bright lights, ovens, and other heat sources, and away from oil.
- Do not cover the ventilation openings or let objects fall into them.
- Keep the power plug and outlet easy to reach.
- After unplugging the monitor, wait 6 seconds before reconnecting.
- Use only the approved power cable and the stated voltage. Wrong voltage can cause malfunction, fire, or electric shock.
- Do not bend or pull the cables, or set heavy objects on them.
- Avoid knocks, drops, and strong vibration. Lift the monitor by its frame, not by pressing on the panel.
- Use it only at 0–40°C and 20–80% humidity, away from dust, rain, and water.
- Run an animated screen saver or a screen-refresh application when leaving the monitor unattended. Burn-in from static images is not covered by the warranty (PDF p. 5).
- If liquid or foreign objects get inside, switch off, unplug, and send it for service.
- Take short breaks often. A 5–10 minute break after 50–60 minutes of use is suggested (PDF p. 4).
Cleaning and Maintenance
Unplug the monitor before cleaning. Wipe a powered-off screen with a dry cloth, or with a slightly damp cloth once it is unplugged. Do not use oil-based cleaners, alcohol or other organic solvents, or ammonia-based liquids. Unplug the monitor if you will not use it for a long time. If it gets wet, dry it with a cloth as soon as possible (PDF pp. 4–5).
Troubleshooting
| Problem | What to try |
| No picture, power LED off | Check the power cable at the outlet and the monitor, then confirm the front power key is off and press it again to turn the monitor on (PDF p. 26). |
| No picture, power LED white | Make sure the computer is on and the signal cable is firmly connected and has no bent pins. Power saving may also be active. |
| Auto key does not work | Auto applies only in VGA (analog) mode. Adjust manually in the OSD if needed. |
| Image off-center | Use Auto, or adjust Phase/Clock in Setup (VGA only). |
| Flickering or vertical lines | Use Auto, or adjust Phase/Clock (VGA only). Check that the signal cable is seated in the graphics card or PC. |
| Blurry, unclear, or dark image | Adjust brightness and contrast in the OSD. |
| Distorted image or fuzzy text | Set the PC to the native resolution, 1920 × 1080 @ 60 Hz. |
| Power LED too bright | Adjust the LED setting under Setup in the OSD. Availability depends on the model. |
If you see smoke or sparks, skip all troubleshooting, unplug the monitor right away, and contact Philips support.
Frequently Asked Questions
What resolution and refresh rate should I use?
Use 1920 × 1080 at 60 Hz. If you see noise on screen, you can try 75 Hz.
What if the screen says the video mode cannot be displayed?
Set the computer to 1920 × 1080 @ 60 Hz. If you can’t reach the settings, reconnect your previous monitor, open Display settings, set the desktop area to 1920 × 1080 pixels and the refresh rate to 60 Hz, restart, and confirm the setting (PDF p. 28).
How do I reset the monitor to factory settings?
Press OK to open the OSD, then choose Reset.
Does it work with a Mac?
Yes. The monitor supports Plug & Play with Windows 10, 8.1, 8, 7, and Mac OS X. A cable adapter may be needed to connect to a Mac.
Can I mount it on a wall?
Yes, the VESA interface is 100 × 100 mm with M4 screws. Ask the mounting manufacturer about wall installation.
Why does a ghost image remain on screen?
Static images shown for a long time can cause burn-in, also called afterimage or ghosting. It usually fades gradually after the monitor is turned off. Use a moving screen saver to prevent it, because severe burn-in cannot be repaired and is not covered by the warranty.
Are a few dead pixels normal?
Some pixel defects are unavoidable in TFT panels. The warranty covers a monitor only when defects exceed the acceptable levels: more than 3 bright dots or more than 5 black dots, or more than 5 of both combined (PDF p. 24).