
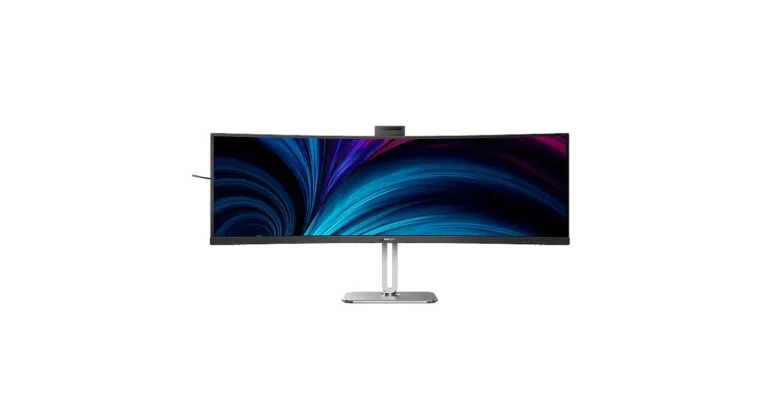
The Philips Curved Business Monitor 6000 Series 49B2U6900CH is a 48.8-inch (124 cm) curved VA display with a 32:9 aspect ratio and a native resolution of 5120 x 1440. It gives you the space of two side-by-side screens without a bezel in the middle. A single USB-C cable can carry video, data and up to 140W of power to a compatible laptop. The monitor also includes a built-in KVM switch for two computers, an Ethernet port, 5W x 2 speakers, and a pop-up 5.0 megapixel webcam with Windows Hello face recognition. It is VESA DisplayHDR 400 certified and supports Adaptive Sync, PIP/PBP and SmartImage presets.
Product Specifications
| Item | Detail |
| Panel | 48.8″ VA, W-LED backlight, 3000:1 typical contrast |
| Resolution | 5120 x 1440 native @ 60 Hz, up to 75 Hz |
| Video inputs | 2 x HDMI, 1 x DisplayPort 1.4, 2 x USB-C (DP Alt mode) |
| USB | 2 x USB-C upstream (PD 3.1, 140W), 1 x USB-C downstream (15W), 4 x USB-A downstream |
| Other ports | 1 x RJ45, 1 x combo audio in/out jack |
| Stand | Tilt -5° to +15°, swivel ±30°, height 150 mm |
| Size with stand (W x H x D) | 1193 x 583 x 268 mm |
| Weight | 15.21 kg with stand, 11.58 kg without |
| Power use | 53.6 W typical, 0.3 W in sleep, 0 W with AC switch off |
| Operating conditions | 0°C to 40°C, 20% to 80% humidity |
USB-C1 and USB-C2 need a USB-C PD 3.1 cable and a device that accepts 140W EPR charging. The two ports share power dynamically, with combined output up to 155W (PDF p. 38).
What’s in the Box
The box holds the monitor, stand and base, a Quick Start Guide, and a power cord. Included cables vary by region and can include HDMI, DisplayPort, USB-C and USB-A types.
Installation and Setup
Attach the Stand
The panel is curved, so place protective material under it and never press down on the screen while attaching or removing the base (PDF p. 7).
- Lay the monitor face down on a cushion.
- Hold the stand with both hands and gently attach the base to it.
- Tighten the screws on the bottom of the base.
- Attach the stand to the VESA mount area until the latch locks.
Connect to a Computer
- Connect the power cord firmly to the back of the monitor.
- Turn off your computer and unplug its power cable.
- Connect the signal cable (HDMI, DisplayPort or USB-C) to the computer.
- Plug the computer and monitor into a nearby outlet.
- Turn on both. If an image appears, setup is complete.
The monitor does not switch inputs automatically, so choose your source under Input in the on-screen display (OSD). Set the PC to 5120 x 1440 at 60 Hz. Your graphics card must support DisplayPort 1.4 with Display Stream Compression and USB-C HBR3 for full resolution (PDF p. 40). Over HDMI, 5120 x 1440 is available at 8-bit color only.
For wall mounting, the monitor accepts a 100 x 100 mm VESA mount with M4 screws. Press the release button to detach the neck, and contact the manufacturer for wall-mount installation.
Controls and Settings
The OSD uses a single toggle button on the rear that works like a joystick: move it in four directions and press to select. Near the webcam are hot keys for microphone mute, a hook button for accepting or declining call invitations, and a FocusSync Light button.
To set a User Key, open OSD Setting, select User Key, then choose Volume, MultiView, Brightness, KVM or PowerSensor.
USB Hub and Charging
USB ports shut down in standby and off modes, and lose power entirely if you switch off the power switch. To keep USB power active in standby, set USB Standby Mode to On (default is Off).
Under USB Setting, USB-C Setting defaults to High Data Speed. If your PC doesn’t support HBR3, choose High Resolution, which limits the picture to 5120 x 1440 at 75 Hz. If Ethernet seems slow, switch back to High Data Speed. Keep 2.4 GHz wireless receivers away from USB 3.2 ports to avoid interference.
Pop-Up Webcam and Windows Hello
Press the webcam on top and turn it forward; it adjusts 30° either way. Connect a USB cable from your PC to USB-C1 or USB-C2, then pick the matching port under KVM in the OSD. Windows Hello needs Windows 10 or 11 and a PIN set under Settings > Accounts > Sign-in options. On other systems, including macOS, the webcam works but face recognition does not. A closed camera disables both camera and microphone.
Webcam Autoframing follows you within about 180 cm and responds to gestures: an open hand or fist toggles it, and a “V” shape zooms out. Single mode follows the closest person, Multi mode frames everyone. Autoframing limits video to 2MP. The FocusSync Light turns on automatically during Teams and Skype calls, or press its button to show a red “busy” signal.
Control Two PCs with the Built-In KVM
Connect each PC’s USB upstream cable to USB-C1 and USB-C2. For HDMI or DisplayPort video, use USB-C1 for PC 1 and USB-C2 for PC 2. In the OSD, open KVM and select Auto, USB C1 or USB C2. In Auto mode, pressing Ctrl three times switches sources and swaps the main and sub picture in PIP (PDF p. 21).
MultiView and Picture Modes
Under PIP/PBP, choose PIP for a small window or PBP for side-by-side sources. You can set the sub input, three PIP sizes and four corner positions, and swap sources; audio swaps with them.
SmartImage cycles through EasyRead, Office, Photo, Movie, Game, Economy, SmartUniformity and Off. With an HDR signal, it offers HDR Premium, HDR Movie, HDR Photo, DisplayHDR 400, HDR Basic and Off. To turn HDR off, disable it at the source device, since mismatched settings can produce poor images. Noise Cancelling filters voice during USB-C calls and is on by default.
Safety Instructions
- Never tilt the monitor downward more than -5°. Exceeding it can peel the panel from the bezel and isn’t covered by warranty (PDF p. 3).
- Lift by the frame, not the panel, and avoid pressure on the screen.
- Keep it away from direct sunlight, heat and oil, and don’t block ventilation holes.
- Use the approved Philips power cord and the specified voltage. After unplugging, wait 6 seconds before reconnecting.
- Connect the USB-C port only to equipment with a fire enclosure complying with IEC 62368-1 or IEC 60950-1.
- Use a moving screen saver when the screen is unattended. Burn-in from static images isn’t covered by warranty (PDF p. 5).
- Only qualified service staff should open the casing.
Cleaning and Maintenance
Unplug the monitor before cleaning. Wipe it with a soft, slightly damp cloth, or a dry cloth when it is off. Oil-based cleaners can damage the plastic, and the safety section warns against organic solvents such as alcohol or ammonia, although the FAQ permits isopropyl alcohol for extensive cleaning only. Unplug the monitor if you won’t use it for a long time.
The PowerSensor detects whether you are seated 30 to 100 cm away and reduces power use when you leave. Raise its setting (up to 4, around 120 cm) if it misses you, or lower it if it’s too sensitive. It works in landscape orientation only, and the sensor lens can be wiped with alcohol.
Troubleshooting
| Problem | What to try |
| No picture, power LED off | Check the power cord, then turn the power switch off and on. |
| No picture, LED white | Turn on the computer, check the signal cable and look for bent pins. Energy saving may be active. |
| Blurred or too dark | Adjust brightness and contrast in the OSD. |
| Fuzzy text or distorted image | Set the PC to 5120 x 1440. |
| “Cannot display this video mode” | Reconnect your previous display, set 5120 x 1440 at 60 Hz, restart, then reconnect this monitor. |
| Colored or dark dots | Normal unless they exceed the pixel defect policy. |
| Power light too bright | Adjust Power LED in the Setup menu. |
| Smoke or sparks | Disconnect power immediately and contact Philips customer service. |
Pixel defects qualify for warranty service only above the policy limits, such as more than 5 total dot defects (PDF p. 44).
Frequently Asked Questions
What resolution and refresh rate should I use?
Use 5120 x 1440 at 60 Hz. If you see screen disturbance, try 75 Hz.
Why won’t my phone charge when the monitor sleeps?
USB ports are off in standby by default. Set USB Standby Mode to On in the OSD.
How do I switch between two computers?
Connect both PCs to USB-C1 and USB-C2, select the source in the OSD, then choose Auto, USB C1 or USB C2 under KVM. In Auto, press Ctrl three times.
Why isn’t Windows Hello detecting the webcam?
Press Ctrl + Shift + Esc, open Services, stop and restart WbioSrvc (Windows Biometric Service), then set up Windows Hello again.
Can I hear a different source than the main picture?
Yes. Pick it under Audio Source in the Audio menu. The monitor remembers your choice at next power-on.
Why does the PIP or PBP sub-window flicker?
Its source is probably using interlaced timing. Change it to progressive timing.
How do I restore factory settings?
Open the OSD and select Setup, then Reset, then Yes. Set USB Standby Mode again afterward if you rely on it.