
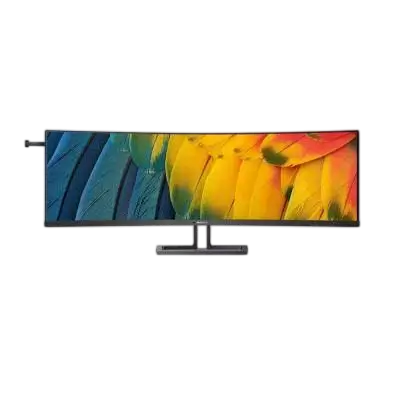
The Philips 6000 Series Curved Business Monitor is a 44.5-inch, 32:9 VA display with a native resolution of 5120 x 1440, designed to give you two monitors’ worth of workspace on one panel. This guide covers two models. The 45B1U6900C has one USB-C upstream port, while the 45B1U6900CH adds a second USB-C upstream port, a pop-up 5.0 MP webcam with Windows Hello face recognition, and 10 Gbps USB. Both models include a USB hub, an Ethernet port, 5 W stereo speakers, and USB-C input that can supply up to 96 W of power to a connected laptop.
Product Specifications
| Feature | Details |
| Panel | 44.5-inch (113 cm) VA, W-LED backlight, 32:9 |
| Native resolution | 5120 x 1440 at 60 Hz |
| Maximum resolution | 5120 x 1440 at 75 Hz |
| HDR | VESA DisplayHDR 400 certified |
| Video inputs | 2 x HDMI 2.0, 1 x DisplayPort 1.4, and USB-C (one port on the 45B1U6900C, two on the 45B1U6900CH) |
| USB | 4 x USB-A downstream (up to 7.5 W), 1 x USB-C downstream (up to 15 W); USB-B upstream on the 45B1U6900C only. Speed: 5 Gbps (45B1U6900C), 10 Gbps (45B1U6900CH) |
| USB-C power delivery | 96 W typical (USB PD 3.0) |
| Stand | Tilt +15°/-5°, swivel ±45°, height adjustment 150 mm |
| Wall mount | VESA 100 x 100 mm, M4 screws; Kensington lock slot |
| Size with stand (W x H x D) | 1085 x 515 x 238 mm |
| Weight with stand | 12.81 kg (45B1U6900C), 12.96 kg (45B1U6900CH) |
| Power | Built-in supply, 100–240 V AC; typically 57.6 W (45B1U6900C) or 60.7 W (45B1U6900CH) at 115 V, 0.3 W in standby |
| Operating conditions | 0–40 °C (32–104 °F), 20–80% relative humidity |
What’s in the Box
The box includes the monitor, a stand neck and base, a quick start guide, a power cable, and a screwdriver with four M4 screws. DisplayPort, HDMI, and USB-C cables are also shown, marked with an asterisk that points to the enclosed attachment, so check which ones shipped with your unit. A USB A-to-B cable is shown for the 45B1U6900C only.
Installation and Setup
Attach the Stand
- Lay the monitor face down on a cushion so the screen is not scratched.
- Use a screwdriver to tighten the assembly screws and fasten the neck to the monitor.
- Gently attach the base to the neck, then tighten the screw under the base.
The panel is curved, so put a protective pad under it whenever you attach or remove the base, and don’t press down on the screen (p. 4).
Connect to a Computer
- Plug the power cord firmly into the back of the monitor.
- Turn off the computer and unplug its power cable.
- Connect the signal cable (HDMI, DisplayPort, or USB-C) to the computer’s video port.
- Plug both power cords into a nearby outlet.
- Turn on the computer and monitor. If a picture appears, setup is done.
USB Ports, Charging, and Ethernet
The USB-A ports and USB-C downstream port can charge a phone or power an external drive while the monitor is on. To keep them active in sleep or standby, set USB Standby Mode to On in the menu (default: Off). Switching the monitor off with its power switch cuts USB power.
For wired networking, install the LAN driver from the Philips support site and restart your computer.
If your computer doesn’t support HBR3, set USB-C Setting to High Resolution. The maximum supported resolution in that mode is 5120 x 1440 at 75 Hz (p. 12).
Controls and On-Screen Menu
| Button | Function |
| 1 | Power on/off |
| 2 | Open the on-screen menu, confirm a setting |
| 3 | Adjust menu values |
| 4 | User key (assign a favorite function) |
| 5 | Change input source |
| 6 | Go back one menu level |
| 7 | SmartImage picture modes |
| 8 | 45B1U6900C: KVM hotkey (Auto, USB up, USB C). 45B1U6900CH: microphone mute |
The main menu covers PowerSensor, LightSensor, LowBlue Mode, Input, Picture, PIP/PBP, Audio, Color, Language, OSD Setting, USB Setting, and Setup (plus Webcam on the 45B1U6900CH). To assign the User key, go to OSD Setting, choose User Key, and pick a function. If you get lost in the menus, select Setup, then Reset, to restore factory settings. A notice recommending 5120 x 1440 appears when the signal uses a different resolution; you can turn it off in the menu.
Using Key Features
Switch Between Two Computers with KVM
The built-in KVM switch lets one keyboard and mouse control two computers. Connect each computer’s USB data cable to a different upstream port, then choose the active computer under KVM in the menu.
- 45B1U6900C: use USB UP (USB A-to-B cable) and USB C, with Auto, USB C, or USB UP in the KVM menu.
- 45B1U6900CH: use USB C1 and USB C2, with Auto, USB C1, or USB C2 in the KVM menu.
Video input selection isn’t automatic, so pick the matching input in the menu too. KVM also works in PBP mode, which shows both computers at once.
Show Two Sources with PIP or PBP
Under PIP/PBP in the menu, set PIP/PBP Mode to PIP (a small window over the main picture) or PBP (two pictures side by side). Then choose the second input and, for PIP, the window size and corner. Swap exchanges the two sources and their audio.
In PBP mode, black bars may appear above and below each picture; setting each device to a half-screen-friendly resolution removes them. If the sub-window flickers, switch that source to progressive timing.
Picture Modes, Sensors, and HDR
SmartImage offers EasyRead, Office, Photo, Movie, Game, LowBlue Mode, Economy, SmartUniformity, and Off. LowBlue Mode is TUV Low Blue Light certified (Mode 2 compliance). LightSensor adjusts brightness to the room, and PowerSensor can cut power use by up to 80% when you step away. It detects you within about 30–100 cm (12–40 in).
For HDR on Windows 10 or 11, right-click the desktop, open display settings, select the monitor, switch HDR on, and adjust SDR content brightness. HDR and the sRGB color mode can’t run together, so turn HDR off before choosing sRGB. To turn HDR off, disable it on the source device.
Webcam and Noise Cancelling (45B1U6900CH)
Press the camera on top of the screen to pop it up. Connect a USB cable from the computer to USB C1 or USB C2, then pick that port under KVM in the menu. Windows Hello face sign-in works on Windows 10 and 11; Windows 8 and 8.1 get the webcam only.
In Windows 11, open Accounts, then Sign-in options, set a PIN, and select Get started under Windows Hello. The webcam light has levels 0 to 4 under Webcam. Noise Cancelling is on by default and can be switched off under Audio.
Safety Instructions
- Keep the monitor away from direct sunlight, heat sources, and oil, and don’t block the vents.
- Use only the Philips-supplied power cord. After unplugging, wait 6 seconds before reconnecting.
- Never tilt the screen down past -5°. Panel damage from over-tilting isn’t covered by the warranty (p. 1).
- Connect USB-C only to devices with a fire enclosure that meets IEC 62368-1 or IEC 60950-1.
- Keep the monitor away from rain, water, and dust. If liquid or an object gets inside, power it off, unplug it, and send it for service. Only qualified technicians should open the cover.
- To reduce eye strain, take a 5–10 minute break after every 50–60 minutes of continuous use.
- Static images shown for long periods can burn in permanently, and the warranty doesn’t cover it. Use a screen saver when you step away.
Cleaning and Maintenance
Unplug the monitor before cleaning, then wipe it with a dry or slightly damp cloth. Oil-based cleaners can damage the plastic and void the warranty; avoid ammonia-based liquids and organic solvents such as alcohol. When moving the monitor, hold the frame and never press on the LCD.
Troubleshooting
| Problem | What to try |
| No picture, power LED off | Check the power cord at the outlet and the monitor. Make sure the power switch is on. |
| No picture, power LED white | Confirm the computer is on and the signal cable is seated with no bent pins. Power saving may be active. |
| Blurry or distorted text | Set the computer to 5120 x 1440. |
| Smoke or sparks | Unplug the monitor right away and contact Philips support. |
Frequently Asked Questions
What resolution and refresh rate should I use?
Use 5120 x 1440 at 60 Hz for the best picture. If you see flicker, try a refresh rate up to 75 Hz.
What if the screen says “Unable to display this video mode”?
Reconnect the computer to the display you used before, set the resolution to 5120 x 1440 and the refresh rate to 60 Hz in Windows display settings, restart, then switch back to the Philips monitor.
How do I switch between two computers?
Connect both through their USB upstream ports, open the KVM menu, and choose Auto or the port you want. Select the matching video input too.
Why won’t Windows Hello detect the webcam on the 45B1U6900CH?
Press Ctrl+Shift+Esc, open the Services tab, and find WbioSrvc (Windows Biometric Service). If it’s running, stop it and start it again manually, then return to Sign-in options and set up the webcam.
Can I clean the screen with alcohol?
Safety guidance advises against alcohol-based cleaners, yet the cleaning FAQ allows isopropyl alcohol for a thorough clean and rules out ethanol, acetone, and hexane. Start with a soft cloth.
How many bad pixels are acceptable?
A few defective pixels are possible on any LCD. Warranty service applies only when a panel exceeds 2 bright dots, 3 dark dots, or 5 dots in total. For warranty length and coverage, visit philips.com/support.