
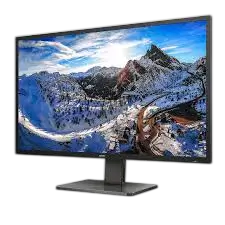
The Philips 439P1 is a 42.51-inch 4K Ultra HD LCD monitor with a VA panel and a 3840×2160 native resolution at 60Hz. It works as a USB-C docking display. One cable can carry video, data, and up to 90W of laptop charging, and the built-in Ethernet port and USB hub let you connect a keyboard and mouse. A KVM switch lets one keyboard and mouse control two computers. MultiView shows several sources on the screen at once. The monitor also has two 5W speakers, a remote control, an RS232 port, and VESA DisplayHDR 400 certification. The sections below cover the details most owners need.
Product Specifications
| Feature | Detail |
| Panel | VA technology, W-LED backlight, 42.51″ (108 cm), 16:9 |
| Resolution | 3840×2160 @ 60Hz (optimum) |
| Contrast ratio | 4000:1 (typ.) |
| Viewing angle | 178° horizontal / 178° vertical |
| Colors | 1.07 billion (8 bit + FRC) |
| Refresh rate | 48Hz–60Hz vertical |
| Video inputs | 1 x HDMI 1.4, 2 x HDMI 2.0, 1 x DisplayPort 1.4, 1 x USB-C1 |
| USB | USB-C2 downstream (15W), 3 x USB-A downstream (one fast-charge port, 5V/3A), USB 3.2 Gen1 at 5 Gbps |
| Network and other ports | RJ45 Ethernet (10/100/1000M), audio out, RS232, Kensington lock |
| Speakers | 5W x 2 |
| Dimensions with stand | 978 x 713 x 281 mm |
| Weight with stand | 18.0 kg (12.4 kg without stand) |
| Power use | 76.3 W typical at 115VAC; 0.3 W in sleep and off modes; 43.9 W in ECO mode |
HDMI 1.4 tops out at 3840×2160 @ 30Hz. HDMI 2.0, DisplayPort, and USB-C1 support 3840×2160 @ 60Hz (p. 29).
What’s in the Box
The package includes the monitor, a Quick Start guide, a power cord, the base and stand, and M4 screws (four are shown). Several items vary by region: the remote control with two AAA batteries, and the USB A-B, HDMI, DisplayPort, USB C-C, USB C-C/A, and RS232 cables. Check your own box against the Quick Start guide.
Installation and Setup
Attach the Base
- Lay the monitor face down on a cushion so the screen isn’t scratched.
- Hold the stand with both hands and gently attach the base to it.
- Tighten the screw at the bottom of the base by hand, then secure it firmly with a screwdriver.
- Attach the stand to the VESA mount area until the latch locks it.
- Stand the monitor up with both hands while it is still held in its foam. Pull the foam out without squeezing the panel.
Connect to Your Computer
- Connect the power cord firmly to the back of the monitor.
- Turn off the computer and unplug its power cable.
- Connect the signal cable (USB-C, HDMI, or DisplayPort) to the computer.
- For a USB-C signal cable, connect the USB-C upstream cable to the monitor’s USB Type-C port. For HDMI or DisplayPort, use a USB-C to A or USB-B to A upstream cable to the “USB Type C” or “USB up” port. Connect your keyboard and mouse to the USB downstream ports.
- Plug the computer and monitor into a nearby outlet.
- Turn on the computer and the monitor. If an image appears, installation is complete.
If the keyboard or mouse isn’t detected, open the OSD, go to USB Settings, choose KVM, and select Auto.
For wired Ethernet through the monitor, install the Realtek USB Ethernet LAN driver from the Philips support page and reboot afterward.
Tilt, Swivel, and Height
Tilt ranges from -5° to +23°, swivel from -45° to +45°, and height adjustment is 100mm. Grasp only the bezel when adjusting. Never tilt the screen down past -5°, because panel peeling from that kind of misuse isn’t covered by warranty (p. 13).
Wall Mounting
The monitor has a 200 x 200mm VESA interface that takes M4 screws. Extend the stand to maximum height, lay the display face down on a smooth surface, loosen the assembly screws, and detach the neck. Buy a wall mount that leaves enough room for the rear cables, and contact the manufacturer for wall-mount installation (p. 14).
Controls and Remote
A single toggle button on the bottom of the bezel works like a joystick. Toggle it in four directions to move through the OSD, and press it to select. A long press of more than three seconds turns the display off. Toggling left opens SmartImage. The remote control has buttons for power, mute, the OSD menu, input source, brightness, volume, SmartImage, and Sound Mode.
To install the remote’s batteries, slide off the cover and match the (+) and (–) marks. Don’t mix battery types or combine new and used batteries. Remove dead batteries right away, and take them out if you won’t use the remote for a long time.
Main Features
MultiView (PIP and PBP)
Open the OSD, select PIP/PBP, then PIP/PBP Mode. The choices are Off, PIP (a small sub-window), PBP 2Win (two sources side by side), and PBP 4Win. In PIP mode you can set the sub-window size (Small, Middle, Large) and position (any corner). Swap exchanges the main and sub sources, and the audio swaps with them. Audio normally follows the main source, but you can pick another under Audio > Audio Source.
In PBP mode, black strips may appear above and below the picture to preserve the aspect ratio. Change your device resolution to remove them.
Integrated KVM
Connect both computers’ upstream cables to the USB-C1 and USB up ports at the same time, then plug your keyboard and mouse into the monitor’s downstream ports. Open the OSD, go to USB Settings > KVM, and choose Auto, USB C1, or USB up to move control between computers. KVM also works while PBP is active.
Smart Power and USB-C Charging
With Smart Power on (Setup menu), USB-C1 can deliver up to 90W. Delivery depends on brightness:
| Brightness | Power from USB-C1 |
| 0–20 | 90W |
| 21–60 | 85W |
| 61–100 | 80W |
If Smart Power is off, or a downstream port draws more than 5W, USB-C1 delivers up to 65W (p. 23).
SmartImage and HDR
SmartImage presets are EasyRead, Office, Photo, Movie, Game, Economy, LowBlue Mode, SmartUniformity, and Off. When the monitor receives an HDR signal, the HDR modes are HDR Game, HDR Movie, HDR Photo, DisplayHDR 400, Personal, and Off. To turn HDR off, disable it on the source device as well, because mismatched settings can produce poor images. Adaptive Sync (AMD) is available under the Picture menu.
Other OSD Settings
The OSD menus cover input selection, picture adjustments (brightness, contrast, sharpness, SmartResponse, gamma), audio, color temperature (including sRGB and a user-defined RGB mode), language, USB settings, and Setup items such as Power LED, RS232, and Reset. Unlock or lock the hot keys by pressing the button for 10 seconds.
USB Behavior to Know
To meet energy standards, the USB ports are disabled in standby and off modes, so connected devices stop working. To keep USB power and charging active in sleep, turn on USB Standby Mode in the OSD (the default is Off). A factory reset returns it to Off. Turning off the rear power switch cuts power to all USB ports.
2.4GHz wireless mice and keyboards can suffer interference from USB 3.2 signals. Keep wireless receivers away from USB 3.2 ports, or use a USB extension cable or hub to add distance.
Safety Instructions
- Use only the specified power supply and the approved Philips power cord.
- Don’t pull, bend, or place heavy objects on the power or signal cables.
- Keep the vents clear. Don’t let objects fall into them.
- Keep the monitor away from direct sunlight, heat sources, oil, dust, rain, and moisture.
- Operating range is 0–40°C and 20–80% humidity (p. 2).
- Wait 6 seconds before reconnecting power after unplugging the cable.
- Don’t knock, drop, or subject the monitor to heavy vibration.
- Lift it by the frame, never by pressing on the LCD panel.
- Only qualified service personnel should open the casing.
- The USB Type-C port should only connect to equipment with a fire enclosure that complies with IEC 62368-1 or IEC 60950-1.
- If smoke or sparks appear, disconnect the monitor from mains power immediately and contact Philips customer service. Don’t troubleshoot.
- Turn the power off and disconnect the cord at once if water or a foreign substance gets inside.
- Very high headphone volume can cause hearing loss.
Plan screen breaks as well. A 5–10 minute break after 50–60 minutes of continuous use is recommended over a longer break every two hours.
Cleaning and Maintenance
Unplug the monitor before cleaning. Wipe the screen with a dry cloth when it’s off, or with a slightly damp cloth after unplugging. Never use organic solvents, alcohol, or ammonia-based liquids, and keep oil-based cleaners away from the plastic parts. If the monitor gets wet, wipe it dry as soon as possible. Unplug it if it will sit unused for an extended period.
To prevent burn-in or ghost images, run a moving screen saver whenever you step away. Use a periodic screen refresh application if the screen shows static content. Severe burn-in can’t be repaired, and it isn’t covered by warranty.
Troubleshooting
| Problem | What to try |
| No picture, power LED off | Check the power cord at the outlet and monitor. Set the rear power switch to OFF, then ON. |
| No picture, LED white | Make sure the computer is on, the signal cable is secure, and the connector has no bent pins. Energy saving may be active. |
| Image vibrates or flickers | Reseat the signal cable at the graphics board or PC. |
| Blurry, distorted, or fuzzy text | Set the PC to the native 3840×2160 resolution. |
| Image too dark or indistinct | Adjust brightness and contrast in the OSD. |
| Colored or dark dots | Normal for LCD technology within the pixel defect policy (p. 31). |
| Power LED too bright | Change the Power LED level in the Setup menu. |
Frequently Asked Questions
What should I do if the screen says “Cannot display this video mode”?
The recommended setting is 3840×2160 @ 60Hz. Reconnect your previous monitor, open Windows display settings, set the resolution to 3840×2160 and the refresh rate to 60Hz, restart, then reconnect the Philips monitor.
How do I get the full 90W of laptop charging?
Connect the laptop to USB-C1 and turn on Smart Power in the Setup menu. Lowering brightness raises the available power, from 80W at brightness 61–100 up to 90W at 0–20. If Smart Power is off, USB-C1 provides up to 65W.
How do I switch my keyboard and mouse between two computers?
Connect both computers’ upstream cables to USB-C1 and USB up, then open USB Settings > KVM in the OSD and pick Auto, USB C1, or USB up. Repeat the step to switch back.
Why do the sub-windows flicker in PBP mode?
The sub-window source is using interlaced timing. Switch that source to progressive timing.
What if the speakers have no sound from a MacBook?
Open the OSD, go to Audio, and select Audio Recover.
How do I clean the screen safely?
Use a clean, soft cloth for normal cleaning. For extensive cleaning, isopropyl alcohol is the one solvent mentioned. Ethyl alcohol, ethanol, acetone, and hexane are ruled out. The safety section also warns against alcohol and ammonia-based liquids, so try the cloth first and apply no pressure to the panel.
How do I lock or unlock the hot keys?
Hold the same button for 10 seconds. The monitor shows an on-screen notice confirming the lock or unlock status.
What does the warranty cover, and where can I find the period?
The warranty period depends on your region, and details are on the Philips support site or in the Important Information manual. Extended coverage of +1, +2, or +3 years can be bought within 30 calendar days of the original purchase, and it requires proof of purchase. Pixel defects only qualify for repair or replacement when they exceed the stated tolerances. Examples are more than 2 bright sub-pixel dots in total, or more than 10 dot defects of all types (p. 33).