
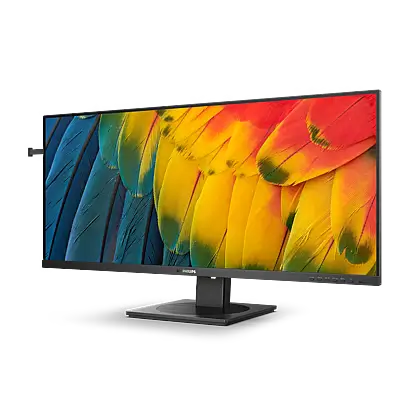
The Philips 40B1U5600 is a 39.5-inch business monitor from the 5000 Series. It uses a 21:9 IPS panel with a native resolution of 3440 x 1440. Video comes in over HDMI 2.0, DisplayPort 1.4, or USB-C, and the USB-C port can also deliver power to a laptop. A built-in USB hub with a KVM function lets one keyboard and mouse control two computers, and MultiView shows two sources on screen at once. The monitor also has two 5 W speakers, a PowerSensor that detects when you leave your desk, and a LightSensor for automatic brightness. This guide covers model 40B1U5600 only.
Product Specifications
| Feature | Details |
| Panel | 39.5-inch IPS, W-LED backlight, 21:9 |
| Native resolution | 3440 x 1440 @ 60 Hz |
| Maximum resolution | 3440 x 1440 @ 120 Hz (DP/USB-C); @ 100 Hz (HDMI) |
| Contrast / colors | 1200:1 typical; 16.7 million colors (8-bit) |
| Viewing angle | 178° horizontal / 178° vertical |
| HDR | VESA Certified DisplayHDR 400 |
| Video inputs | 1 x HDMI 2.0, 1 x DisplayPort 1.4, 1 x USB-C (upstream, DP Alt mode) |
| USB | 1 x USB-C downstream (15 W), 4 x USB-A downstream (USB 3.2 Gen1, 5 Gbps), 1 x USB UP |
| Power Delivery | USB PD 3.0, typically 96 W (up to 100 W depending on the device) |
| USB-A charging | One port supports fast charge (B.C 1.2), up to 7.5 W |
| Speakers | 5 W x 2 |
| Stand | Tilt -5° to +30°, swivel ±180°, height 150 mm, slant ±2° |
| Mounting | VESA 100 x 100 mm (M4 screws), Kensington lock slot |
| Size with stand (W x H x D) | 944 x 628 x 280 mm |
| Weight with stand | 13.94 kg |
| Power use | 36.4 W typical at 115 V; 0.4 W in sleep |
| Operating environment | 0°C to 40°C, 20% to 80% humidity |
What’s in the Box
The box holds the monitor, a base, a power cord, a quick start guide, and an M4 screw with a screwdriver. Signal and USB cables (DP, HDMI, USB C-C/A, USB C-C, USB C-A, USB A-B) differ by region, so check what shipped with yours (page 5).
Installation and Setup
Attach the Base
- Lay the monitor face down on a smooth surface and avoid scratching the screen.
- Hold the stand with both hands and tighten the assembly screws with a screwdriver to secure it to the monitor.
- Gently attach the base to the stand, with the base arrow pointing toward the front.
- Tighten the screw at the bottom of the base by hand.
Connect to a Computer
- Plug the power cord firmly into the back of the monitor.
- Turn off your computer and unplug its power cable.
- Connect the signal cable to the video connector on the computer.
- Plug the computer and monitor power cords into nearby outlets.
- Turn on the computer and the monitor. If an image appears, setup is complete.
Adjust the Stand
Tilt, swivel, height, and slant are all adjustable. Never tilt the screen downward past -5°. This can peel the panel from the bezel, and damage from exceeding that angle is not covered by warranty. Hold the bezel when adjusting, and don’t press on the screen (pages 1–2, 11).
Wall Mounting
To use a VESA mount, lay the monitor face down, loosen the assembly screws, and detach the neck. The mounting pattern is 100 x 100 mm with M4 screws. Contact the manufacturer for wall-mount installation (page 16).
USB Ports and Charging
The USB hub and ports switch off in Standby and Off modes to meet energy standards. To keep them working during sleep, open the OSD and set USB Standby Mode to On (the default is Off). If you turn the monitor off with its power switch, all USB ports lose power. The monitor must be on to charge a phone or run an external drive (pages 6–7).
The 2.4 GHz wireless receivers for mice, keyboards, and headsets can suffer interference from USB 3.2 devices. Keep receivers away from the USB 3.2 ports, or use an extension cable or hub to add distance.
Resolution and Refresh Rate
For best results, use 3440 x 1440 @ 60 Hz. A notification appears if you connect at another resolution, and you can turn it off under Setup in the OSD.
The USB-C input defaults to High Data Speed, and the maximum resolution then depends on your graphics card. If your PC doesn’t support HBR 3, go to USB Setting > USB-C Setting and choose High Resolution. The maximum is then 3440 x 1440 @ 120 Hz (page 10). HDMI is factory-set to 3440 x 1440 @ 60 Hz.
Controls and On-Screen Menu
The front bezel has eight controls: power, menu/OK, up/down adjust, a customizable User key, input source, back, a SmartImage hotkey, and a KVM hotkey (page 8). Main OSD menus include PowerSensor, LightSensor, LowBlue Mode, Input, Picture, PIP/PBP, Audio, Color, Language, OSD Setting, USB Setting, and Setup.
To assign the User key, open OSD Setting > User Key and pick a function: Volume, MultiView, Brightness, USB-C Setting, or PowerSensor. If you get lost in the menus, choose Setup > Reset to restore factory settings.
Picture Modes and HDR
SmartImage cycles through EasyRead, Office, Photo, Movie, Game, Economy, LowBlue Mode, SmartUniformity, and Off. LowBlue Mode 2 complies with TUV Low Blue Light certification. SmartUniformity raises screen uniformity from a typical 75–80% to above 95% (pages 17–18).
When the monitor receives an HDR signal, the SmartImage key opens an HDR menu instead: HDR Premium, HDR Movie, HDR Photo, DisplayHDR 400, HDR Basic, or Off. To turn HDR off completely, disable it on the source device and its content. Mismatched HDR settings between device and monitor can produce poor images. In Windows 11/10, open Display settings, select the monitor, choose Windows HD Color settings, and adjust brightness for SDR content.
Using Two Computers with One Keyboard and Mouse
The built-in KVM switch lets one keyboard and mouse control two PCs (pages 12–13).
- Connect each PC’s USB upstream cable to the monitor, one to USB C and one to USB UP.
- Pair each video input with its upstream port: HDMI or DP with USB UP, and USB-C with USB C.
- Plug your keyboard and mouse into the monitor’s USB downstream ports.
- Open the OSD, go to KVM, and choose Auto, USB C, or USB up to move control between computers.
KVM also works in PBP mode, with both sources visible side by side.
MultiView (PIP and PBP)
MultiView shows two sources at once. Open PIP / PBP > PIP / PBP Mode and choose PIP (a small window over the main picture) or PBP (side by side). Then set the sub-source (HDMI 2.0, DisplayPort, or USB-C), the PIP size (Small, Middle, Large), and the PIP position in any corner. Any input can be paired with any other. Swap exchanges main and sub sources, and the audio swaps with them (pages 14–15).
In PBP mode you may see black strips above and below each picture to keep the correct aspect ratio. Adjust each device’s resolution to the pop-up suggestion to remove them. If the sub-window flickers, its source is probably using interlaced timing, so switch it to progressive.
PowerSensor
PowerSensor uses harmless infrared signals to detect whether you’re at your desk. When you leave, the monitor reduces power consumption by up to 75%. The default range is 30–100 cm (12–40 in) and within five degrees left or right of the screen. Setting 4 extends detection to about 120 cm (47 in). Dark clothing can absorb the signal, so raise the setting if detection fails. If it triggers too easily, lower the setting. PowerSensor works only in landscape orientation (pages 23–24).
Safety Instructions
- Use only the Philips-approved power cord and the specified voltage.
- Don’t block the ventilation openings or let objects fall into them.
- Keep the monitor away from direct sunlight, strong lights, heat sources, and oil.
- Operate it at 0–40°C and 20–80% humidity.
- Don’t bend, pull, or crush cables.
- Wait 6 seconds before reconnecting power after unplugging.
- Connect the USB-C port only to equipment with a fire enclosure that meets IEC 62368-1 or IEC 60950-1.
- Don’t open the casing. Only qualified service staff should do so.
- Keep headphone volume moderate, because excessive sound pressure can cause hearing loss.
Burn-in: Use a moving screen saver whenever you leave the monitor unattended, and a periodic refresh application if it shows static content. Severe burn-in may be permanent and is not covered by warranty (page 3).
Cleaning and Maintenance
Unplug the monitor before cleaning. Wipe it with a clean, soft, slightly damp cloth, or with a dry cloth when it’s powered off. Oil-based cleaners can damage the plastic and void the warranty. Lift the monitor by its frame, never by pressing on the panel. If liquid or foreign material gets inside, switch it off, disconnect the power cord, and contact a service center. Unplug the monitor if you won’t use it for a long period (page 2).
Troubleshooting
| Problem | What to try |
| No picture, power LED off | Check the power cord at both ends. Set the power button to off, then on. |
| No picture, power LED white | Make sure the computer is on and the signal cable is secure. Check the cable for bent pins. Energy saving may be active. |
| Blurry, distorted, or fuzzy text | Set the PC to 3440 x 1440. |
| Image too dark or indistinct | Adjust brightness and contrast in the OSD. |
| Ghost image remains | Use a moving screen saver. Most after-images fade gradually with the power off. |
| Power LED too bright | Adjust Power LED under Setup in the OSD. |
| Colored or dark dots | Small numbers are normal for LCD panels (see the pixel defect policy on pages 30–32). |
| Smoke or sparks | Disconnect power immediately and contact Philips customer service. Don’t troubleshoot. |
Frequently Asked Questions
What resolution and refresh rate should I use?
Use 3440 x 1440 @ 60 Hz, the recommended native setting. Higher rates are available: up to 120 Hz over DisplayPort or USB-C, and up to 100 Hz over HDMI.
Why can’t I reach 120 Hz over USB-C?
The USB-C input defaults to High Data Speed, which depends on your graphics card’s capability. If your PC doesn’t support HBR 3, switch USB-C Setting to High Resolution to get 3440 x 1440 @ 120 Hz.
Can the monitor charge my laptop?
The USB-C upstream port provides typical Power Delivery of 96 W, up to 100 W depending on the device. Actual charging depends on the laptop’s own capability. The separate downstream USB-C port supplies up to 15 W.
Why don’t my USB devices work when the monitor sleeps?
USB ports switch off in Standby and Off modes by default. Set USB Standby Mode to On in the OSD. If you reset the monitor to factory settings, you’ll need to turn it on again.
Will it work with a Mac?
The manual states that Philips LCD displays are compatible with PCs, Macs, and workstations. You may need a cable adapter for a Mac, and Philips sales can advise. Plug-and-play is listed for Windows 11/10 and Mac OS X.
Is burn-in covered by warranty?
Not when it results from failing to use a screen saver or periodic refresh. Severe burn-in that can’t be repaired is excluded.
How should I clean the screen?
The manual gives mixed guidance. The safety section says not to use organic solvents such as alcohol or ammonia-based liquids. The FAQ allows isopropyl alcohol for extensive cleaning, and no other solvents. A clean, soft, slightly damp cloth is the safest routine choice. If you’re unsure about alcohol, ask Philips support first.