
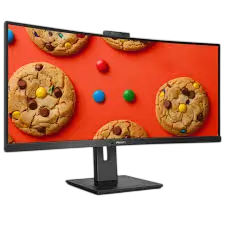
The Philips 34B1U5600CH is a 34-inch curved UltraWide business monitor from the 5000 Series, built around a 3440 x 1440 VA panel with a 21:9 aspect ratio. It doubles as a USB-C docking station: one cable can carry video, data, Ethernet and up to 96W of laptop power. A built-in 5.0-megapixel pop-up webcam supports Windows Hello face sign-in, a KVM function lets one keyboard and mouse control two computers, and MultiView shows two sources at once. The stand tilts, swivels and adjusts in height, and the monitor accepts 100 x 100 mm VESA mounts.
Product Specifications
| Item | Detail |
| Panel | 34″ (86.36 cm) VA, W-LED backlight, 21:9 |
| Native resolution | 3440 x 1440 @ 60 Hz |
| Maximum resolution | 3440 x 1440 @ 100 Hz (HDMI); @ 120 Hz (DP/USB-C) |
| Viewing angle | 178° (H) / 178° (V) |
| Video inputs | 1 x HDMI 2.0, 1 x DisplayPort 1.4, 1 x USB-C (USBC1, DP Alt mode) |
| USB | USBC1 upstream (PD 3.0, typical 96W); USBC2 upstream (data only); 1 x USB-C downstream (up to 15W); 4 x USB-A downstream (one with BC 1.2 fast charge, up to 7.5W) |
| Network | RJ45 Ethernet (1000M with USB 3.0, 10M/100M with USB 2.0) |
| Audio | 5W x 2 speakers; combo audio out/mic in jack |
| Power use | 56.1 W typical at 115V; 0.3 W in sleep or off mode |
| Size with stand (W x H x D) | 807 x 601 x 250 mm |
| Operating conditions | 0–40 °C, 20–80% humidity |
What’s in the Box
The box holds the monitor, a quick start guide, an I/O cover, a power cable, and a set of signal and USB cables that differs by region (DP, HDMI, USB C-C/A, USB C-C or USB C-A).
Parts and Controls
Rear connections
The rear panel has the power switch, AC input, HDMI, DisplayPort, USBC1, USBC2 (DATA), RJ45, USB downstream and fast-charge ports, a 15W USB-C port, the audio combo jack and a Kensington lock slot. Remove the rubber plug before using USBC2.
Front keys
The front keys cover power, Menu/OK, Up/Down, Back, input selection, a customizable User key (set under OSD Settings > User Key) and a SmartImage key that cycles through EasyRead, Office, Photo, Movie, Game, Economy, LowBlue Mode, SmartUniformity and Off.
Installation and Setup
Attach the base
- Lay the monitor face down on a soft, smooth surface to protect the screen.
- Hold the stand with both hands and attach the base, with the arrow pointing to the front.
- Hand-tighten the screw at the bottom of the base.
- Attach the stand to the VESA mount area until the latch locks.
Because the screen is curved, put protective material under the monitor and never press down on it while attaching or removing the base (p. 5).
Connect to your computer
- Connect the power cord firmly to the back of the monitor.
- Turn off your computer and unplug its power cable.
- Connect the signal cable (HDMI, DisplayPort or USB-C) to your computer.
- Plug the computer and monitor into a nearby outlet.
- Slide the I/O cover into the slots on the rear and snap it into place.
- Turn on the computer and monitor. If an image appears, setup is complete.
Install the LAN driver
To use the RJ45 port, install the Realtek LAN driver that matches your system, which is available from the Philips support page. Run the driver, follow the Windows prompts and restart the computer. “Realtek USB Ethernet Network Adapter” should then appear in your program list.
VESA mounting
Press and hold the release button, tilt the base and slide it off. The pattern is 100 x 100 mm with M4 screws. Contact the manufacturer for wall-mount installation.
Using the Monitor
Stand adjustment
Tilt runs from -5° to +25°, swivel covers ±180°, and height adjusts by 180 mm. Do not tilt the monitor downward past -5°, because panel peeling from that angle is not covered by warranty. Adjust by gripping the bezel only, never the screen (p. 11).
USB-C charging and Smart Power
USBC1 can power a compatible laptop. With Smart Power on (OSD > Setup), available power depends on brightness:
| Brightness | Power from USBC1 |
| 0–20 | 96W |
| 21–60 | 85W |
| 61–100 | 80W |
With Smart Power off, or a downstream port drawing over 15W, USBC1 delivers up to 65W. Smart Power cannot run at the same time as PowerSensor or LightSensor.
USB ports and standby
The USB hub and ports shut off in standby and off modes to meet energy standards. To keep them working, set OSD > USB Setting > USB Standby Mode to On (default is Off). Turning off the rear power switch cuts power to every USB port.
Pop-up webcam and Windows Hello
Press the webcam on top of the monitor and turn it to the front. Connect a USB cable from your PC to USBC1 or USBC2, then pick the matching port under OSD > KVM. Face sign-in needs Windows 10 or 11 with a PIN already set up; on older Windows versions or macOS the webcam works without facial recognition. Noise Cancelling filters for human voices during calls over USB-C (default On).
Two computers with one keyboard and mouse (KVM)
- Connect USB upstream cables from both computers to USBC1 and USBC2.
- Connect your keyboard, mouse or other peripherals to the monitor’s USB downstream ports.
- Open OSD > KVM and choose Auto, USB C1 or USB C2 to switch control.
With HDMI or DP as the video source, USBC2 is the upstream; with the USB-C video source, USBC1 is. KVM also works in PBP mode.
MultiView (PIP and PBP)
Go to OSD > PIP/PBP > PIP/PBP Mode and choose PIP (small window over the main picture) or PBP (two pictures side by side). You can then set the sub-source (HDMI 2.0, DisplayPort or USB C1), PIP size (Small, Middle, Large), PIP position (four corners) and Swap, which exchanges the sources and their audio. PBP shows black strips above and below to keep the correct aspect ratio.
Picture settings
SmartImage, LowBlue Mode, LightSensor and PowerSensor (user detection from 30 to 100 cm) are in the OSD. If the screen looks dim, DPS (selected models) is on by default and can be switched off.
Safety and Care
- Use only the Philips power cord, and wait 6 seconds before reconnecting power after unplugging.
- Keep the monitor away from sunlight, heat and oil, and do not block the ventilation holes.
- Connect the USB-C port only to equipment with a fire enclosure that meets IEC 62368-1 or IEC 60950-1.
- Lift by the frame, not the screen.
- Run a moving screen saver or periodic screen refresh when the monitor is unattended. Severe burn-in cannot be repaired and is not covered by warranty (p. 3).
- Unplug the monitor before cleaning. Use a dry or slightly damp cloth, and avoid oil-based cleaners, ammonia and organic solvents.
- If water or a foreign object gets inside, switch off, unplug and send it for service. Only qualified personnel should open the casing.
- Use it within 0–40 °C and 20–80% humidity.
Troubleshooting
| Problem | What to try |
| No picture, power LED off | Check the power cord at both ends. Set the power switch to OFF, then ON. |
| No picture, power LED white | Make sure the computer is on and the signal cable is firmly connected with no bent pins. Energy saving may be active. |
| Blurry, distorted or fuzzy text | Set the PC to 3440 x 1440, the native resolution. |
| Colored or dark dots | These are normal for LCD technology. See the pixel defect policy in the manual. |
| Smoke or sparks | Unplug the monitor immediately and contact Philips customer service. Do not troubleshoot. |
Frequently Asked Questions
What resolution and refresh rate should I use?
The monitor works best at its native 3440 x 1440 at 60 Hz. DP and USB-C support up to 120 Hz, and HDMI up to 100 Hz. If you see “Cannot display this video mode,” set your PC to 3440 x 1440 and a 60 Hz refresh rate.
Why can’t I reach 120 Hz over USB-C, or why is Ethernet slow?
The USB hub defaults to High Data Speed, so maximum resolution depends on your graphics hardware. If your PC does not support HBR 3, go to OSD > USB Setting > USB-C Setting and choose High Resolution for up to 3440 x 1440 at 120 Hz. If Ethernet seems slow, choose High Data Speed, which supports 1G LAN.
My Windows Hello webcam isn’t detected and face recognition is greyed out. What can I do?
Press Ctrl + Shift + Esc to open Task Manager and select the Services tab. Find WbioSrvc (Windows Biometric Service). If it shows Running, stop it and restart it manually. Then return to sign-in options and set up Windows Hello again.
Why do my USB devices stop working when the monitor sleeps?
USB ports are disabled in standby by default. Set USB Standby Mode to On in the OSD to keep charging and USB functions active.
Why does the PIP or PBP sub-window flicker?
The sub-window source is using interlaced timing. Change the sub-source signal to progressive timing.
How do I reset the monitor or lock the OSD?
To restore factory settings, open the OSD and choose Setup > Reset. To lock or unlock the OSD, hold the Menu button while the monitor is off and then press the power button to turn it on. Afterward, set USB Standby Mode back to On if you rely on it.
When does a dead or stuck pixel qualify for warranty repair?
Philips repairs or replaces a panel only when defects exceed the acceptable levels. That means more than 2 bright dots, more than 3 black dots, or more than 5 dot defects in total. Warranty length depends on your region and is listed in the Important Information manual.