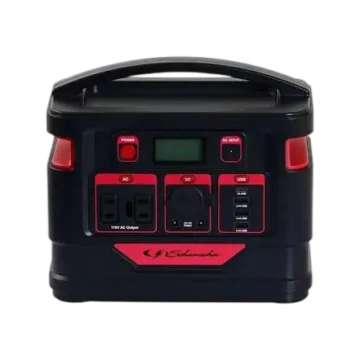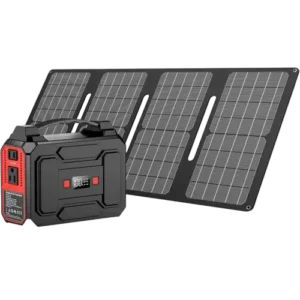
| Field | Details |
| Document Title | Portable Solar Powerstation (Model SP-10) |
| Document Type | User Manual / Operating Instructions |
| Brand Name | Schumacher Electric Corporation |
| Product Name | Portable Solar Powerstation |
| Model Number(s) | SP-10 |
| PDF File Size | 100 KB |
| Number of Pages | 2 |
| Languages | English, Spanish, French |
Schumacher Portable Solar Powerstation SP-10
The Schumacher SP-10 Portable Solar Powerstation is a multifunction solar charger with a built-in rechargeable lithium-ion battery. It is designed to store electrical energy and provide portable charging power for compatible mobile phones, digital cameras, and other electronic devices.
The SP-10 features a monocrystalline silicon solar panel that charges its internal 2700mAh lithium-ion battery when exposed to direct sunlight. The internal battery can also be charged through a USB charging connection.
Once charged, the battery stores energy for use when sunlight is unavailable, including at night. The unit includes a USB output port, charging cables, red and green charging indicators, and three built-in LED work lights.
The solar charger automatically stops charging when its internal battery reaches full capacity.
Product Features
The Schumacher SP-10 includes the following features:
- Monocrystalline silicon solar panel.
- Rechargeable 2700mAh lithium-ion internal battery.
- Automatic charging through direct sunlight.
- USB charging input for charging from a USB power source.
- USB output port for compatible electronic devices.
- Portable charging support for mobile phones and digital cameras.
- Stored battery power for use without sunlight.
- Red LED charging indicator.
- Green LED fully charged indicator.
- Automatic charging stop when the battery is fully charged.
- Three built-in LED work lights.
- Front ON/OFF button for controlling the work lights.
- Output cable for connecting compatible devices.
- USB charging input cable.
- Portable design for use away from a fixed electrical outlet.
Technical Specifications
| Specification | Details |
| Brand | Schumacher |
| Model Number | SP-10 |
| Product Type | Portable Solar Powerstation |
| Solar Panel Type | Monocrystalline Silicon |
| Solar Panel Output Current | 100mA |
| Solar Panel Working Voltage | 5.5V |
| Internal Battery Type | Rechargeable Lithium-Ion |
| Internal Battery Capacity | 2700mAh |
| Battery Output | 6V/250mAh |
| Solar Charging | Yes |
| USB Charging Input | Yes |
| USB Power Output | Yes |
| Automatic Charging Stop | Yes |
| Charging Status Indicator | Red LED |
| Fully Charged Indicator | Green LED |
| Built-in Work Lights | 3 LEDs |
| Work Light Control | ON/OFF Button |
| Warranty | 1-Year Limited Warranty |
Parts and Components
The Schumacher SP-10 includes seven components identified in the product diagram.
Main Parts and Their Functions
| No. | Component | Function |
| 1 | USB Output Port | Provides a connection for charging compatible electronic devices |
| 2 | LED Work Lights | Three built-in lights used to illuminate the surrounding work area |
| 3 | USB Charging Port | Provides an input connection for charging the internal battery through USB |
| 4 | ON/OFF Button | Controls the built-in LED work lights |
| 5 | Charging/Charged LED Indicator | Displays the internal battery charging status |
| 6 | Output Cable | Connects the solar charger to compatible electronic devices |
| 7 | USB Charging Input Cable | Connects the solar charger to a USB charging source |
Buttons and LED Indicator Guide
The SP-10 uses an ON/OFF button and a charging status LED indicator.
ON/OFF Button
The ON/OFF button is located on the front of the unit and controls the three built-in LED work lights.
Holding the button for approximately 2 seconds activates the lights.
Pressing the button again turns them off.
Charging/Charged LED Indicator
The charging indicator displays the status of the internal lithium-ion battery.
| LED Color | Meaning |
| Red | Internal battery is charging |
| Green | Internal battery is fully charged |
Red Charging LED
The red LED illuminates when the internal battery is being charged through direct sunlight or a USB charging connection.
Green Fully Charged LED
The LED changes from red to green when the internal battery reaches full charge.
The charging system automatically stops charging when the battery is fully charged.
Important Safety Instructions
The Schumacher SP-10 must be used according to the manufacturer’s operating and safety precautions.
General Safety Precautions
- Charge the internal battery before using the solar powerstation.
- Do not use the solar panel during rainy weather.
- Do not scrape the solar panel surface with sharp objects.
- Position the solar panel facing upward toward the sunlight when charging.
- Use only adapters recommended by the manufacturer.
- Keep the solar panel surface clean for the best charging performance.
Solar Panel Safety
The solar panel must be protected from rain and physical damage.
Sharp objects must not be used to scrape or clean the solar panel surface.
During solar charging, the panel should face toward direct sunlight.
Charging Adapter Safety
Only charging adapters recommended by the manufacturer should be used.
Before connecting an electronic device to the solar charger, confirm that the device’s required charging voltage matches the charger’s output voltage.
Cleaning Safety
Disconnect the solar charger before cleaning.
Do not immerse the device in water or any other liquid.
Before First Use
The internal lithium-ion battery must be charged before the SP-10 is used.
The manufacturer also instructs performing at least two charging and discharging cycles before regular use to improve the internal battery’s efficiency.
Initial Battery Preparation
- Place the SP-10 solar charger in a suitable charging location.
- Charge the internal battery using direct sunlight or a USB charging connection.
- Allow charging to continue until the LED changes from red to green.
- Use the stored battery charge.
- Repeat the charging and discharging process at least twice before regular use.
Important: The solar charger must undergo at least two charge and discharge cycles before regular use, as instructed by the manufacturer.
How to Charge the SP-10 Internal Battery
The Schumacher SP-10 supports two charging methods:
- Charging through the solar panel using direct sunlight.
- Charging through a USB charging connection.
For both methods, the red LED indicates charging, and the green LED indicates that the internal battery is fully charged.
The charging system automatically stops when the battery reaches full capacity.
How to Charge the SP-10 Using Solar Power
The built-in monocrystalline silicon solar panel converts sunlight into electrical energy for charging the internal lithium-ion battery.
Solar Charging Instructions
- Place the solar charger in direct sunlight.
- Position the solar panel facing upward toward the sunlight.
- Check the charging status indicator.
- The red LED illuminates when charging begins.
- Allow the internal battery to charge.
- When the battery is fully charged, the LED changes from red to green.
- The charger automatically stops charging when the battery reaches full capacity.
Solar Charging Specifications
| Specification | Details |
| Solar Panel Type | Monocrystalline Silicon |
| Working Voltage | 5.5V |
| Output Current | 100mA |
| Charging Status | Red LED |
| Fully Charged Status | Green LED |
| Charging Control | Automatic Stop at Full Charge |
Solar Charging Precautions
For proper solar charging:
- Position the panel toward direct sunlight.
- Do not use the solar panel during rainy weather.
- Keep the panel surface clean.
- Avoid scratching the panel with sharp objects.
How to Charge the SP-10 Using USB
The internal battery can also be charged through the USB charging port.
This method allows the SP-10 to be recharged without relying on direct sunlight.
USB Charging Instructions
- Locate the USB charging port on the SP-10.
- Connect the USB charging input cable to the solar charger.
- Connect the other end to a suitable USB charging port.
- The red charging LED illuminates.
- Allow the internal battery to charge.
- When the battery is fully charged, the LED changes from red to green.
- Charging stops automatically when the internal battery reaches full capacity.
USB Charging Indicator Meanings
| Charging Condition | LED Status |
| Internal Battery Charging | Red |
| Battery Fully Charged | Green |
The charger automatically stops charging when the battery is full.
How to Charge Electronic Devices With the SP-10
The Schumacher SP-10 can supply stored battery power to compatible electronic devices through its USB output connection.
The solar charger can be used with mobile phones, digital cameras, and other compatible electronic products.
Device Compatibility
Before connecting a device, check the device manufacturer’s charging instructions.
Important: The connected device’s charging voltage must match the output voltage provided by the solar charger.
Charging a Compatible Device
- Check the charging voltage required by the electronic device.
- Confirm that the required voltage matches the solar charger’s output.
- Connect the USB plug of the output cable.
- Connect the other end using the appropriate adapter for the device.
- Connect the adapter to the electronic device for charging.
Charging Mobile Phones
The SP-10 can provide portable charging power for compatible mobile phones.
The correct charging adapter must be used, and the charging voltage must match the connected phone’s requirements.
Charging Digital Cameras
The SP-10 can also supply charging power to compatible digital cameras.
Before connecting a camera, confirm that its charging voltage matches the solar charger’s output and use the appropriate adapter.
Using Stored Solar Power
The SP-10 stores electrical energy in its internal lithium-ion battery.
The stored charge can be used to power compatible electronic devices when direct sunlight is unavailable, including during nighttime use.
How to Use the Built-in LED Work Lights
The Schumacher SP-10 includes three LED work lights.
The lights are controlled using the ON/OFF button on the front of the unit.
Turning On the LED Work Lights
- Locate the ON/OFF button on the front of the solar charger.
- Press and hold the button for approximately 2 seconds.
- The three LED work lights turn on.
- The lights illuminate the surrounding work area.
Turning Off the LED Work Lights
- Press the ON/OFF button.
- The three LED work lights turn off.
Charging After Using the Work Lights
Recharge the solar powerstation as soon as possible after using the built-in LED lights.
The internal battery can be recharged using direct sunlight or a USB charging connection.
Cleaning and Maintenance Instructions
Regular cleaning helps maintain the solar panel’s charging performance.
Cleaning the Solar Charger
- Disconnect the solar charger from its charging connection.
- Use a dry, soft cloth to remove dust and dirt.
- Clean the device regularly.
- Keep the solar panel surface free from accumulated dust.
Solar Panel Cleaning Precautions
- Do not scrape the solar panel with sharp objects.
- Do not immerse the charger in water or other liquids.
- Use a dry, soft cloth for cleaning.
- Disconnect the charger before cleaning.
Storage Instructions
The Schumacher SP-10 should be stored in a clean, dry location.
Proper Storage Procedure
- Disconnect the solar charger from connected charging cables and devices.
- Turn off the built-in LED work lights.
- Clean the charger with a dry, soft cloth.
- Store the unit in a clean, dry location.
Storage Precautions
- Protect the unit from rain and moisture.
- Keep the solar panel surface clean.
- Prevent sharp objects from scratching the panel.
- Do not immerse the device in liquid.
Limited Warranty
Schumacher Electric Corporation provides a one-year limited warranty for the SP-10 Portable Solar Powerstation.
Warranty Coverage
| Warranty Detail | Information |
| Manufacturer | Schumacher Electric Corporation |
| Product | Portable Solar Powerstation SP-10 |
| Warranty Type | Limited Warranty |
| Warranty Duration | 1 Year |
| Warranty Start Date | Original Retail Purchase Date |
| Eligible Purchaser | Original Purchaser |
| Covered Defects | Defective Materials or Workmanship Under Normal Use and Care |
| Warranty Remedy | Repair or Replacement at Manufacturer’s Discretion |
Warranty Repair or Replacement
If the solar charger develops a covered defect during the warranty period, Schumacher Electric Corporation may repair the product or replace it with a new or reconditioned unit.
The manufacturer determines whether repair or replacement is appropriate.
Warranty Claim Requirements
The purchaser must send the unit to Schumacher Electric Corporation or an authorized representative.
The warranty claim must include:
- The solar charger requiring repair or replacement.
- Proof of purchase.
- Prepaid shipping charges.
Warranty Limitations
The manufacturer disclaims and excludes warranties other than the stated limited warranty.
The warranty also excludes liability for incidental, special, or consequential damages.
The limited warranty provides specific legal rights. Additional rights may vary depending on applicable law.
Customer Support Information
Schumacher Electric Corporation provides customer service assistance for the SP-10 Portable Solar Powerstation.
Customer Support Details
| Service | Information |
| Manufacturer | Schumacher Electric Corporation |
| Customer Service Phone | 1-800-621-5485 |
| Support Days | Monday–Friday |
| Support Hours | 7:00 AM–5:00 PM CST |
| Address | 801 Business Center Drive, Mount Prospect, Illinois 60056-2179, USA |
Warranty Service Assistance
For warranty repairs or replacement, contact Schumacher Electric Corporation Customer Service.
Keep the original purchase receipt available when requesting warranty service.
Frequently Asked Questions
1. How do I charge the Schumacher SP-10 solar powerstation?
The Schumacher SP-10 can be charged in two ways: by placing its solar panel in direct sunlight or by connecting the unit to a suitable USB charging port. The red LED illuminates while charging, and the green LED indicates that the internal battery is fully charged. Charging stops automatically when the battery reaches full capacity.
2. What battery does the Schumacher SP-10 use?
The Schumacher SP-10 contains a rechargeable 2700mAh lithium-ion battery. The battery stores electrical energy collected from the solar panel or USB charging connection for later use with compatible electronic devices and the built-in LED work lights.
3. What do the red and green LED lights mean on the SP-10?
The red LED indicates that the internal battery is charging. When the battery becomes fully charged, the indicator changes to green. The solar charger automatically stops charging when the battery reaches full capacity.
4. Can the Schumacher SP-10 charge a mobile phone?
Yes. The SP-10 is designed to charge compatible mobile phones, digital cameras, and other electronic devices. Before connecting a device, confirm that its required charging voltage matches the solar charger’s output voltage and use the appropriate charging adapter.
5. How do I turn on the LED lights on the Schumacher SP-10?
Press and hold the ON/OFF button on the front of the unit for approximately 2 seconds. All three LED work lights will illuminate. Press the button again to turn them off. Recharge the solar powerstation as soon as possible after using the lights.
6. Does the Schumacher SP-10 stop charging automatically?
Yes. The SP-10 automatically stops charging when its internal battery is fully charged. This applies to both solar charging and USB charging. The status indicator changes from red to green when charging is complete.
7. How many times should the Schumacher SP-10 be charged before first use?
The manufacturer instructs that the internal battery must be charged and discharged at least twice before regular use to improve battery efficiency. The internal battery must also be charged before its first use.
8. How should the Schumacher SP-10 solar charger be cleaned and stored?
Disconnect the charger before cleaning and wipe the device regularly with a dry, soft cloth. Do not scrape the solar panel with sharp objects or immerse the unit in liquid. Store the solar charger in a clean, dry location.